Next-Gen App & Browser
Testing Cloud
Trusted by 2 Mn+ QAs & Devs to accelerate their release cycles

- Automation
- Home
- /
- Learning Hub
- /
- Selenium Python Tutorial
Selenium Python Tutorial: A Comprehensive Guide With Examples And Best Practices
Selenium when paired with Python becomes a robust framework for web testing and automation. Explore this tutorial for comprehensive insights into Selenium and Python, the knowledge that will play a key role in enhancing the efficiency of your web automation workflows.
Published on: November 20, 2023
- Share:
OVERVIEW
Python, a language that needs no introduction, is renowned for its versatility and ease of use. It is one of the most preferred languages, especially in Machine Learning (ML), Artificial Intelligence (AI), and various other domains. According to the Stack Overflow Developer Survey 2023, Python has surpassed SQL to become the third most widely-used language. Remarkably, Python has claimed the top spot among non-professional developers and learners (Other Coders).

When it comes to web automation , the powerful combination of Selenium and Python takes the center stage, widely favored by developers and testers alike.
Appium InspectorIn this Selenium Python tutorial, we will dive into the world of Selenium with Python, exploring its capabilities and empowering you to master the art of automating websites efficiently. Let's embark on this exciting journey and unlock the potential of Selenium Python!
Introduction to Selenium
The Selenium framework is an open-source and highly popular automation testing framework for web application testing. It provides a suite of tools and libraries that allow testers and developers to automate the testing of web applications across different browsers and platforms.
It supports multiple programming languages such as Java, Python, C#, and more, making it versatile and adaptable to various testing environments. It is widely used in the software industry for its flexibility, scalability, and cross-browser testing capabilities, helping teams ensure the quality and reliability of their web applications.
The key components of the Selenium framework include:
- Selenium WebDriver: This is the core component of the framework, providing a set of APIs to interact with web browsers. It allows testers to simulate user actions like clicking buttons, filling forms, and navigating through web pages, making it an essential tool for creating test scripts.
- Selenium IDE: The Selenium Integrated Development Environment (IDE) is a record-and-playback tool allowing testers to create test cases without writing code. It provides a user-friendly interface for recording web application interactions and automatically generating test scripts.
- Selenium Grid: Selenium Grid is a server that runs tests in parallel on multiple machines, allowing testers to distribute test execution across different browsers and platforms. It facilitates large-scale testing and provides centralized control over test execution.
Selenium WebDriver
Just as car manufacturers in the automotive industry design different types of cars, numerous frameworks implement WebDrivers in web automation. These WebDrivers act as the drivers of web applications, allowing you to simulate or replicate user actions on the web or the Internet itself.
Consider a user's typical actions on a website - opening a webpage by clicking on a link, filling up a form, or dragging and dropping to upload a file. With the help of WebDrivers, automation suites can effortlessly mimic these user actions in an automated manner.
Selenium WebDriver is a powerful tool in the world of automation testing . As technology evolves, web applications become increasingly complex, making manual testing time-consuming and error-prone. In this context, Selenium WebDriver emerges as a game-changer, empowering testers and developers to automate interactions with web applications.
It provides a user-friendly API that allows you to control web browsers programmatically. Its support for various programming languages like Python, Java, C#, and more offers flexibility and ease of integration into different testing frameworks and environments.
Selenium WebDriver Architecture consists of 4 components:
- Selenium Client Libraries in Java, Python, or Ruby.
- WebDriver W3C Protocol.
- Browser Drivers.
- Web Browsers like Google Chrome, Mozilla Firefox, and Microsoft Edge.
Selenium Client Libraries
Selenium Client Libraries are a set of language-specific libraries or bindings that allow developers to interact with the Selenium WebDriver in their preferred programming language. These libraries bridge the WebDriver and the programming language, enabling testers and developers to write automation scripts using familiar syntax and idioms.
WebDriver API and W3C Protocol
The WebDriver API and the W3C Protocol are two fundamental components of Selenium that enable automated web testing across different browsers and platforms.
The WebDriver API is the core component of Selenium that provides a set of methods and commands for interacting with web browsers. Whereas the W3C (World Wide Web Consortium) Protocol is a set of standards and guidelines defined by the W3C to ensure the interoperability and consistency of web technologies across different browsers and platforms.
By combining the WebDriver API and the W3C Protocol, Selenium provides a robust and standardized approach to automated testing.

Browser Drivers
Browsers are built on top of an underlying browser engine. Google Chrome is built on top of the Chromium engine; similarly, Mozilla Firefox is built using the Gecko engine.
Each browser provides a proxy for using W3C WebDriver-compatible clients to interact with their browser engines. This proxy is called Browser Drivers.
Browser Drivers are essential components of the Selenium framework that enable communication between the WebDriver API and web browsers. They act as intermediaries, facilitating the interaction between automation scripts and the web browser being tested.
Following is a list of implementations of WebDriver for each browser.
| Browser | WebDriver |
| Google Chrome | https://sites.google.com/chromium.org/driver/ |
| Firefox | https://developer.mozilla.org/en-US/docs/Web/WebDriver |
| Edge | https://learn.microsoft.com/en-us/microsoft-edge/webdriver-chromium |
Note : Run your Selenium 4 tests on the cloud grid. Try LambdaTest Now!
So far, we've covered the broader ecosystem of automation frameworks and how Selenium fits into that ecosystem. We'll deep-dive into the implementation of tests using Python and Selenium 4. However, the latest version of Selenium used while writing this tutorial is 4.8.2.
Setup and Installation of Selenium and Python
Here are some prerequisites for using Selenium with Python:
- The latest version of Python, i.e., Python3, should be installed on your machine. You can download the latest version of Python3 from the Python website and follow the installation instructions.
- Access an IDE like VS Code or PyCharm Community Edition to execute and test Python automation scripts.
You can install Selenium using the below command:
pip install seleniumTo utilize Selenium in a Python project, add the following to requirements.txt
selenium==4.8.2
You can also go through this detailed guide for installing Selenium for Python.
Getting Started with Selenium Automation Testing with Python
Now that we have Python and Selenium installed on our machines, we can start running a few basic automated test cases covering different scenarios with Selenium and Python. For this Selenium Python tutorial, we will use the unittest framework, which comes bundled with Python.
Opening a URL
Given a URL, let's write the first Selenium script to open it. We'll use Python bindings with Selenium to open a website in Google Chrome.
def open_website(url):
   from selenium import webdriver
   import time


   driver = webdriver.Chrome()


   driver.get(url)


   time.sleep(2)


if __name__ == '__main__':
   url = "https://lambdatest.com/selenium-playground"
   open_website(url)
Code Walkthrough
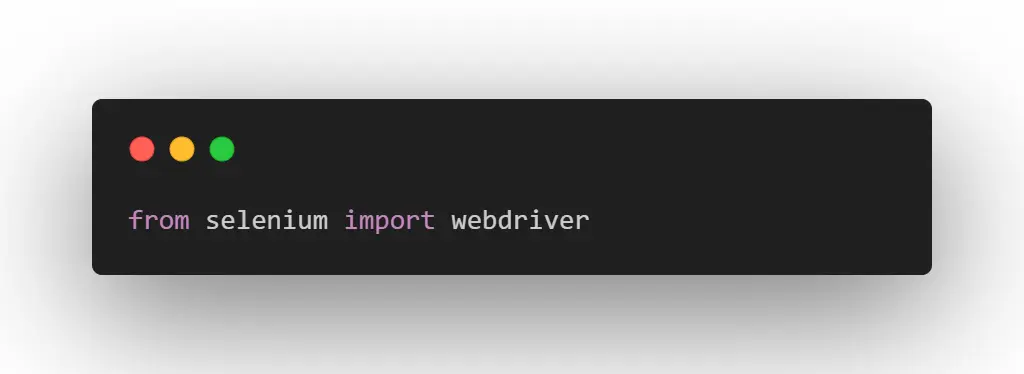
First, we import the WebDriver module from the Selenium package.

We chose to use Chrome WebDriver. This ensures that the WebDriver will interact with the Google Chrome browser. You can open Edge or Firefox as well by invoking their driver methods. Use the below snippet to use Edge or Firefox WebDriver.
| Browser | Method |
|---|---|
| Edge | |
| Firefox | |

The above code specifies the URL to open in the browser.

We wait 2 seconds for the browser to open the website and close the session. By specifying this waiting time of 2 seconds, we ensure that the browser remains open for some time for us to see the results.
Common Exceptions in Selenium Python
Errors and exceptions can arise for various reasons, such as incorrect syntax, unexpected changes in the web page structure, or issues with the Selenium WebDriver. Handling errors and exceptions is an integral part of the testing process, and understanding how to handle them effectively is crucial for maintaining the stability and reliability of automated test scripts.
In Selenium Python, errors can manifest in different forms. Syntax errors, for instance, occur when there's a mistake in the code structure. On the other hand, exceptions are runtime errors that can be triggered during the execution of the test script. Common exceptions in Selenium Python include the NoSuchElementException, which occurs when the WebDriver cannot locate a web element, and the StaleElementReferenceException, which occurs when an element is no longer attached to the DOM.
Let's see other exceptions that can occur in context with the scenarios considered for this Selenium Python tutorial.
- ModuleNotFoundError: No module named 'selenium'
If you receive the above error while running your Python code, you can follow the command in your OS terminal to install the Selenium package.
pip install seleniumThere can be multiple reasons for such an exception. Do read the “Message” in your error stack trace. Let's say you do not have a browser installed on your machine; you can receive the following error.
Expected browser binary location, but unable to find binary in the default location, no 'moz:firefoxOptions.binary' capability provided
Through the above code snippet, we execute a browser session using Python and Selenium automation framework. We open a URL in a browser of our choice for 2 seconds, and then the browser is closed.
Let's do a bit more than just opening a website using Selenium.
Using Different Locators in Selenium Python
Let's write a program to open Google.com or Bing.com and search for a string on it. It'll be so cool to search programmatically.
Let's dive into it.
A common web page is composed of several HTML tags. These HTML tags combine with CSS (on how to style elements) to form a beautiful-looking webpage. Each HTML tag has certain attributes that differentiate each in a webpage.
While working with Selenium, we must get comfortable with the term WebElement. Let's navigate through a webpage - Wikipedia.org.

- Visit https://www.wikipedia.org/.
- Right-click and click on “View Page Source”. It will open a new tab in the browser. It'll contain all the HTML elements.
Let's narrow our focus on the search input of the Wikipedia home page.
To inspect the search input, right-click on the webpage and click “Inspect”. It'll open up Chrome Dev Tool either on the right or bottom side.

Let's focus on the highlighted part in the Chrome DevTools in the above image.
Following is the screenshot of the highlighted HTML.

Let's narrow our focus on the highlighted code section.
This HTML snippet contains two HTML tags to identify the search input.
- Id - “id” is a unique identifier for the WebElement. It cannot and will not be repeated in a well-formed webpage.
- Name - “name” can also reference a WebElement.
Let's dive into our code snippet to figure out how to find an element and then perform an action on it. In the following code snippet, we do the following:
- Open the Wikipedia website.
- Navigate to the search input web element by name or id attribute.
- Search for a specific string.
import selenium.common.exceptions


def search_website():
   from selenium import webdriver
   from selenium.webdriver.common.by import By
   import selenium.common.exceptions
   import time


   driver = webdriver.Chrome()


   driver.get("https://www.wikipedia.org/")


   try:
       element = driver.find_element(By.NAME, 'search')
   except selenium.common.exceptions.NoSuchElementException as e:
       raise Exception(e)
   else:
       element.send_keys("Selenium Software")
       element.submit()


   time.sleep(2)
   driver.quit()


if __name__ == '__main__':
   search_website()
Let's break this apart and dive deep into each code snippet section. But before that, let's look into different locator strategies.
- ID = "id"
- XPATH = "xpath"
- LINK_TEXT = "link text"
- PARTIAL_LINK_TEXT = "partial link text"
- NAME = "name"
- TAG_NAME = "tag name"
- CLASS_NAME = "class name"
- CSS_SELECTOR = "css selector"
Finding Element by Name
element = driver.find_element(By.NAME, search)We use the driver.find_element to search for WebElement in a webpage. The find_element() method takes in two arguments - locator strategy and string to search, respectively.
Finding Element by ID
Considering our Wikipedia search input example, we could have used the following code snippet.
element = driver.find_element(By.ID, 'searchInput')Once we find an element, we can act on top of it. We use the send_keys() method to input the string to search for.
element.send_keys("Selenium Software")
element.submit()
Apart from Name and ID, XPath forms a very important way to find elements.
Finding Element by XPath
XPath is a query language that selects elements from an XML document. It's commonly used to locate elements in a webpage. It's similar to defining a regex to select a web page's node(s).
element = driver.find_element(By.XPATH, "//input[@id='name']")In the below example, the name input field is located by XPath.

If the search string (2nd parameter in find_element() method) does not find a matching element, it'll throw an error called NoSuchElementException. As a best practice, you can choose to handle the exception in your code. You can change the 2nd parameter to another string to expect an error.

Working with Form Elements in Selenium Python
Selenium can be used to automate the submission of forms using Python. Let's consider this sample form from the LambdaTest Signup page.
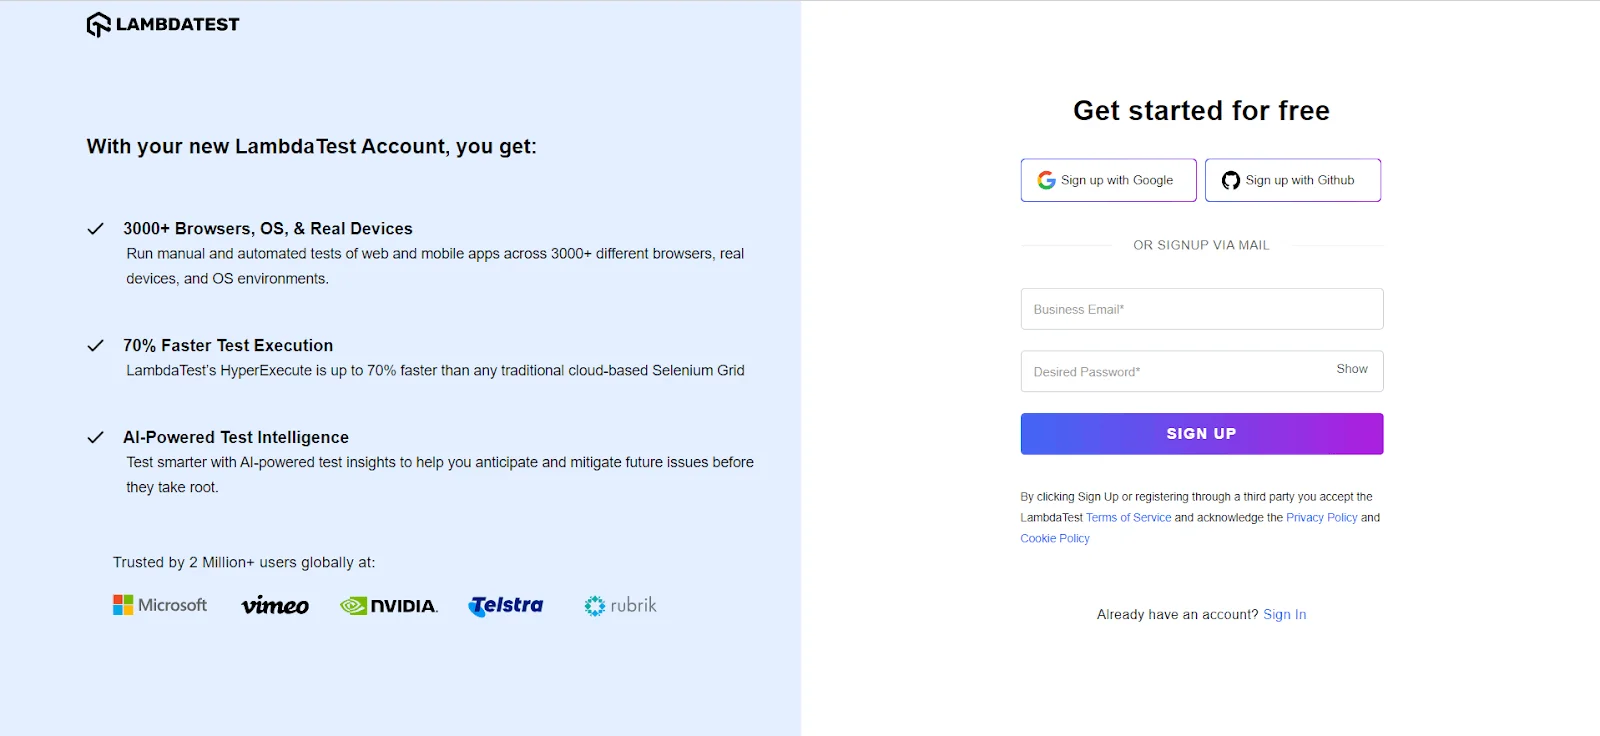
As a first step, we should locate the WebElement for each input field. In this tutorial, using Selenium's Python client, we'll learn how to:
- Input fields in a form.
- Locate the Submit button and then press it to submit the form.
We'll use XPath to locate WebElement to revise our learnings of locating web elements through XPath.
import selenium.common.exceptions


def search_website():
   from selenium import webdriver
   from selenium.webdriver.common.by import By
   import selenium.common.exceptions
   import time
   driver = webdriver.Chrome()


   driver.get("https://accounts.lambdatest.com/register")


   try:
       name = driver.find_element(By.XPATH, "//input[@id='name']")
       email = driver.find_element(By.XPATH, "//input[@id='email']")
       userpassword = driver.find_element(By.XPATH, "//input[@id='userpassword']")
       phone = driver.find_element(By.XPATH, "//input[@id='phone']")
   except selenium.common.exceptions.NoSuchElementException as e:
       raise Exception(e)
   else:
       name.send_keys("Selenium Software")
       email.send_keys("testuser@gmail.com")
       userpassword.send_keys("strongpassword123!@#")
       phone.send_keys("8347384828")


   # Get element for button
   try:
       submit_button = driver.find_element(By.XPATH, "//button[@type='submit']")
   except selenium.common.exceptions.NoSuchElementException as e:
       raise e
   else:
       submit_button.submit()


   time.sleep(10)
   driver.quit()


if __name__ == '__main__':
   search_website()
Let's understand the above code snippet in detail.
submit_button = driver.find_element(By.XPATH, "//button[@type='submit']")
In the above code snippet, we locate WebElement using XPath. The method locates the WebElement for the Submit button and uses the submit() method to submit the form.
Most forms also contain other input options like dropdowns, radio buttons, and checkboxes. Let's look at them.
Handling Dropdowns in Selenium Python
Navigating through dropdowns in web applications is a common and essential task in Selenium Python automation. Dropdowns, or select elements, often present challenges and nuances that demand a strategic approach for effective handling. You can learn more about it through this blog on handling dropdowns in Selenium Python.
This section will delve into the intricacies of interacting with dropdown menus, selecting options, dealing with dynamic content, and implementing robust strategies to streamline your automation scripts.
Let’s understand how to select one or more options from a dropdown of a form. Consider the following screenshot of the LambdaTest Selenium Playground containing a dropdown.

Select class in Selenium WebDriver can be used for selecting and deselecting an option in the dropdown.
It offers 3 methods to locate WebElements. They are:
Select an option by ‘index’
Select an option in the drop-down based on its position in the dropdown list.
Syntax

Example
# Locate the drop down on the page using relevant locator
select = Select(driver.find_element_by_id("drop-down"))


# Select the option at index 4
select.select_by_index(4)
Select an option by ‘value’
Select an option based on the value attribute of the HTML tag.
Syntax

Example
# Locate the drop down on the page using relevant locator
select = Select(driver.find_element_by_id("drop-down"))


# Select the option by value
select.select_by_value("text")
Select an option by ‘visible text’
Select an option based on the text visible in the drop-down.
Syntax

Example
# Locate the drop down on the page using relevant locator select = Select(driver.find_element_by_id("drop-down")) # Select the option using the text visible in the drop down select.select_by_visible_text("Monday")Demo: Handling Drop Down in Selenium
For the demo, we will be selecting option from the drop-down in LambdaTest Selenium Playground using value, index, and visible text.
Implementation

Code Walkthrough
Step 1
First, we import the Select class that provides the relevant methods for selecting and deselecting the options. The class is instantiated at a later point in the code.

Step 2
Then we initialize the Chrome WebDriver and navigate to the desired URL.

Step 3
After initializing the driver, the ID attribute is used to locate the desired element along with the find_element() method in Selenium. The located element is then passed as an argument to the Select class.

NoSuchElementException is raised if the find_element() method cannot locate the element on the page.

Step 4

| select.select_by_index(1) | We choose the first option in the drop-down. In this case, index 1 refers to the second option because indexing starts at 0. |
| select.select_by_visible_text(“Monday”) | We choose the option with Monday as the text in the drop-down. |
| select.select_by_value(“Friday”) | We choose the option with a value attribute equal to Friday in the drop-down. |
Step 5
Once the tests are completed, close the Chrome browser window and end the session to release all the resources.

Handling Checkboxes and Radio Buttons in Selenium Python
We can follow the same strategy to select a checkbox and radio buttons. We can locate the WebElement and then use the click() method to select the checkbox or radio button. You can learn more about it through this blog on handling checkboxes in Selenium.
Capturing Screenshots in Selenium Python
In the dynamic landscape of web testing, visual evidence is key to understanding the state of your application at critical points.
Screenshots often help the QA teams report bugs. It’s an effective and efficient way to share UI bugs that may have crept in. Capturing screenshots in Seleniumin Selenium Python is not just a feature but a powerful tool while performing web automation.
import selenium


def take_screenshot():
   from selenium import webdriver
   from selenium.webdriver.common.by import By


   import time


   driver = webdriver.Chrome()


driver.get("https://www.lambdatest.com/blog/web-scraping-with-python/")
   driver.save_screenshot("screenshot_lambdatest.png")


   try:
       element = driver.find_element(By.ID, 'content')
   except selenium.common.exceptions.NoSuchElementException as e:
       raise Exception(e)
   else:
       try:
           element.screenshot("blog_content.png")
       except IOError as ioerror:
           raise ioerror


   time.sleep(4)
   driver.quit()


if __name__ == '__main__':
   take_screenshot()
Code Walkthrough
The By query helps locate web elements within the Document Object Model (DOM) using the find_element() method in Selenium.
We also used the save_screenshot() method, which takes a filename as a parameter to screenshot a webpage.
The script attempts to find an element on the page with the ID 'content' using driver.find_element(By.ID, 'content'). If the element is not found, it raises a NoSuchElementException with an informative error message. If the element is found, it proceeds to the next step.
The script also includes a 4-second sleep (you can adjust this) to allow time for the screenshots to be taken. Finally, it quits the WebDriver.
You can additionally use any image processing library to view the screenshot captured. Pillow or OpenCV can be used in such cases.
Capturing Screenshots of a specific WebElement
In case you need to capture a screenshot of a WebElement, you can locate the WebElement and then use the screenshot() method to save the screenshot.
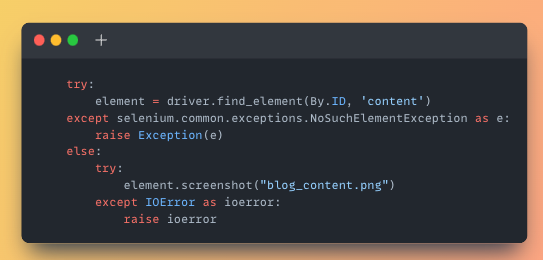
One caveat is that you might face read or write errors while saving the file in the filesystem. Hence, handling the IOError highlighted in the above code snippet is wise.
You can choose to use the Selenium-Screenshot library as well in Python.
Selenium Automation Testing with Python: Advanced Use Cases
In this section, we will learn how to handle advanced use cases like Cookie Management, Zoom In and Out, Drag and Drop, Mouse Actions, and more.
Cookie Management
Cookies are key-value pair information stored in a web browser, where a web server sends this information to web browsers.
It helps website information about the user to ensure a personalized experience. For instance, a website may showcase a different experience to the user based on its geo-location information stored in cookie files.
You can visit chrome://settings/content/all to see the cookies stored in your browser for each website.
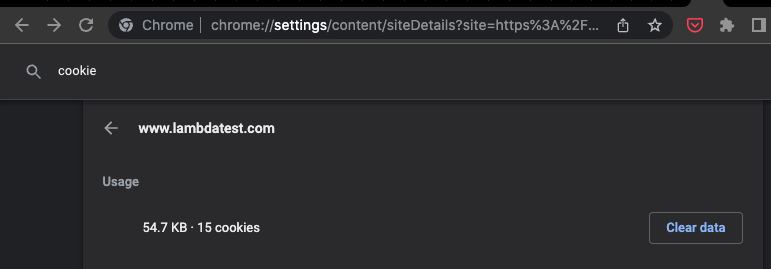
In the Python client for Selenium, we can use the get_cookies() method to get all the cookies for a website.
def cookie_manager():
   from selenium import webdriver
   import time


   driver = webdriver.Chrome()
   driver.get("https://www.lambdatest.com/")
   driver.add_cookie({"name": "user",
                      "domain": "lambdatest.com",
                      "value": "automation_user"})
   all_cookies = driver.get_cookies()
   for cookie in all_cookies:
       print(cookie)


   driver.delete_all_cookies()
   print("Post deletion")
   all_cookies = driver.get_cookies()
   for cookie in all_cookies:
       print(cookie)


   time.sleep(4)
   driver.quit()


if __name__ == '__main__':
   cookie_manager()
Code Walkthrough
A new cookie named "user" is added to the current session with specified attributes such as name, domain, and value. This is done using driver.add_cookie().
The script retrieves all cookies in the current session using driver.get_cookies(). It then iterates through the list of cookies and prints each one.
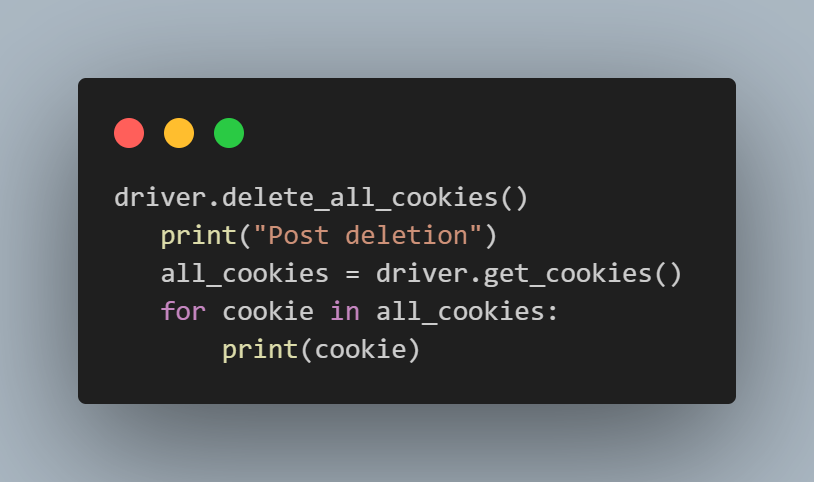
All cookies in the current session are deleted using driver.delete_all_cookies(). After the deletion, the script prints "Post deletion" and again retrieves and prints all cookies to confirm that they have been successfully deleted.
The script includes a 4-second sleep (you can adjust this) to allow time for actions to take effect. Finally, it quits the WebDriver. The if __name__ == '__main__' block ensures the script is run directly when the cookie_manager() function is called.
There are several methods to Add and Delete cookie(s).
Adding Cookies in Selenium Python
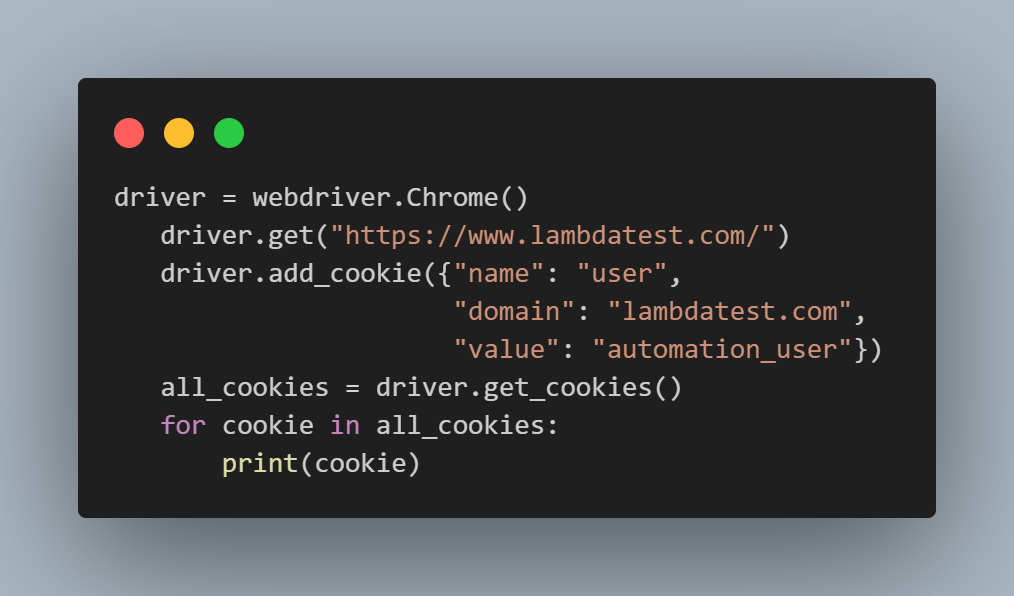
We can add a cookie using the add_cookie() method. It takes in 3 arguments viz-a-viz - name, domain, and value. Following is a snippet to add a cookie for the website lambdatest.com with the name ‘user’ and value ‘automation_user’.
Deleting Cookies in Selenium Python
Similar to adding a cookie, we can use the delete_cookie() and delete_all_cookies() methods.
Zoom In and Out
A Selenium WebDriver assumes a web page zoom level of 100%. You can perform zoom-in and zoom-out operations by executing JavaScript commands in WebDriver.
WebDriver’s execute_script() method can execute vanilla JavaScript commands to mimic user actions.
def zoom_in_out():
   from selenium import webdriver
   import time


   driver = webdriver.Chrome()
   driver.get("https://www.lambdatest.com/")


   # zooming to 200%
   driver.execute_script("document.body.style['-webkit-transform'] = 'scale(2.0)';")
   time.sleep(1)


   # zoom in to 150%
   driver.execute_script("document.body.style['-webkit-transform'] = 'scale(1.5)';")
   time.sleep(1)


   # zoom in to 120%
   driver.execute_script("document.body.style['-webkit-transform'] = 'scale(1.2)';")
   time.sleep(1)


 # zoom in to 50%
   driver.execute_script("document.body.style['-webkit-transform'] = 'scale(.5)';")
   time.sleep(1)


   # reset based to 100%
   driver.execute_script("document.body.style['-webkit-transform'] = 'scale(1.0)';")


   # reset based to 100%
   driver.execute_script("document.body.style['-webkit-transform'] = 'scale(-0.5)';")


   time.sleep(2)
   driver.quit()


if __name__ == '__main__':
   zoom_in_out()
Code Walkthrough
In the above code snippet, we use the execute_script() method to execute the following snippet.
The execute_script() method in Selenium allows you to execute JavaScript code within the context of the current WebDriver instance. This method is handy when interacting with web pages in ways that cannot be achieved through the standard WebDriver API. With execute_script(), you can execute custom JavaScript code to manipulate the webpage's Document Object Model (DOM), modify styles, retrieve information, or perform other actions.
driver.execute_script("document.body.style['-webkit-transform'] = 'scale(1.0)';")
Let’s understand the above snippet.
The document.body returns an object of the DOM element. We access style attributes to adjust the viewport.
The CSS Scale property is used to transform the viewport. You could zoom in and out using the parameters, invert the page upside, and more.
Drag and Drop
Drag and drop is one of the common functionalities present in many websites. Its use case includes uploading files and tools like Canva and draw.io to draw elements on the canvas among many other use cases.
Let’s dissect drag and drop functionality into a sequence of user actions. To drag and drop, a user does the following steps:
- Select a source web element.
- Clicks and holds the selected web element.
- Move the coordinates to the target location.
- Release or unclick at the target location.
Selenium’s Python bindings provide ActionChains to manipulate DOM elements and mimic drag-and-drop functionality. Let’s dive into the code part and look at it part by part for handling drag and drop in Selenium.
Queue up actions in the ActionChains object
Let’s understand the ActionChains class with an example. We will open a website and click on one link.
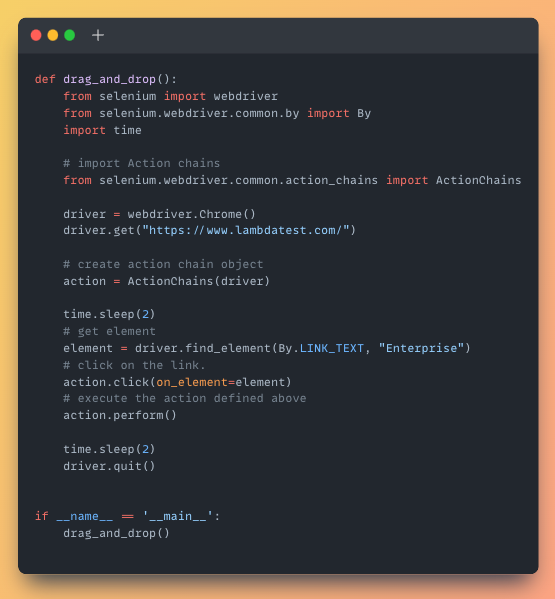
In the above code snippet, we import the ActionChain class. We then find the element using By.LINK_TEXT and “Enterprise” text. Once we find the element, we execute a click() action using the perform() method.
We can very well chain these actions, as in the following snippet.
  # click on the link and perform
   action.click(on_element=element).perform()
We, essentially, chain the actions of a user together in a sequence and, therefore the name ActionChain.
Let’s come back to our original problem of drag and drop.
ActionChain class has a method drag_and_drop(), which holds the left click on the source element, moves the element to the target location, and then releases the button.
The drag_and_drop() method takes 2 arguments as input. First, the “source element” is to be picked and the “target element” where the source element should be dragged to.
def drag_and_drop():
   from selenium import webdriver
   from selenium.webdriver.common.by import By
   import time


   # import Action chains
   from selenium.webdriver.common.action_chains import ActionChains


   driver = webdriver.Chrome()
   driver.get("https://www.w3schools.com/html/html5_draganddrop.asp")


   # create action chain object
   action = ActionChains(driver)


   time.sleep(2)


   source_element = driver.find_element(By.ID, "div1")
   target_element = driver.find_element(By.ID, "div2")
   action.drag_and_drop(source_element, target_element).perform()


   time.sleep(2)
   driver.quit()


if __name__ == '__main__':
   drag_and_drop()
In the above code snippet, we locate “div1” and “div2” WebElement as source and target elements, respectively. We then pass them as arguments in the drag_and_drop() method. We, towards the end, chain perform() method to finally execute the chain of actions.
Mouse Hover
Mouse Hover is a user action generally used to signal a tooltip to a user. This helps the user know more about the link or a button. It gets activated typically when a user hovers over a trigger area - in most cases, using a mouse or digital pen.
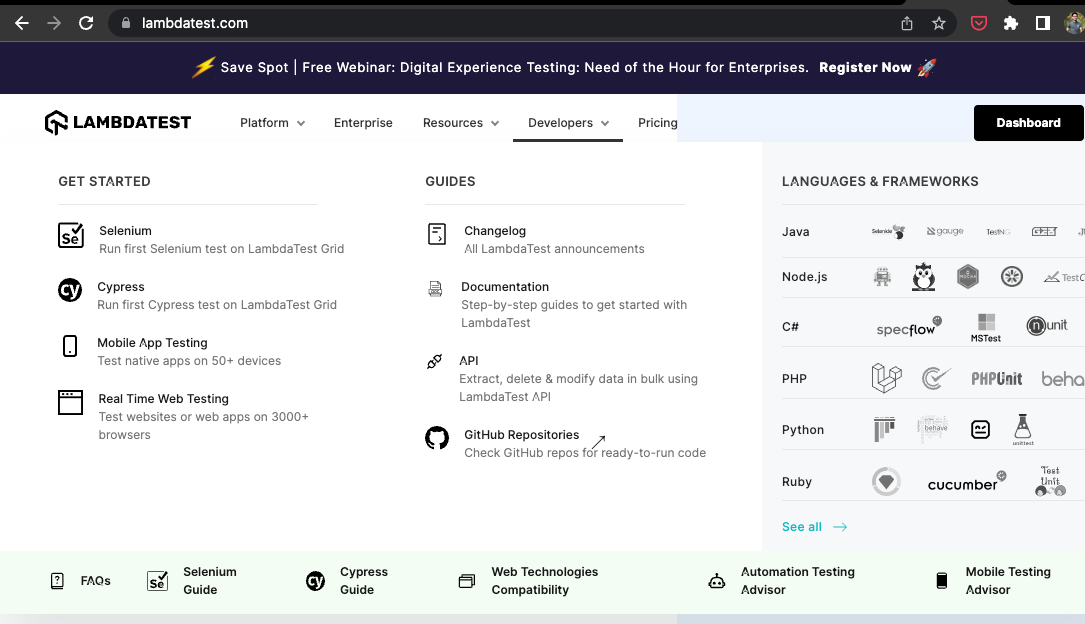
When we hover over the main menu of the LambdaTest website, the dropdown or the sub-nav menu expands to list a host of other options available on the platform for developers.
We will use ActionChain’s class method move_to_element() to mimic the mouse hover user behavior. We will first locate the element and then pass on the element as an argument to the move_to_element() method.
On the lambdatest.com website, we must first locate the navbar menu using XPath.
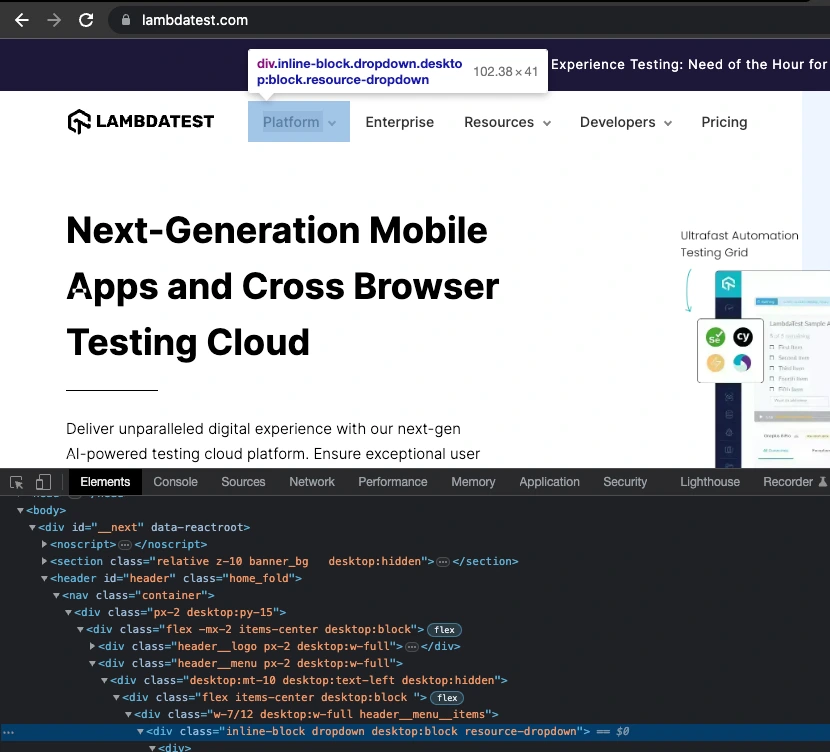
Implementation
We locate the element by using the following XPath.
element = driver.find_element(By.XPATH, //a[contains(.,'Platform')])def mouse_hover():
from selenium import webdriver
from selenium.webdriver.common.by import By
import time
# import Action chains
from selenium.webdriver.common.action_chains import ActionChains
driver = webdriver.Chrome()
driver.get("https://lambdatest.com")
# create action chain object
action = ActionChains(driver)
time.sleep(2)
element = driver.find_element(By.XPATH, "//div[@class='inline-block "
"dropdown desktop:block "
"resource-dropdown']")
action.move_to_element(element).perform()
time.sleep(2)
driver.quit()
if __name__ == '__main__':
mouse_hover()
Code Walkthrough
In the above code snippet, we do the following:
Initialize the ActionChains object by passing a ChromeDriver object.
- Locate the WebElement using XPATH - //div[@class='inline-block " "dropdown desktop:block " "resource-dropdown']
- Chain move_to_element() and perform() methods. In Selenium, the move_to_element() and perform() methods are used in combination to simulate complex user interactions, particularly when working with mouse actions like hovering over an element or performing a sequence of actions. These methods are part of the ActionChains class in Selenium, which provides a way to chain together a series of actions and then perform them.
Mouse Actions - Right-Click and Double-Click
Using the ActionChains class in Selenium Python binding, we can perform right-click and doubt-click actions. An example code snippet showcases how to perform the right-click and double-click actions.
def mouse_hover():
   from selenium import webdriver
   from selenium.webdriver.common.by import By
   import time


   # import Action chains
   from selenium.webdriver.common.action_chains import ActionChains


   driver = webdriver.Chrome()
   driver.get("https://lambdatest.com")


   # create action chain object
   action = ActionChains(driver)


   time.sleep(2)


   element = driver.find_element(By.XPATH, "//div[@class='inline-block "
                                           "dropdown desktop:block "
                                           "resource-dropdown']")


   action.context_click(element).perform()
   action.double_click(element).perform()


   time.sleep(2)
   driver.quit()


if __name__ == '__main__':
   mouse_hover()
In the above example, we first locate the search WebElement using its name attribute, create an instance of the ActionChains class, and then call the context_click() method. We pass the search box WebElement in the context_click() method. We then call the .perform() method to perform the right-click action.
Similarly, we call the double_click() method to perform the double-click action.
Emulation using Chrome
Mobile emulation allows testers and developers to emulate the behavior of a mobile device without an actual device.
Following is an example of mobile emulation in Selenium WebDriver using Python.
from selenium import webdriver
from selenium.webdriver.chrome.options import Options


mobile_emulation = {
   "deviceName": "iPhone X"
}


chrome_options = Options()
chrome_options.add_experimental_option("mobileEmulation", mobile_emulation)


driver = webdriver.Chrome(options=chrome_options)
In the above code example, we emulate an iPhone X device. All devices available to emulate can be found in Devtools Source Code.
You can also look at Chrome DevTools for all mobile devices that can be emulated.
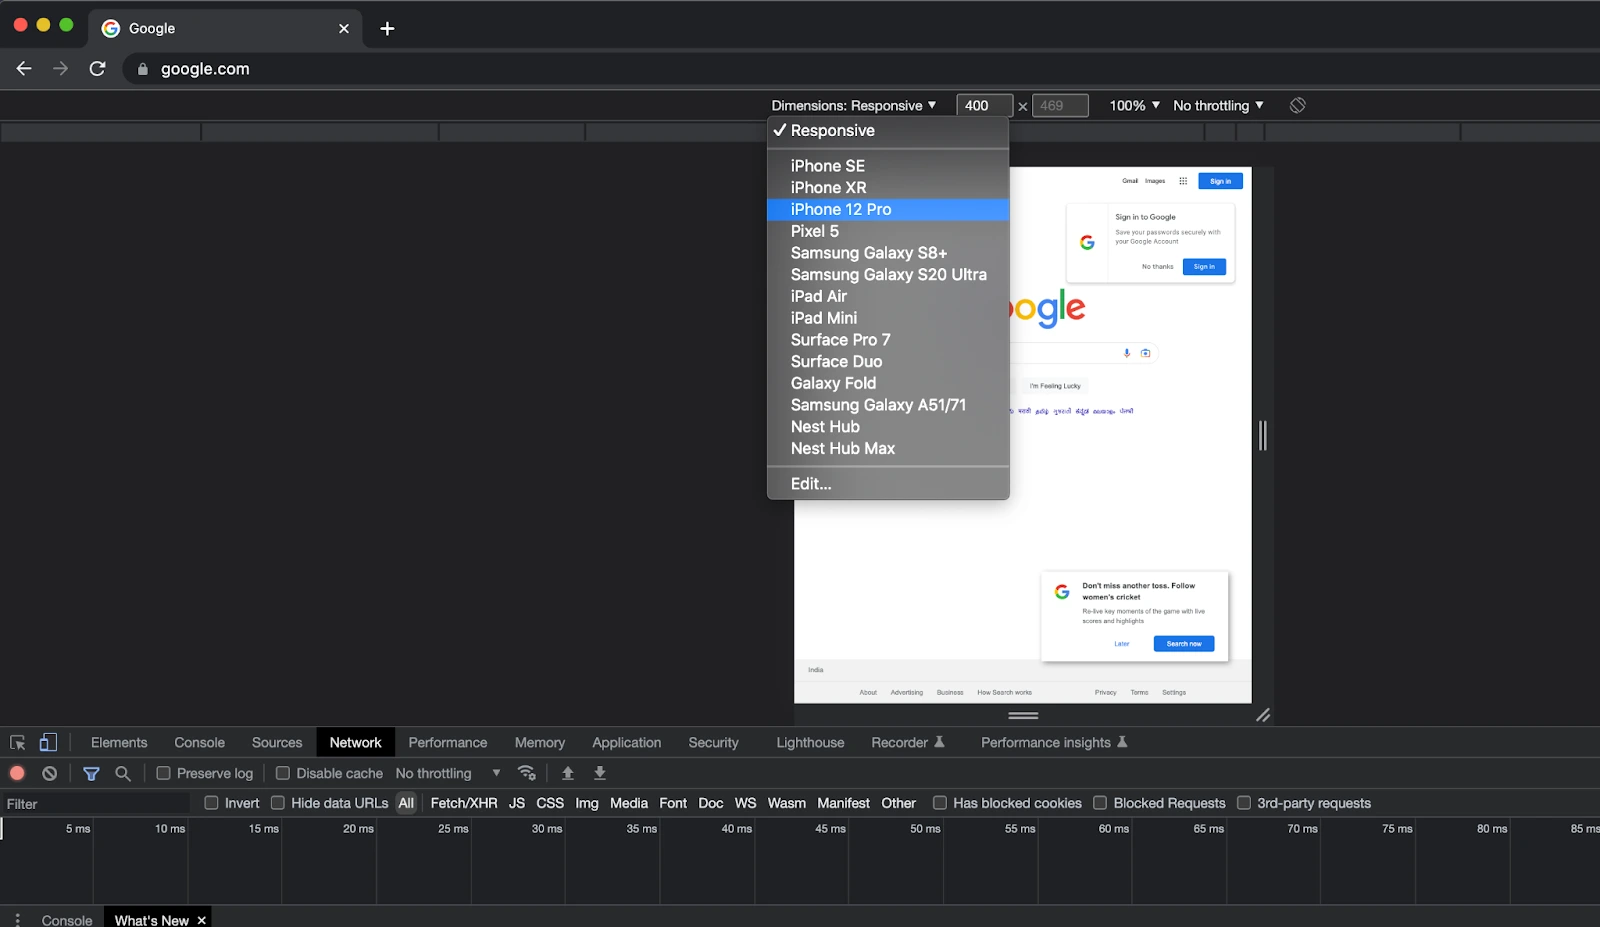
In the above image, we can see the list of devices we can emulate.
In this Selenium Python tutorial, we've explored the process of running Python automation testing on a local Selenium Grid. While this approach works well when dealing with a limited number of test scenarios and combinations, it may become impractical in scenarios with a broader range of testing.
For instance, imagine a situation where you have a Mac machine and must execute cross-browser tests on a combination like Chrome on Windows 10. Maintaining an in-house grid infrastructure that includes machines with various browsers, browser versions, and operating systems can be a costly and complex endeavor.
This is where Selenium testing on the cloud comes into play, offering a valuable solution for performing Selenium Python testing across a diverse set of virtual browsers, browser versions, and operating systems. AI-native test orchestration and execution platforms like LambdaTest provide a scalable and secure online Selenium Grid infrastructure that empowers you to execute Selenium Python tests at scale efficiently and effectively.
Below is a tutorial on how to perform automation testing on LambdaTest.

Catch up with the latest tutorials on test automation and more — Subscribe to the LambdaTest YouTube Channel.
Best Practices for Writing Robust Tests with Selenium and Python
Writing robust tests with Selenium and Python involves adopting various best practices to ensure your test suite's reliability, maintainability, and effectiveness. Here are some key practices to consider:
- Python’s unittest module for writing a test framework
The unittest is a unit testing framework. It draws inspiration from the JUnit framework in Java. Unittest framework brings a structure to the test suite and makes it more manageable.
Following is an example of performing an automated Google search using Python bindings in Selenium.
import unittest
from selenium import webdriver
from selenium.webdriver.common.by import By
from selenium.webdriver.remote.webelement import WebElement


class TestGoogle(unittest.TestCase):


   def setUp(self):
       self.driver = webdriver.Chrome()


   def test_google_search(self):
       self.driver.get("https://www.google.com/")
       self.assertIn("Google", self.driver.title)


       search_box = self.driver.find_element(By.NAME, "q")
       search_box.send_keys("Selenium WebDriver Python")
       search_box.submit()
       self.assertTrue(isinstance(self.driver.find_element(By.CSS_SELECTOR, ".g"), WebElement))


   def tearDown(self):
       self.driver.quit()


if __name__ == "__main__":
   unittest.main()
In the above code snippet, we implement three methods of the TestGoogle class.
- setUp() - We initialize the webdriver.Chrome() class to initialize a new WebDriver instance.
- test_google_search() - We perform the actual location of the WebElement and input the search string in the search box.
- tearDown() - We clean up the WebDriver instance.
There are several benefits to using the unittest module.
- Organized Test Suite - unittest organizes tests into test cases and suites. You can write a method to validate search results and another to check for a website's expected title. This ensures cleaner management of the two tests in the code base.
- Test Reports - unittest generates detailed test reports to identify and diagnose issues in code.
- Integration - Code coverage tools like coverage.py, pytest-cov, and nose2-cov can easily be integrated with the unittest module. Among these, coverage.py is the most popular and widely adopted coverage tool.
- Test Discovery - unittest can automatically discover and run all tests in a directory. Therefore, in a single command, we can run numerous tests.
The insecure certificate error occurs when a website controlled by a WebDriver hits a certificate warning. This commonly occurs when the TLS certificate of a website has expired or is invalid. In other words, the browser cannot verify the website's identity and considers it insecure.
Selenium’s Python client offers an InsecureCertificateException class to handle this exception.
from selenium import webdriver
from selenium.common import exceptions


def ssl_error():
   session = webdriver.Chrome()
   try:
       session.get("https://self-signed.badssl.com/")
   except exceptions.InsecureCertificateException:
       print("Hit insecure cert on {}".format(session.current_url)


if __name__ == "__main__":
   ssl_error()
In the above code, we handle the exception using the InsecureCertificateException class.
To handle this exception, you can configure the browser to ignore the error and process the test. To do that, we need to use the Options class.
from selenium import webdriver
from selenium.common import exceptions


def ssl_error():
   from selenium import webdriver
   from selenium.common.exceptions import InsecureCertificateException
   from selenium.webdriver.chrome.options import Options


   # create Chrome options object
   options = Options()


   # ignore certificate errors
   options.add_argument('--ignore-certificate-errors')


   # create Chrome driver with options
   driver = webdriver.Chrome(options=options)


   # navigate to a website with an invalid certificate
   try:
       driver.get('https://example.com')
   except InsecureCertificateException:
       # handle the exception as needed
       print('Invalid certificate encountered')


if __name__ == "__main__":
   ssl_error()
In the above code example, we create an object of the class Options and add --ignore-certificate-errors that as an argument to the options. This instructs the Chrome WebDriver to ignore the certificate errors.
However, it should be noted that such a practice is discouraged since it allows an attacker to intercept the data that’s being transmitted. This is commonly referred to as the Man in the middle attack.
Wait commands, as the name suggests, ask the WebDriver to wait for a defined time. This impacts the stability of the automated tests in page loads where there is slowness in rendering heavy pages, Ajax calls, and sometimes poor internet connectivity of the end user.
In one of your tests, you’re trying to locate a WebElement that’s not yet loaded. In such cases, the script will throw a NoSuchElementException exception. To prevent such errors, one can use `waits`.
There are 3 types of wait commands.
- Implicit wait
- Explicit wait
- Fluent wait
Implicit wait
This is the default wait that is always in place with a value 0. Once we set a specific time, the WebDriver will wait for the element until that time before the exception occurs. It tells the WebDriver to wait for an element to appear on the page before throwing a NoSuchElementException.
The implicit wait is applied globally to a webdriver and is not linked to a WebElement.
Explicit Wait
This command will wait until a certain condition is met for a WebElement. This is very useful in cases where some elements take more time to load naturally. For instance, some element on a website may take a few seconds before it becomes clickable.
There are methods in Selenium’s Python bindings defined in the expected_conditions module of the support package.
WebDriverWait class is used to wait for an element, and the expected_conditions module is used to check for a condition to wait for.
from selenium import webdriver
from selenium.common import exceptions


def explicit_wait():
   from selenium import webdriver
   from selenium.webdriver.common.by import By
   from selenium.webdriver.support.ui import WebDriverWait
   from selenium.webdriver.support import expected_conditions as EC


   # create a Chrome driver instance
   driver = webdriver.Chrome()


   # navigate to a page and wait for an element to become visible
   driver.get('https://lambdatest.com')
   wait = WebDriverWait(driver, 10)
   element = wait.until(EC.visibility_of_element_located((By.LINK_TEXT, "Platform")))


if __name__ == "__main__":
   explicit_wait()
In the above code example, WebDriverWait class waits for an element with Link Text “Platform” to load for lambdatest.com website for 10 seconds. Once the element is found, it’s returned and can be further used for testing. Apart from the visibility_of_element_located method, several methods are offered by expected_conditions and can be found here. Selenium’s documentation also highlights a list of expected conditions here.
Fluent Wait
Fluent Wait is a more dynamic form of explicit wait. Along with the time to wait for a condition to be met, it also specifies the polling frequency to check for a condition.
The rest of the test gets immediately executed as soon as the condition is met.
It ensures that there is no hardcoding in the codebase for waits, and the execution time of tests depends on the slowness or fastness of the test environment.
from selenium import webdriver
from selenium.common import exceptions


def explicit_wait():
   from selenium import webdriver
   from selenium.webdriver.common.by import By
   from selenium.webdriver.support.ui import WebDriverWait
   from selenium.webdriver.support import expected_conditions as EC


   # create a Chrome driver instance
   driver = webdriver.Chrome()


   # navigate to a page and wait for an element to become visible
   driver.get('https://lambdatest.com')
   wait = WebDriverWait(driver, timeout=10, poll_frequency=1)
   element = wait.until(EC.visibility_of_element_located((By.LINK_TEXT, "Platform")))


if __name__ == "__main__":
   explicit_wait()
In the above code example, the poll_frequency and timeout parameters are passed while initializing the WebDriverWait class.
Fluent waits are useful in web applications where Ajax calls are made. Ajax calls are dependent on the latency of the APIs. This can lead to the rendering of certain elements at a later time.
Whether you're a developer or a tester aspiring to become a skilled Python automation tester, fear not! Enroll in the Selenium Python 101 certification program to bolster your Python proficiency. This certification provides a robust foundation, empowering you to utilize Selenium Python in testing projects and excel in your automation testing career.
Conclusion
We broadly covered the automation frameworks ecosystem and how Selenium forms a core part of it. We covered the basics of Selenium WebDriver and wrote a basic test script in Python and Selenium 4.
After going through this Selenium Python tutorial, you will be comfortable writing basic automation scripts using Python and Selenium.
On This Page
- Overview
- Introduction to Selenium
- Setup and Installation of Selenium and Python
- Getting Started with Selenium Automation Testing with Python
- Selenium Automation Testing with Python: Advanced Use Cases
- Best Practices for Writing Robust Tests with Selenium and Python
- Conclusion
- Frequently Asked Questions (FAQs)
Frequently asked questions
Did you find this page helpful?


