Test Plan Creation
Test plans are collections of test cases which help in achieving certain test objectives by selecting and validating important test cases. By providing a structured approach to testing, test plans ensure that a particular goal or objective is tested and verified.
The process of creating a test plan is user-friendly and intuitive. Users can seamlessly begin this process by selecting the "Test Plans" option from the repository. It provides a workflow to follow necessary steps for defining and structuring the test plan.
Steps for Creating a Test Plan
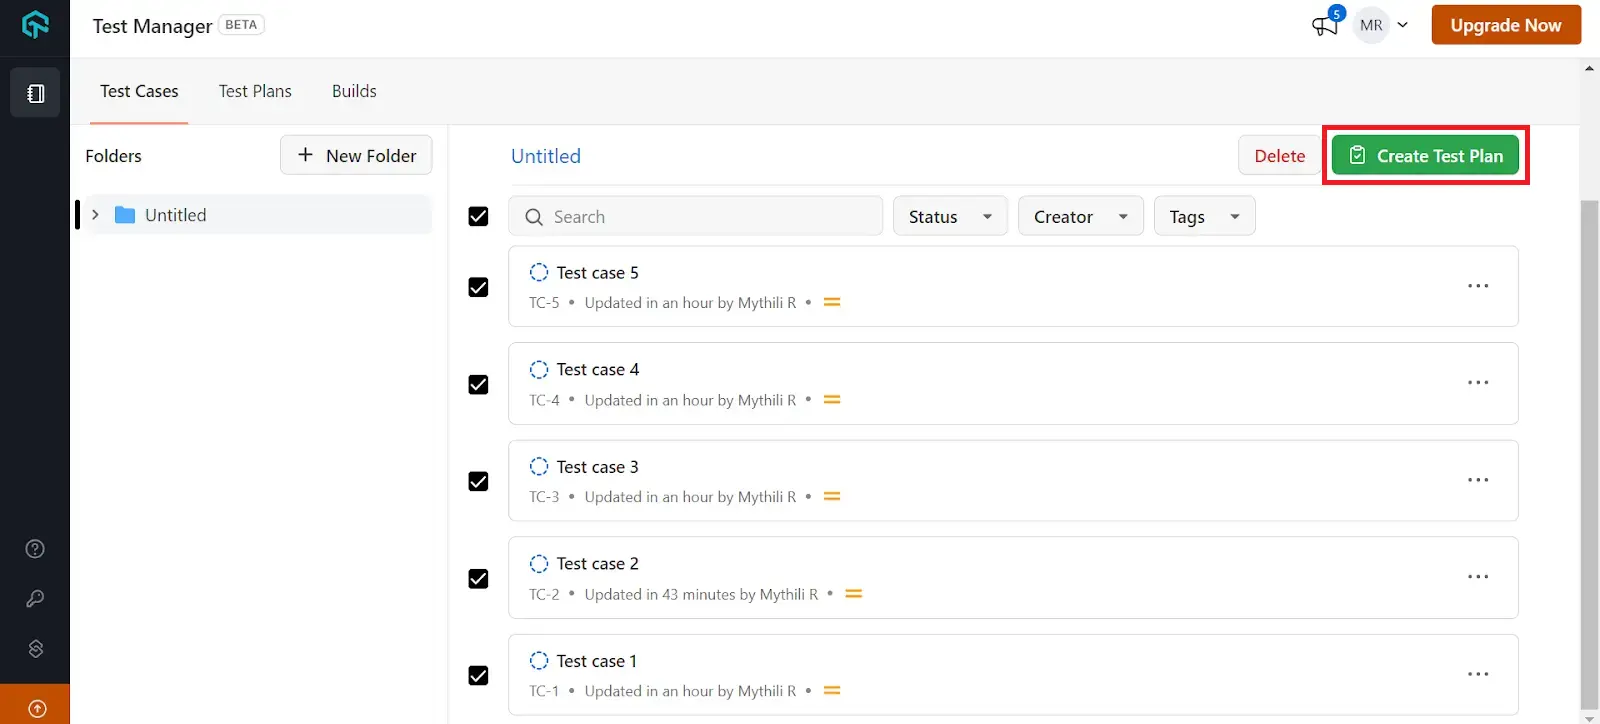
- Under Test cases, select multiple test cases and choose the Create Test Plan option.
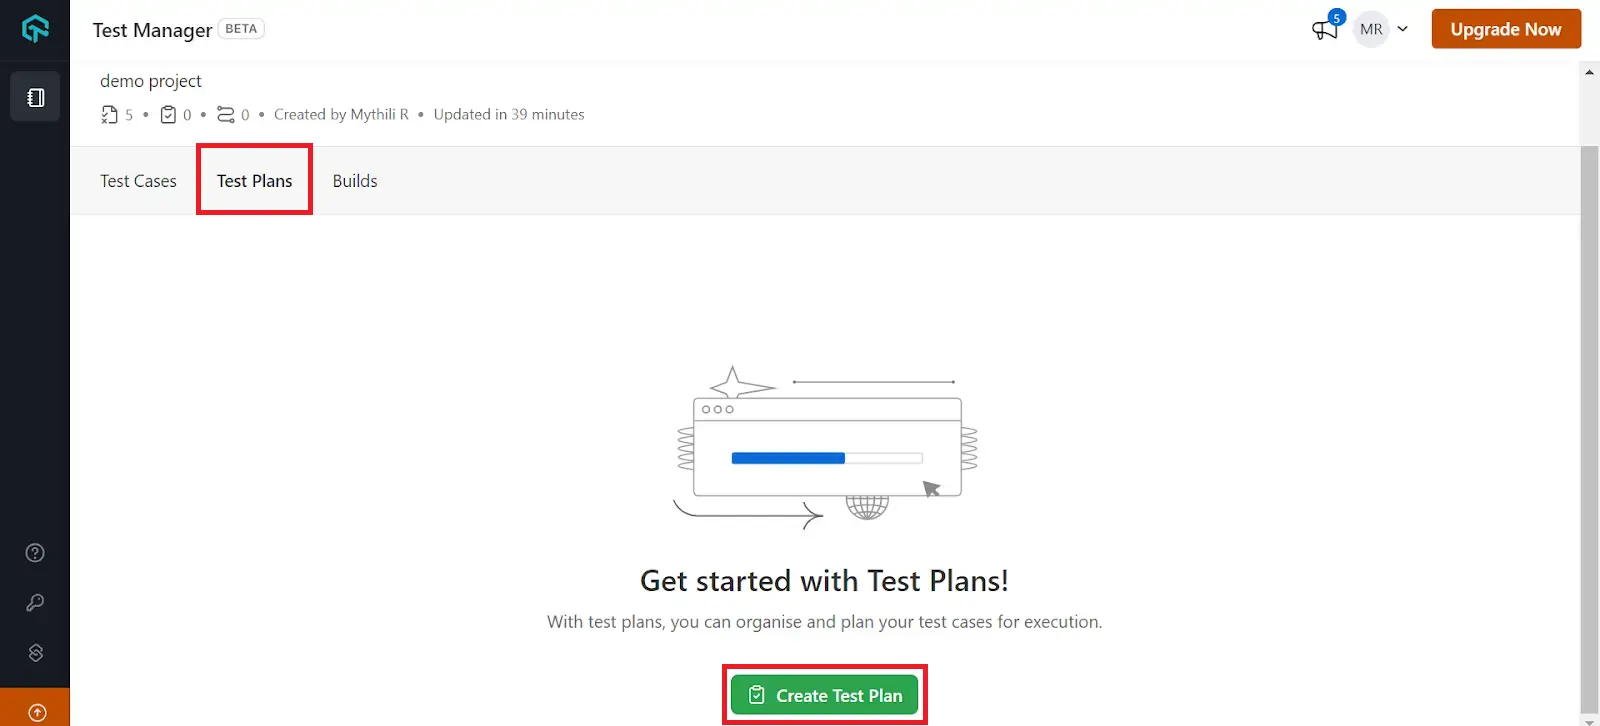
- Alternatively, click on the Test Plans dashboard and click on the toggle that says Create Test Plan.
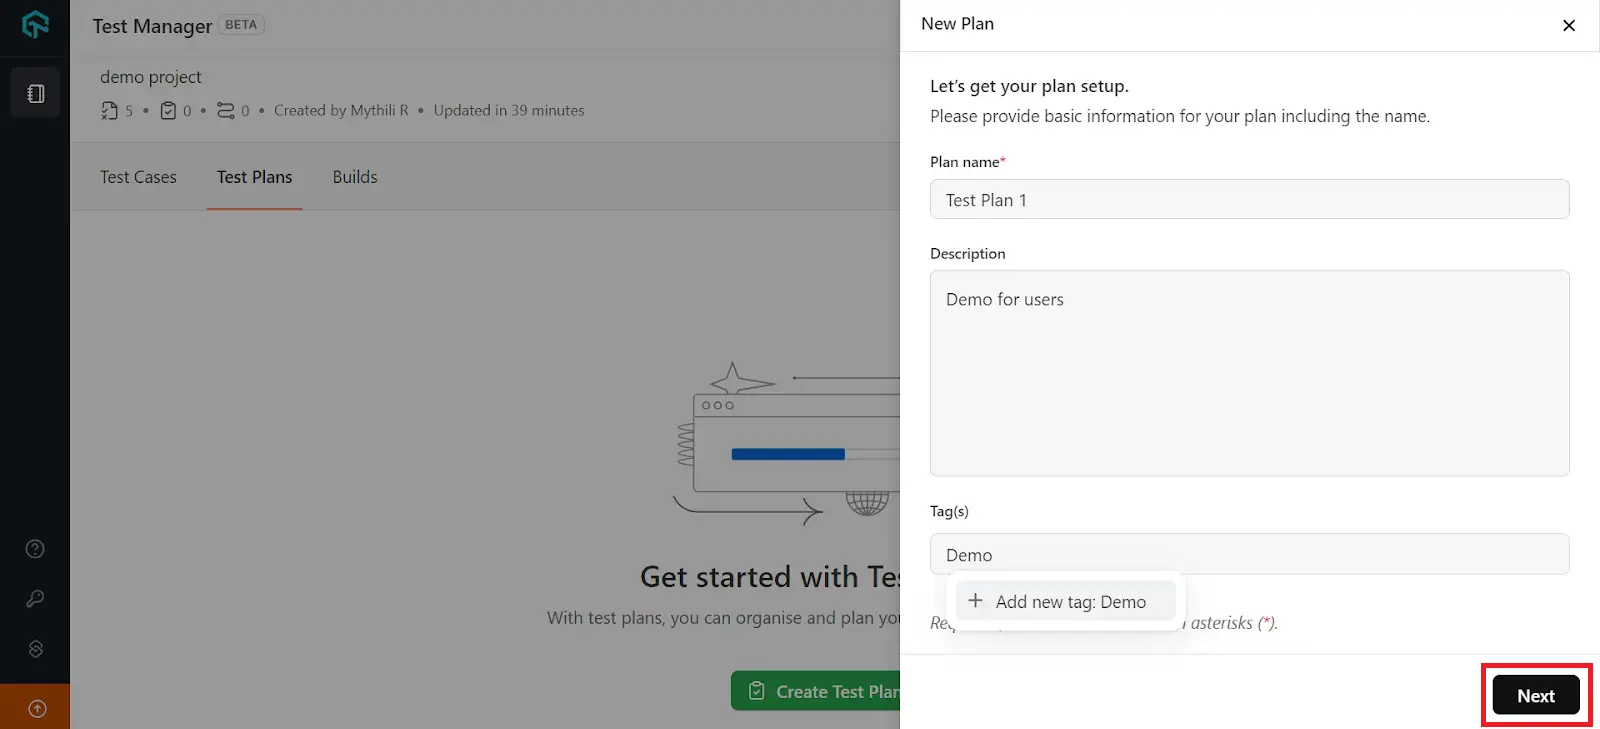
- You will be redirected to the test plan creation workflow. Enter the Plan Name, Description, and Tag(s), then select Next to proceed.
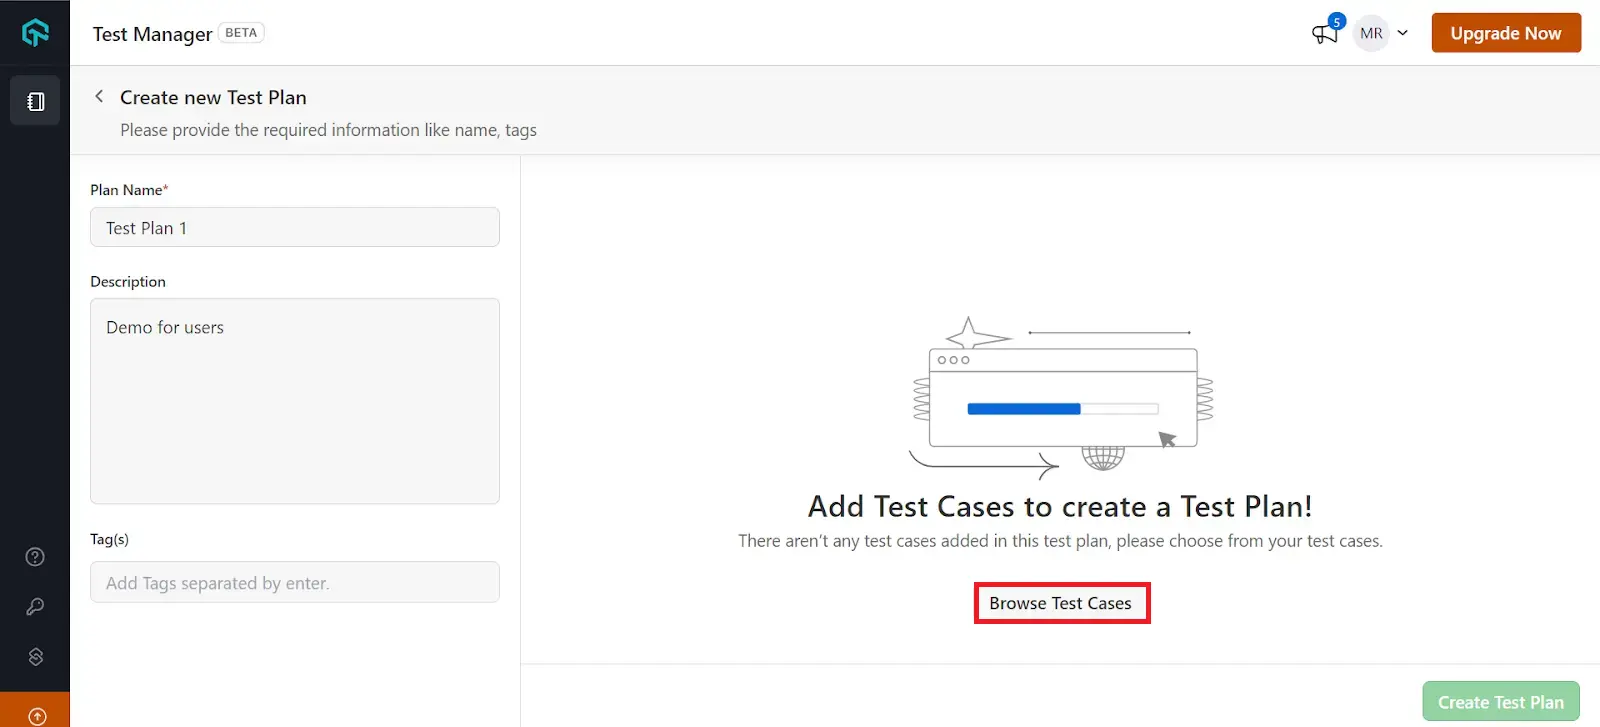
- Select Browse Test Cases to add additional test cases.
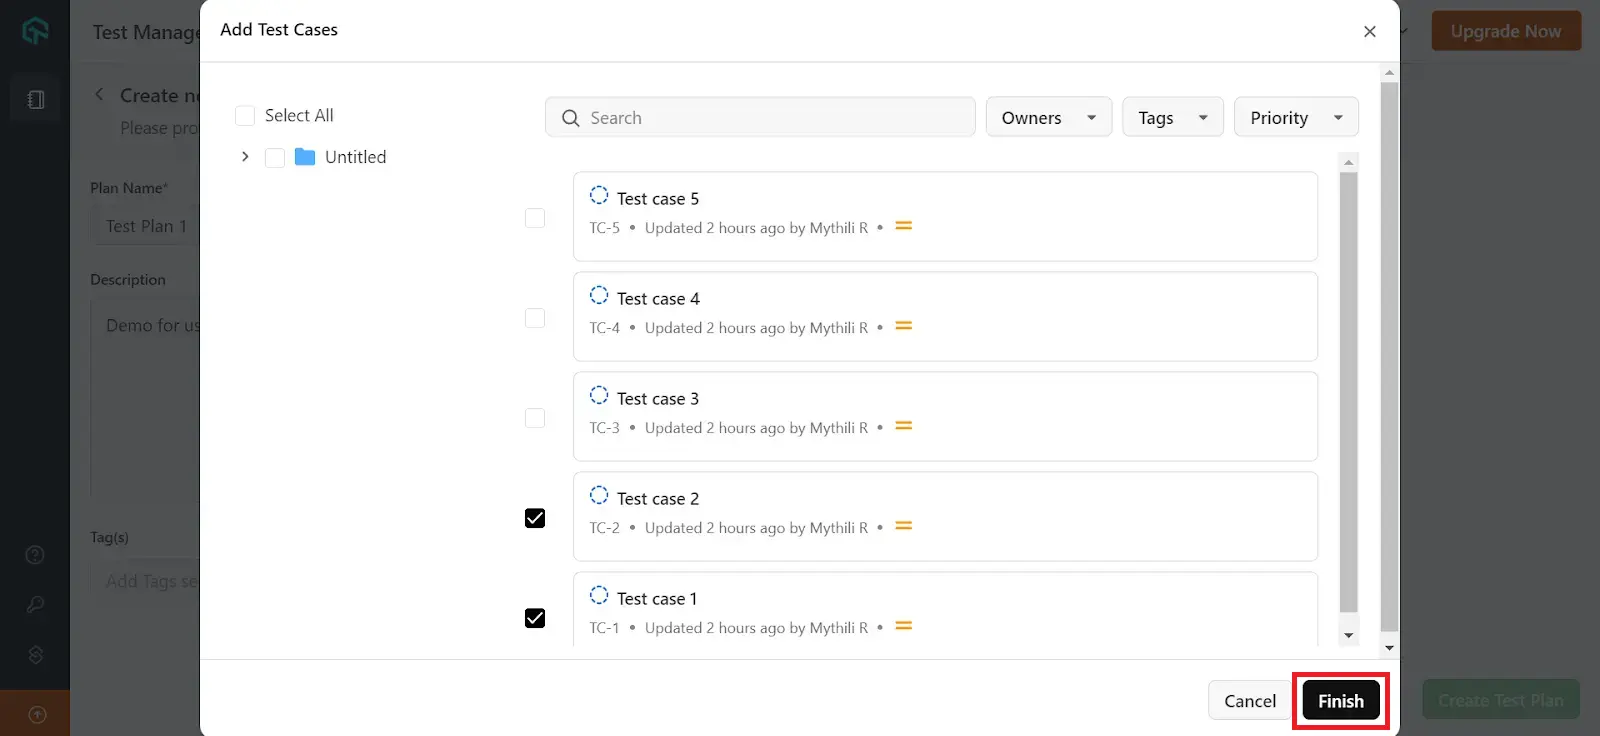
- Choose the test case of your choice from the list that appears and click on Finish.
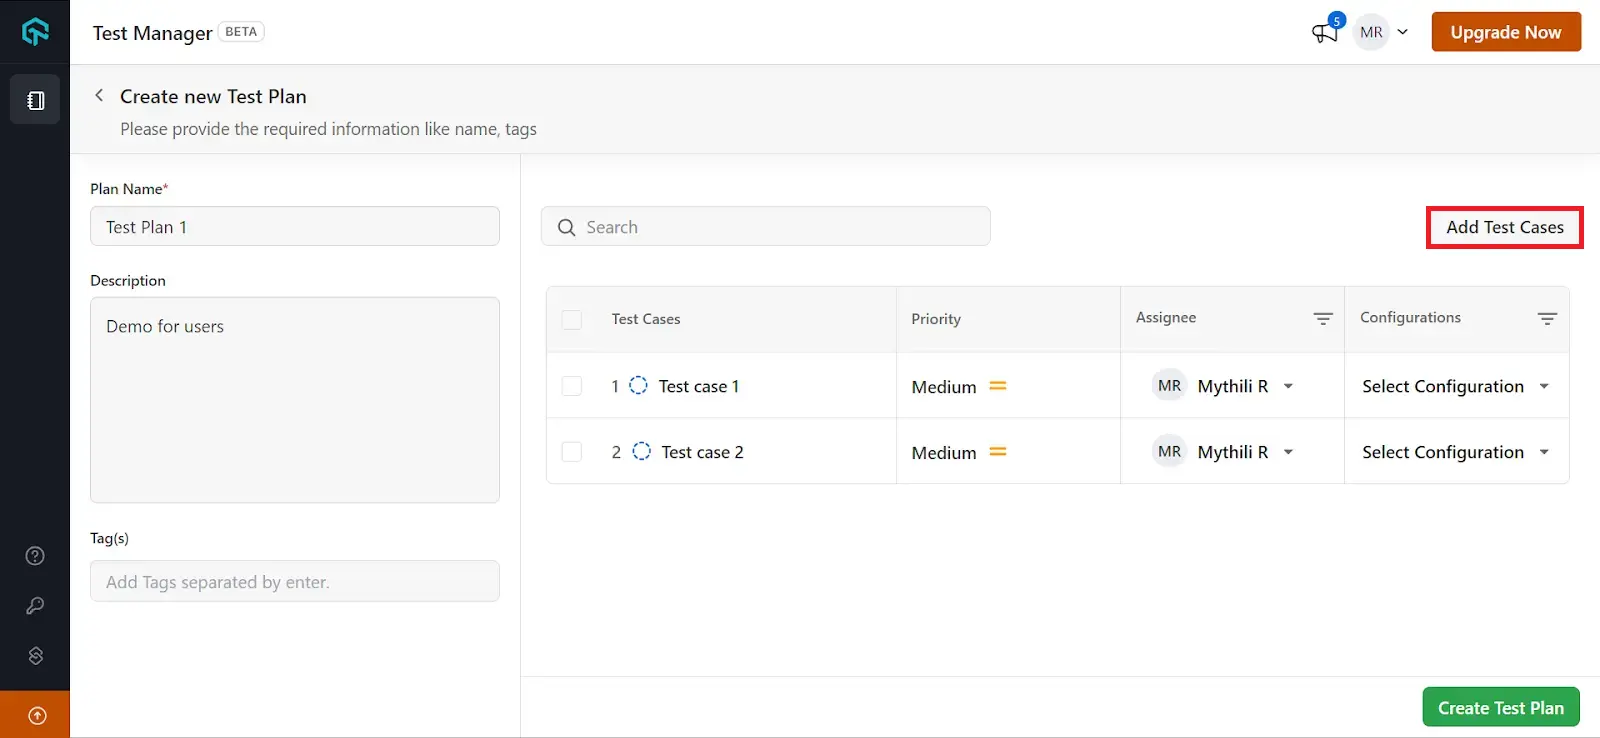
- It is recommended to add details such as Priority, Assignee and Configurations for the test cases to create a build. Multiple test cases can also be added using the Add Test Cases option available on the top right hand side.
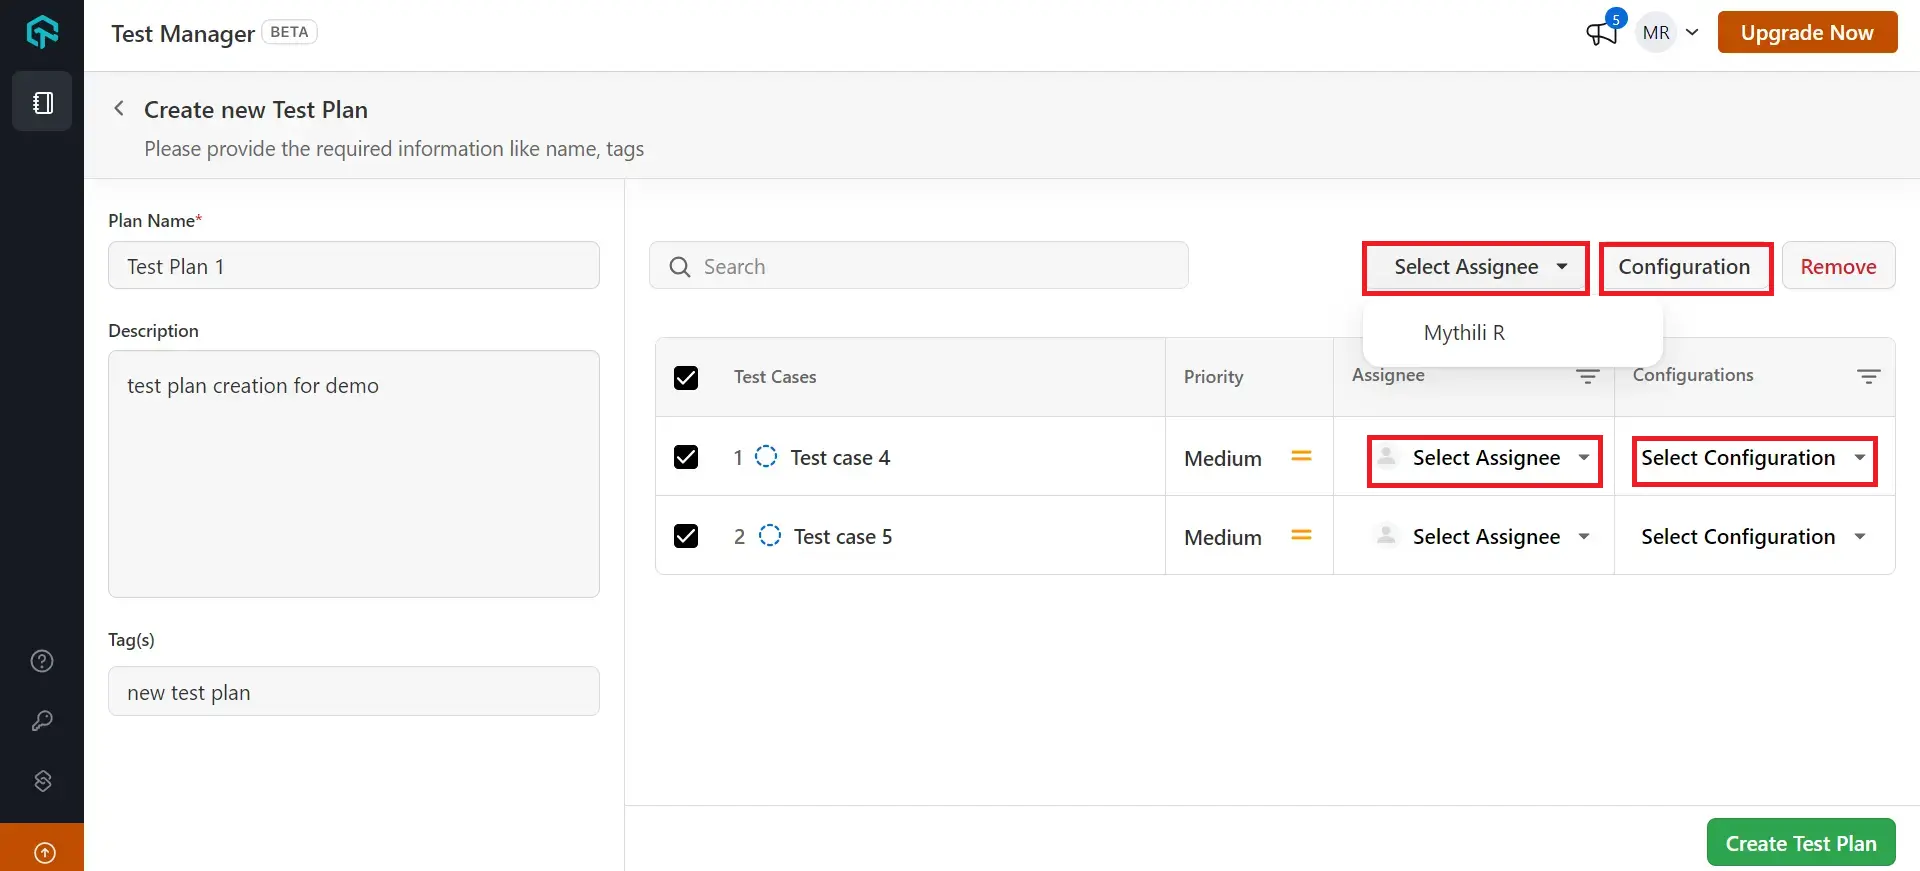
- Select all the test cases together to add bulk assignees and configurations or click on Select Assignee and Select Configuration individually.
- Select configurations from the list of existing configurations. You can search or filter them as well.
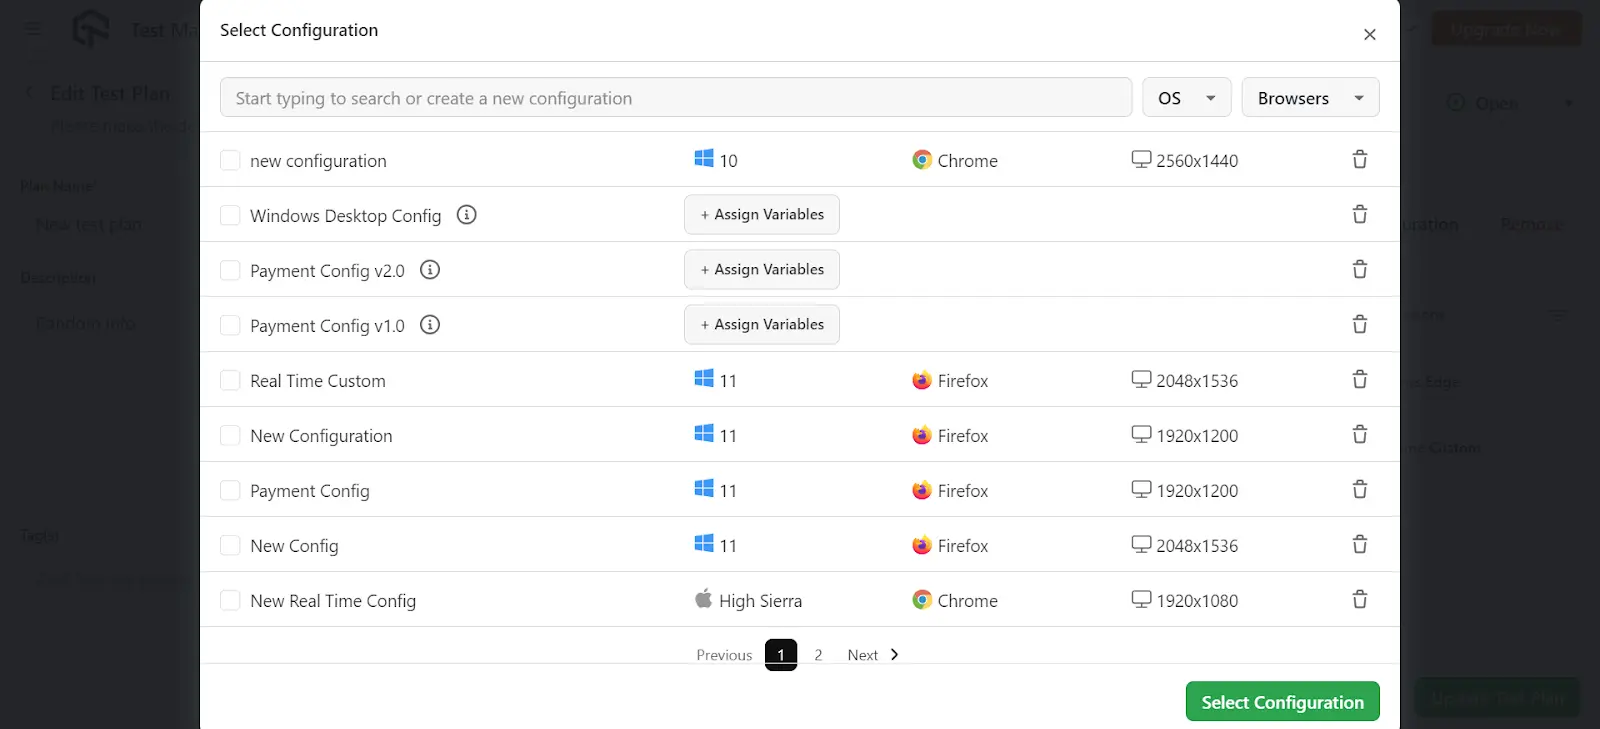
- To create a new configuration, start typing the title of the configuration as shown in the image below.
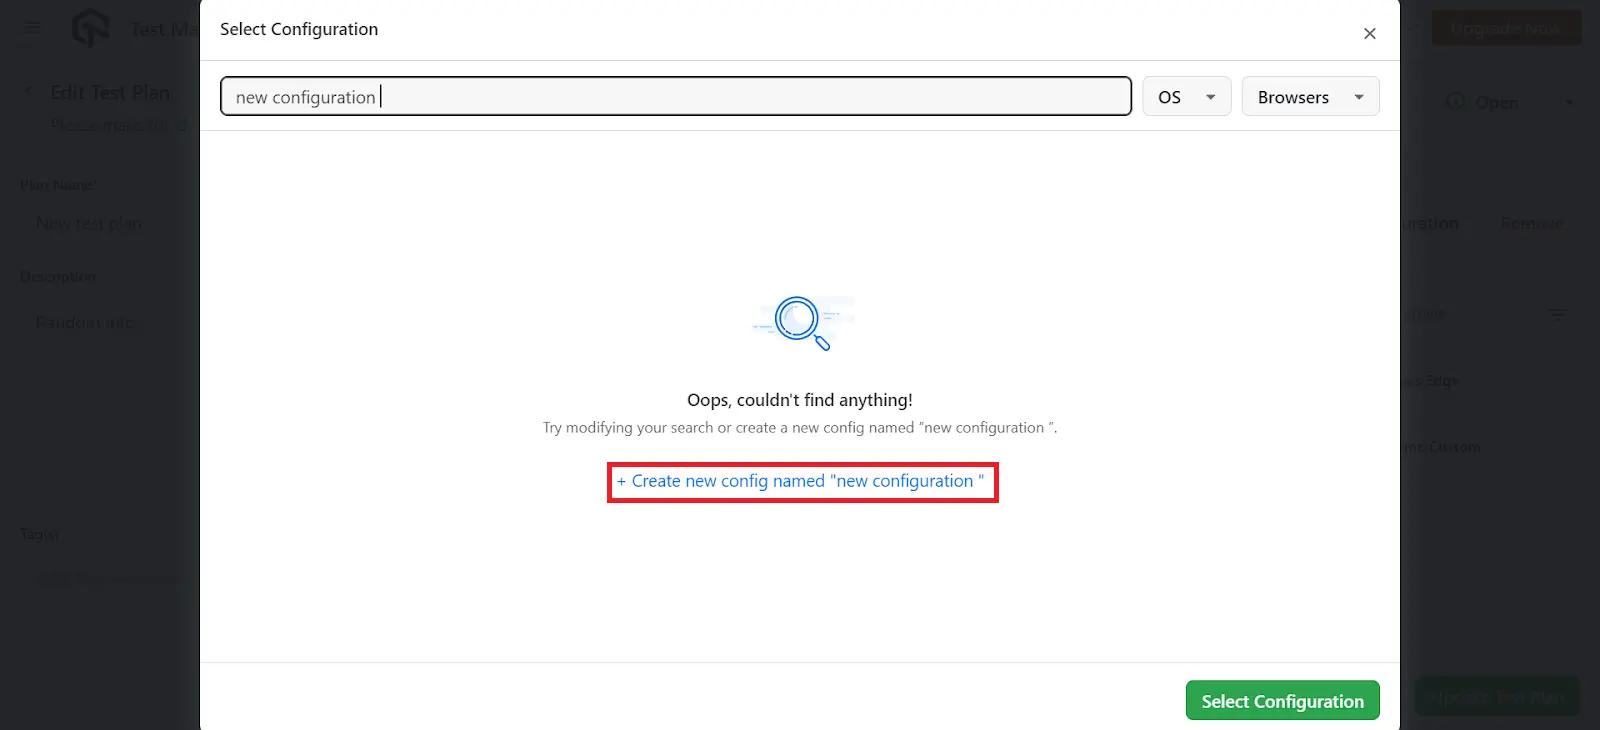
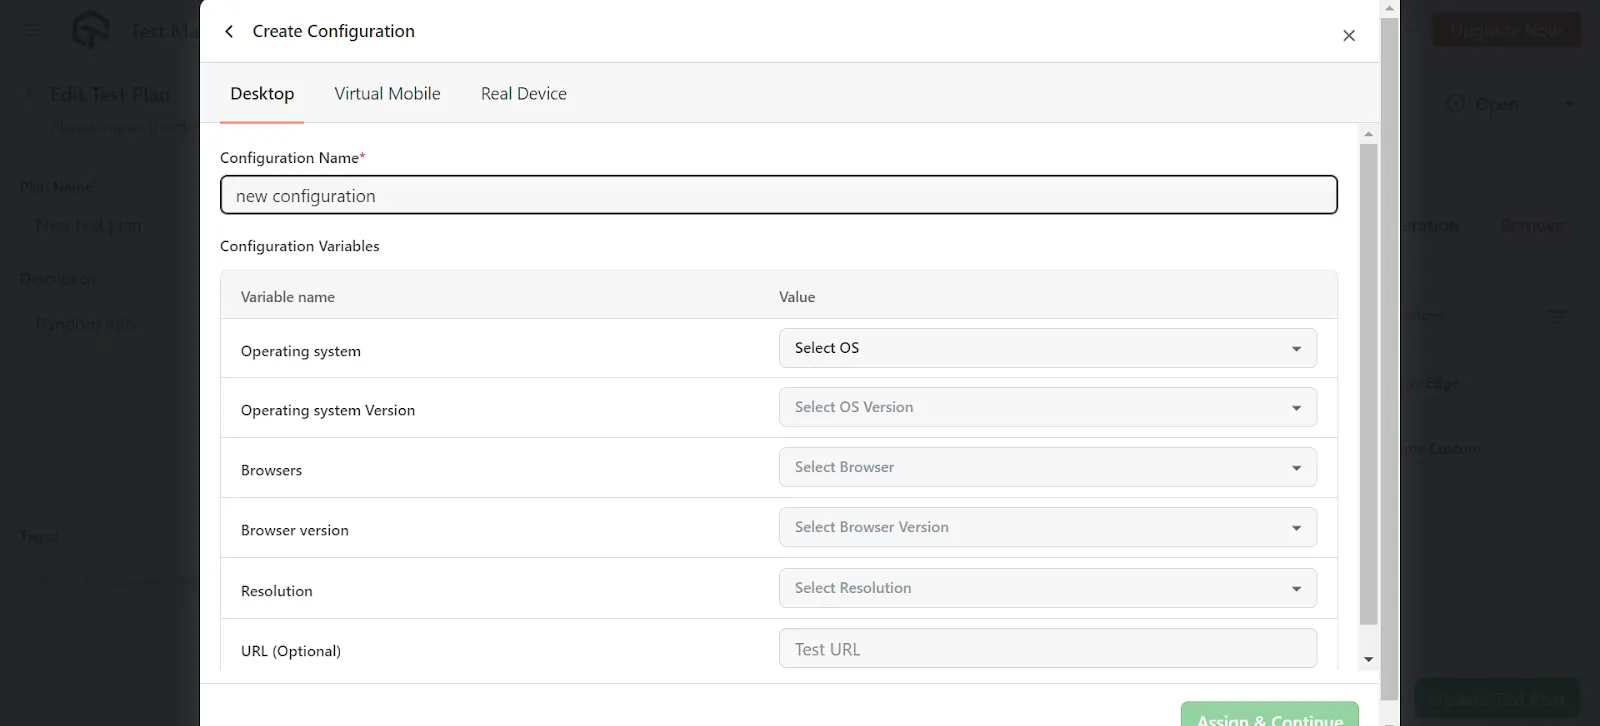
- Click on Assign Variables to select your preferred Operating Systems and Browsers. Once selected, click on Assign & Continue to finalize your choices.
- Select the Priority, Assignee and Configuration for the test cases, click on Update Test Plan.
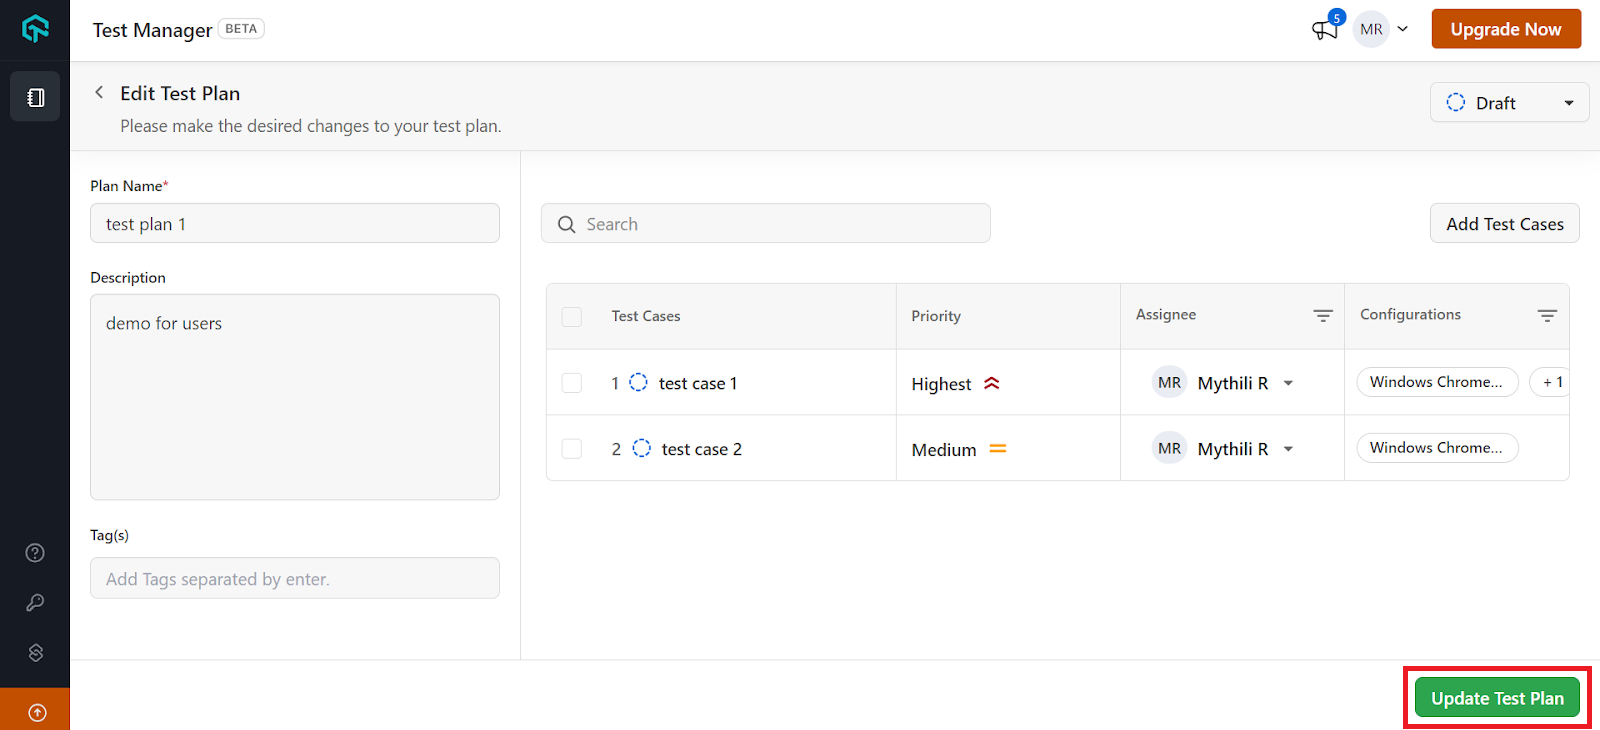
NOTE: If you choose multiple configurations for your test case, the number of entries for the test case increases by the number of configurations used.
