Integrate SmartUI SDK with Playwright-Python
Welcome to the world of simplified visual testing with the SmartUI SDK.
Integrating seamlessly into your existing Playwright testing suite, SmartUI SDK revolutionizes the way you approach visual regression testing. Our robust solution empowers you to effortlessly capture, compare, and analyze screenshots across a multitude of browsers and resolutions, ensuring comprehensive coverage and accuracy in your visual testing endeavors.
Prerequisites
- Basic understanding of Command Line Interface and Playwright is required.
- Login to LambdaTest SmartUI with your credentials.
- Install virtualenv which is the recommended way to run your tests. It will isolate the build from other setups you may have running and ensure that the tests run with the specified versions of the modules.
pip install virtualenv
The following steps will guide you in running your first Visual Regression test on LambdaTest platform using SmartUI Playwright SDK integration.
Create a SmartUI Project
The first step is to create a project with the application in which we will combine all your builds run on the project. To create a SmartUI Project, follow these steps:
- Go to Projects page
- Click on the
new projectbutton - Select the platform as CLI for executing your
SDKtests. - Add name of the project, approvers for the changes found, tags for any filter or easy navigation.
- Click on the Submit.
Steps to run your first test
Once you have created a SmartUI Project, you can generate screenshots by running automation scripts. Follow the below steps to successfully generate screenshots
Step 1: Create/Update your test
- You can clone the sample repository to run
LambdaTestautomation tests withSmartUIand use theSmartUI_SDK_LT_hub.pyfile.
git clone https://github.com/LambdaTest/smartui-playwright-python-sdk-sample
cd smartui-playwright-python-sdk-sample
- Create a virtual environment in your project folder (the environment name is arbitrary).
virtualenv venv
- Activate the environment.
source venv/bin/activate
Step 2: Install the Dependencies
Install required NPM modules for LambdaTest Smart UI Playwright Python SDK in your Frontend project.
npm i @lambdatest/smartui-cli
pip install lambdatest-playwright-driver
Step 3: Configure your Project Token
Setup your project token show in the SmartUI app after, creating your project.
- MacOS/Linux
- Windows - CMD
- Windows-PS
export PROJECT_TOKEN="123456#1234abcd-****-****-****-************"
set PROJECT_TOKEN="123456#1234abcd-****-****-****-************"
$Env:PROJECT_TOKEN="123456#1234abcd-****-****-****-************"

Step 4: Create and Configure SmartUI Config
You can now configure your project configurations on using various available options to run your tests with the SmartUI integration. To generate the configuration file, please execute the following command:
npx smartui config:create .smartui.json
Once, the configuration file will be created, you will be seeing the default configuration pre-filled in the configuration file:
{
  "web": {
    "browsers": [
      "chrome",
      "firefox",
      "safari",
      "edge"
    ],
    "viewports": [
      [
        1920
      ],
      [
        1366
      ],
      [
        1028
      ]
    ] // Full Page screenshots are captured by default for web viewports
  },
  "mobile": {
    "devices": [
      "iPhone 14",  //iPhone 14 viewport
      "Galaxy S24"  //Galaxy S24 viewport
    ],
    "fullPage": true, //Full Page is true by default for mobile viewports
    "orientation": "portrait" //Change to "landscape" for landscape snapshot
  },
  "waitForTimeout": 1000, //Optional (Should only be used in case lazy-loading/async components are present)
  "waitForPageRender": 50000, //Optional (Should only be used in case of websites which take more than 30s to load)
  "enableJavaScript": false, //Enable javascript for all the screenshots of the project
  "allowedHostnames": [] //Additional hostnames to capture assets from
}
- For capturing fullpage or viewport screenshots, please refer to this documentation
- For the list of available mobile viewports, please refer to this documentation
- For more information about SmartUI config global options, please refer to this documentation.
**Step 5: Adding SmartUI function to take screenshot
- You can incorporate SmartUI into your custom
Playwrightautomation test (any platform) script by adding thesmartuiSnapshotfunction in the required segment of playwright script of which we would like to take the screenshot, as shown below:
ffrom playwright.sync_api import sync_playwright, Playwright
from lambdatest_playwright_driver import smartui_snapshot

def run(playwright: Playwright):
    webkit = playwright.webkit
    browser = webkit.launch()
    context = browser.new_context()
    page = context.new_page()

    try:
        page.goto("Required URL")
        smartui_snapshot(page, "Screenshot Name")

        print("SmartUI snapshot taken successfully!")

    except Exception as e:
        print(f"Error occurred during SmartUI snapshot: {e}")

    finally:
        browser.close()

with sync_playwright() as playwright:
    run(playwright)
Step 6: Execute the Tests on SmartUI Cloud
Execute visual regression tests on SmartUI using the following commands
npx smartui --config .smartui.json exec -- python SmartUI_SDK_LT_hub.py
You may use the npx smartui --help command in case you are facing issues during the execution of SmartUI commands in the CLI.
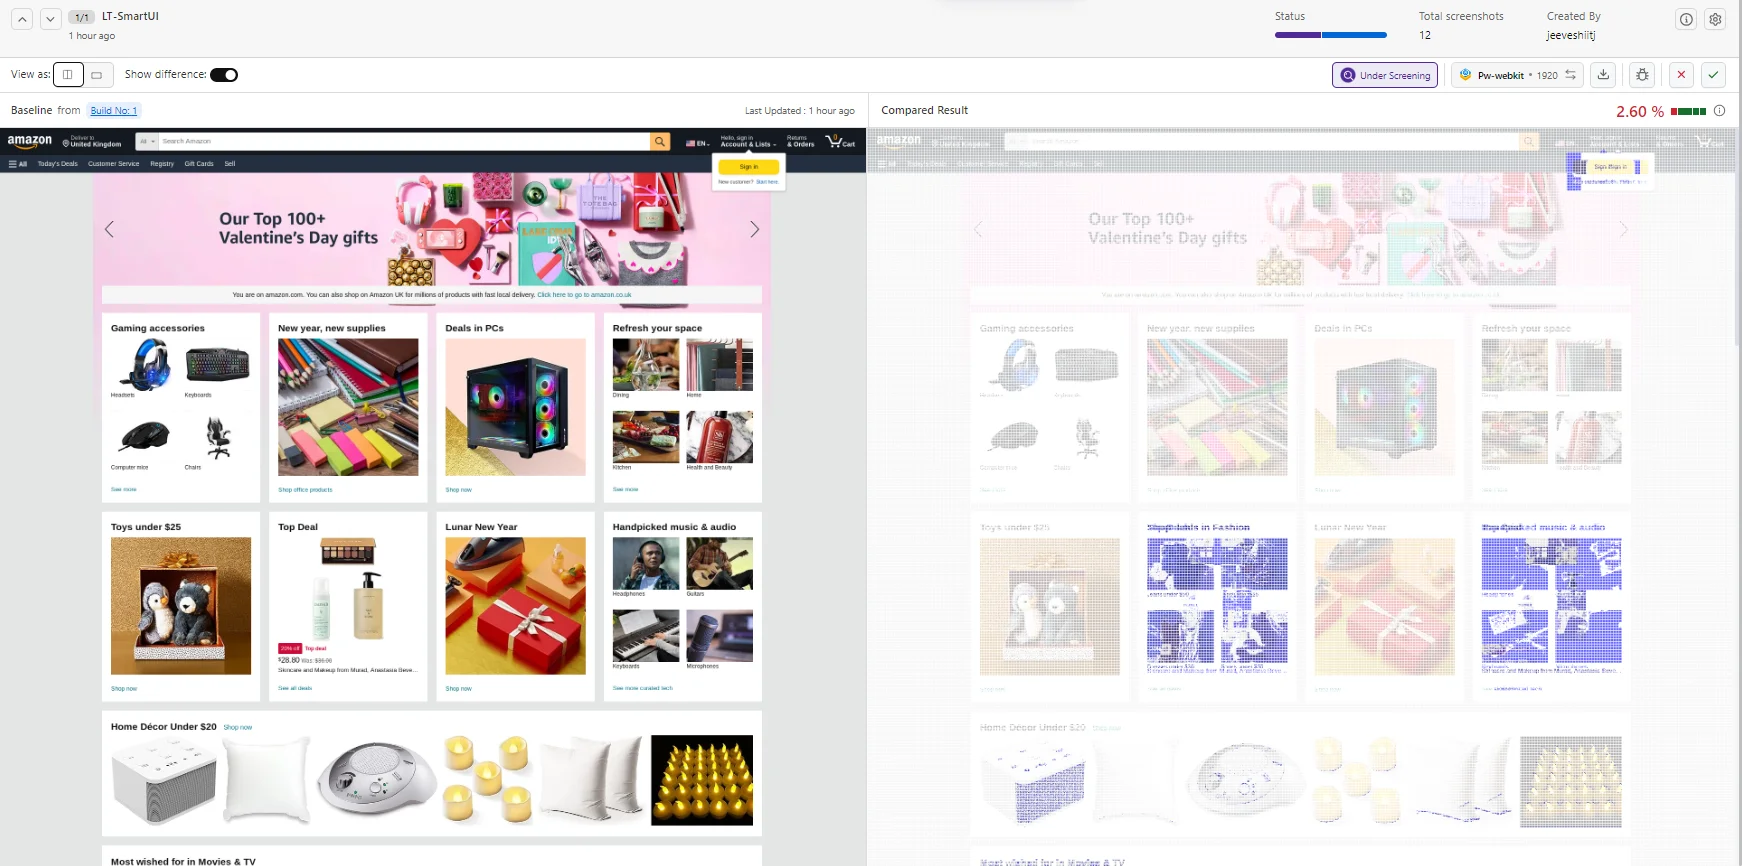
View SmartUI Results
You have successfully integrated SmartUI SDK with your Playwright tests. Visit your SmartUI project to view builds and compare snapshots between different test runs.
You can see the Smart UI dashboard to view the results. This will help you identify the Mismatches from the existing Baseline build and do the required visual testing.
Arguments supported in the smartUISnapshot function
The following are the different options which are currently supported:
| Key | Description |
|---|---|
page (instance) | The instance of the page used in your tests. |
"Screenshot Name" (string) | Specify a name for the screenshot in your tests to match the same screenshot with the name from your baseline. |
options (object) | Specify one or a combination of selectors in the ignoreDOM or selectDOM objects. These selectors can be based on HTML DOM IDs, CSS classes, CSS selectors, or XPaths used by your webpage. They define elements that should be excluded from or included in the visual comparison. |
Handling Dynamic Data in SmartUI SDK New
When conducting visual tests, you may encounter scenarios where certain elements within your application change between test runs. These changes might introduce inconsistencies in your test results.You can ignore / select specific element(s) to be removed from the comparison by parsing the options in the smartuiSnapshot function in the following way
- Ignore ID
- Ignore Class
- Ignore XPath
- Ignore CSS Selector
options = {
            ignoreDOM: {
                id: ["ID-1", "ID-2"],
            }
        }
page.goto("Required URL")
smartui_snapshot(page,"<Screenshot Name>", options)
options = {
            ignoreDOM: {
                class: ["Class-1", "Class-2"],
            }
        }
page.goto("Required URL")
smartui_snapshot(page,"<Screenshot Name>", options)
options = {
            ignoreDOM: {
                xpath: ["Xpath-1", "Xpath-2"],
            }
        }
page.goto("Required URL")
smartui_snapshot(page,"<Screenshot Name>", options)
options = {
            ignoreDOM: {
                cssSelector: ["CSS-Selector-1", "CSS-Selector-2"],
            }
        }
page.goto("Required URL")
smartui_snapshot(page,"<Screenshot Name>", options)
- Select ID
- Select Class
- Select XPath
- Select CSS Selector
options = {
            selectDOM: {
                id: ["ID-1", "ID-2"],
            }
        }
page.goto("Required URL")
smartui_snapshot(page,"<Screenshot Name>", options)
options = {
            selectDOM: {
                class: ["Class-1", "Class-2"],
            }
        }
page.goto("Required URL")
smartui_snapshot(page,"<Screenshot Name>", options)
options = {
            selectDOM: {
                xpath: ["Xpath-1", "Xpath-2"],
            }
        }
page.goto("Required URL")
smartui_snapshot(page,"<Screenshot Name>", options)
options = {
            selectDOM: {
                cssSelector: ["CSS-Selector-1", "CSS-Selector-2"],
            }
        }
page.goto("Required URL")
smartui_snapshot(page,"<Screenshot Name>", options)
For capturing the screenshot of a specific element
You can capture screenshots of targeted elements by leveraging various locator mechanisms such as XPath, CSS ID, class, and selectors. This precision-driven approach ensures accurate and specific visual regression testing for your web application's components.
- Capture Element by ID
- Capture Element by Class
- Capture Element by XPath
- Capture Element by Selector
options = {
      element: {
          id: 'Required ID',
      }
  }
page.goto("Required URL")
smartui_snapshot(page,"<Screenshot Name>", options)
options = {
      element: {
          class: 'Required Class',
      }
  }
page.goto("Required URL")
smartui_snapshot(page,"<Screenshot Name>", options)
options = {
      element: {
          xpath: 'Required Xpath',
      }
  }
page.goto("Required URL")
smartui_snapshot(page,"<Screenshot Name>", options)
options = {
      element: {
          cssSelector: 'Required CSS Selector',
      }
  }
page.goto("Required URL")
smartui_snapshot(page,"<Screenshot Name>", options)
