Migrate from SauceLabs to HyperExecute
Overview
Sauce Labs and HyperExecute are both cloud-based testing platforms that provide a wide range of browsers and devices for running automated tests. However, HyperExecute provides you with a variety of features to help you manage and analyze your test results more easily and efficiently.
By making the switch to HyperExecute, you're not just migrating; you're upgrading your entire testing experience. This document ensures that you have all the information required for a successful migration. Whether you're driven by cost-efficiency, scalability, performance, or advanced features, HyperExecute is the perfect choice for your automated testing needs.
Why Migrate to HyperExecute?
There are several benefits to migrating your tests from Sauce Labs to HyperExecute, including:
-
High Speed, High-Quality Testing : HyperExecute is renowned for its fast and reliable performance. Realize shorter test cycles and quicker feedback, enabling you to deliver high-quality applications at lightning speed.
-
Test Orchestration : HyperExecute is a cloud-based Test Orchestration platform that enables teams to run tests efficiently across multiple devices and browsers, featuring parallel execution, smart test distribution, automatic test reordering, retry logic, and real-time reporting and analytics.
-
Cost-Efficiency : HyperExecute doesn't just offer superior features; it's also cost-effective. By reducing testing time and enhancing productivity, you can optimize your testing budget, allocating resources to other critical areas of your project.
-
Seamless Integration : HyperExecute provides out-of-the-box support for popular tools such as Tosca, Katalon, and Accelq. This means you can effortlessly integrate your testing workflow with your preferred tools, streamlining your testing processes.
-
CI/CD Tools : We offer robust support for CI/CD tools, allowing you to automate testing and release processes seamlessly, resulting in faster software delivery.
Steps to Migrate
To migrate your Test from SauceLabs to HyperExecute, you need to follow the below mentioned steps:
For demonstration purposes, we'll be using Selenium with the TestNG framework in our examples.
Step 1: Create your account in HyperExecute
Before starting the migration process, make sure you have created your account in HyperExecute and that you have also configured your HyperExecute UserName and Access Key.
Step 2: Configure CLI and Environment Variables
Since we will be performing the test from our local system, thus in order to initiate a test execution Job, you are required to download HyperExecute CLI and set the environment variable.
The HyperExecute CLI is used for triggering tests on HyperExecute. It is recommended to download the CLI binary on the host system to perform the tests on HyperExecute. The CLI download site for various platforms is displayed below:
| Platform | HyperExecute CLI download location |
|---|---|
| Windows | https://downloads.lambdatest.com/hyperexecute/windows/hyperexecute.exe |
| macOS | https://downloads.lambdatest.com/hyperexecute/darwin/hyperexecute |
| Linux | https://downloads.lambdatest.com/hyperexecute/linux/hyperexecute |
Run the below mentioned commands in the terminal to setup the CLI and the environment variables.
For macOS / Linux:
export LT_USERNAME=YOUR_LT_USERNAME
export LT_ACCESS_KEY=YOUR_LT_ACCESS_KEY
For Windows:
set LT_USERNAME=YOUR_LT_USERNAME
set LT_ACCESS_KEY=YOUR_LT_ACCESS_KEY
Step 3: Configure and Update your Test Scripts
- Add the HyperExecute YAML file in the root folder of your test code repository.
Sample YAML File
---
version: 0.2
globalTimeout: 150
testSuiteTimeout: 150
testSuiteStep: 150

runson: win

autosplit: true
retryOnFailure: true

maxRetries: 1
concurrency: 4
shell: bash
env:
  # PAT: ${{ .secrets.testKey }}
  CACHE_DIR: m2_cache_dir

cacheKey: '{{ checksum "pom.xml" }}'
cacheDirectories:
  - .m2

pre:
  # Skip execution of the tests in the pre step
  - mvn -Dmaven.repo.local=./.m2 dependency:resolve

post:
  - ls target/surefire-reports/

mergeArtifacts: true


uploadArtefacts:
 - name: ExecutionSnapshots
   path:
    - target/surefire-reports/html/**

report: true
partialReports:
  location: target/surefire-reports/html
  type: html
  frameworkName: extent

framework:
  name: maven/testng
  defaultReports: false
  flags:
    - "-Dplatname=mac"

jobLabel: [selenium-testng, mac, autosplit, migration]
- Replace the SauceLabs Hooks with LambdaTest Hooks (if required).
- Update the SauceLabs Dependencies and Capabilities.
Sauce Labs
MutableCapabilities sauceOptions = new MutableCapabilities();
sauceOptions.setCapability("username", System.getenv("SAUCE_USERNAME"));
sauceOptions.setCapability("accessKey", System.getenv("SAUCE_ACCESS_KEY"));
sauceOptions.setCapability("name", method.getName());
sauceOptions.setCapability("browserVersion", "latest");
HyperExecute
DesiredCapabilities capabilities = new DesiredCapabilities();
capabilities.setCapability("build", "[HyperExecute - 2] Demonstration of the TestNG Framework");
capabilities.setCapability("name", "[HyperExecute - 2] Demonstration of the TestNG Framework");

capabilities.setCapability("platform", System.getenv("HYPEREXECUTE_PLATFORM"));
capabilities.setCapability("browserName", browser);
capabilities.setCapability("version", version);

capabilities.setCapability("tunnel",false);
capabilities.setCapability("network",true);
capabilities.setCapability("console",true);
capabilities.setCapability("visual",true);
Update the Hub URL and Authentication in the Test Scripts
For a Java-based implementation, here are the changes in the script as far as the authentication stage is concerned:
Sauce Labs
// test.java
public static final String user_name = "SauceLabs_UserName";
public static final String access_key = "SauceLabs_AccessKey";
HyperExecute
// test.java
public static final String user_name = "LambdaTest_UserName";
public static final String access_key = "LambdaTest_AccessKey";
For a Java-based implementation, here are the changes in the script as far as the Hub URL is concerned:
Sauce Labs
// test.java
public static final String Hub_URL = "https://" + user_name + ":" + access_key + "@ondemand.us-west-1.saucelabs.com:443/wd/hub";
LambdaTest
// test.java
public static final String Hub_URL = "https://" + user_name + ":" + access_key + "@hub.lambdatest.com/wd/hub";
Step 4: Execute your Job in HyperExecute
Run the below command in your downloaded CLI to trigger your test scripts in the HyperExecute Platform.
./hyperexecute --user YOUR_LAMBDATEST_USERNAME --key YOUR_LAMBDATEST_ACCESS_KEY --config RELATIVE_PATH_OF_YOUR_YAML_FILE
In case of MAC, if you get a permission denied warning while executing CLI, simply run
chmod u+x ./hyperexecuteto allow permission. In case you get a security popup, allow it from your System Preferences → Security & Privacy → General tab.
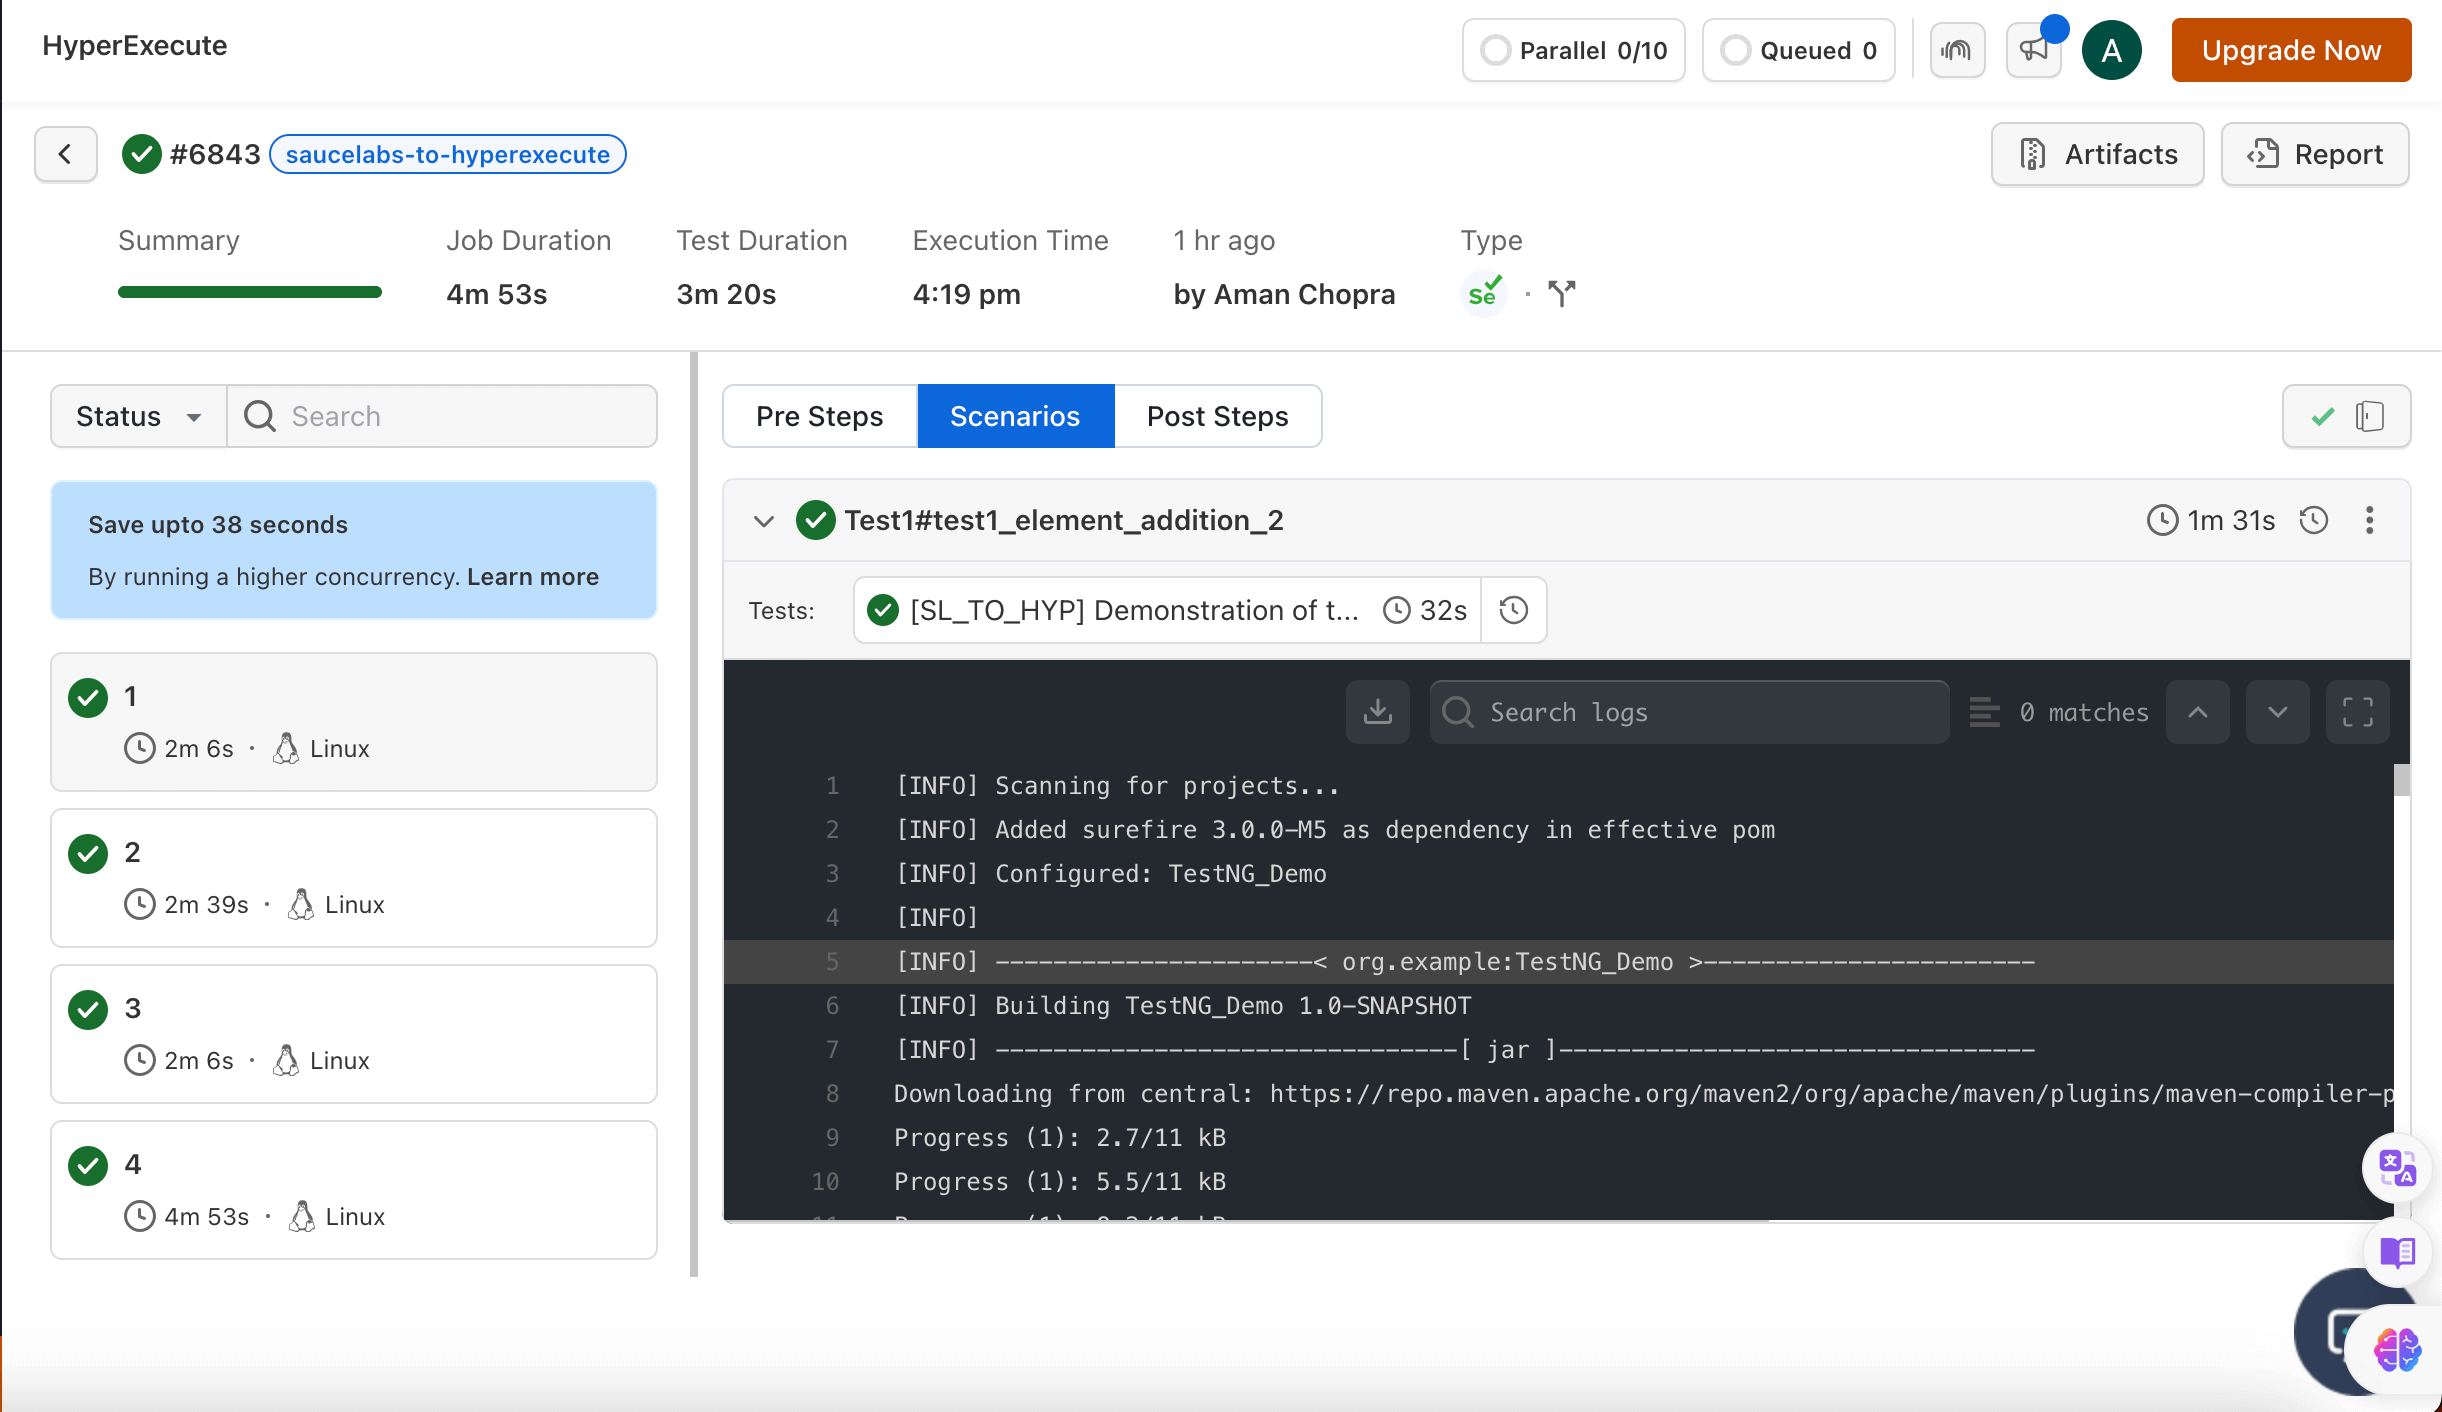
Here is the output in the HyperExecute Dashboard.

Troubleshooting
If you are having trouble migrating your tests from Sauce Labs to HyperExecute, here are some possible solutions:
-
You may not have updated your Test Scripts.
To fix this, you will need to replace the Sauce Labs specific code with the equivalent HyperExecute code. You can use the HyperExecute Capabilities Generator to help you generate the correct desired capabilities for your tests.
-
Your Job is executed, but you are getting an error in the HyperExecute Dashboard.
To fix this, you can check the documentation explaining how you can debug a failed job on your own.
If you are still having trouble migrating your tests, you can contact HyperExecute 24×7 Chat Support or you can also drop a mail to support@lambdatest.com.
for assistance.
