Ranorex Integration With LambdaTest
Ranorex is a GUI test automation framework which helps to execute E2E(End-to-End) testing of web, desktop, and mobile applications. Ranorex Core API is powered with Selenium WebDriver helping you to maximize your cross browser testing in an efficient manner.
Selenium, as we know, has 4 variants, RC, IDE, WebDriver, & Grid. Selenium IDE is built with the purpose of facilitating automated record-and-replay testing over Mozilla Firefox browsers. However, ever since Mozilla Firefox released its version 55, the IDE’s compatibility got disrupted and isn’t replaced till now. Ranorex helps you to overcome this scenario by optimizing their Core API in such manner that users of Selenium WebDriver could get to unleash the full potential of all Selenium variants irrespective of browser updates.
LambdaTest offers integration with Ranorex to help you perform automated cross browser testing of your web app on over 3000+ real browsers & browser versions through an on-cloud Selenium Grid. You could perform tests on your locally hosted files and can execute parallel testing to trim down your test cycles drastically.
In this documentation, we will demonstrate how to set up your Selenium Server using Ranorex, and how to connect it to LambdaTest cloud-based Selenium Grid. You will be going through the below sections:
Getting Started With Ranorex
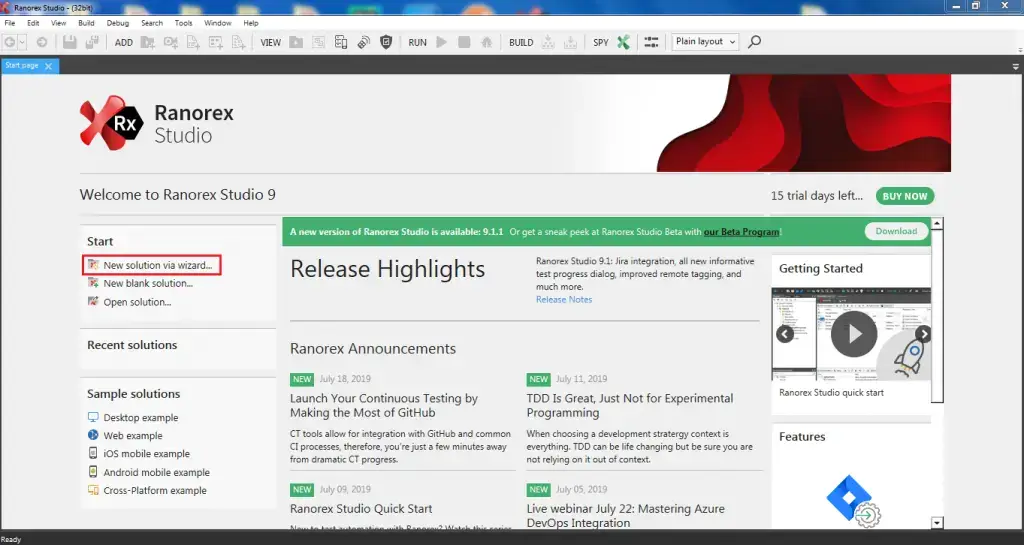
Step 1: Open Ranorex & click on "New solution via wizard" from the left menu.
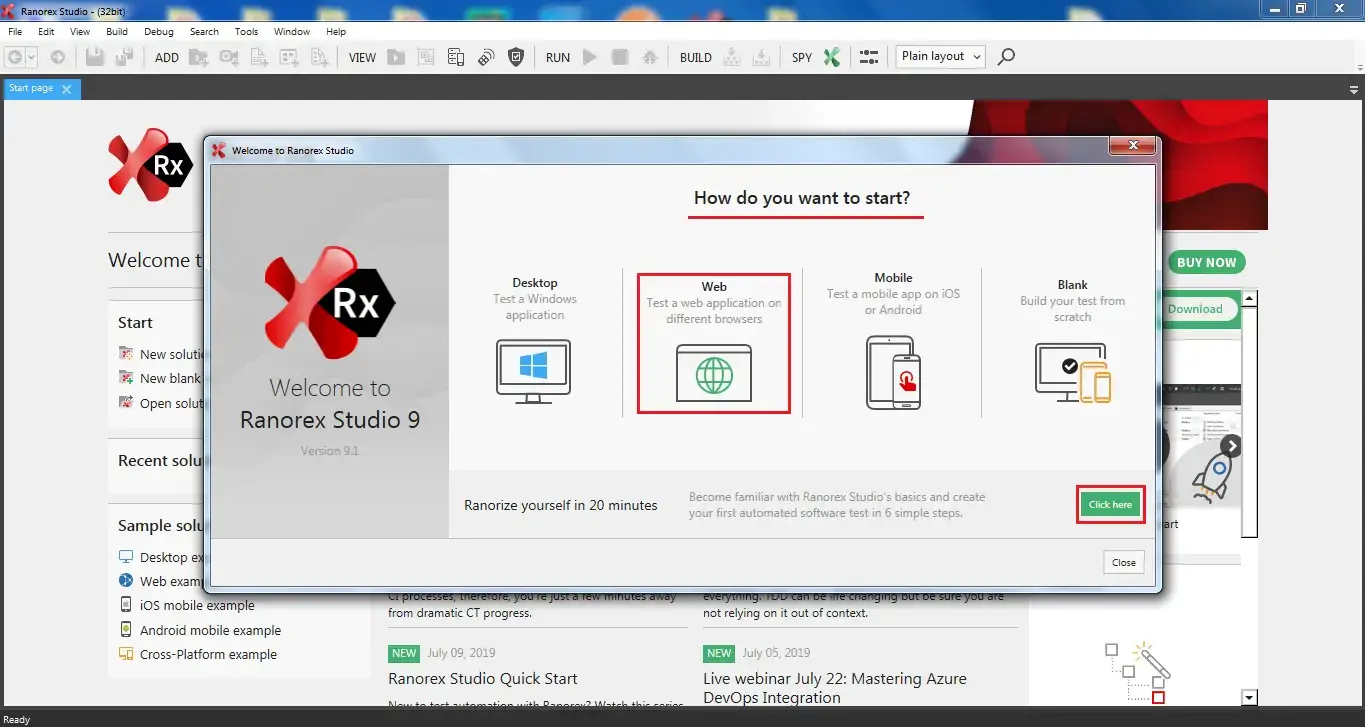
Step 2: Select the method for Web testing over different browsers. Then hit on the button that says "Click here".
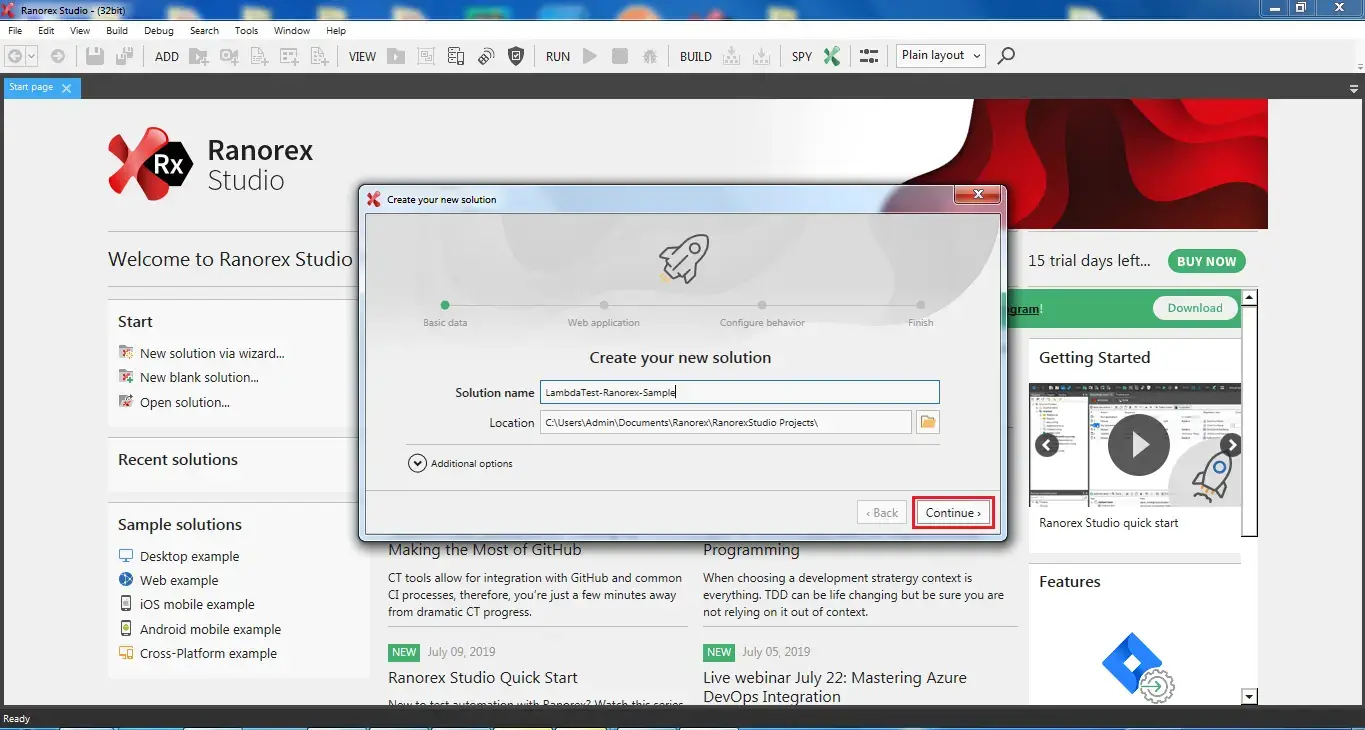
Step 3: Provide the Solution name & Location where you wish to store the new solution & hit continue.
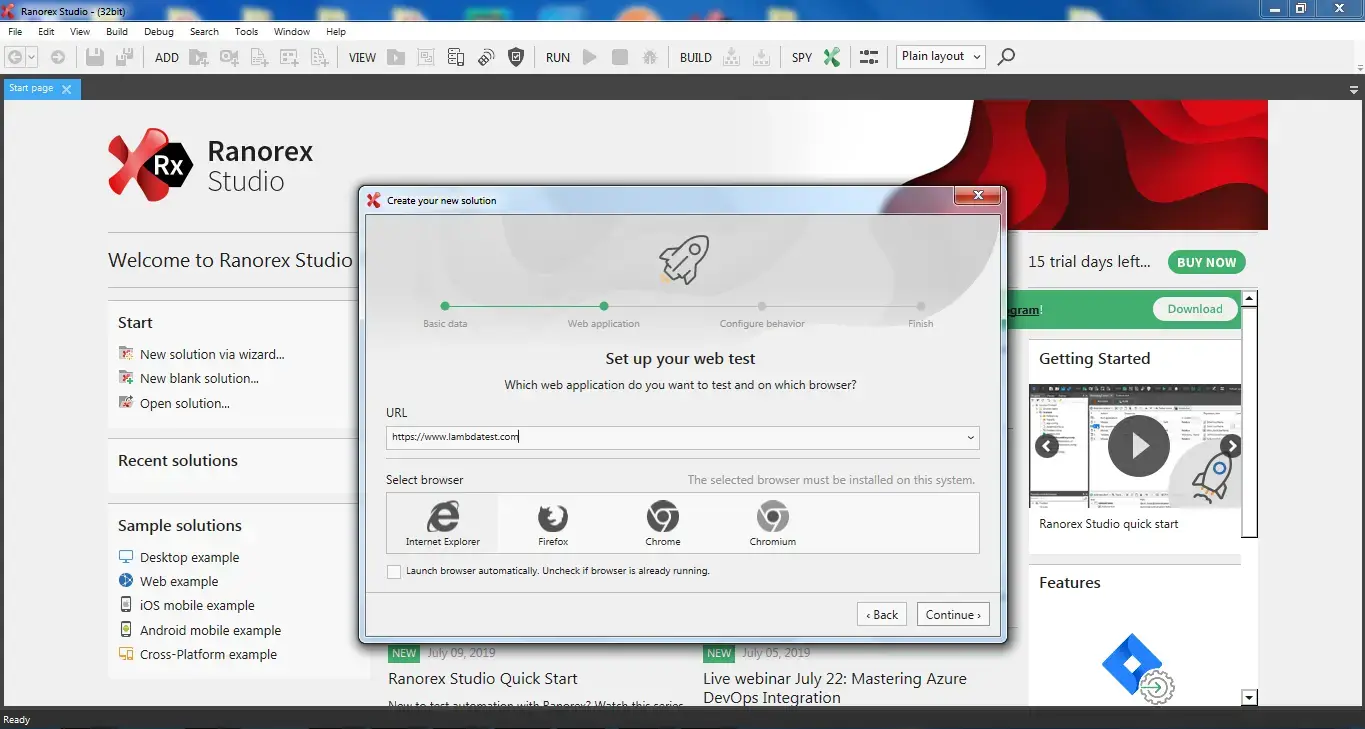
Step 4: Specify the test URL and browsers on which you wish to perform cross browser testing.
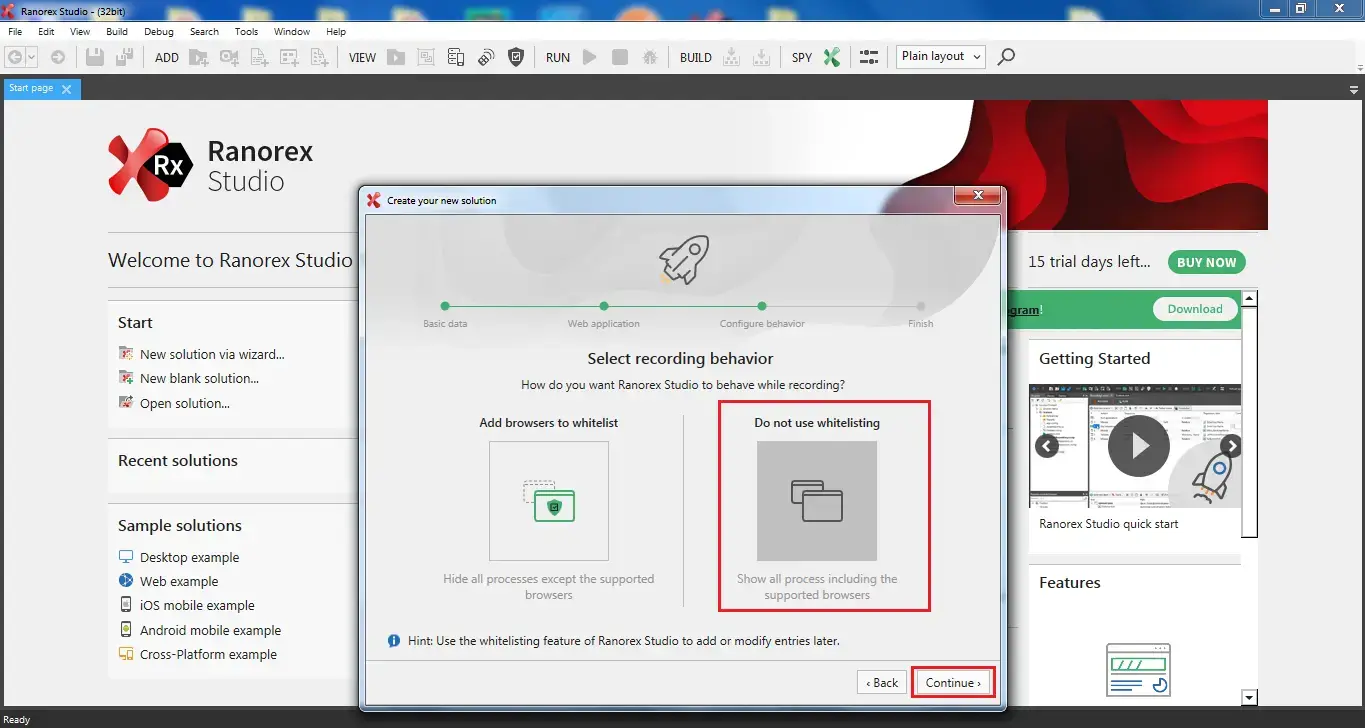
Step 5: Select your recording behaviour as "Do not use whitelisting".
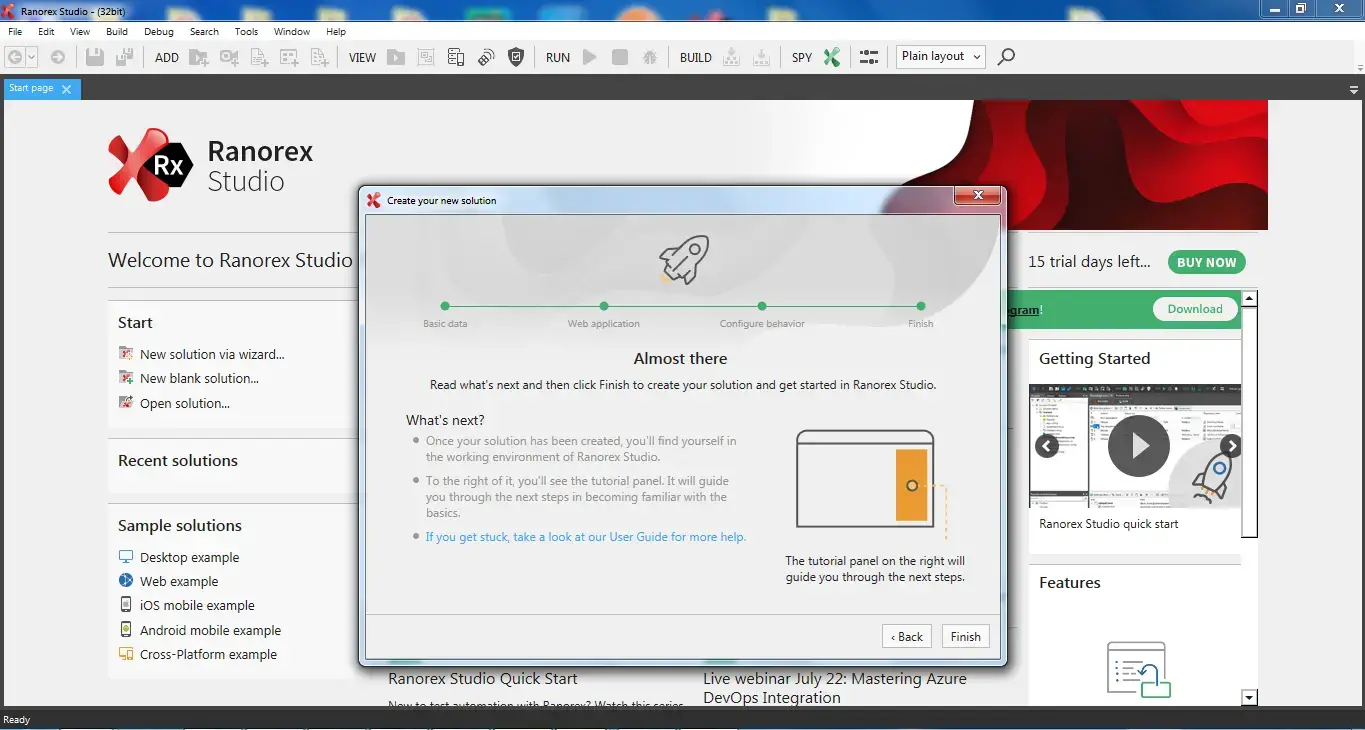
Step 6: And you are done creating your new test automation solution. Now, you can finish the wizard.
Setting Up WebDriver Endpoint For LambdaTest Selenium Grid
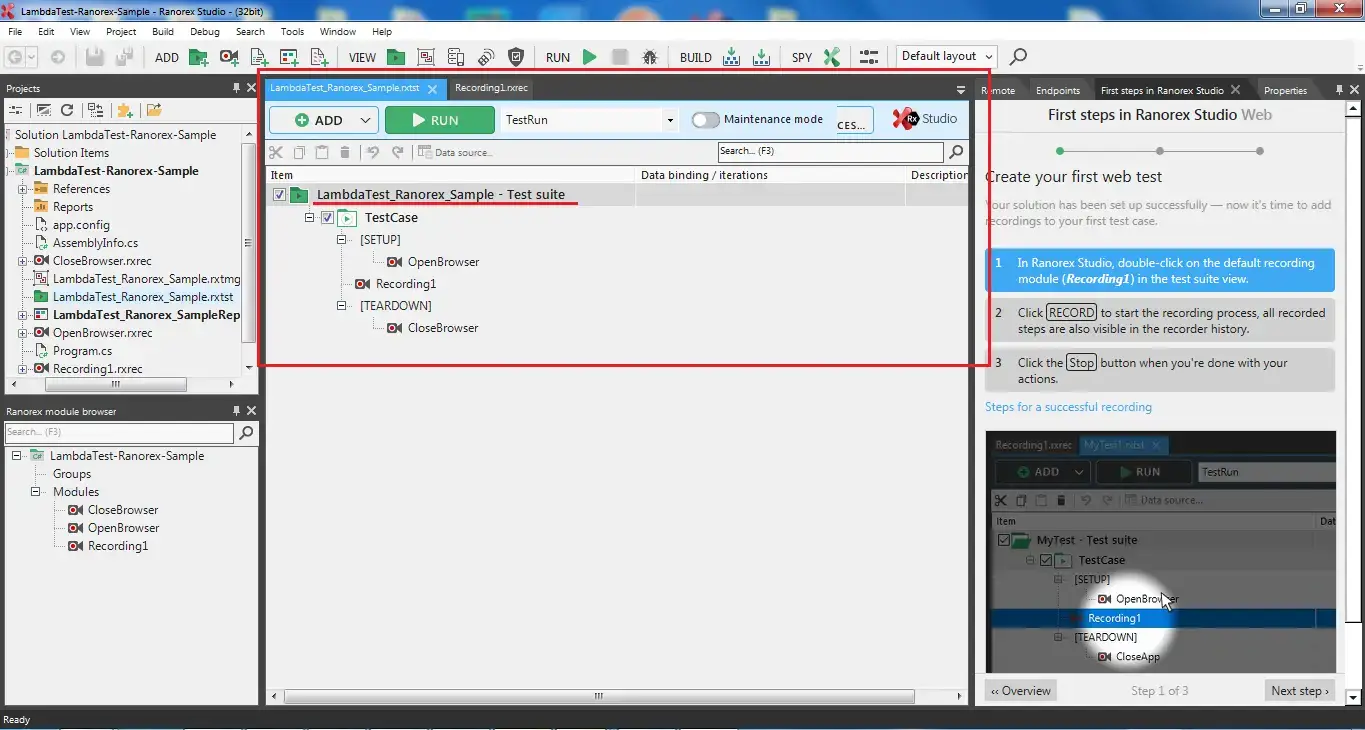
Step 1: After successfully creating a solution, you will notice that a default test suite would be configured in Ranorex.
Step 2: Add the end point to run the test suite on Selenium Grid offered by LambdaTest. You can do so by going to the tab for "Endpoint" Select WebDriver Provide an Endpoint name & Address(Hub URL). Click on Add endpoint.
Note: You can check your connection by clicking on Test connection.
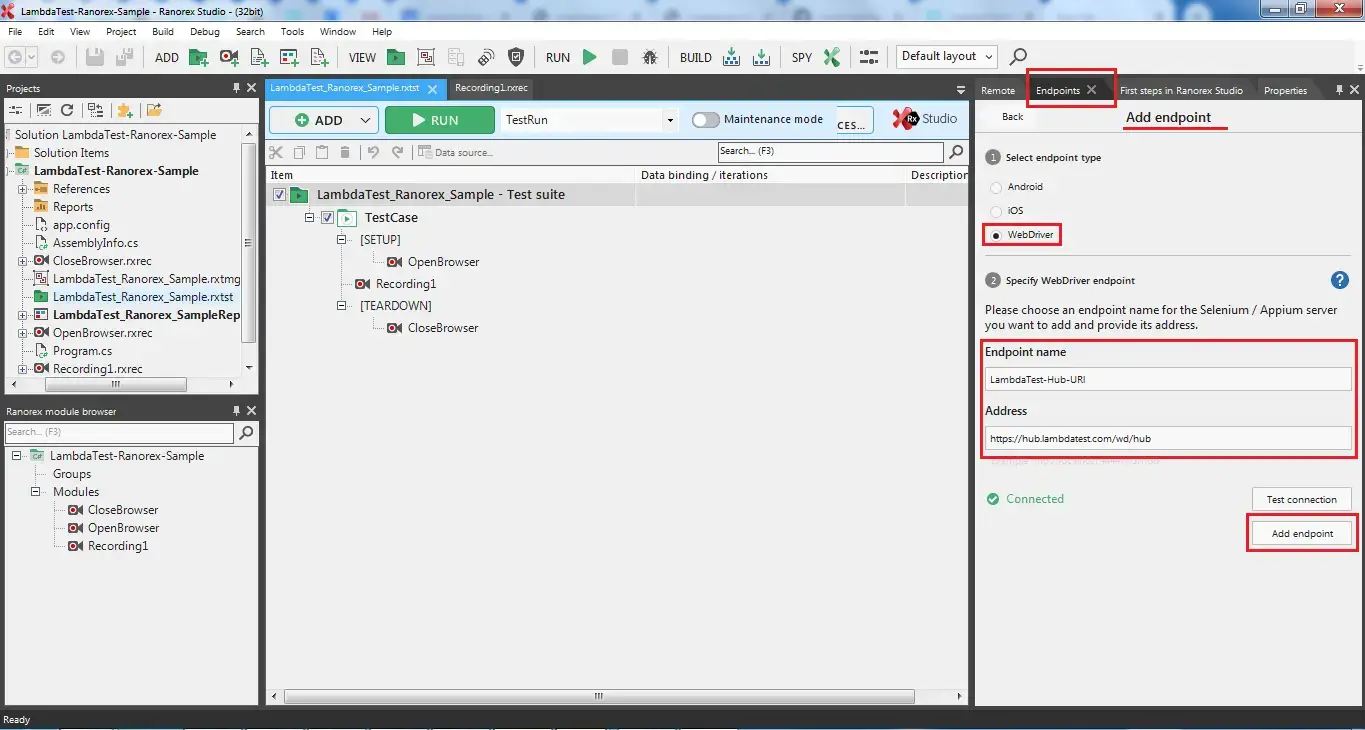
Step 3: You have successfully setup a WebDriver endpoint for LambdaTest Selenium Grid Hub URL.
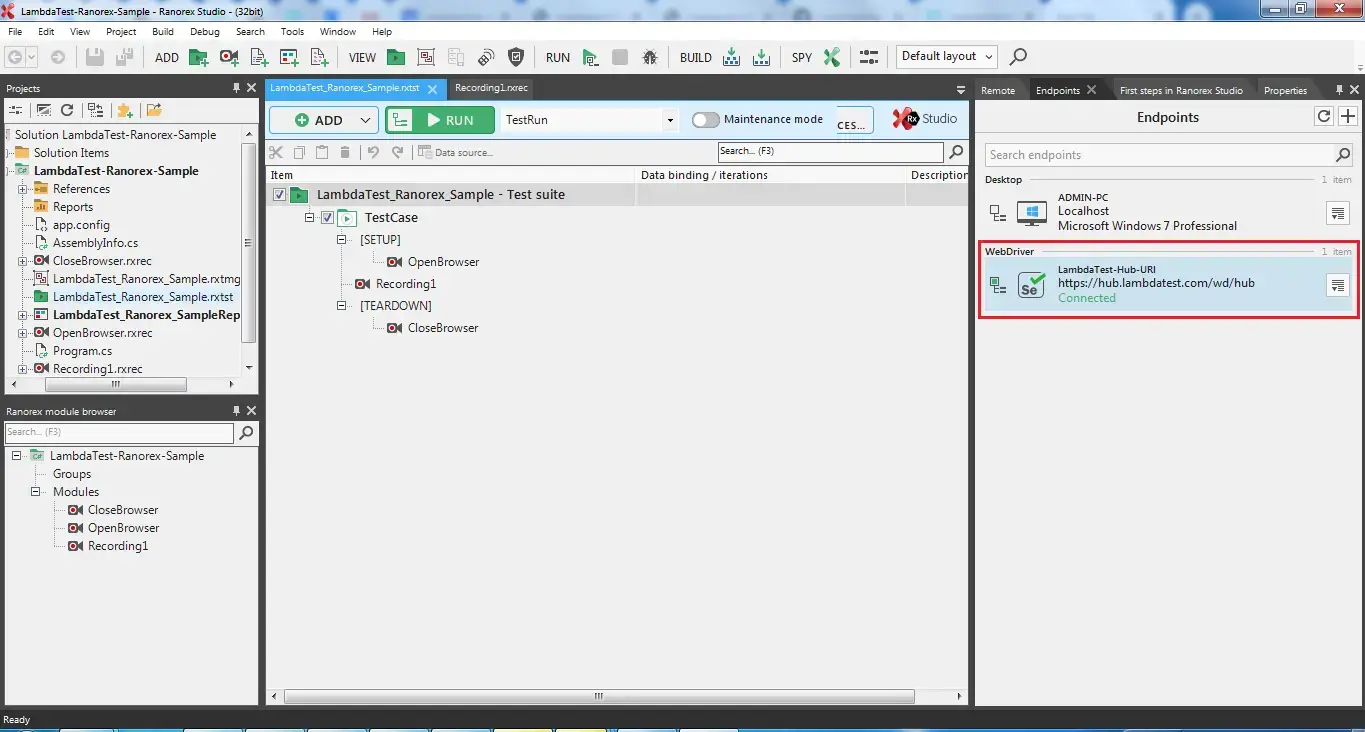
Note: You need to select this WebDriver endpoint to perform automated cross browser testing on 3000+ real browsers & browser versions using the LambdaTest Selenium Grid.
Performing Cross Browser Testing On LambdaTest Selenium Grid Through Ranorex
Step 1: After successful addition of LambdaTest Selenium Grid Hub-URL, comes the time to perform cross browser testing. For browser compatibility testing, you would need to open you test suite and select the particular browser you wish to run your test on.
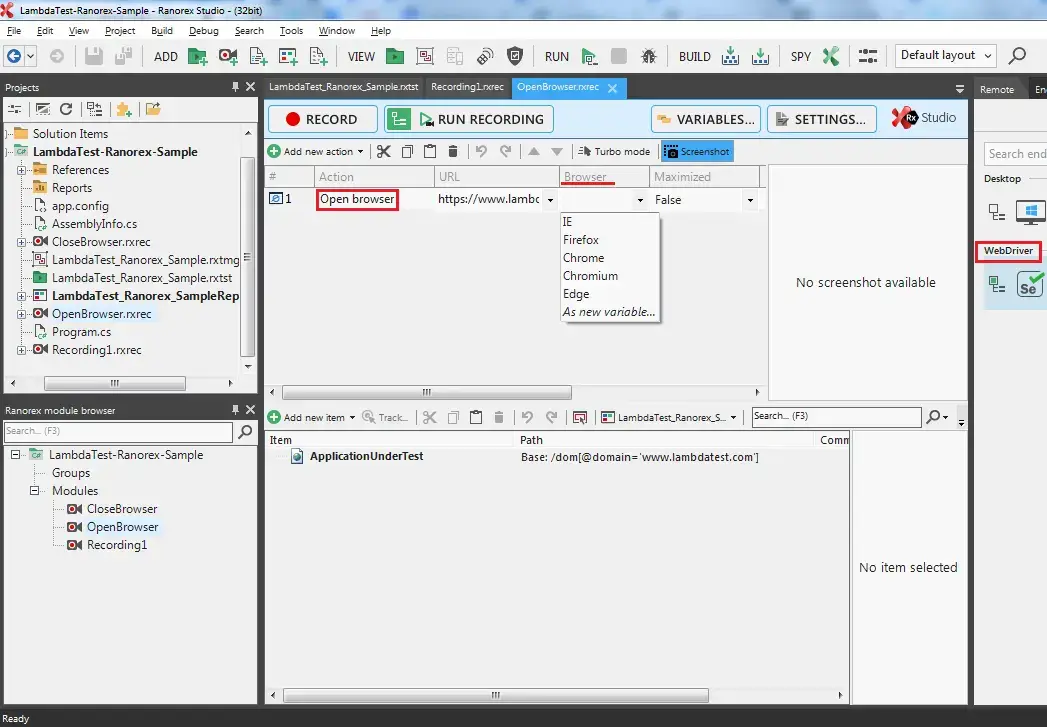
Note: In order to run your test on a browser which is not present in the drop-down, you would need to add a new variable for that browser. For example, if you wish to perform cross browser testing on Safari browser then you can implement it with the help of below variables: Variable name- Mac Variable value – Safari
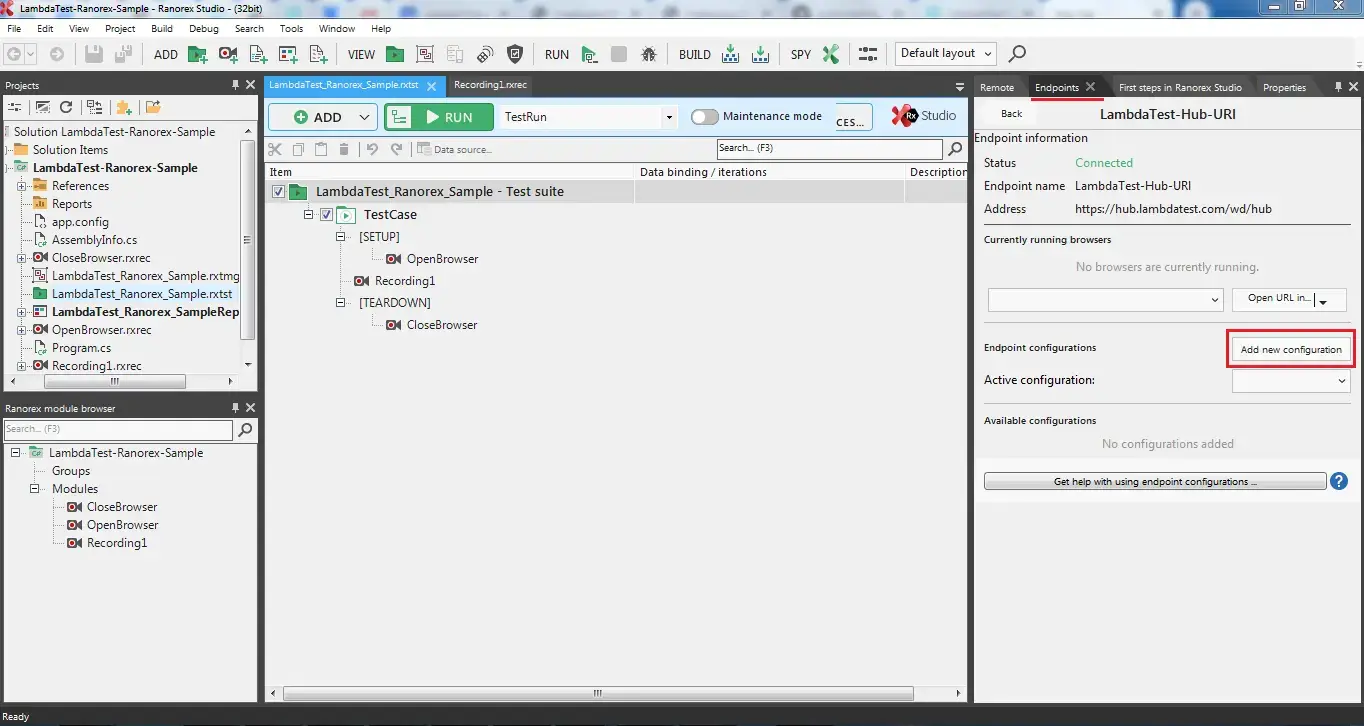
Step 2: Now, under the tab "Endpoint", you need to add a new configuration to set up the DesiredCapabilities for LambdaTest Selenium Grid.
Step 3: Fetch your DesiredCapabilities from LambdaTest Selenium Capability Generator.
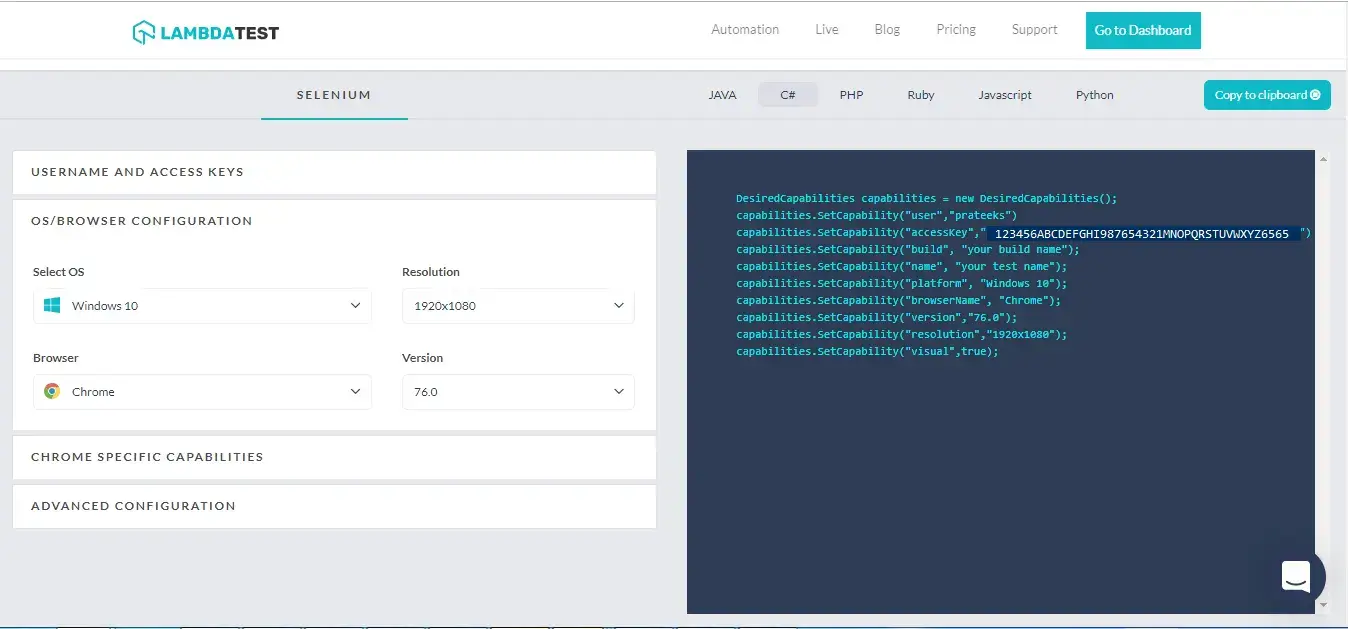
Step 4: Copy the DesiredCapabilities & add them in Endpoint configurations by placing them in "Capabilities JSON". Don’t forget to provide a name as well.
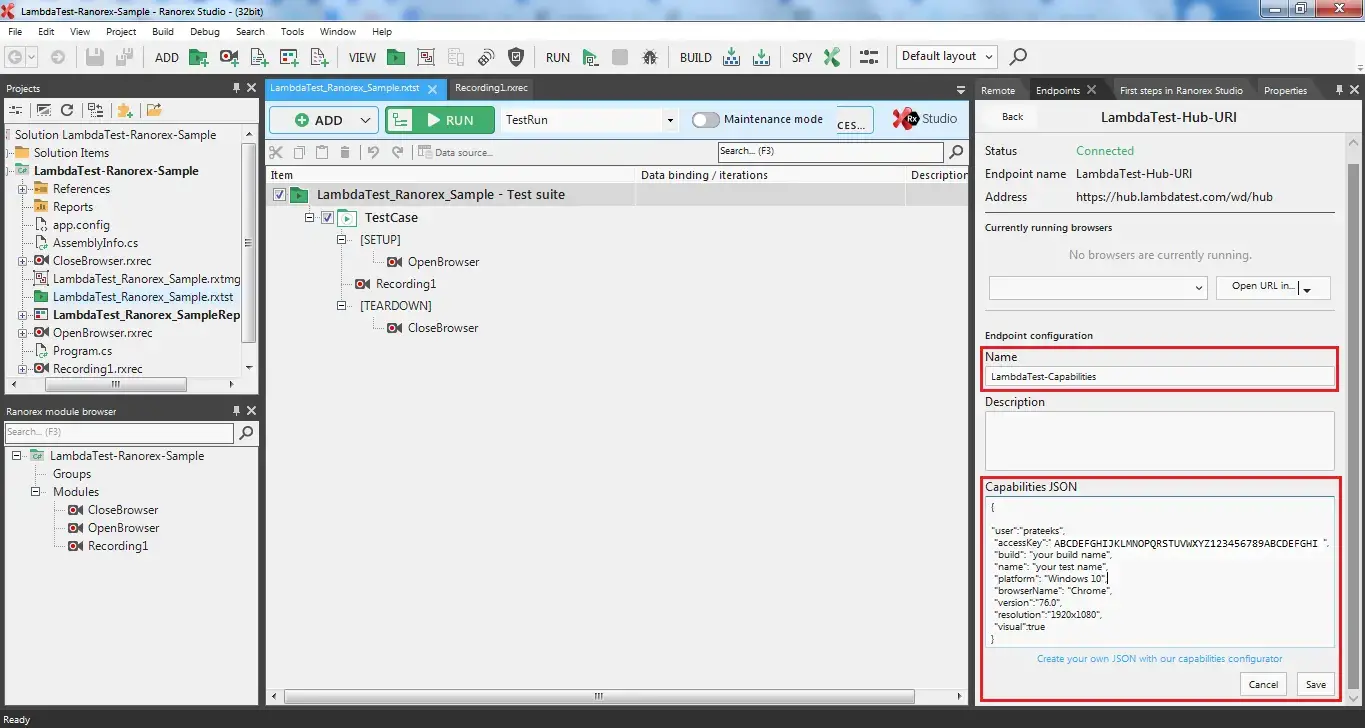
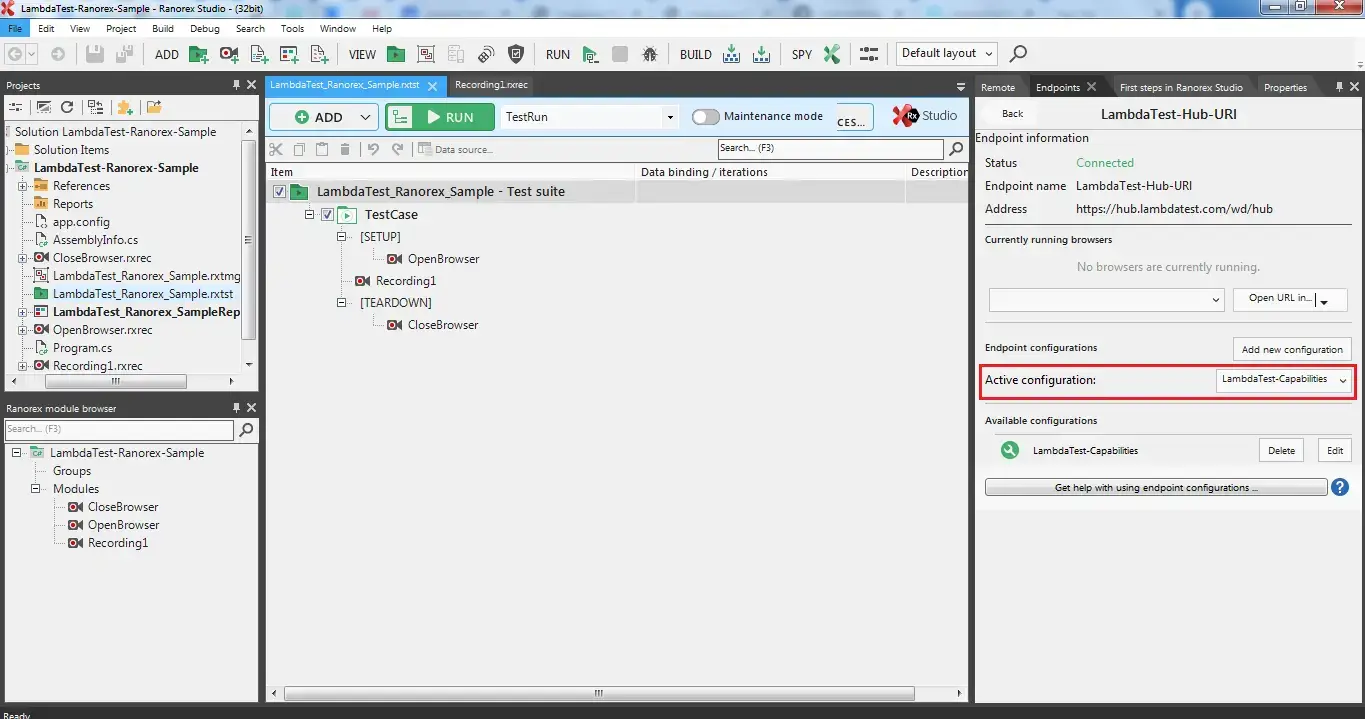
Step 5: Now, from the drop-down for Active configuration, select the latest configuration you added.
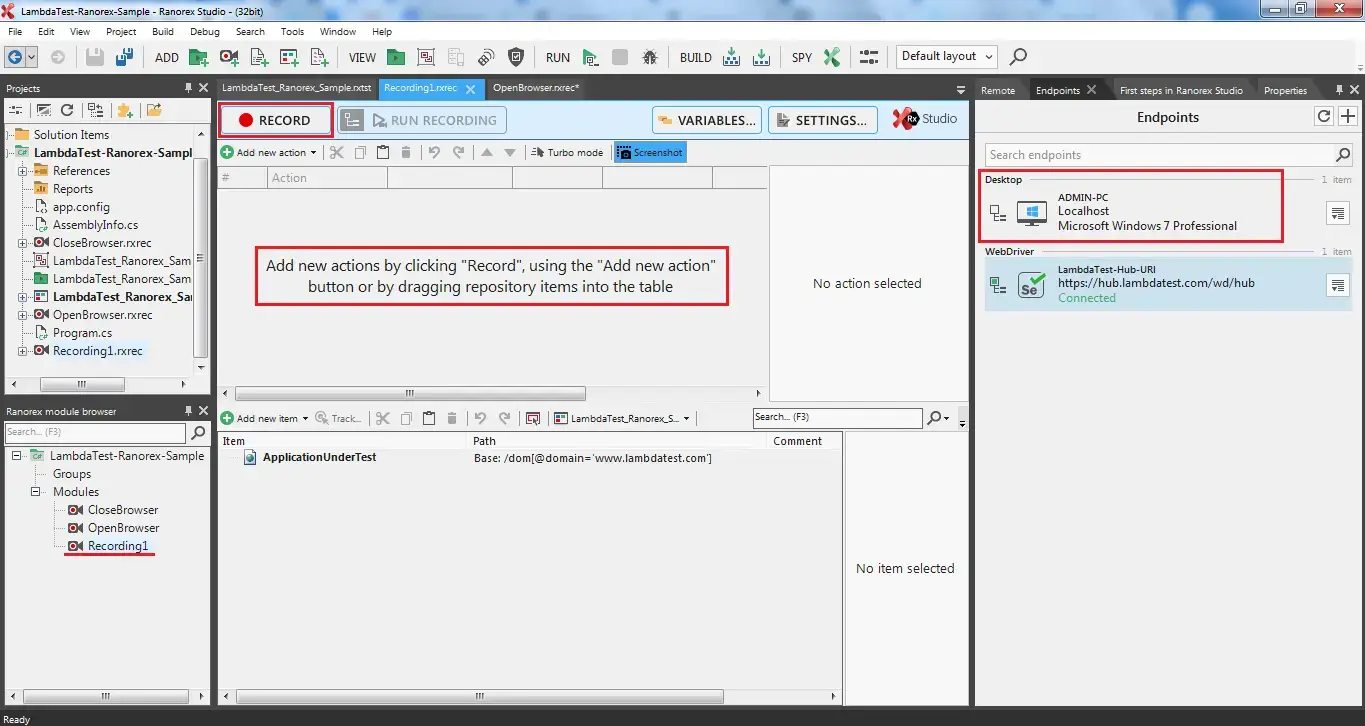
Step 6: Now, go to recording tab & add new actions after clicking the Record button.
Keep in mind, to choose the Endpoint as Admin localhost while recording the test cases.
Step 7: You will find your actions being recorded in the Ranorex interface.
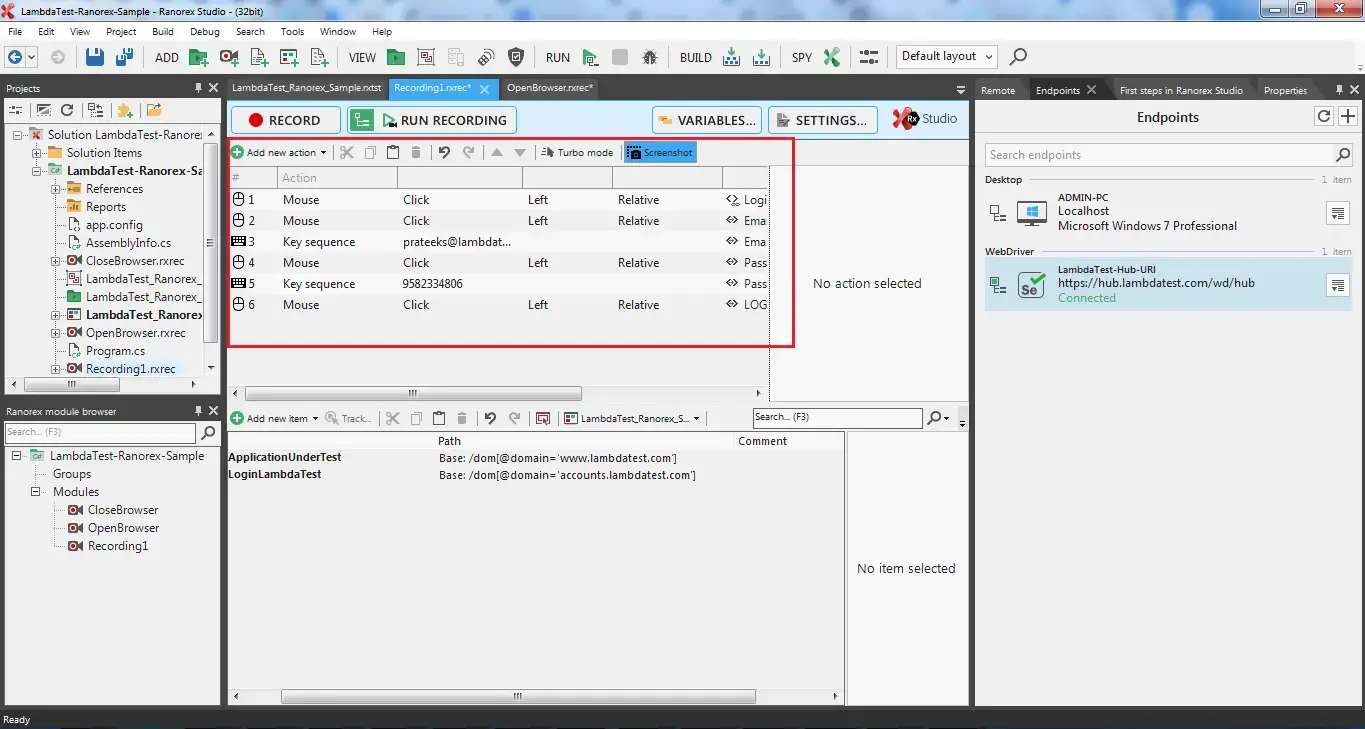
Important: Once you are finished recording you actions, LambdaTest recommends you to choose the repository item in the same instance where you recording is halted. This would help you to avoid any time out issue.

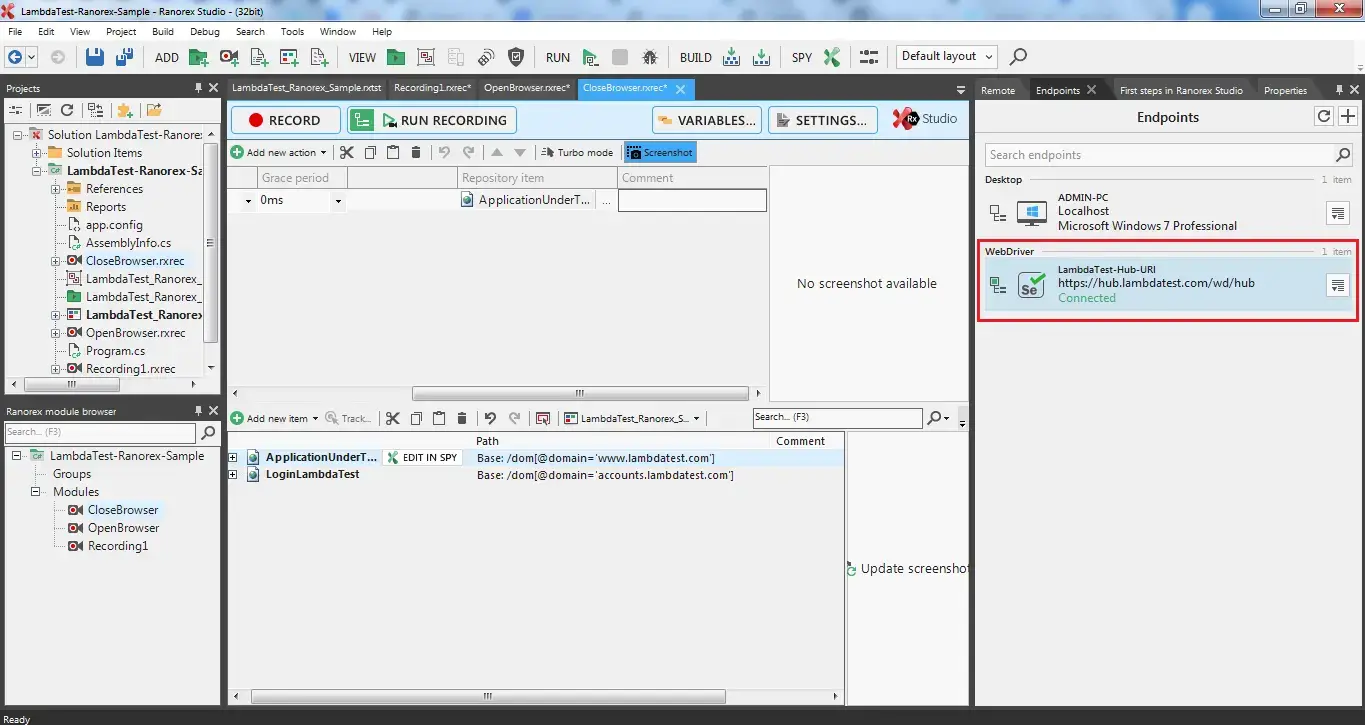
Step 8: After you are done configuring the open browser, recording, & close browser file, come back to your test-suite & ensure that you have WebDriver set as an Endpoint to run the test on LambdaTest.
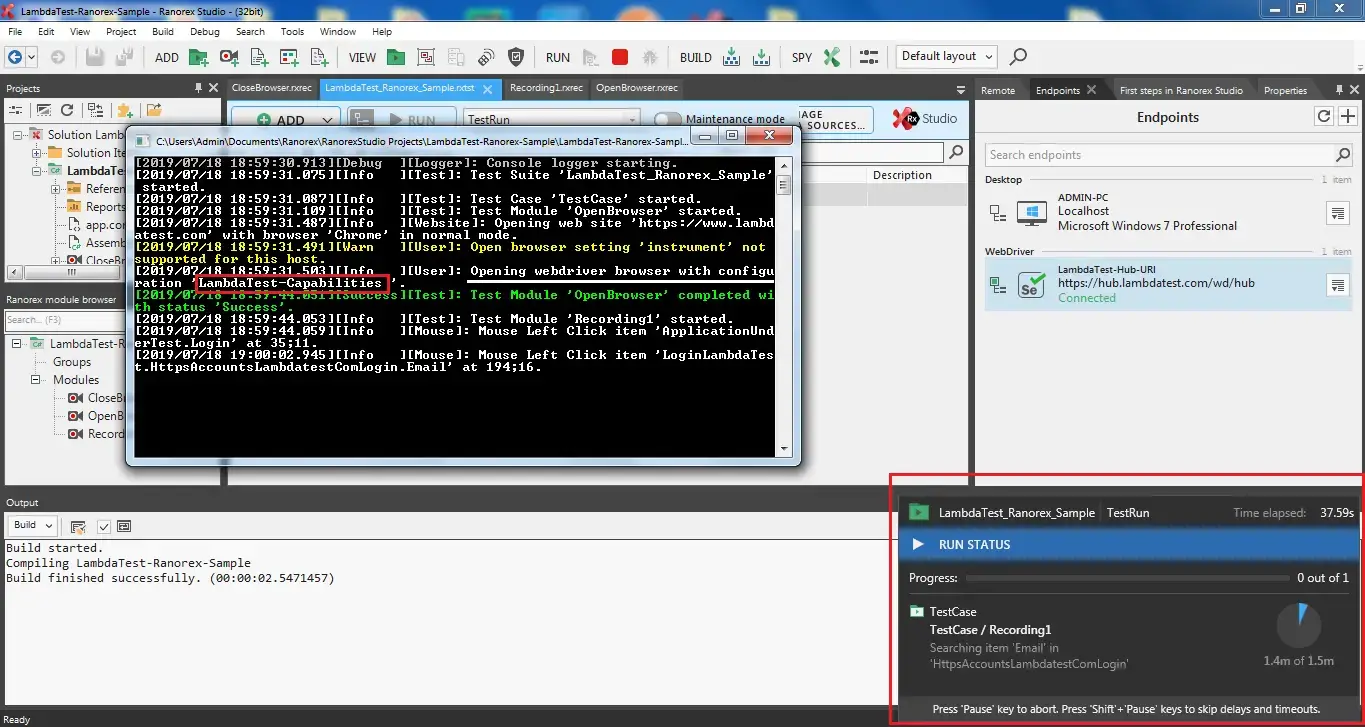
Step 9: Hit the run button. You will notice two output screens. One on the right side, is displaying the running test case. And on the left side, you can see that the test ran on the specific configuration that you chose under Active configuration drop-down, along with all the the steps you recorded.
Step 10: Kudos! You have successfully performed automated cross browser testing on LambdaTest Selenium Grid from your Ranorex instance. You can confirm the text execution on your LambdaTest account. You could also find all the test details such as metadata, network logs, command logs, Selenium logs, command-by-command screenshot, and more on the LambdaTest dashboard. You can also extract these details using our LambdaTest Selenium Automation API. Happy testing!
