Miro Integration
Miro is a cloud-based collaborative whiteboard platform helping teams to manage their projects effectively. Miro gives the team access to digital whiteboards and sticky notes to enable them to brainstorm and do many other collaborative activities such as research, planning, managing workflows and more.
LambdaTest's integration with Miro will help you to log bugs to boards on Miro. You can easily find and report any cross browser compatibility issues to your team instantly.
How To Integrate Miro With Your LambdaTest Account?
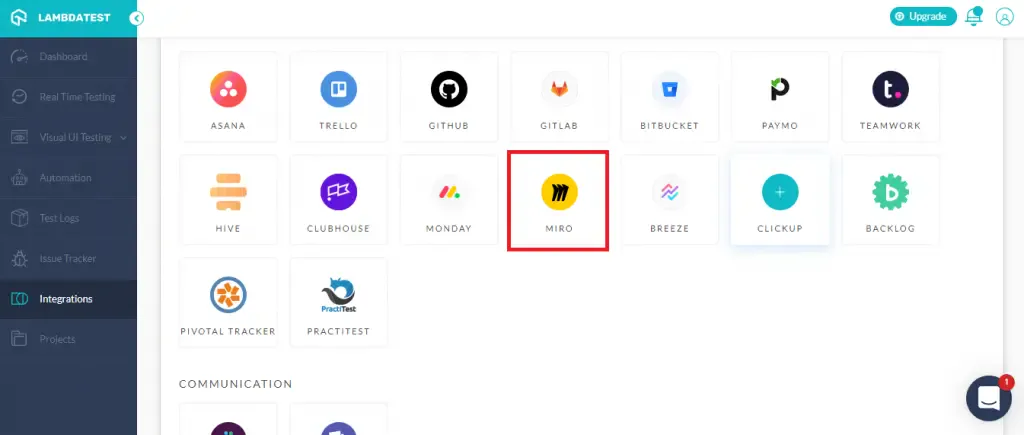
Step 1: Login to your LambdaTest account. Select 'integration' from the left navigation bar. This page includes all the integrations provided with 3rd party tools for LambdaTest. You'll find Miro under the Project Management category. Hover on it and you'll see a plus icon, click on it go further with integration
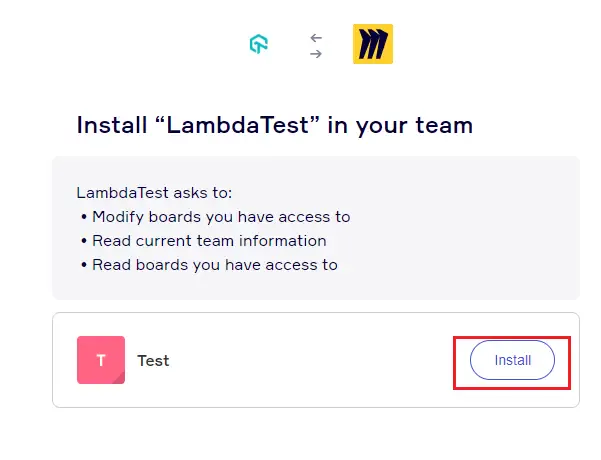
Step 2: If you've already logged into your Miro account, you'll be taken to another screen asking to install 'LambdaTest' in your team. You can click on the 'install' icon next to 'test'.
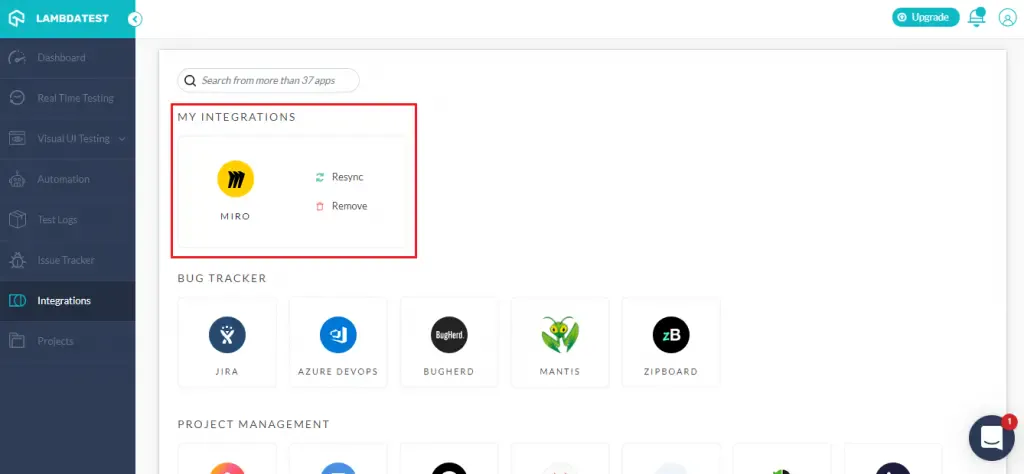
Step 3: After you click on the install button, the integration of LambdaTest will be completed. You can verify the integration by selecting 'integrations' from the left navigation bar, here under the 'My Integration' section you can see 'Miro'.
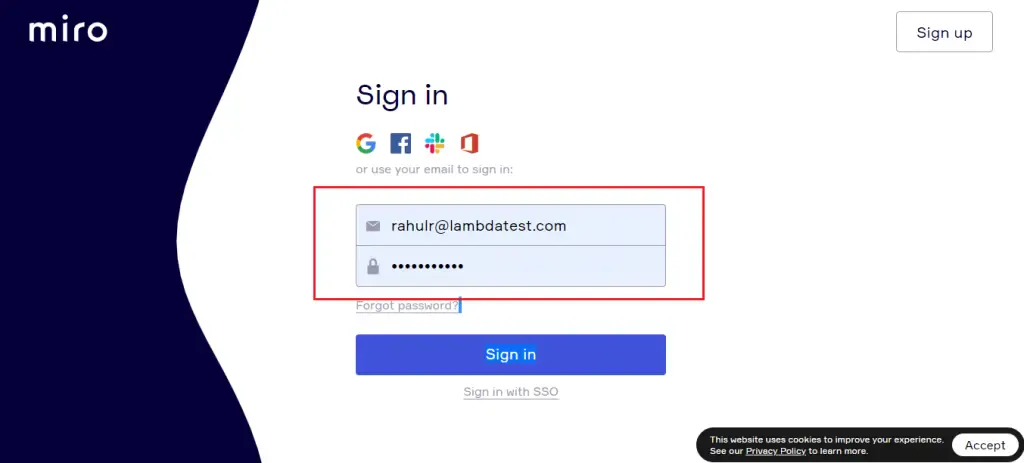
Step 4: If you are not already logged in, then you will be redirected to a page where you can log in with your Miro account by providing login credentials. You can even use your google account to login to Miro.
Log Your First Bug From LambdaTest Integration With Miro
Step 1: Choose the type of test from the left navigation menu. For now, let's go with the "Real-Time" Test"
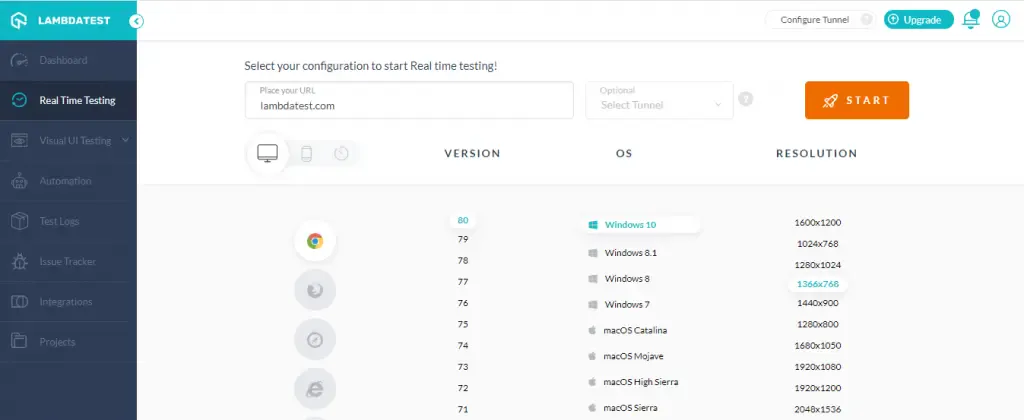
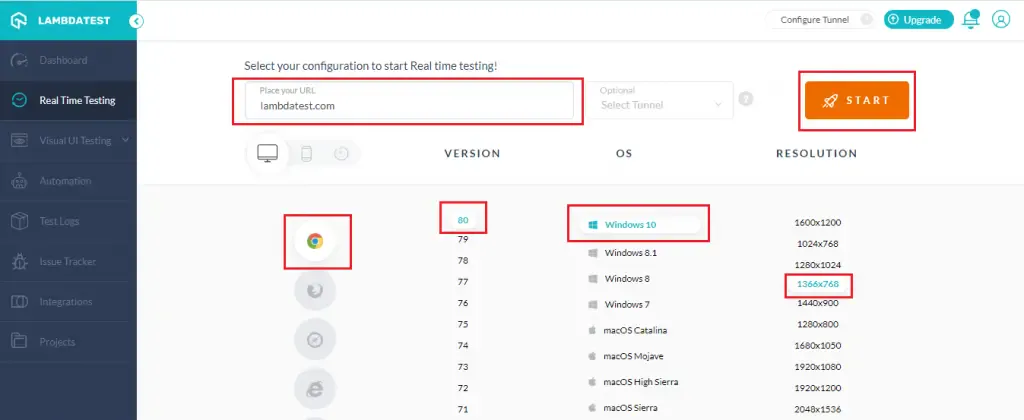
Step 2: Enter your URL in the "Place your URL" dialog box. Choose the browser and OS Configuration you want to test on and click on 'Start'.
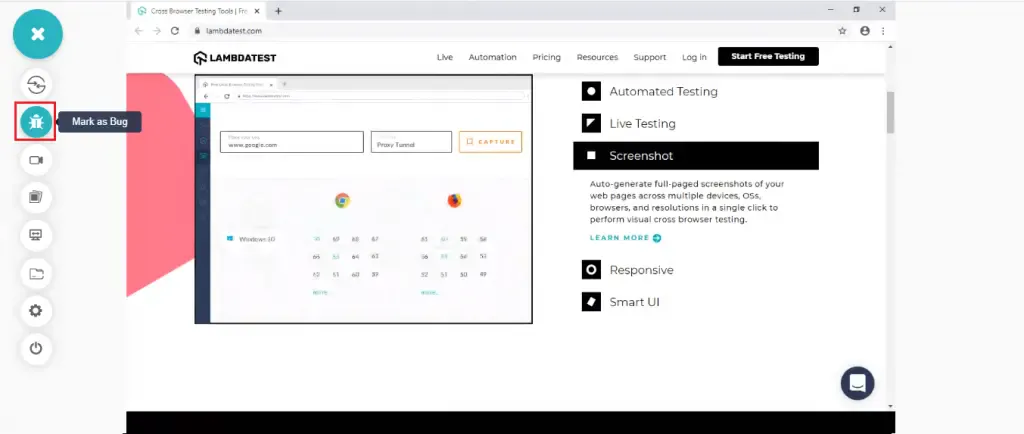
Step 3: After the Virtual Machine is created and launched, you can perform manual tests on your Web-Application in the live environment to find bugs. When a bug is identified, click on the 'Mark as Bug' icon on the left panel to capture the screenshot.
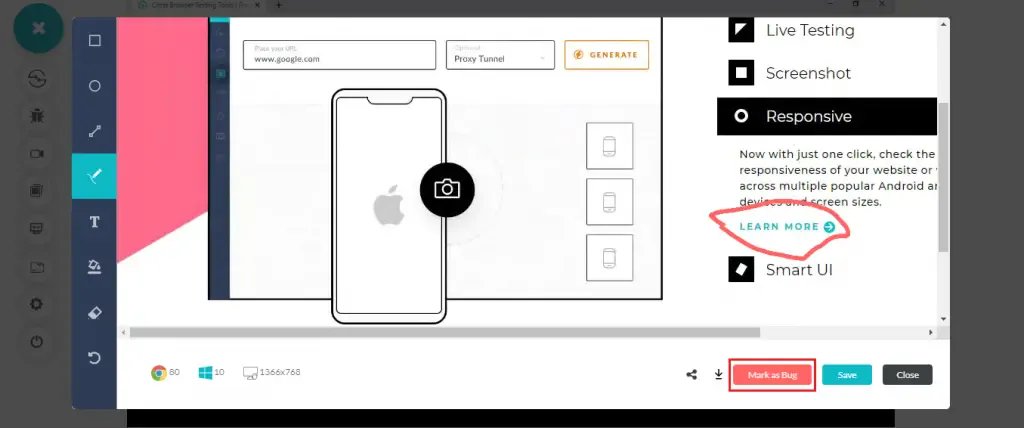
Step 4: After capturing the screenshot, you can mark the issues identified on the page with the help of the in-built image editor. After highlighting the bug, click on the "Mark as Bug" button.
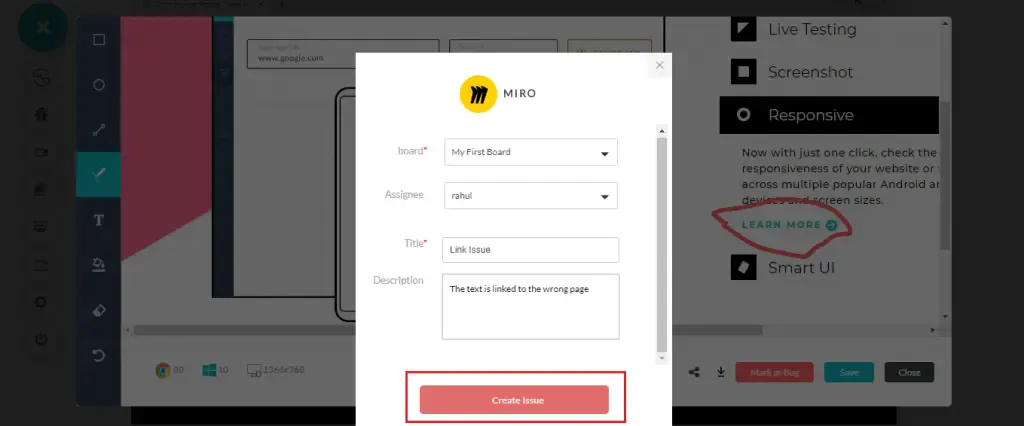
Step 5: A Miro tracker form would pop up to log the issue, you can fill the fields as per the case and click on 'create issue'.
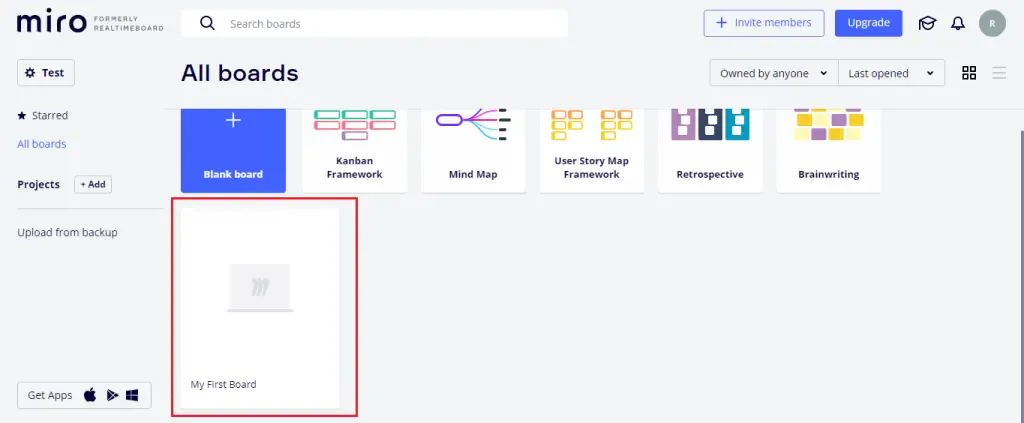
Step 6: The logged task can now be seen as a part of your board in your Miro Project. You can access your board in the dashboard under 'All boards'.
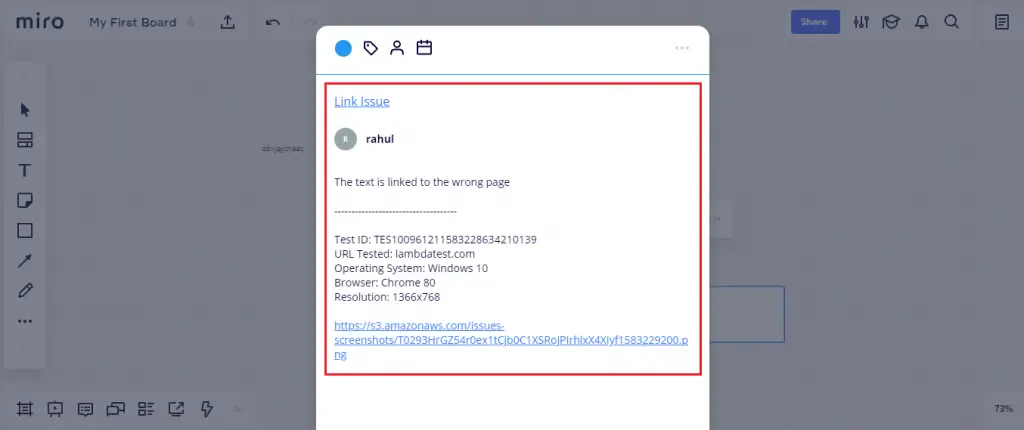
Step 7: After logging into your board, you can see your task created on the board.
Step 8: Upon clicking on the task, you will be able to view all the details you entered while logging the bug on LambdaTest. You'll be able to see the screenshot of the bug along with the configuration you tested on
Remove LambdaTest Integration With Miro
On LambdaTest's Platform
In case you want to remove your Miro integration with LambdaTest, Here is how you can do that.
Step 1: Log in to your LambdaTest account.
Step 2: From the left navigation menu click on Integration. Under the My Integration section, you can see a remove button next to your Miro integration. By clicking on the remove button you can remove the integration.
Note: While removing the integration make sure you do the same from Miro so that you'll be able to integrate LambdaTest with Miro again.
On Miro's Platform
Step 1: Log in to your Miro account. Click on the profile icon on the top left corner and click on settings
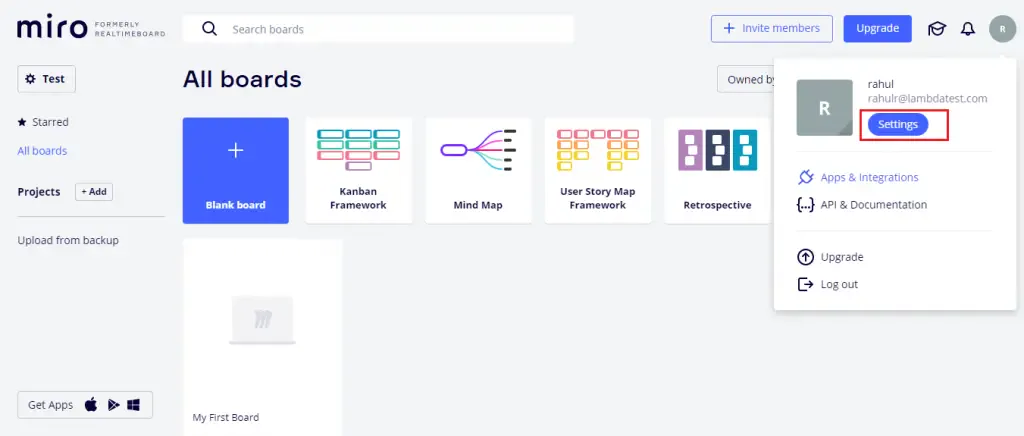
Step 2: Click on Select 'Apps and Integrations' from the left navigation bar. Further, scroll down to "Installed Apps" and click on the LambdaTest icon.
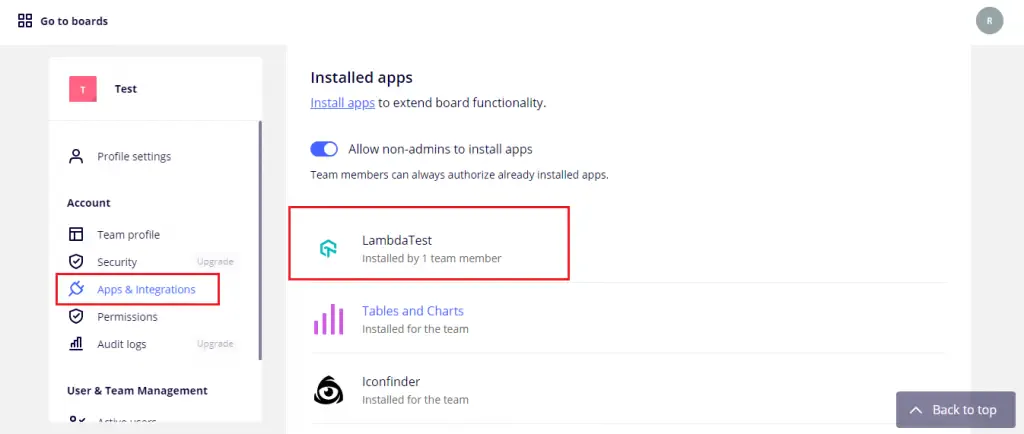
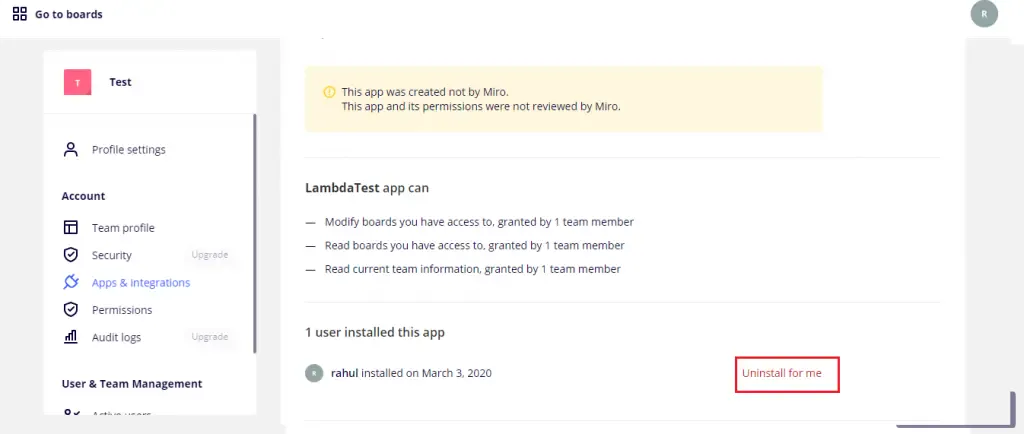
Step 3: Under Apps & Integrations, scroll down and you'll see the user history for the installation. Next to it you'll see the option 'uninstall for me'.
That was all you need to know for integrating LambdaTest with Miro. In case you have any doubts or questions, feel free to share them with our product experts on 24/7 chat support. Happy testing! 🙂
