Intelligent Test Planner - Automate your Test Generation
The Intelligent Test Planner feature in KaneAI empowers you by simplifying the test generation process. Instead of manually writing test steps or scenarios, you can now provide high-level objectives, and KaneAI will automatically translate them into executable test scripts.
This document will guide you through the end-to-end implementation for your web applications.
Steps to generate and execute your test cases
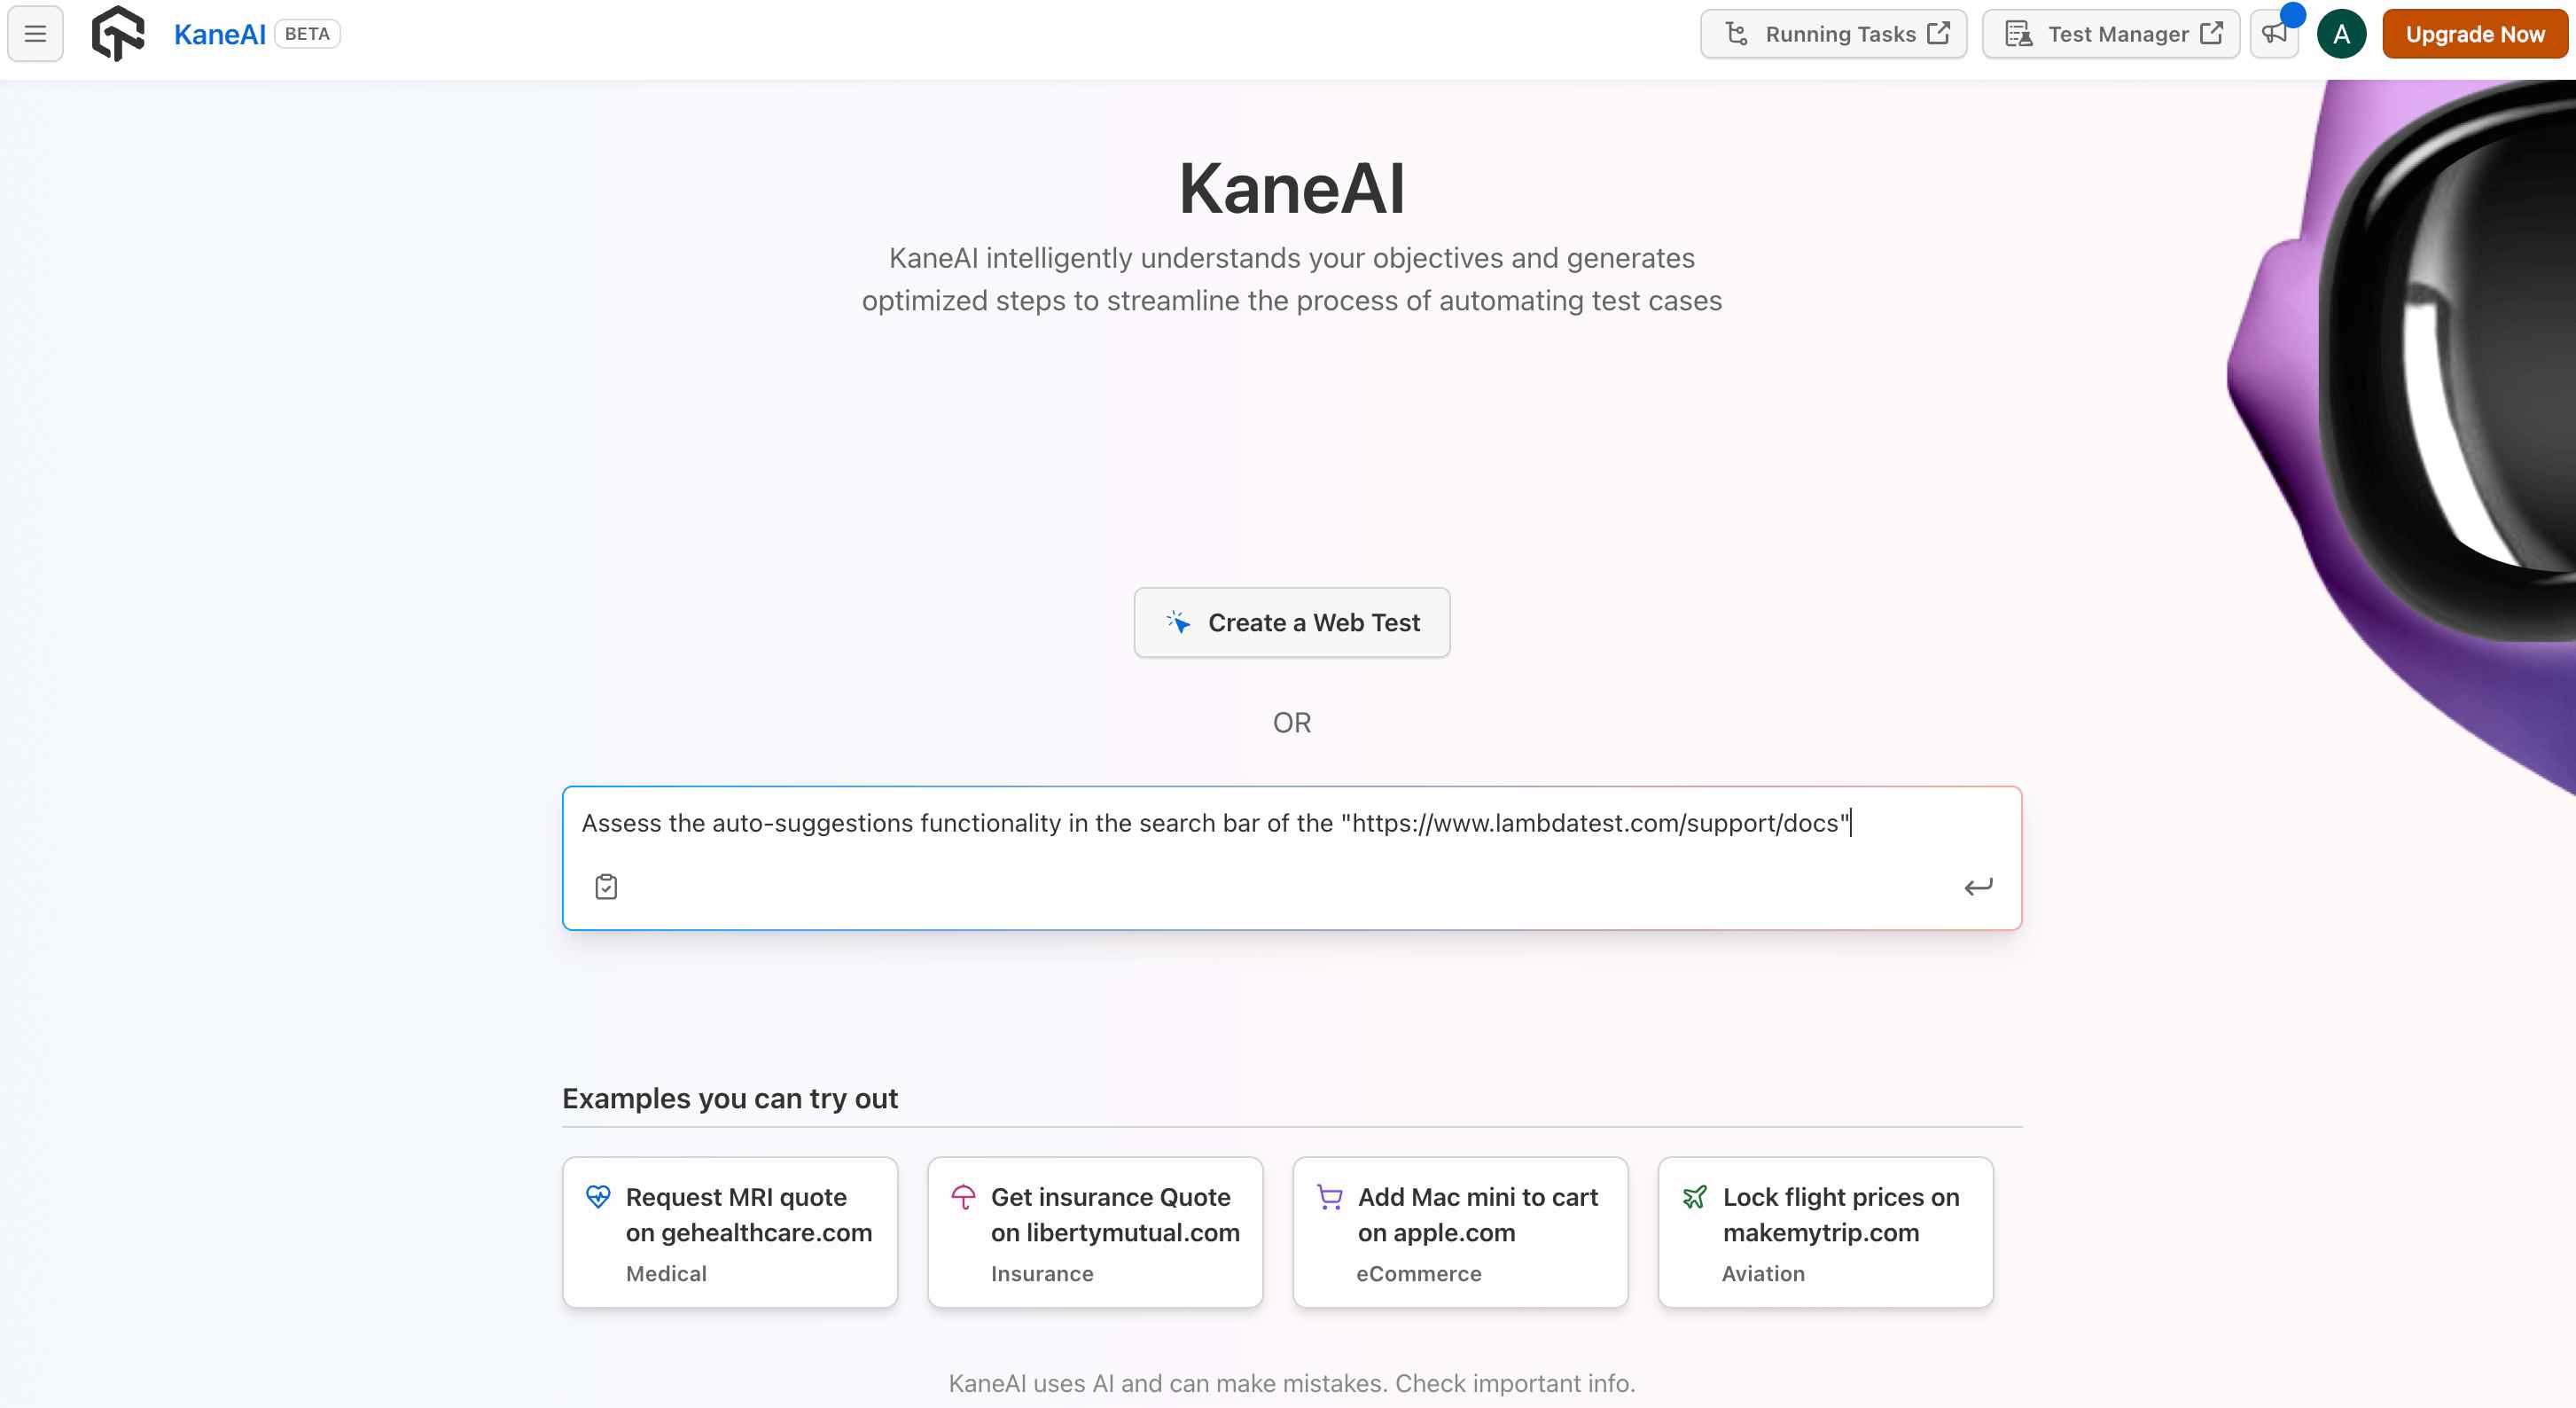
Step 1: Define your test objective
You have to clearly state your goal or define the functionality that you want to test. This could be anything from validating a login process to ensuring the functionality of a shopping cart. The Intelligent Test Planner uses this objective as the basis for automatically generating the necessary test steps.
Examples:
Assess the auto-suggestions functionality in the search bar of the "https://www.lambdatest.com/support/docs"Verify user login functionality for "https://www.example-ecommerce.com/login"Verify the add-to-cart functionality on the "https://www.example.com"Evaluate the user signup process for a new user on https://www.examplesocial.comTrack the add-to-wishlist functionality for a product on "https://www.example.com"
Once your objective is defined, press enter and KaneAI will start analyzing the required actions to achieve the desired outcome.
Step 2: Define your State, Outcomes, Error Messages, Constraints, and User Inputs
- Outcomes : Mention the desired outcomes or behaviors that you expect to observe after performing a test. For example, if testing a login functionality, the expected outcome might be that the user is successfully logged in and redirected to the dashboard.
- Error Message : These are the error messages or notifications that you expect to see under certain conditions. For example, if a user enters invalid login credentials, an error message might indicate that the credentials are incorrect.
- Constraints : These are the conditions or limitations under which the test is conducted. For example, you might constrain the testing to specific browsers, devices, or operating systems.
- User Inputs : This refers to any information or data that the user needs to provide during the test. For example, in a login test, the user input would be the username and password.
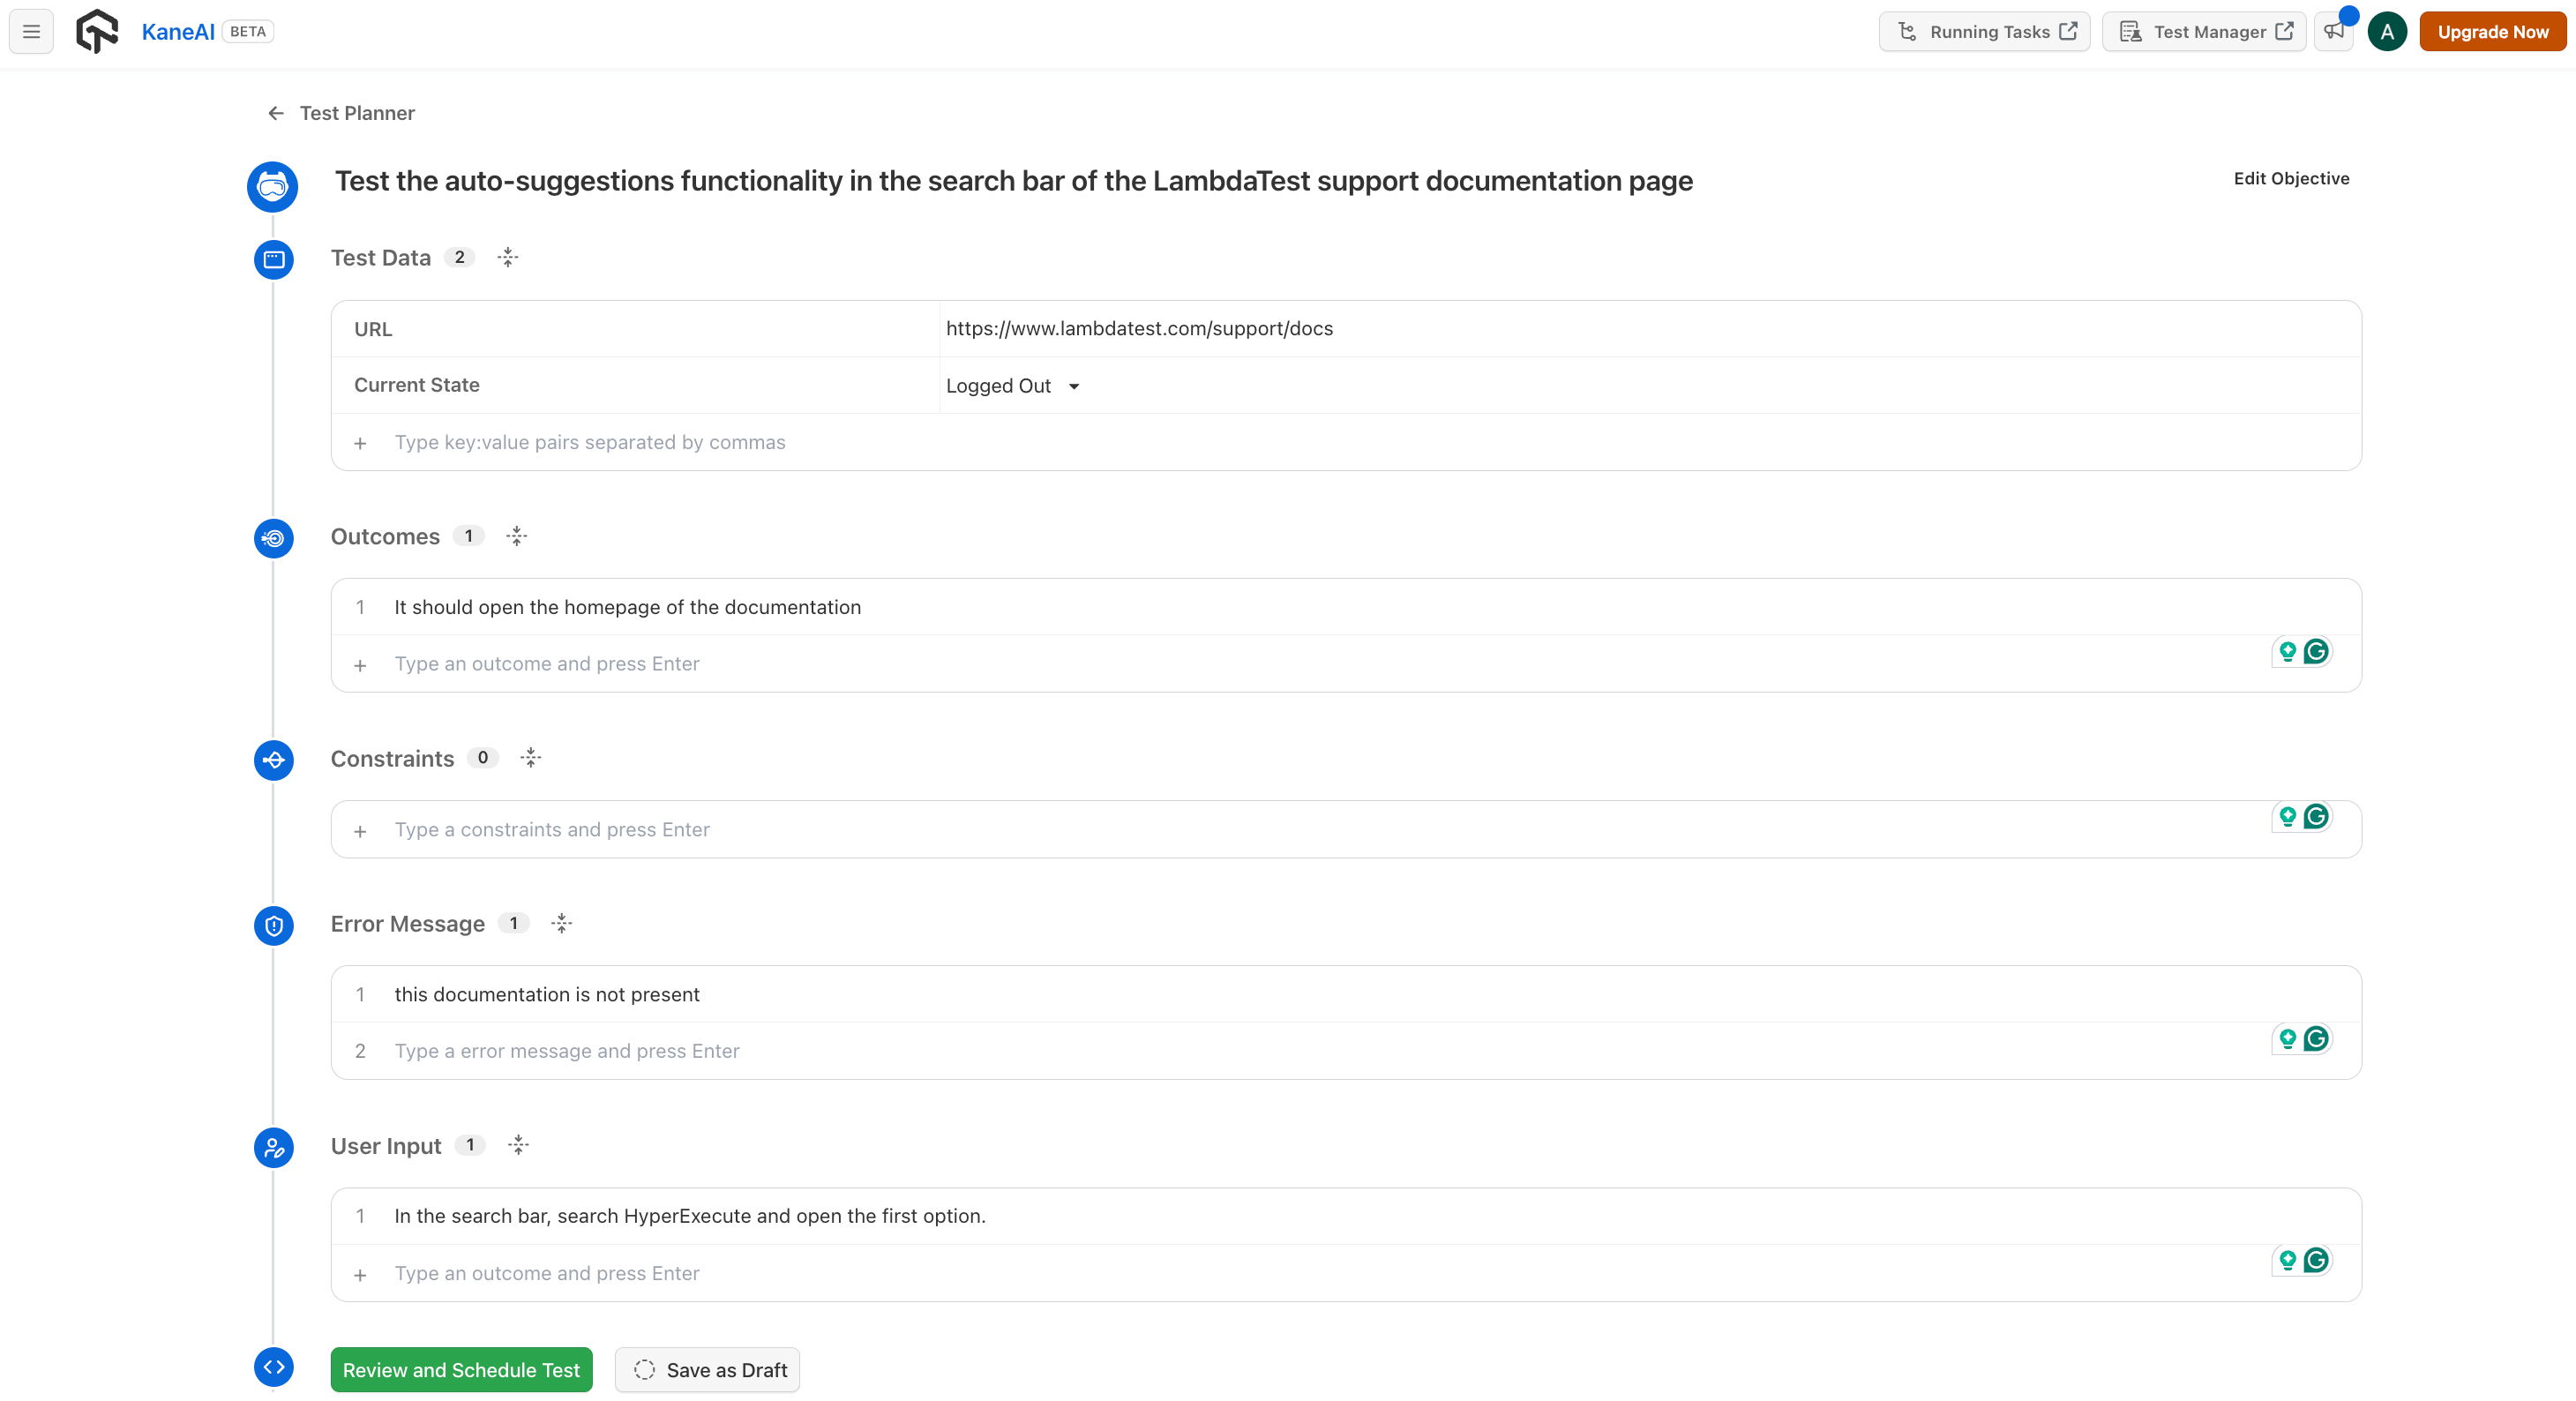
Now click on the Review and Scheule test button.
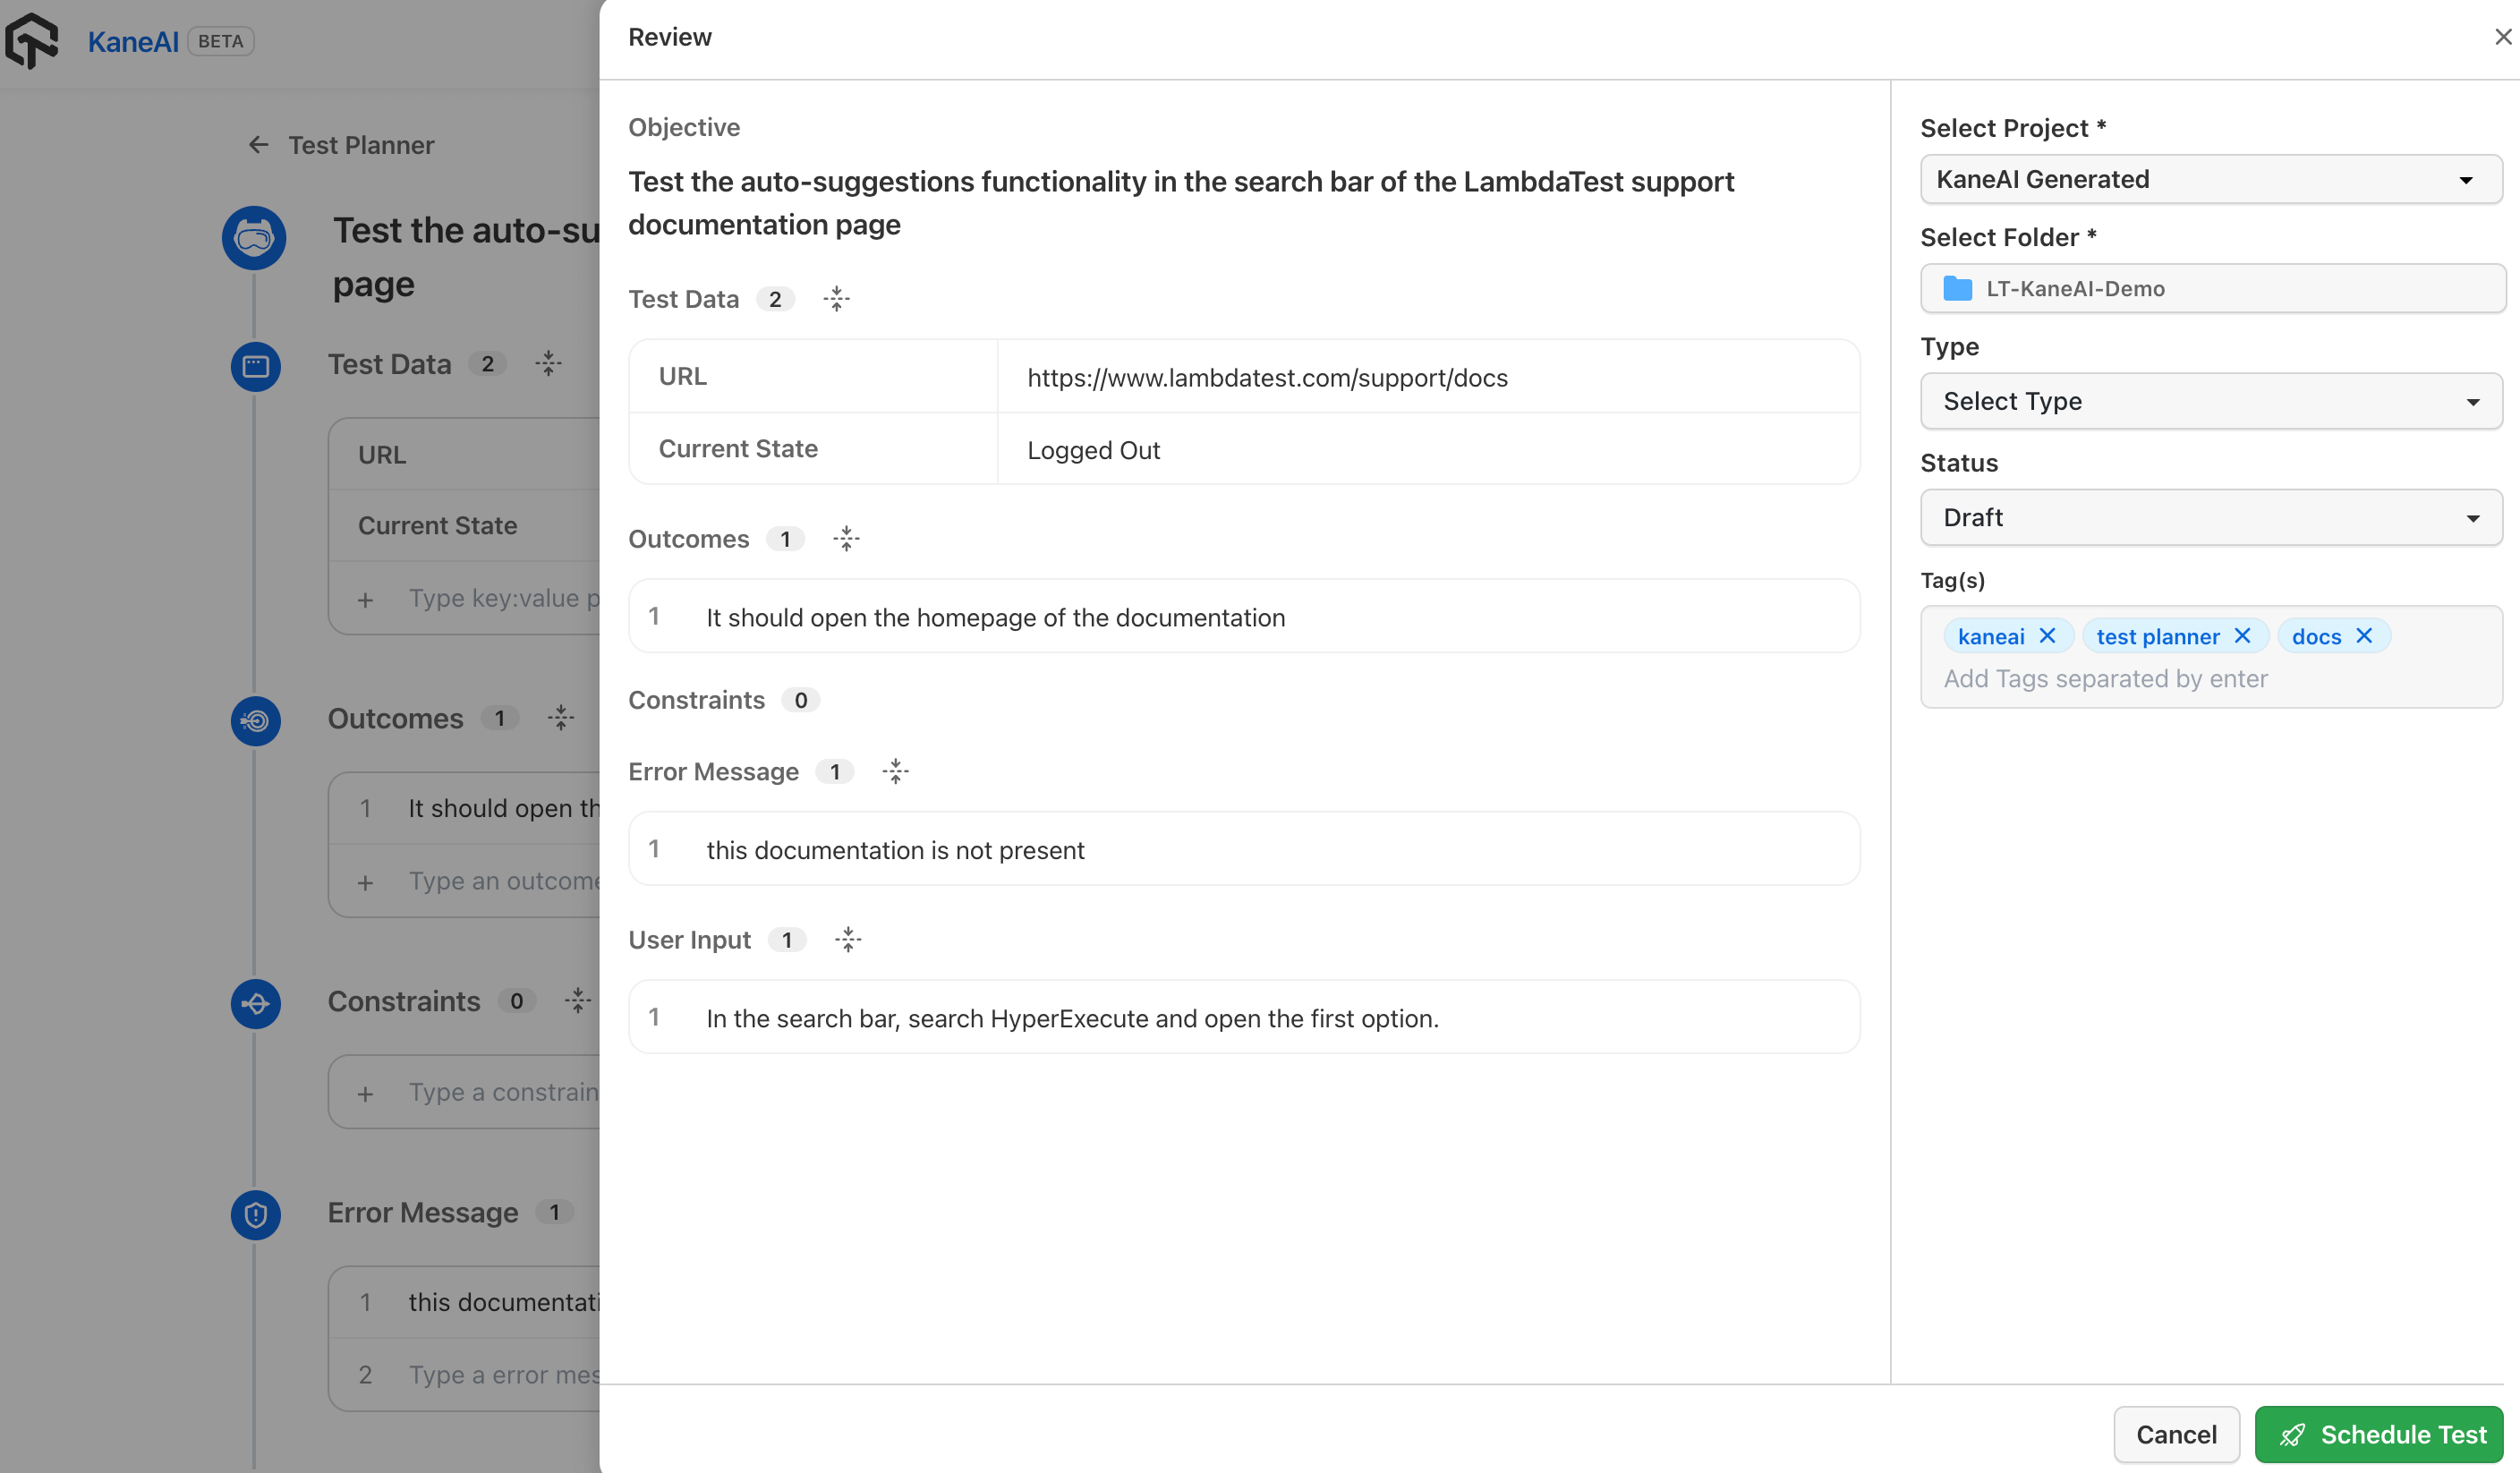
Step 3: Review and Schedule your test
In the left hand side, you can review your test data and verify if something needs to be updated here.
In the right side, you willget an option to select your Project, Folder in which you want to save your test. You can also select the Type of test and the status of it. You can also assign label to your test for unique identification of it.
Click on Schedule Test button.
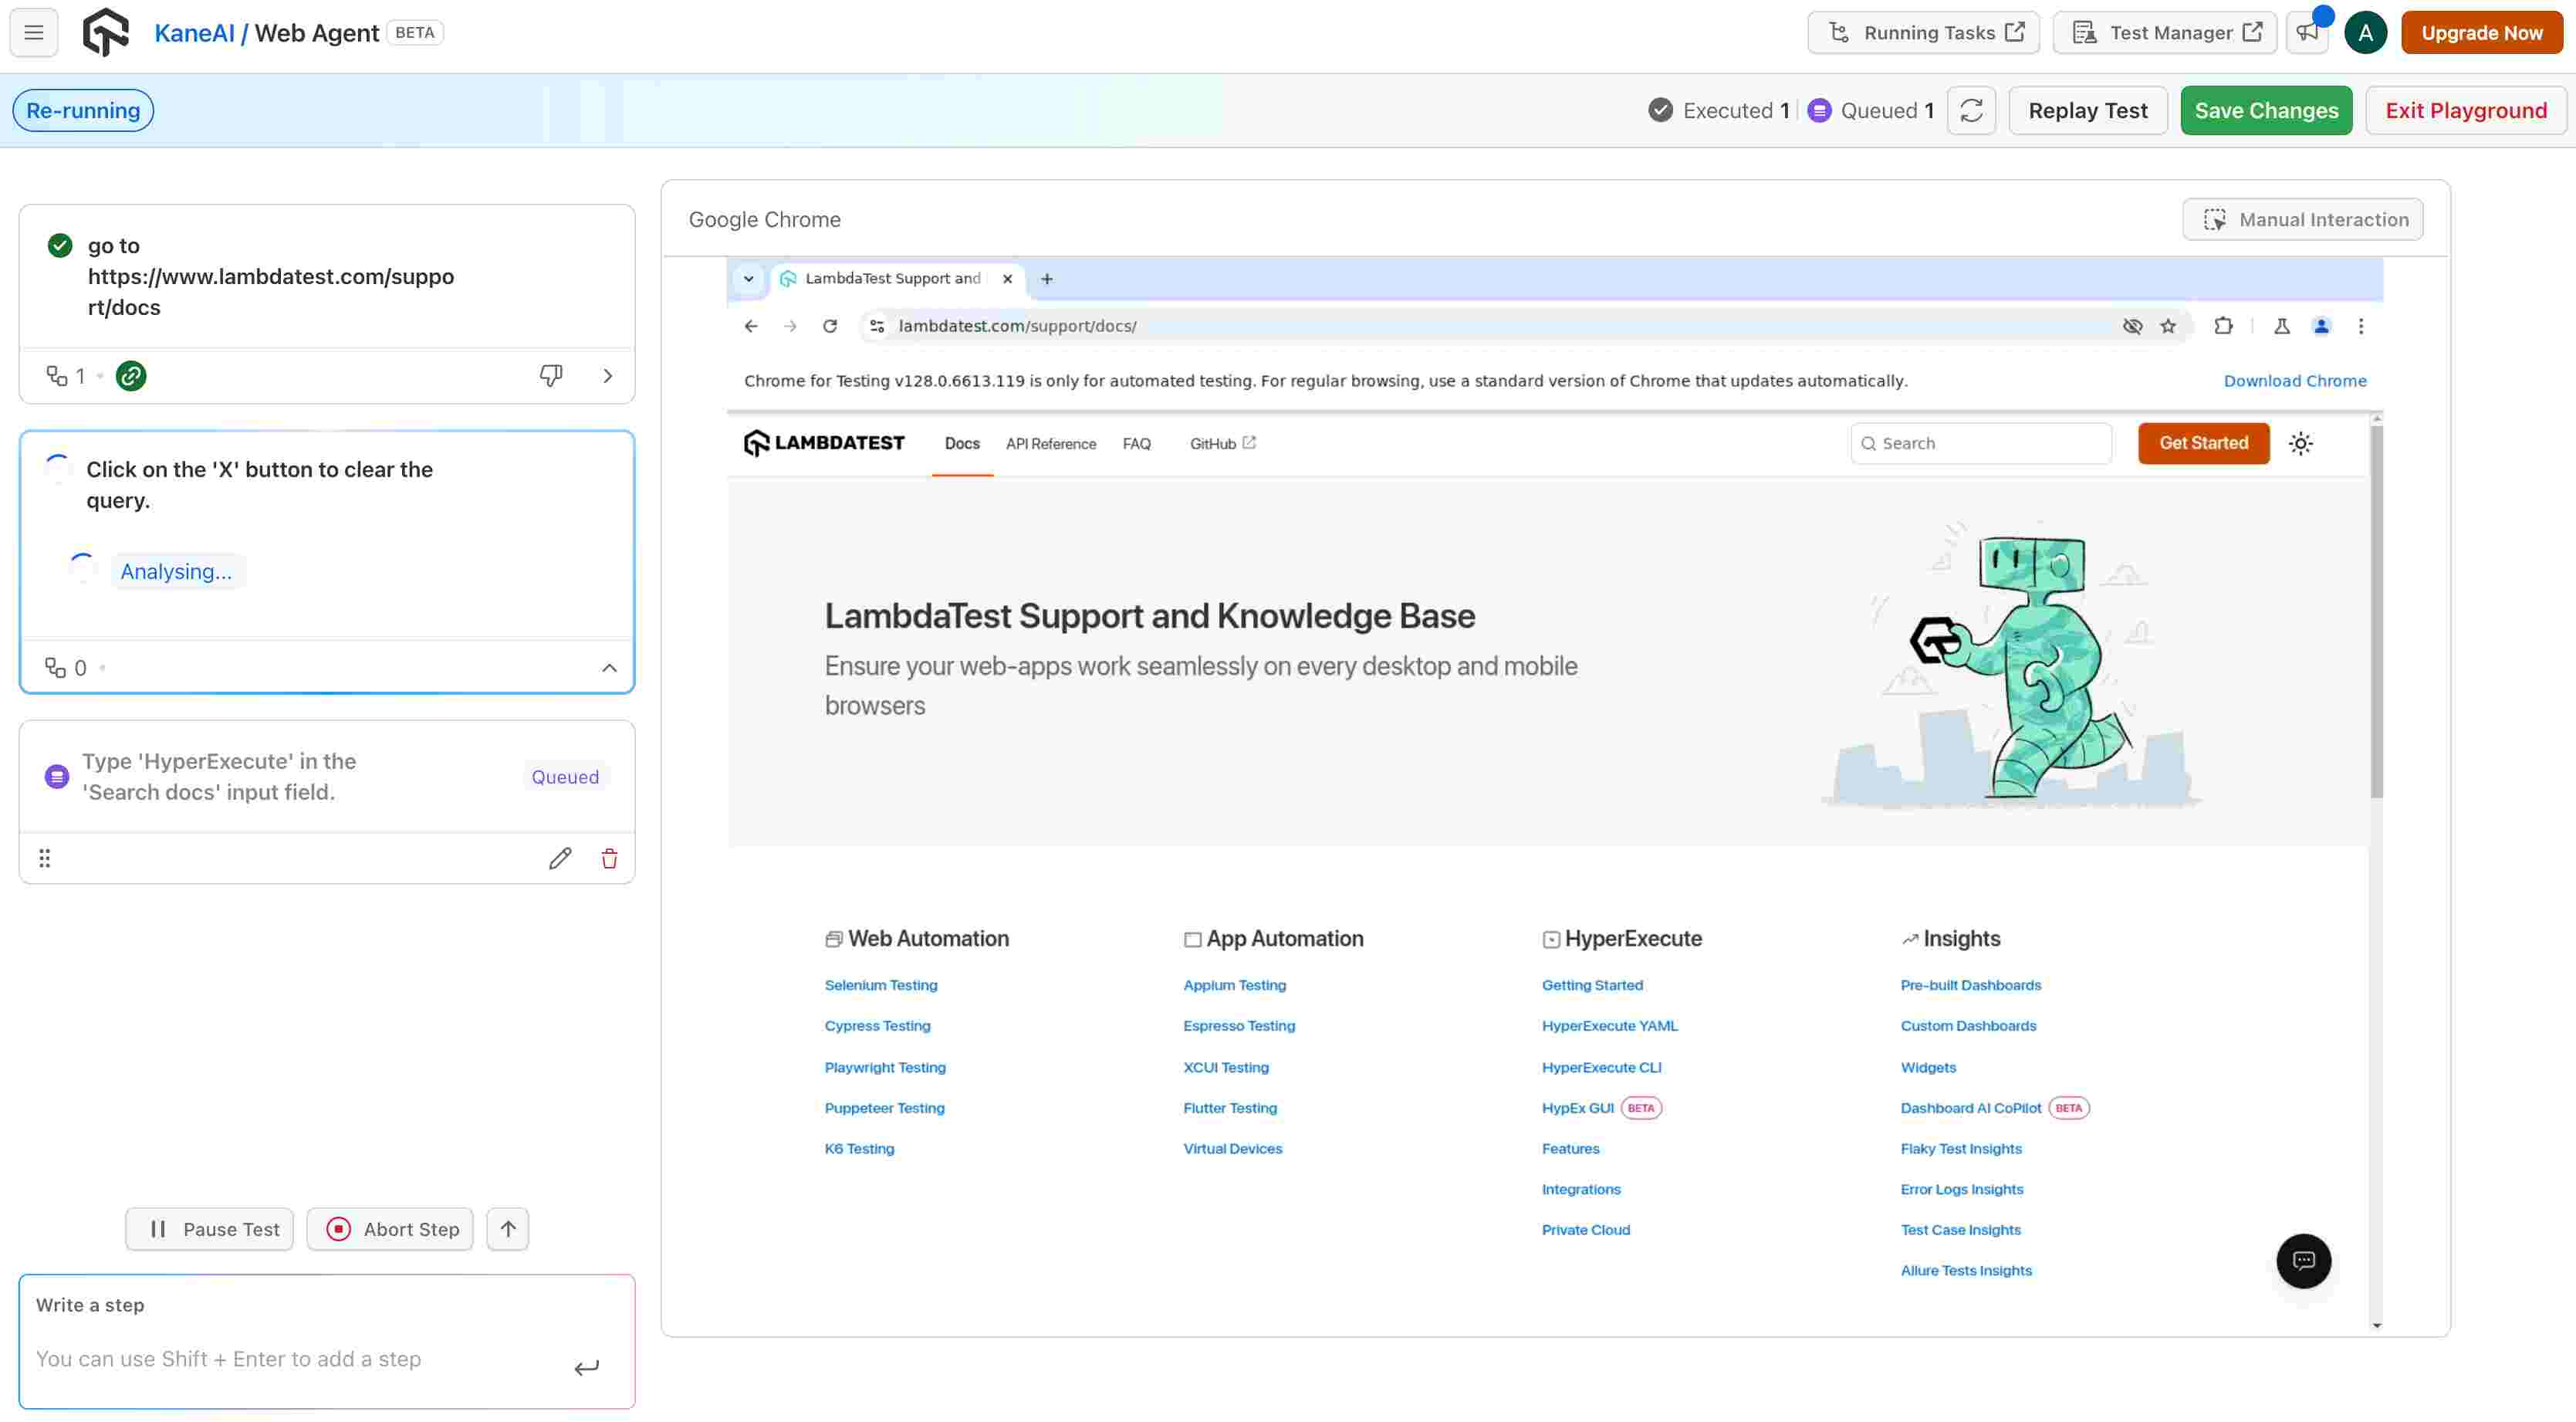
Step 4: Check the test execution
Click on the Live Preview button to enter the playground and check the live execution of your test based on your defined objective.

You will be redirected to playground where your tests will be getting executed and you can check the complete process.
You can now go to the Test Manager where you have saved your test case and trigger it on HyperExecute.
