Automate your App Testing with KaneAI
In this guide, we'll walk you through the process of generating, and executing automated tests for your mobile application using KaneAI.
Steps to generate the test cases
Step 1: Create an App Test
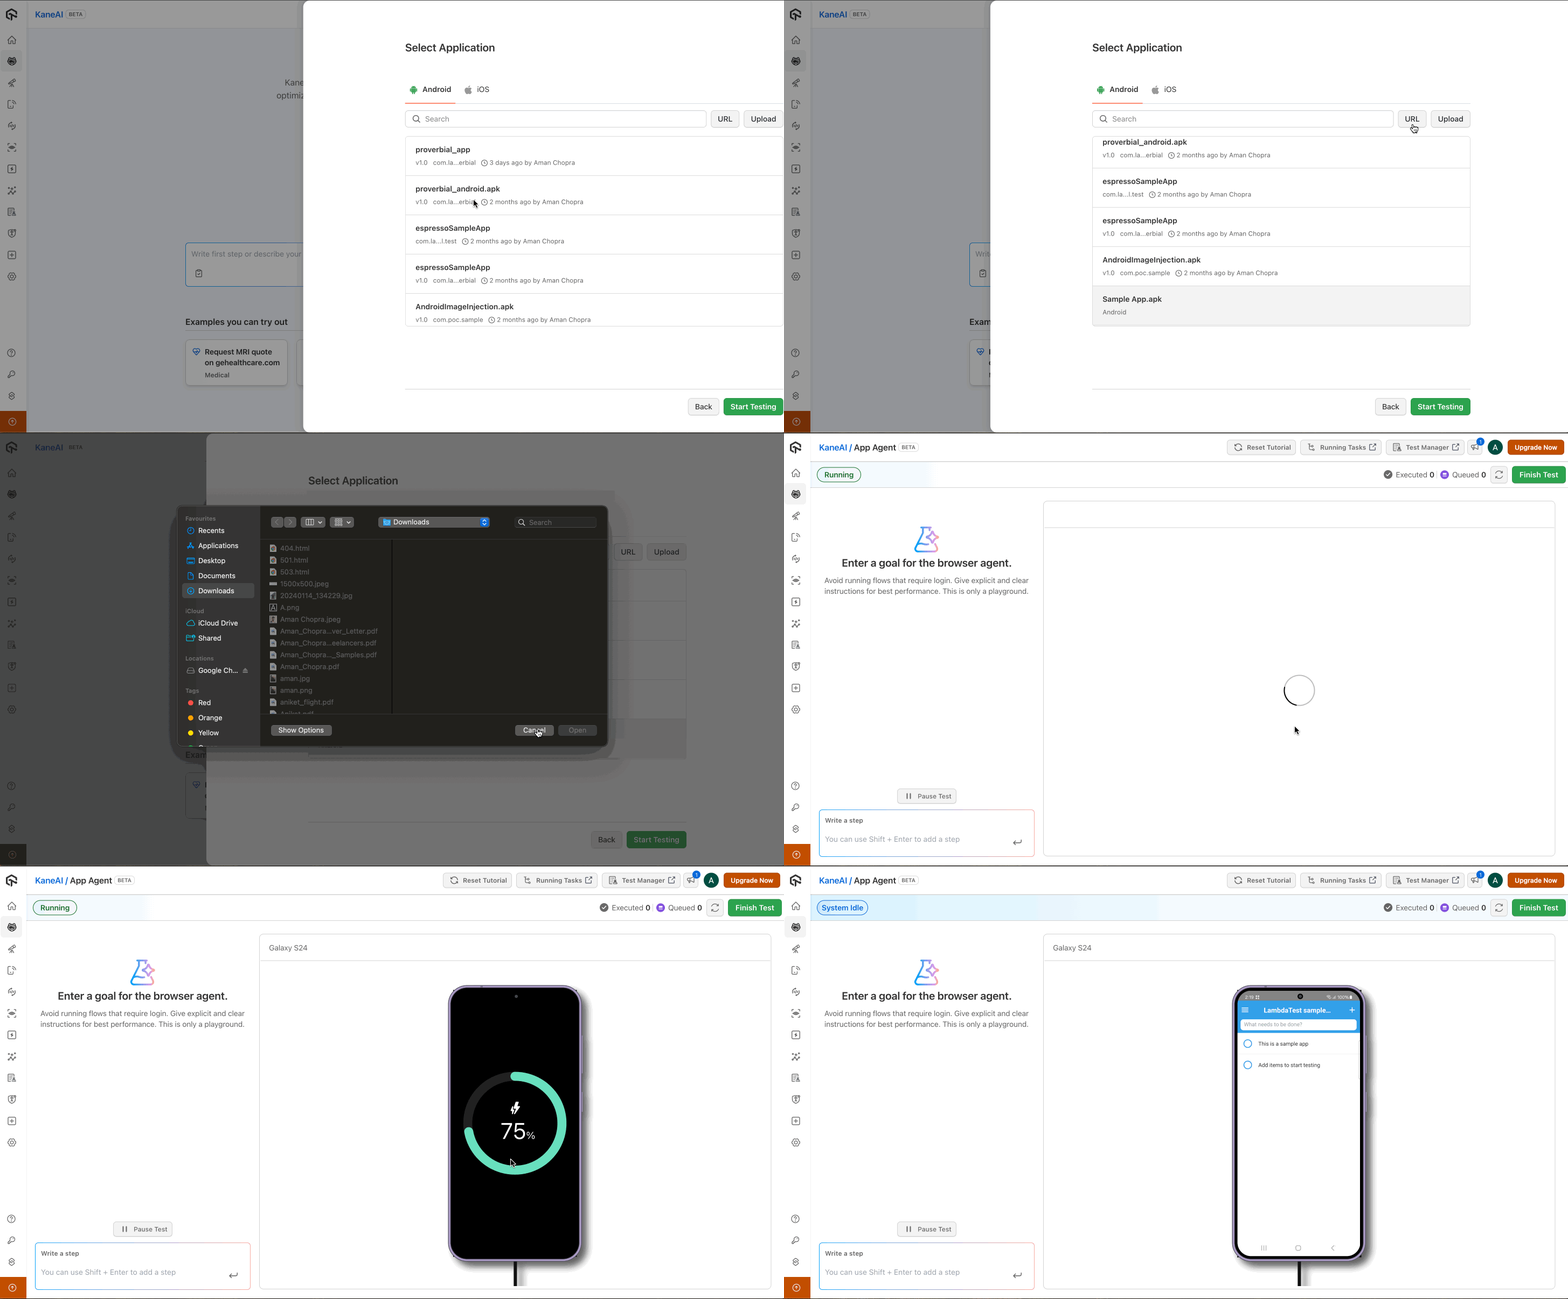
Navigate to the KaneAI homepage and click on the Create an App Test button to initiate the process of generating test cases for your mobile app. Now select your desired operating system (Android, iOS) and upload your application to the platform to start testing.

Step 2: Write Your Test Cases in Plain English
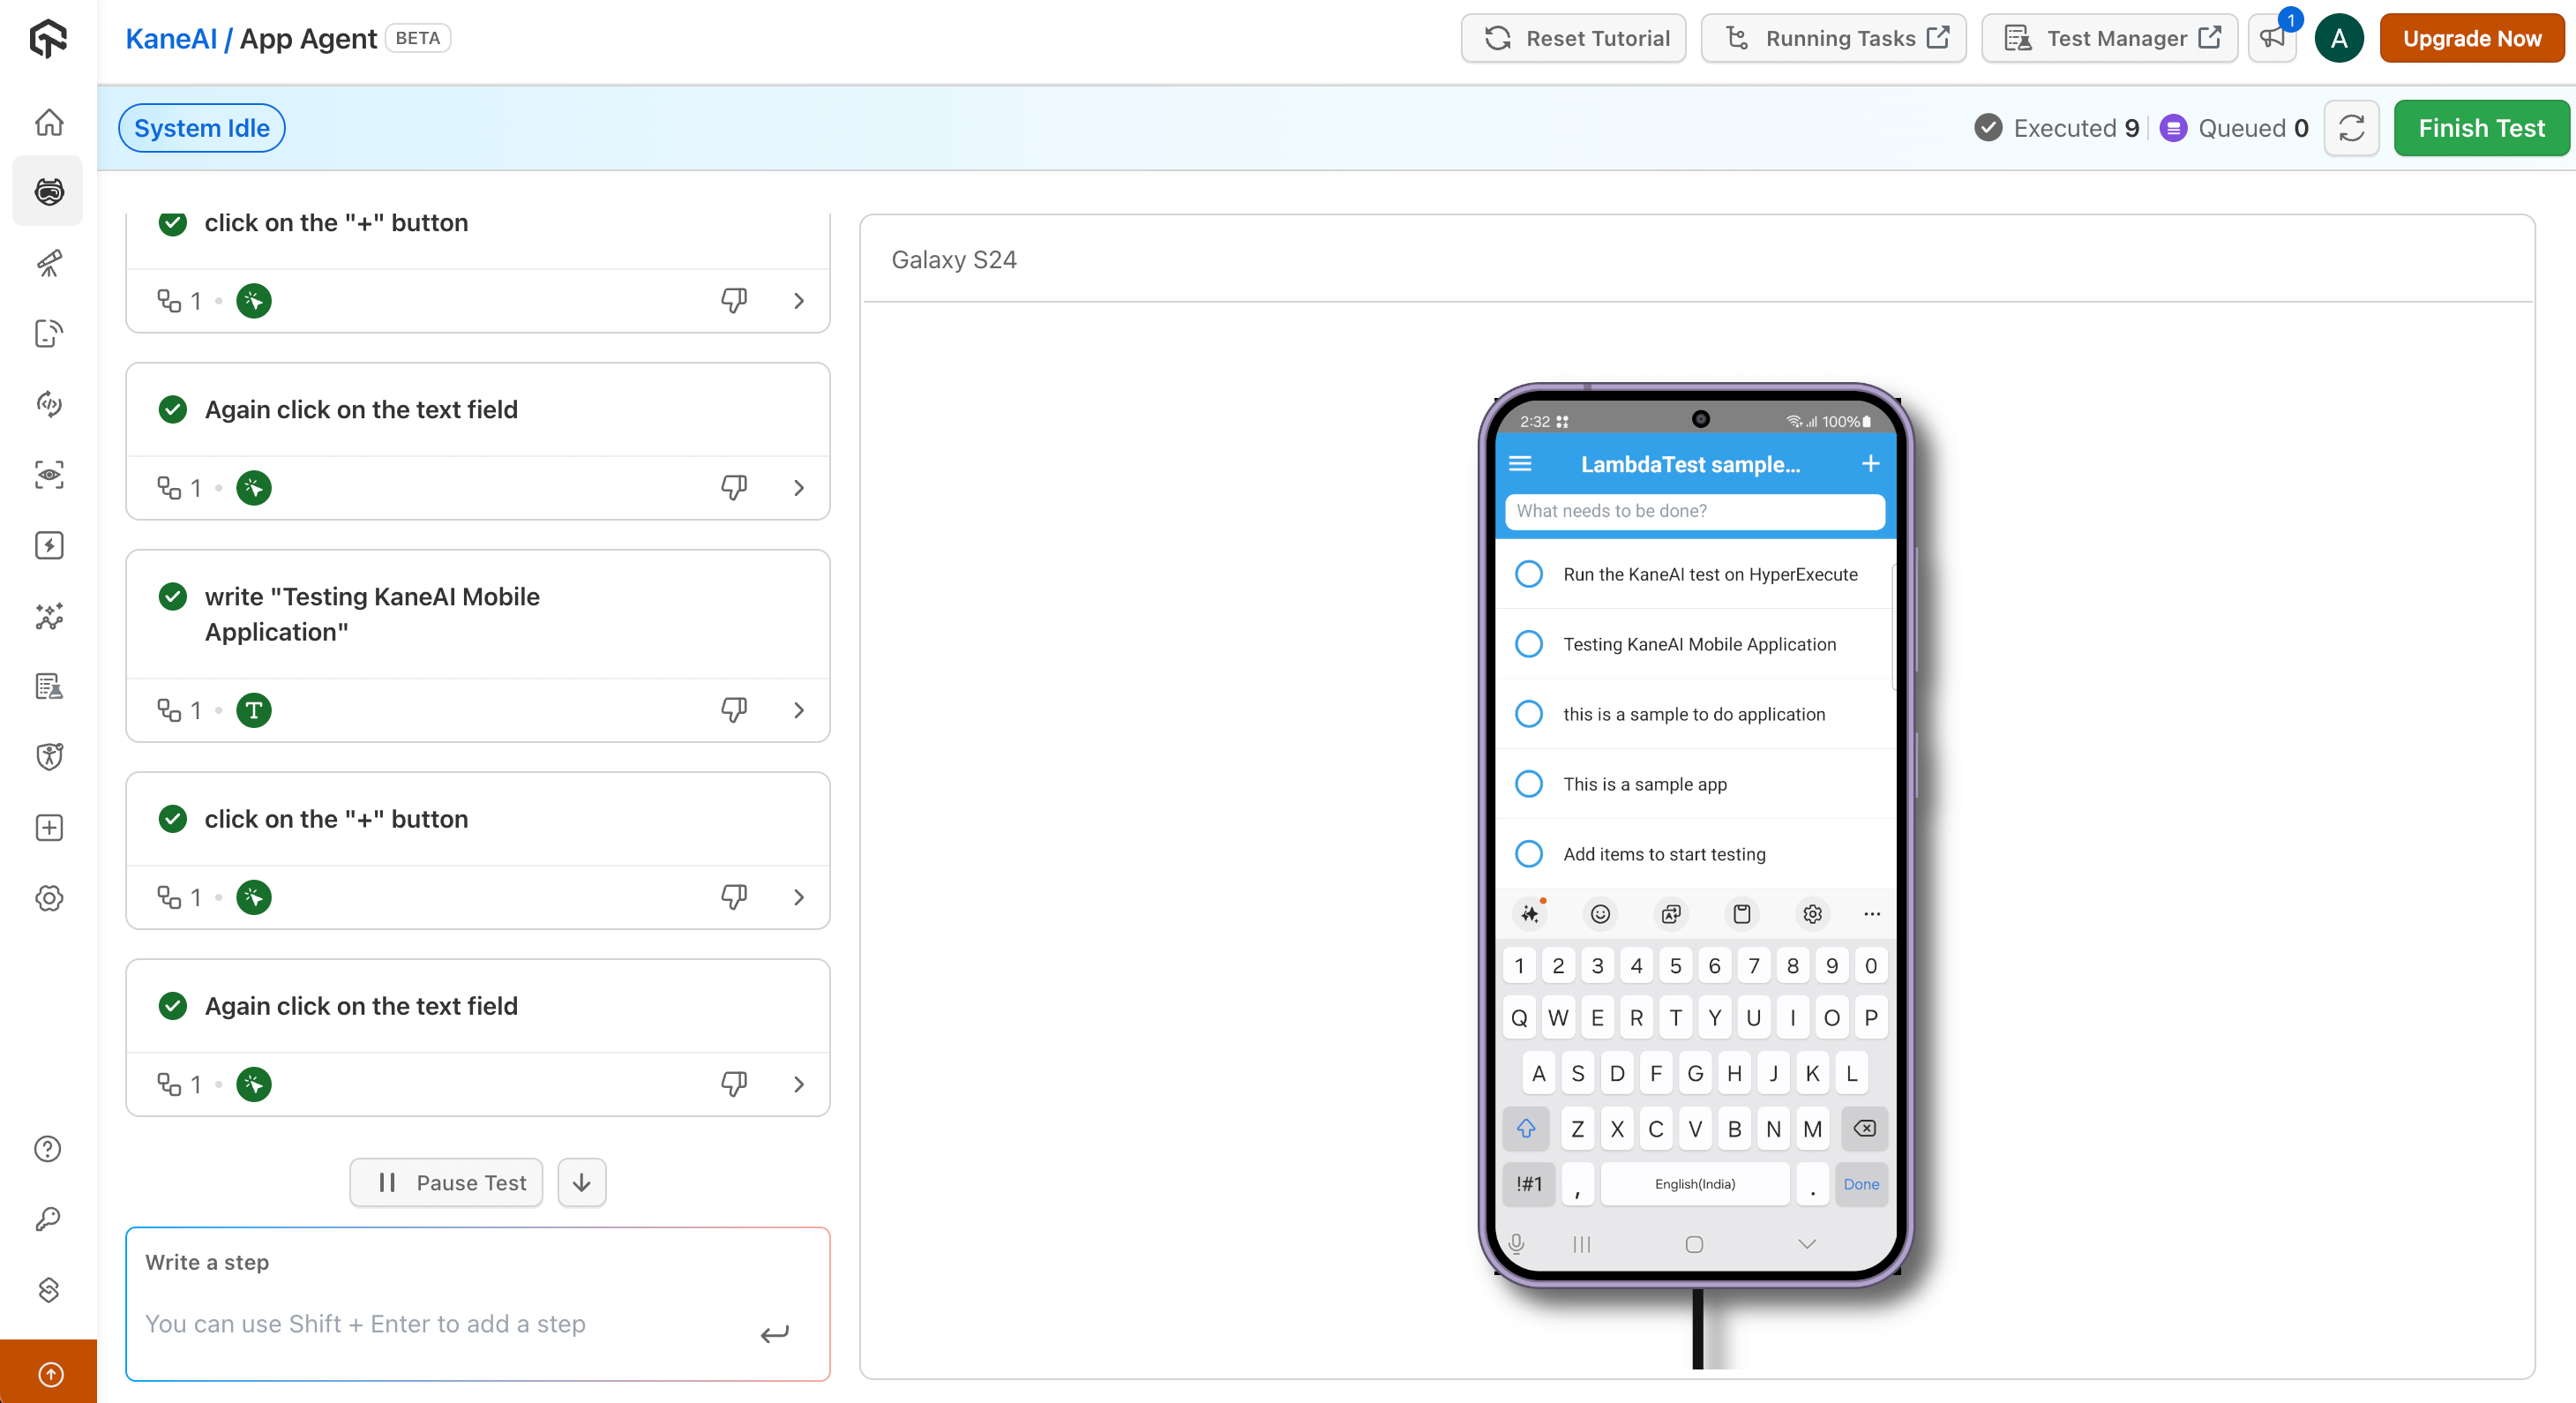
In this step, you'll describe your desired test outcomes using plain English. Don't worry about writing specific code or scripts – KaneAI will handle that for you.
For example:
- Click on the hamburger menu button.
- Write the test in the text field "This is a sample app".
- Click on the "+" button.
Continue to add instructions/commands in plain English as you go; KaneAI will automatically queue them for execution, eliminating the need to wait for one test to finish before writing the next. Click the Finish Test.
Remember: The more specific you are, the more accurate KaneAI's generated test cases will be.

Step 3: Save your Test Case
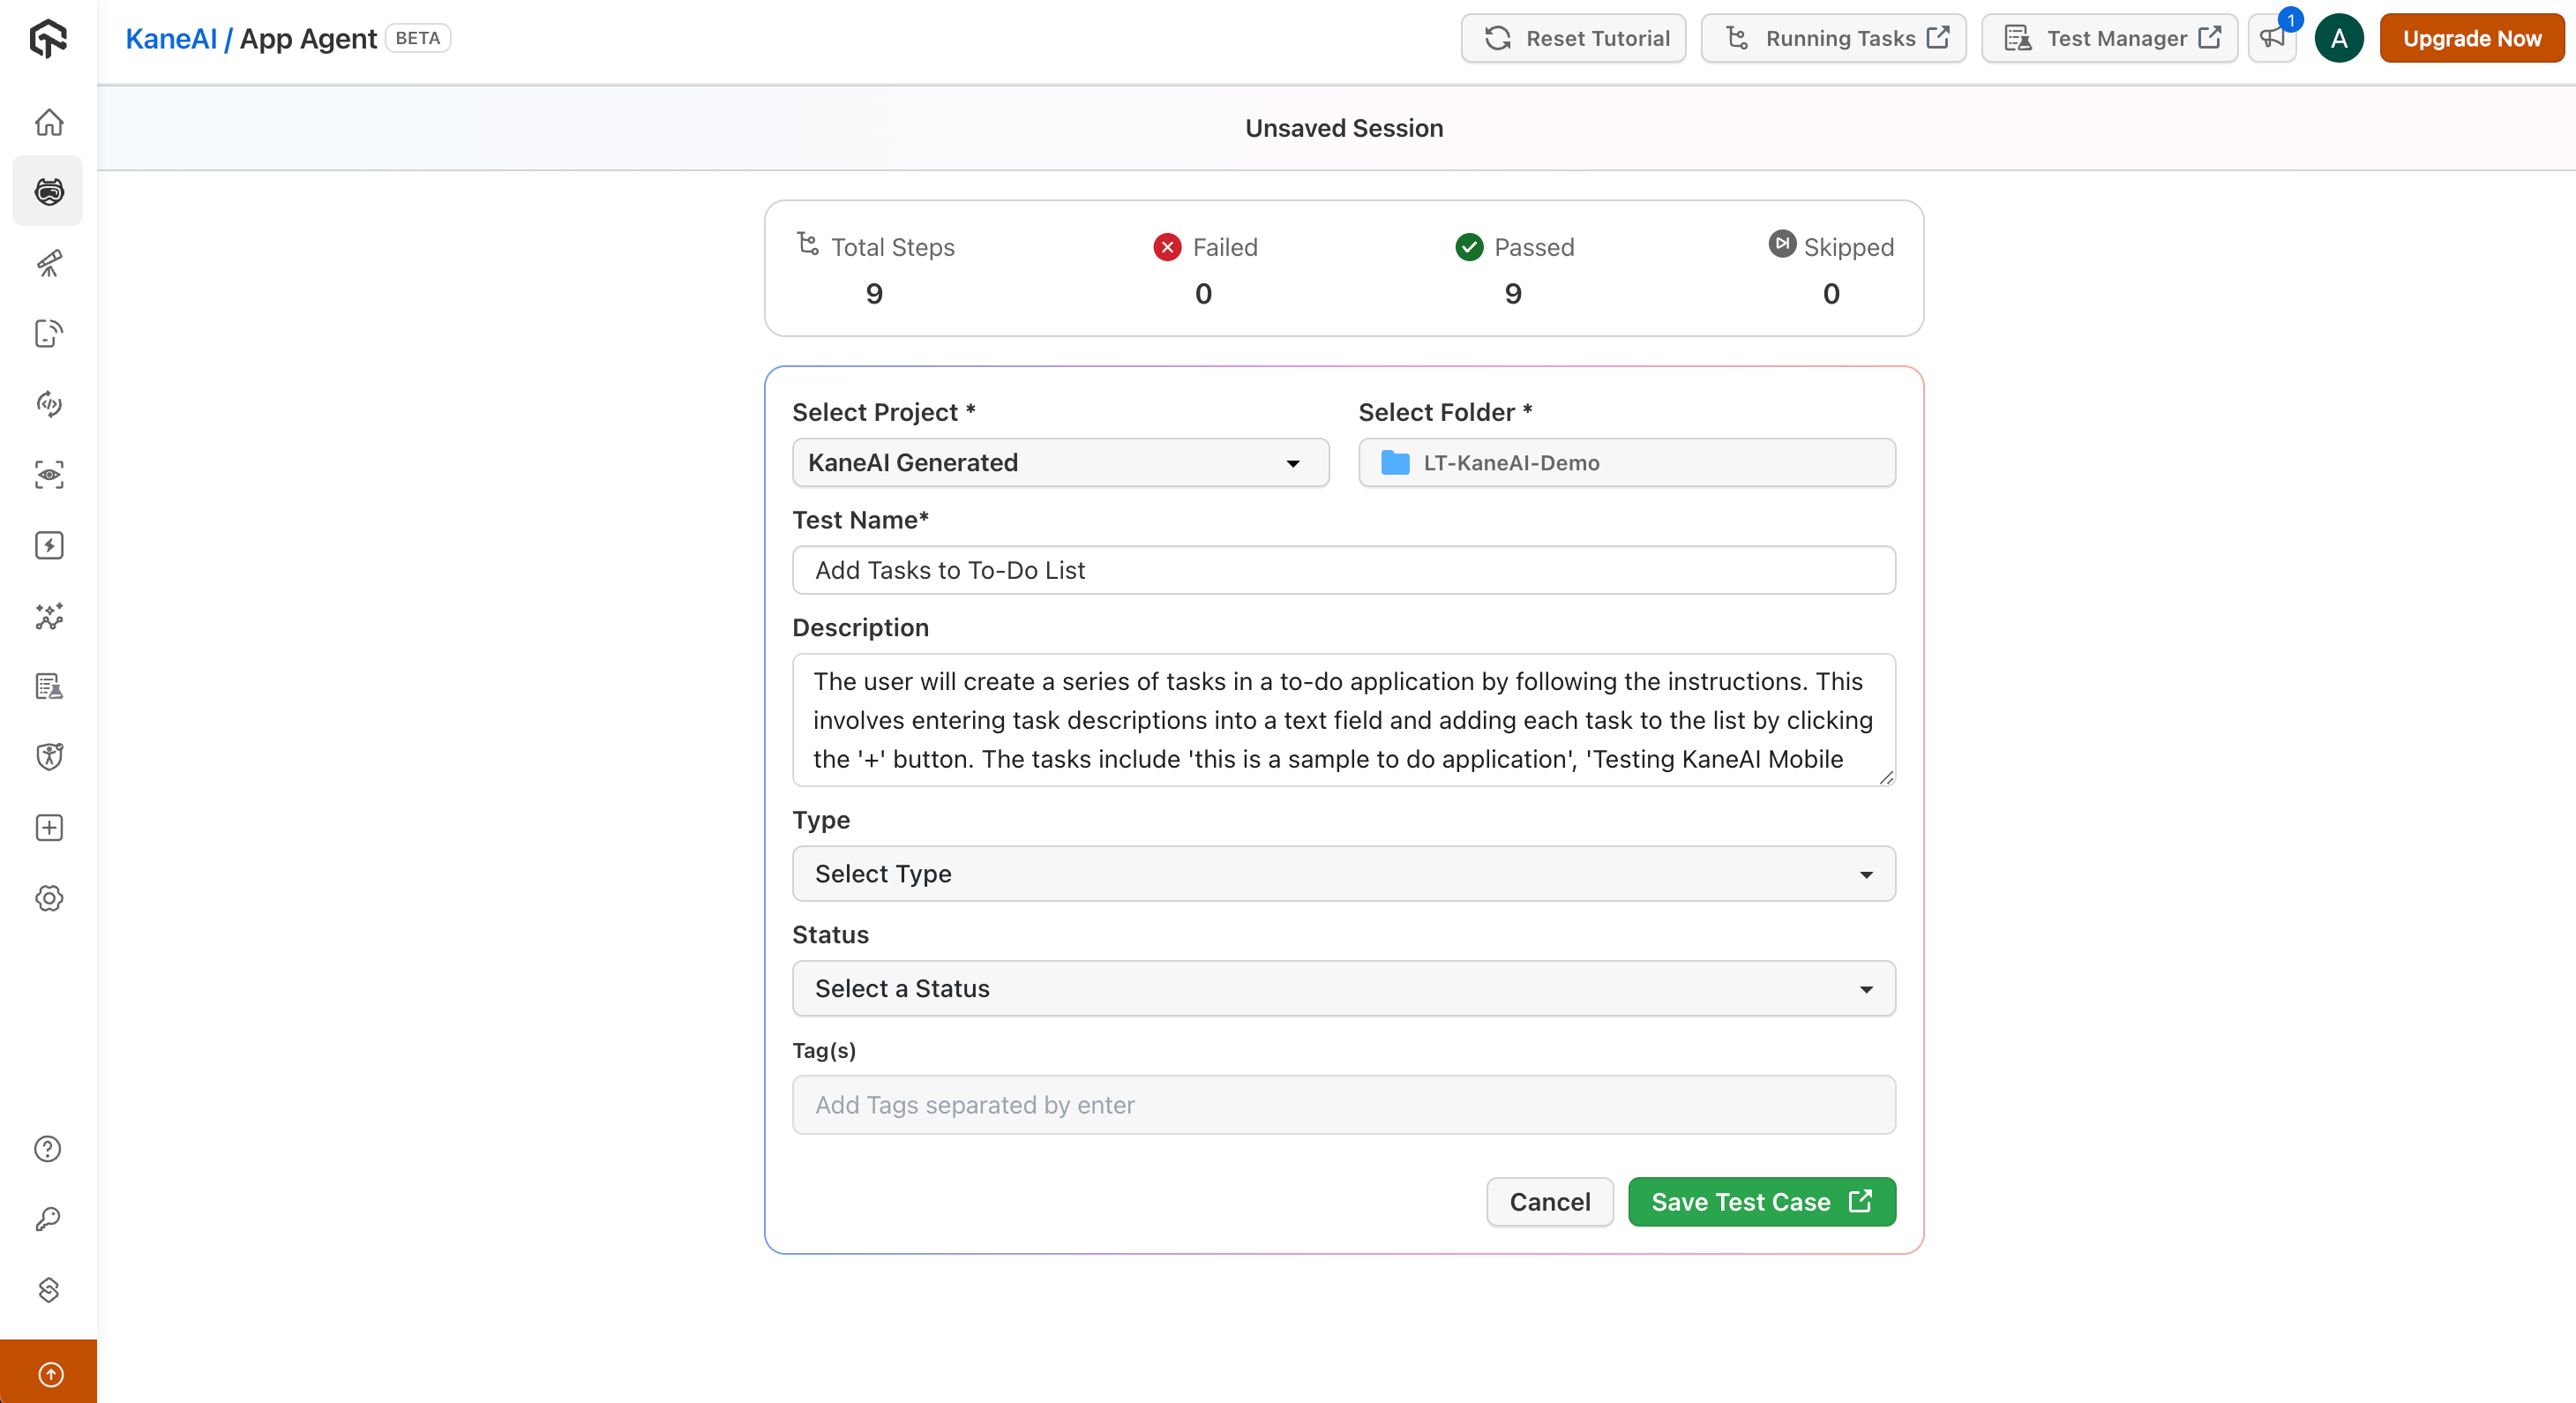
Now, save all of the test cases you've generated so far.
Select your Project and the folder where you want to save your test cases. The Test Name and Description will be generated automatically, but you can also edit them. Select your test's Type and Status, as well as the necessary tags that will allow you to search for it later.

Step 4: Execute your test
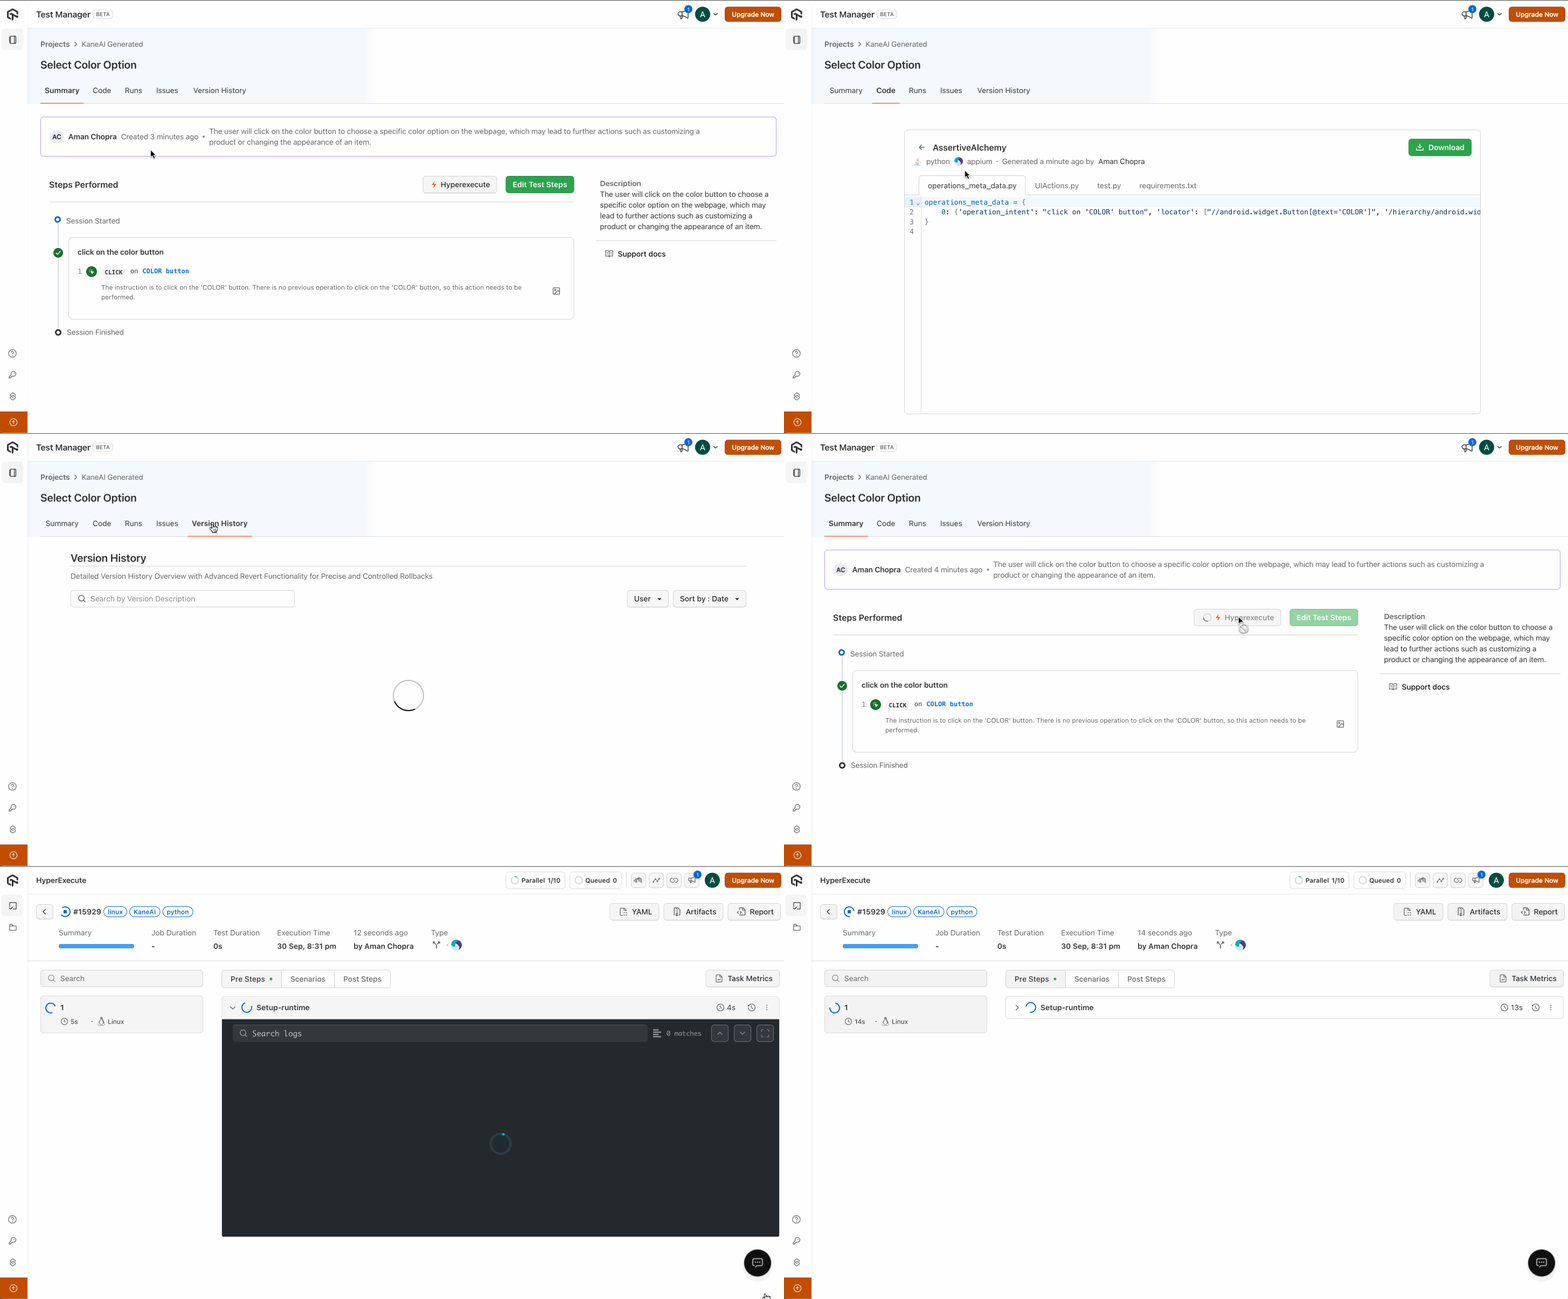
To execute your test, click on the HyperExecute button and you will be redirected to the HyperExecute dashboard where your tests will be executed.

