Integrate LambdaTest Extension With Azure Pipelines
Azure Pipelines, by Microsoft, is a feature of Azure DevOps. It helps to automatically build, test, and deploy your projects, with Continuous Integration or CI, upon various production environments. So your Selenium automation test scripts can run successfully on Azure Pipeline. However, sometimes running your scripts can be a bit tedious. This is where the LambdaTest plugin can be used in the Azure Pipeline to ease the workflow and automate the tests. LambdaTest allows you to perform live interactive and automated cross-browser testing on 3000+ real browsers and operating systems online.
Benefits Of Using LambdaTest Plugin In Azure Pipeline
- Setup your LambdaTest account in Azure Pipeline using your account credentials.
- Set up, and use the LambdaTest Tunnel for testing various production environments like internal, development and staging.
- Embed or fetch LambdaTest test results in your project's job results.
- Witness the execution of the tests, capture screenshots, mark bugs, plot graph and much more, on your automation dashboard on LambdaTest.
Prerequisites
- Azure DevOps (Azure Pipelines) account
- LambdaTest account credentials.
- LambdaTest Username
- LambdaTest Access KeyYou can fetch your account credentials on LambdaTest from your profile section.
How To Install Lambdatest Extension
Follow the below steps to install Lambdatest Extension from Azure DevOps marketplace:
-
Go to Azure DevOps marketplace and search for "LambdaTest" in the search box.

-
In the results window, you will see an option showing the LambdaTest Extension.

-
Open the found result and click on "Get it free", to get the LambdaTest Extension in your organization for free.

-
Select an Azure DevOps organization and press "Install". LambdaTest Extension will be installed in this organization.
-
Once finished, you can see "Done" at the top. It means that LambdaTest Extension has been installed successfully. You can proceed to your organization to see the extension.
How To Integrate LambdaTest Plugin In Azure Pipelines
Step 1: Sign in to your Azure DevOps account to access the Azure Pipelines. Create one if you don't have any.
Step 2: Create a project and download the LambdaTest extension from the Azure marketplace as shown above.
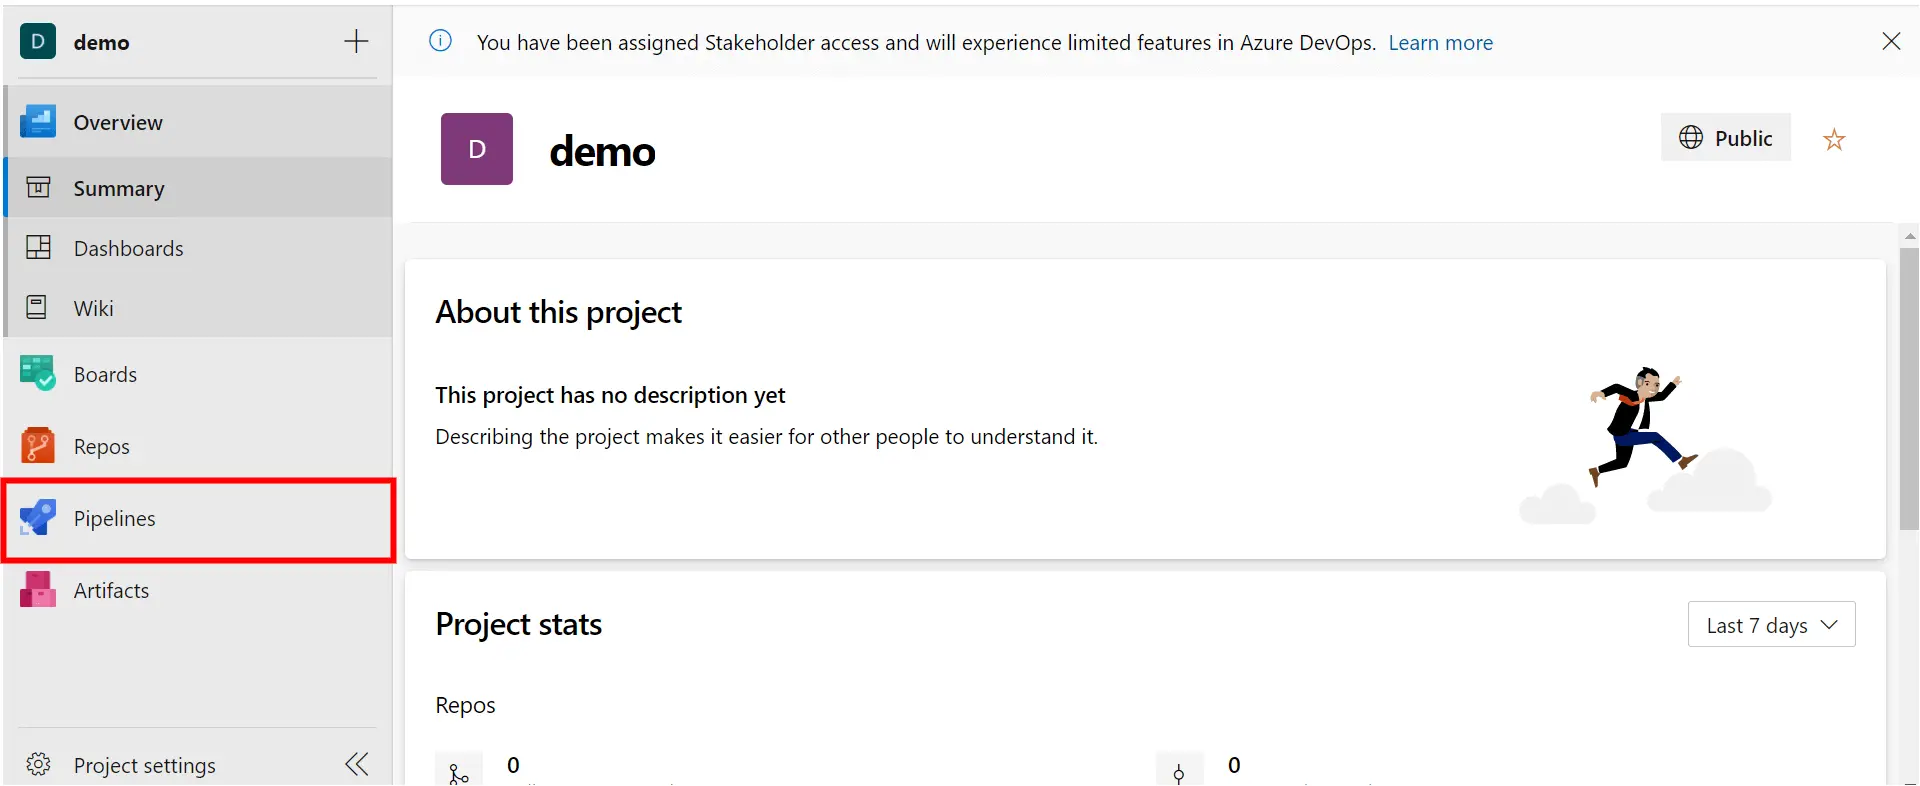
Step 3: In order to use the LambdaTest extension now, select Pipelines from the left side menu bar as shown below:
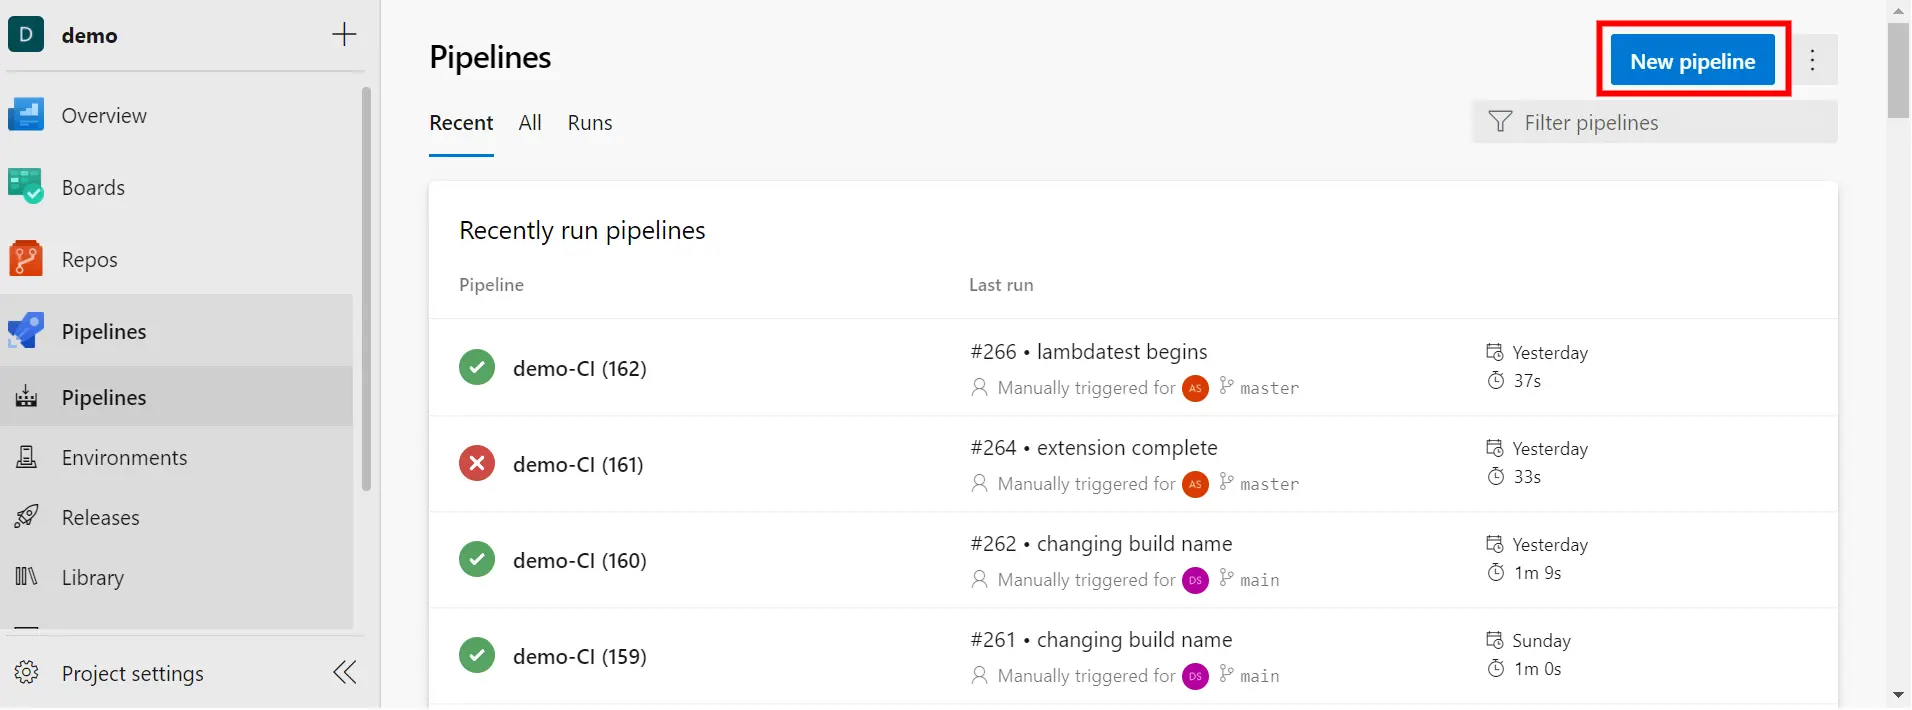
Step 4: Select New Pipelines from the top right corner of your screen.
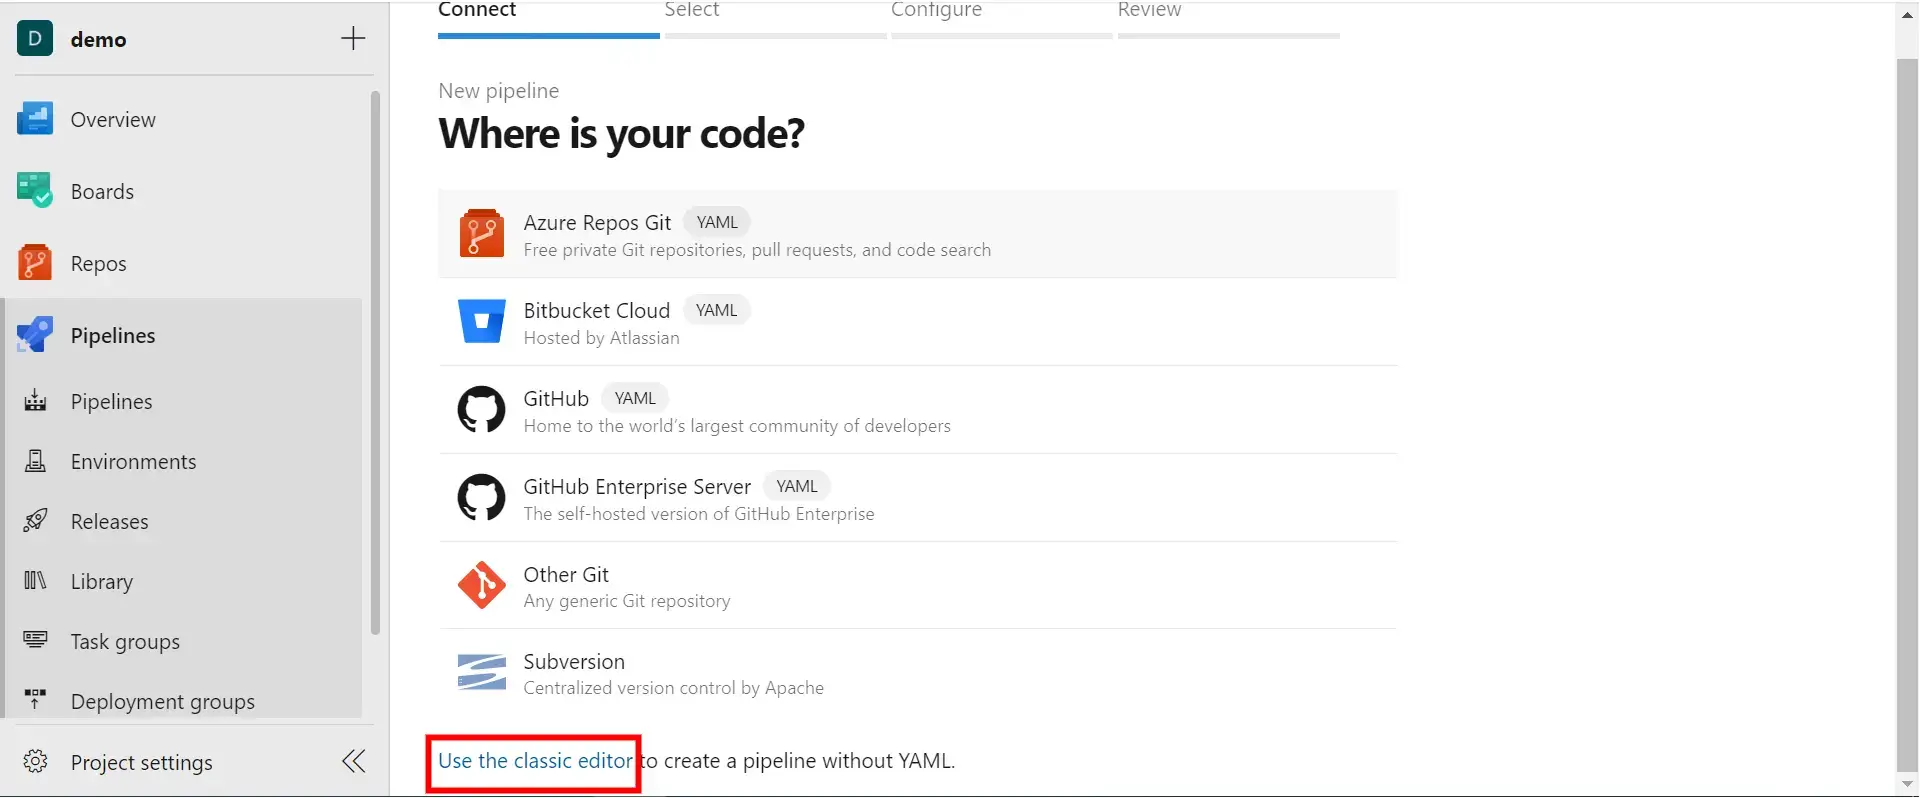
Step 5: Switch to Class Editor from the footer.
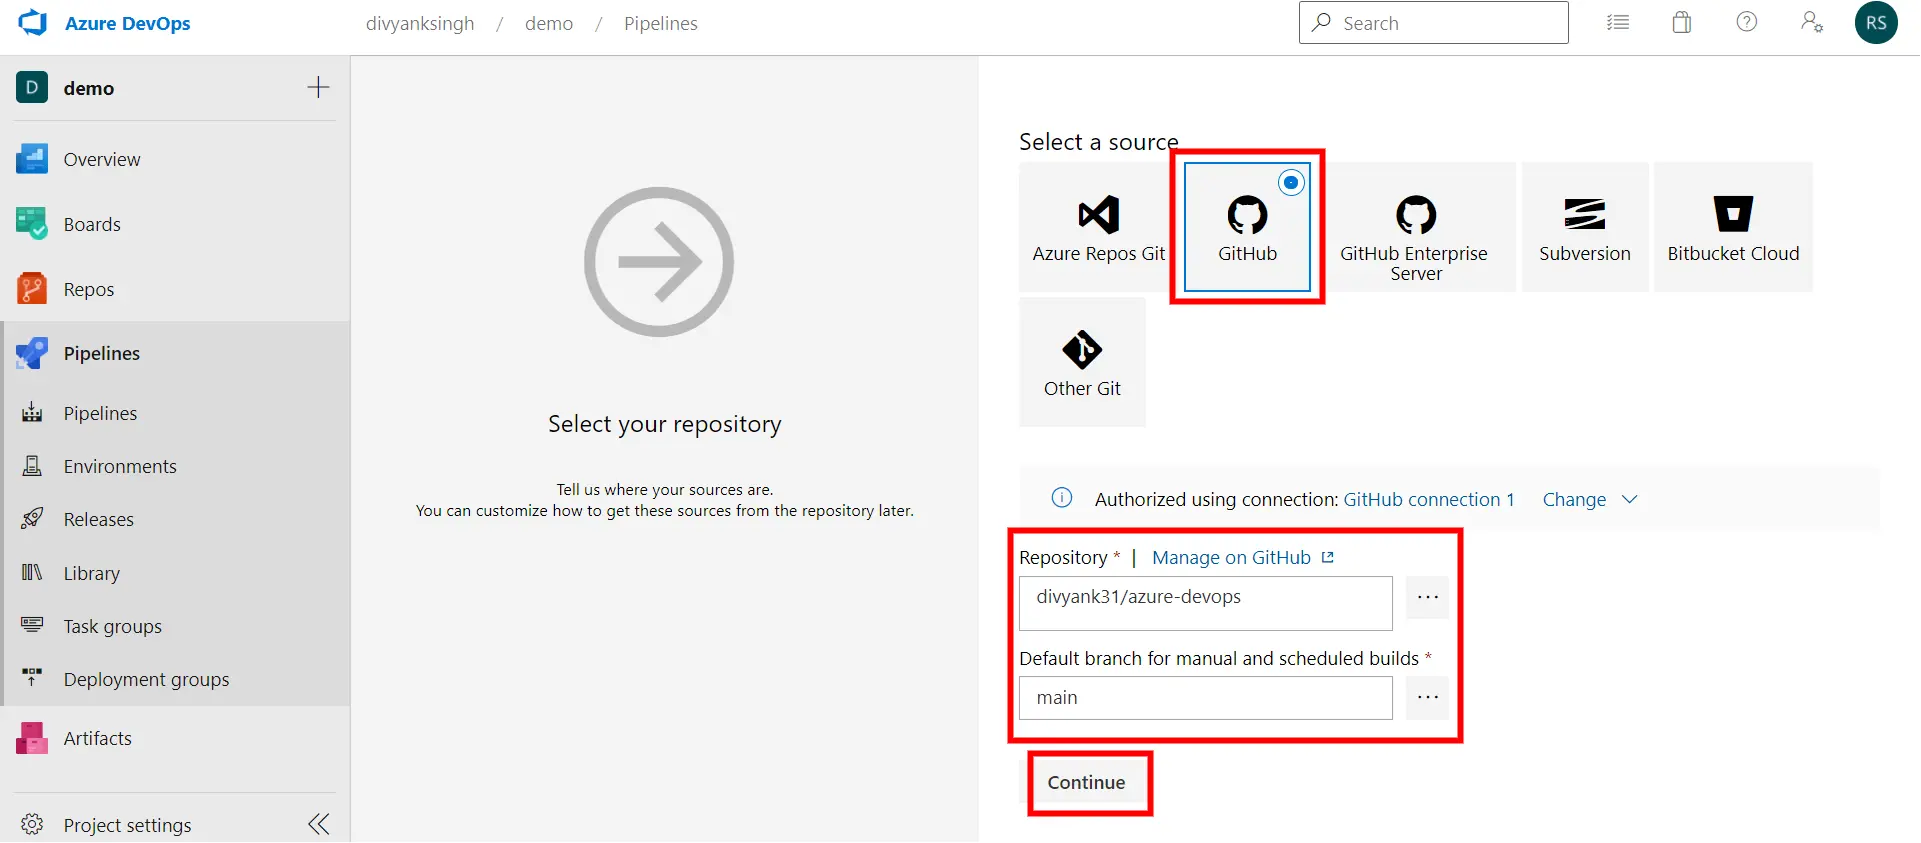
Step 6: Select your choice of versioning control software you use, from the given options. For this demo, we have used "Github".
Step 7: Select the template as Empty Job to begin with. We will create the job as we go.
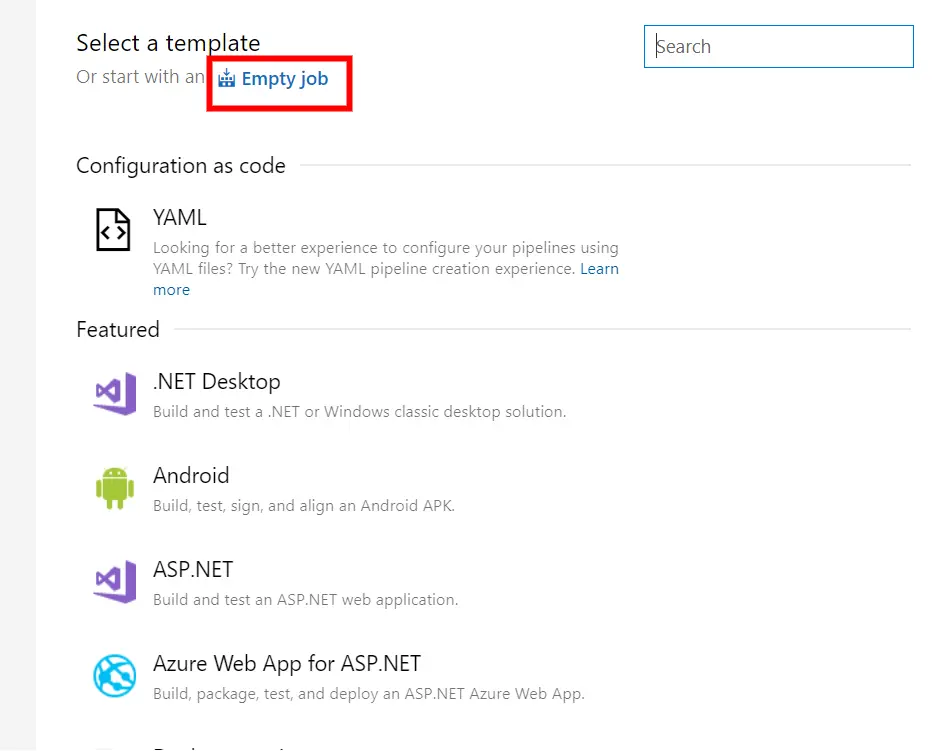
Step 8: Add a new task in the job with the help of + button, and fill the required details.
 For this demo purpose, we have used following tasks:
- Search LambdaTest in the search menu, and select LambdaTest Configuration Setup, Stop Tunnel, and LambdaTest Results from the available tasks.
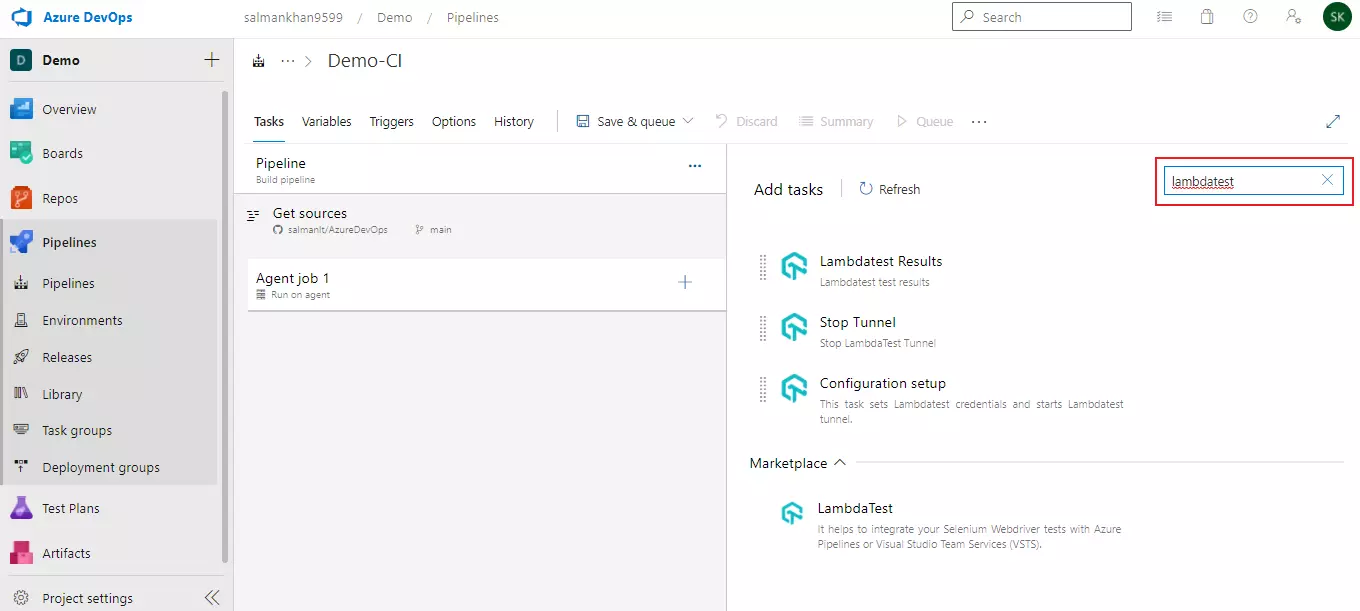
- Similarly, add Command Line Script and Python Script in to this job.
- Once added, arrange the tasks in below shown order:
Step 9: Click on LambdaTest Configuration Setup and then click on New.
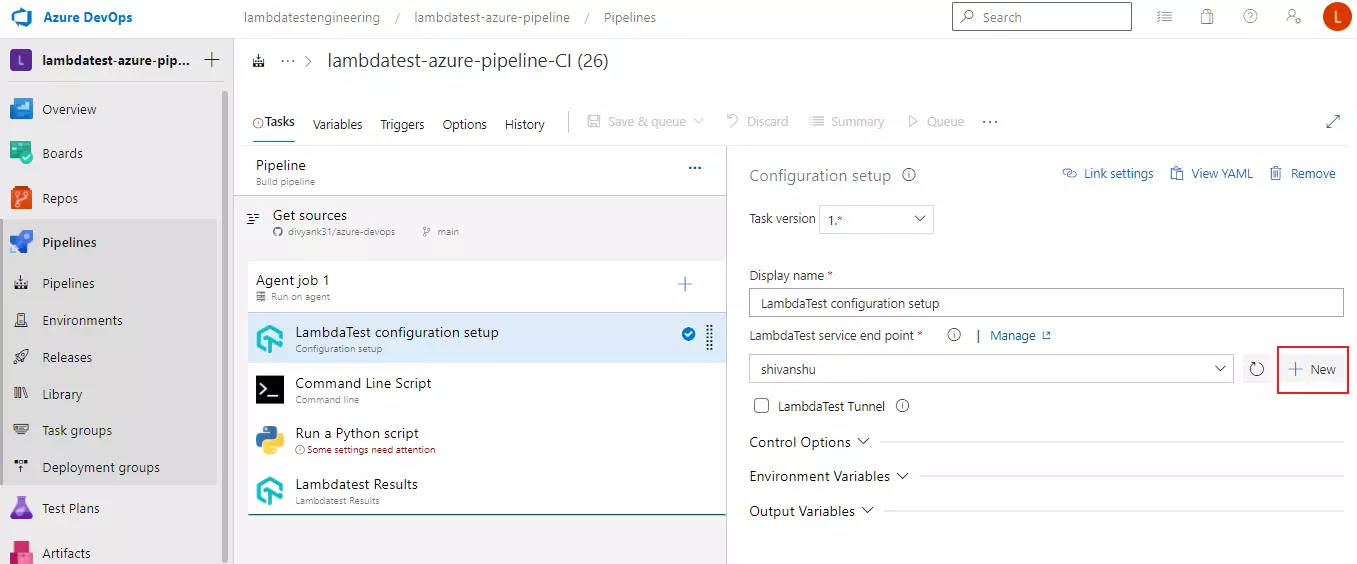
Step 10: Fill the required details. For this demo purpose, we have used following details:
-
Select Basic Authentication mode of integration from the given authentication methods.
-
Enter your LambdaTest username as "Username" and LambdaTest Access Key as "Password" and then click on verify button.
-
Enter the desired Service connection name in the Details section and then click Verify and Save button.

Note: You can also activate the LambdaTest Tunnel for localhost testing. Just select Service connection from the drop down list and Select LambdaTest Tunnel.
Step 11: Now we need to install Selenium in our job to perform the automation tests. Click on Command Line Script and enter the command pip install selenium to install Selenium:
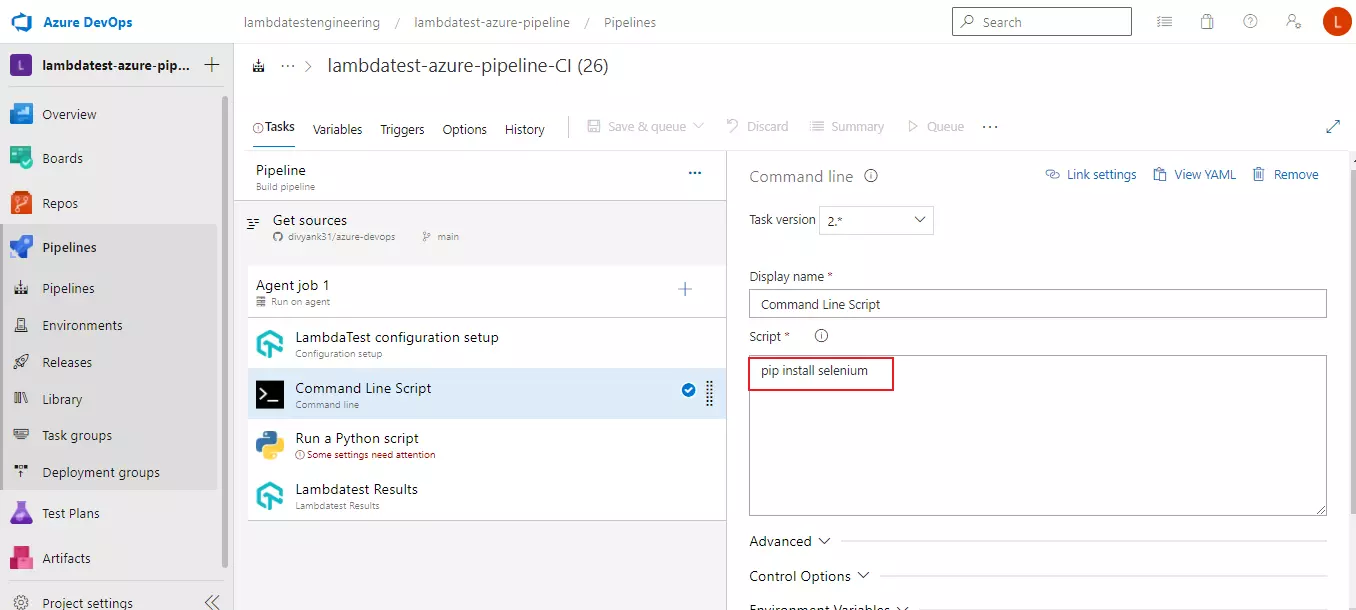
Step 12: Select Run a Python script as we have selected Python in the above steps.
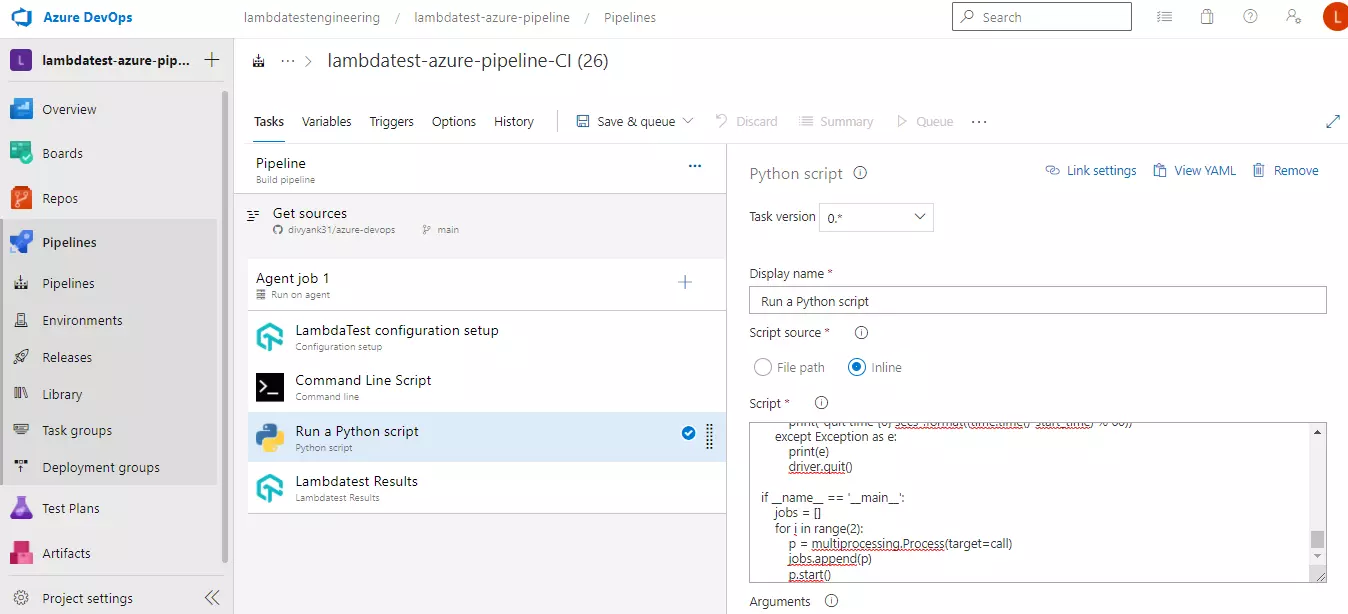
Select your script to execute either from your repository using the "File Path" option, or you can also write the script inline using the "Inline" option. Once the script is ready, click on "OK"
Note: In order to run the tests, you will need to get your build name from the environment variables. Shown below is the syntax of getting the build name from the environment variables for Python test scripts.
build_name = os.getenv("LT_BUILD_NAME")
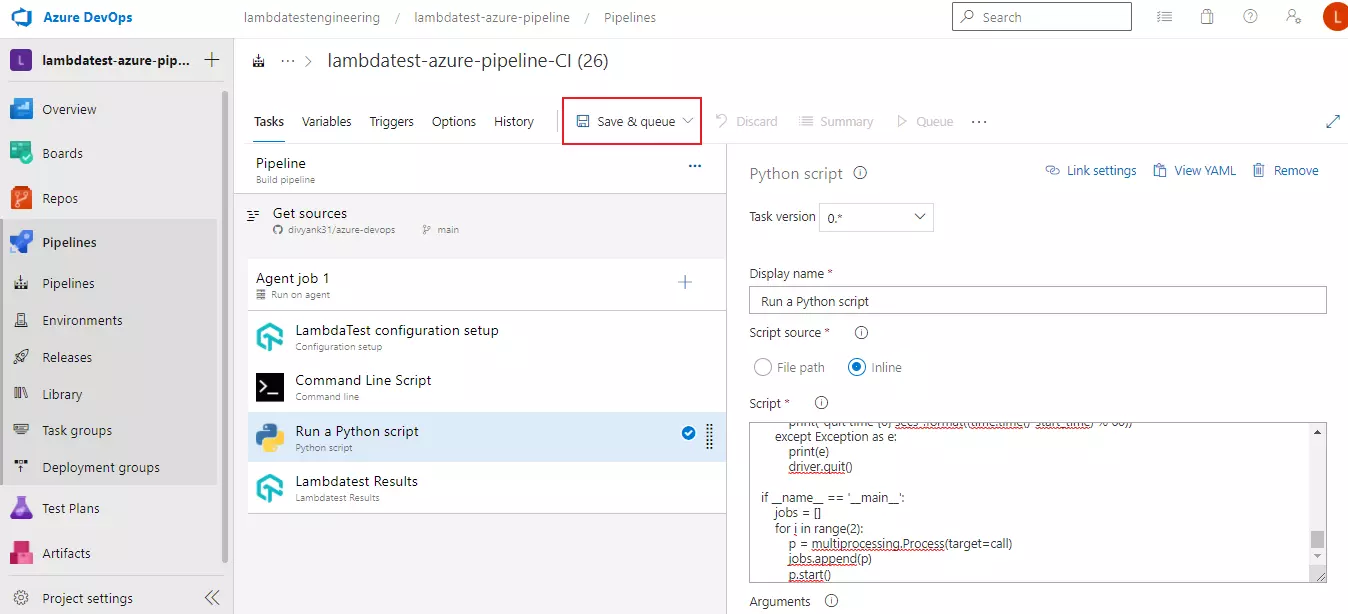
Step 13: Now we have imported everything to run our tests. Click on "Save & Queue" to run your test.
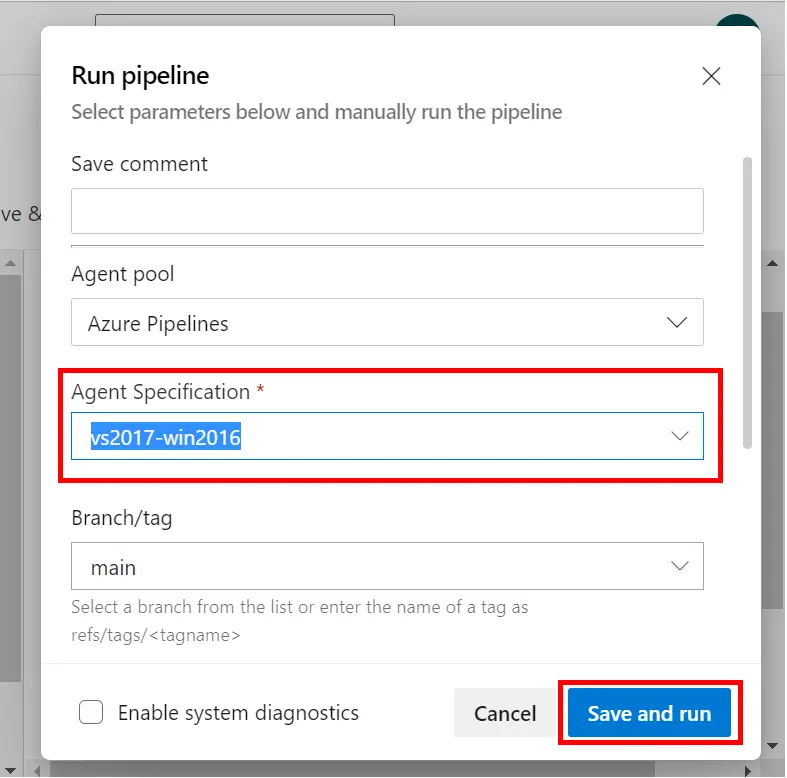
Step 14: Select OS from Agent Specification as shown below and click "Save and Run".
Step 15: The pipeline will get activated and you can see your job queued to be executed.
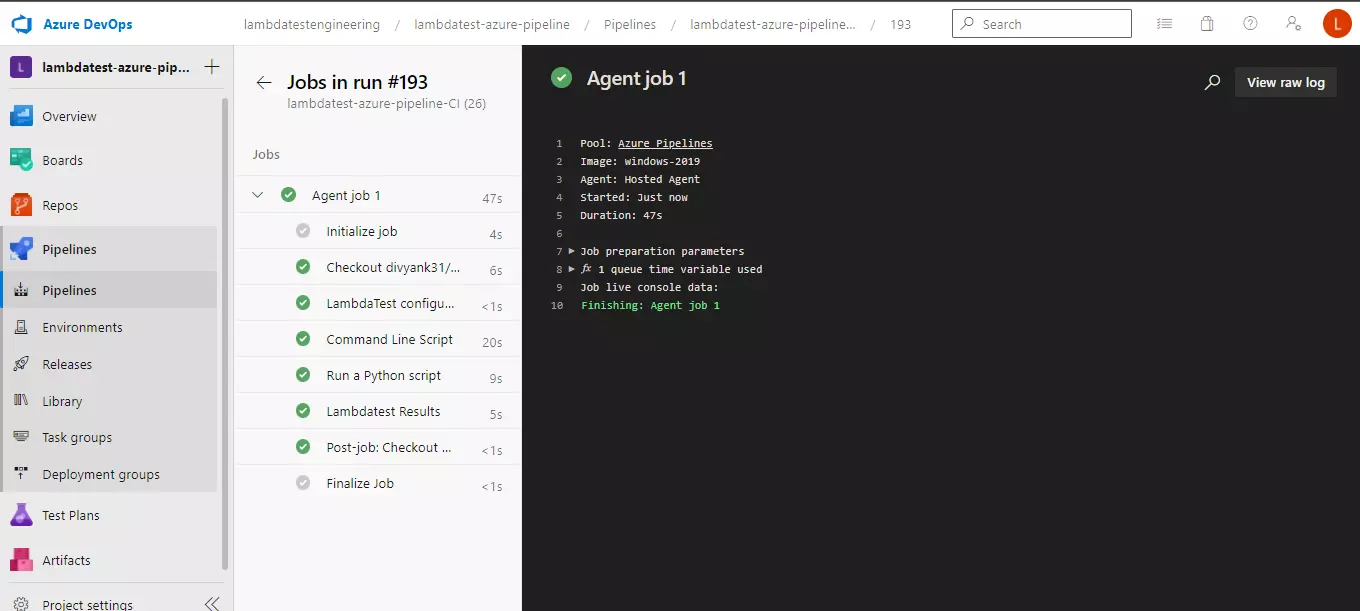
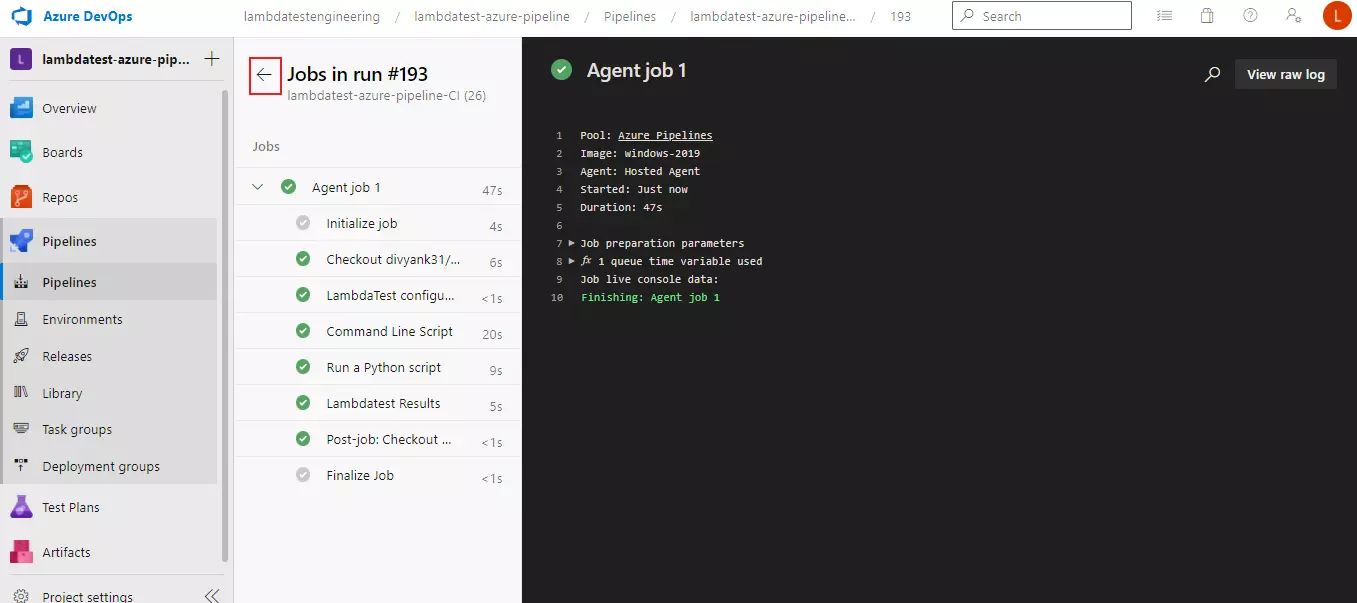
Step 16: To view the test results, click on the Return option.
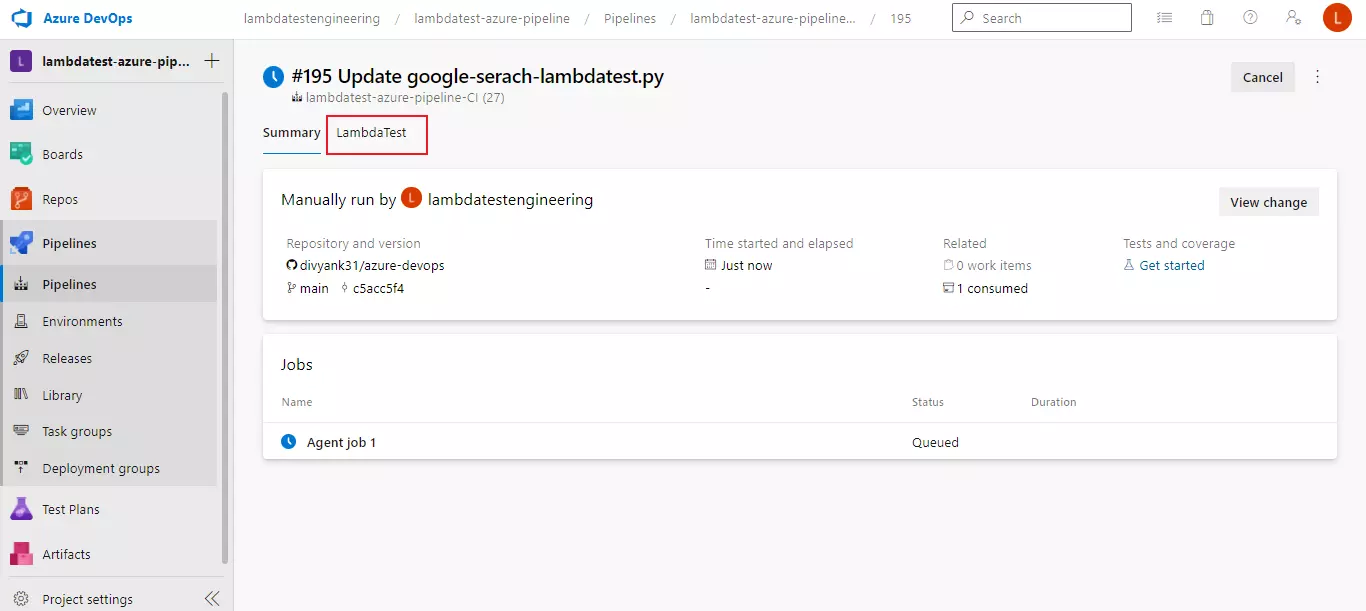
Step 17: Click the LambdaTest tab.
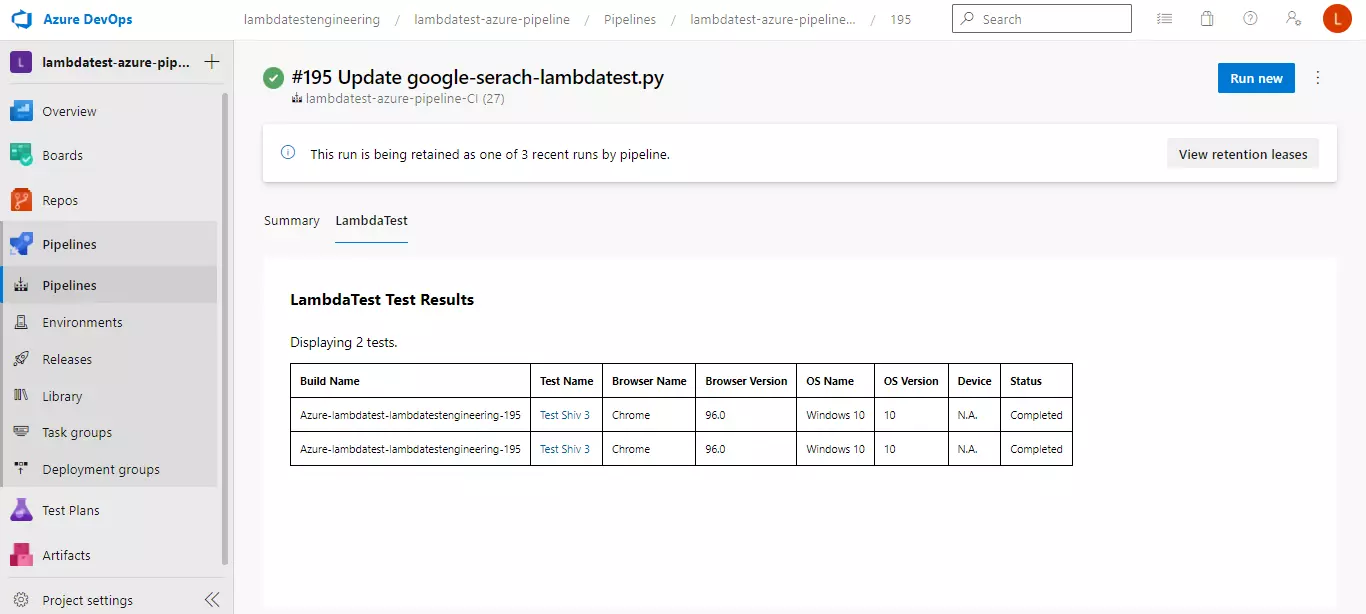
You'll find your executed tests results.
How To Find Test Execution Results On LambdaTest
The output of the tests executed above can be seen in your authenticated LambdaTest account as well. Follow the below steps to see your test execution result:
Step 1: Login into your LambdaTest account using the credentials used above in the Azure Pipelines.
Step 2: Go to "Automations" tab from your left menu.
Step 3: Here you can see the executed tests along with their builds, details and status, as shown below:
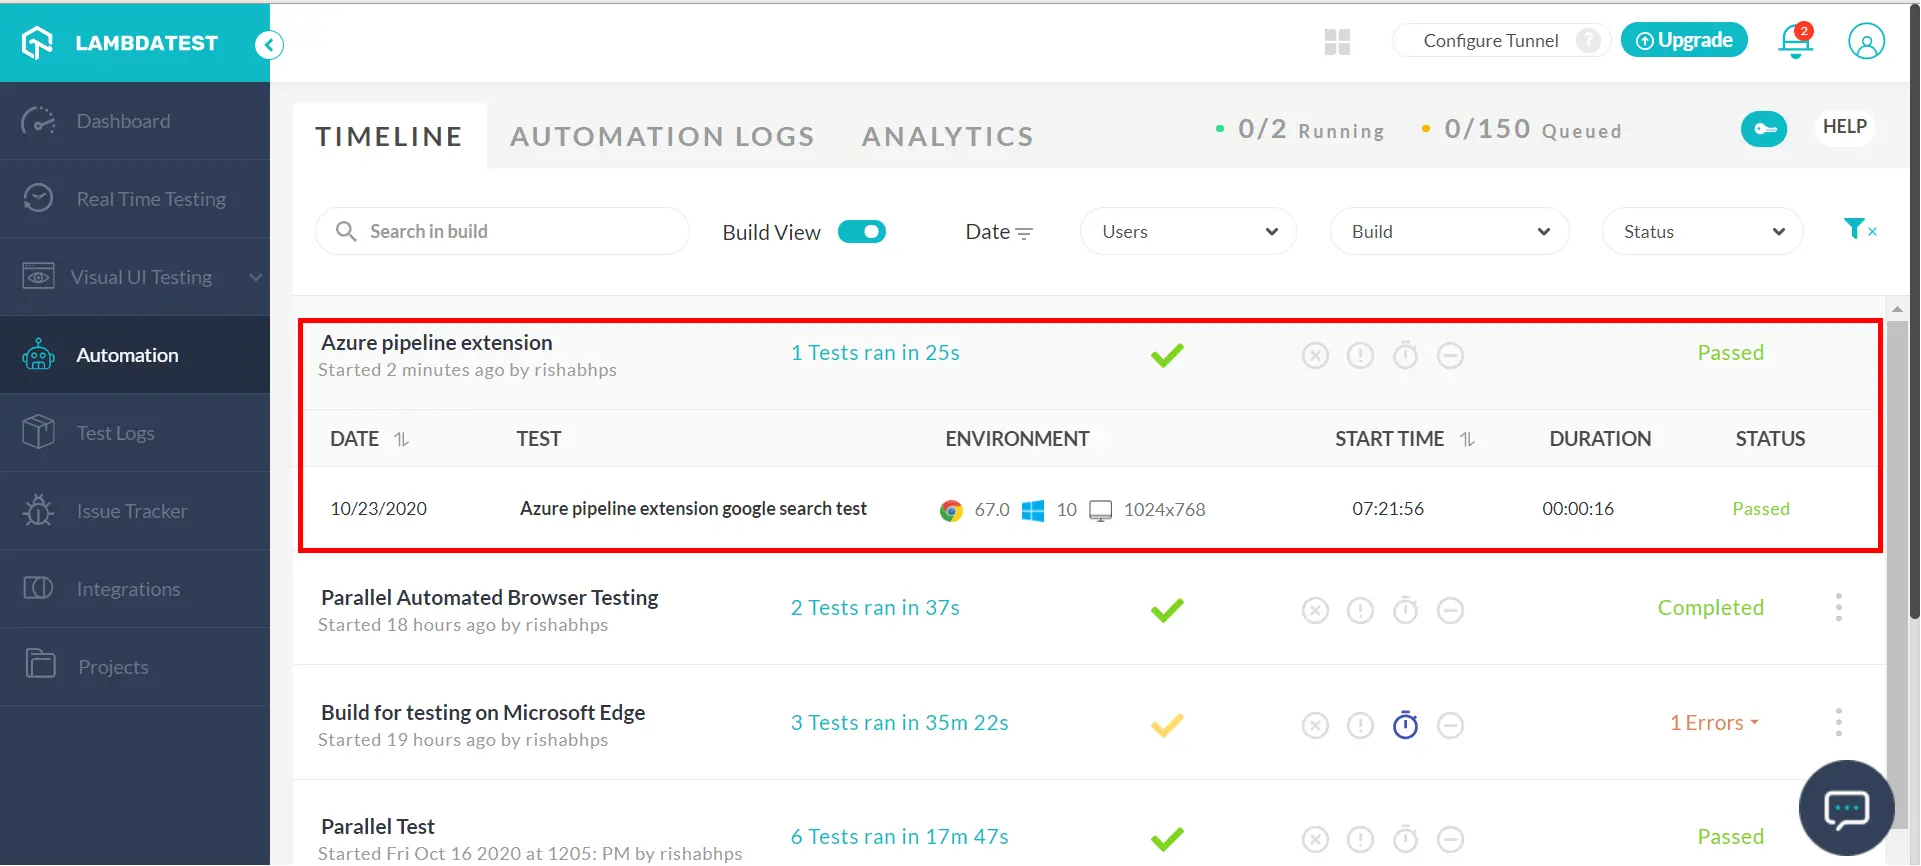
Not only this, but you can also use this automation dashboard to obtain Test logs, Analytics, Mark Bugs, Integrate apps from our diverse app store, fetch build details, and much more. LambdaTest Selenium Automation Grid enables you to perform end-to-end automation tests on a secure, reliable, and scalable Selenium infrastructure. You can perform automated cross-browser testing with Selenium scripts on 3000+ browsers and operating systems environments giving you higher test coverage and at significantly less built times. LambdaTest will help you evaluate how well your web application renders when accessed through a variety of different browsers. You can perform automated cross-browser testing of your locally hosted web pages using LambdaTest Tunnel. You could also run a single test across multiple browser/OS configurations, simultaneously.
LocalHost Testing Using LambdaTest Extension
LambdaTest extension also allows you to perform testing of your localhost project securely with the LambdaTest Tunnel help. The below steps will help you configure the LambdaTest Tunnel using the LambdaTest extension in your Azure Pipelines:
Starting The LambdaTest Tunnel Using LambdaTest Extension
While configuring the LambdaTest Configuration Setup job, as shown above, check the LambdaTest Tunnel checkbox to activate it.
Once you activate it, a LambdaTest Tunnel Options box will appear, which require the modifiers/arguments to configure the tunnel as per requirement. Pass the LambdaTest Tunnel modifiers in JSON format in the options box.
Note: Make sure to use the camel case for passing the tunnel modifiers. For example, use sharedTunnel if you want to use the modifier --shared-tunnel. For our demo purpose, we will be using simple modifiers, such as --tunnel-name and --proxy-port: {"tunnelName":"azure tunnel", "proxyPort":8050}
The LambdaTest Tunnel has been successfully configured now. You can test your locally hosted pages and privately hosted pages at the LambdaTest Platform using LambdaTest Tunnel.
Stopping The LambdaTest Tunnel Using LambaTest Extension
To stop the LambdaTest Tunnel, you need to add the LambdaTest Stop Tunnel task in your job. Once this task is executed, the LambdaTest Tunnel will stop successfully.
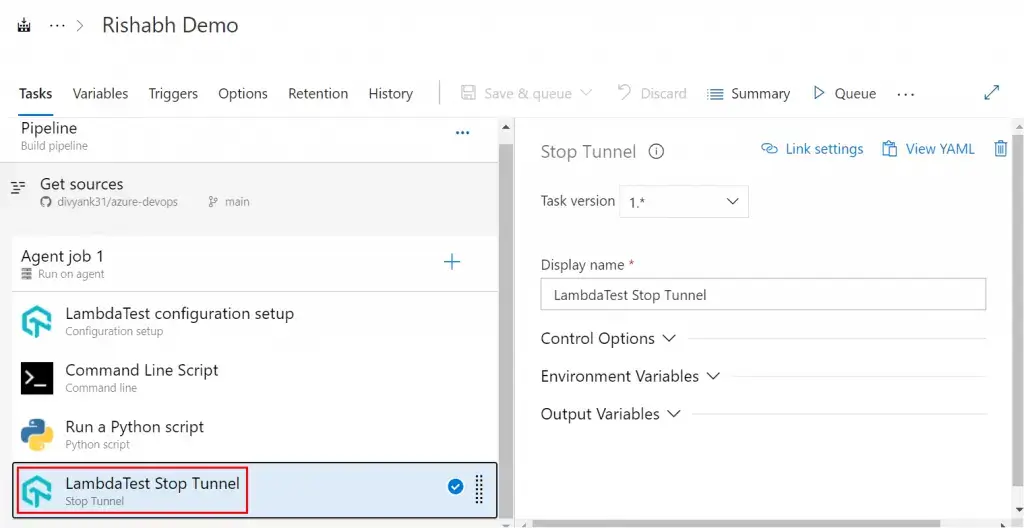
You must keep this task at the end of your all tests, to let your tests execute successfully before stopping the LambdaTest Tunnel.
To setup your azure pipeline using LambdaTest Azure Pipeline Extension, you can refer to the below example:
resources:
  repositories:
  - repository: self
    type: git
    ref: refs/heads/main
jobs:
- job: Job_1
  displayName: Agent job 1
  pool:
    vmImage: windows-2019
  steps:
  - checkout: self
    clean: true
    fetchTags: false
  - task: Lambdatest.lambda-azure-pipeline-extention.configuration-task.configuration@1
    displayName: LambdaTest configuration setup
    inputs:
      connection: 'connect endpoint'  // provide your connection name
      isTunnelActivate: true
      isAppAutomate: false // set true if you want to run your app automate test scripts

  - task: PythonScript@0
    displayName: Run a Python script
    inputs:
      scriptSource: inline
      script: >-
        print('Hello world') // provide your python script or command to run your test scripts

  - task: Lambdatest.lambda-azure-pipeline-extention.stopLambdaTunnel-task.stoptunnel@1
    displayName: LambdaTest Stop Tunnel
  - task: Lambdatest.lambda-azure-pipeline-extention.showResults-task.LambdatestResults@1
    displayName: Lambdatest Results
...
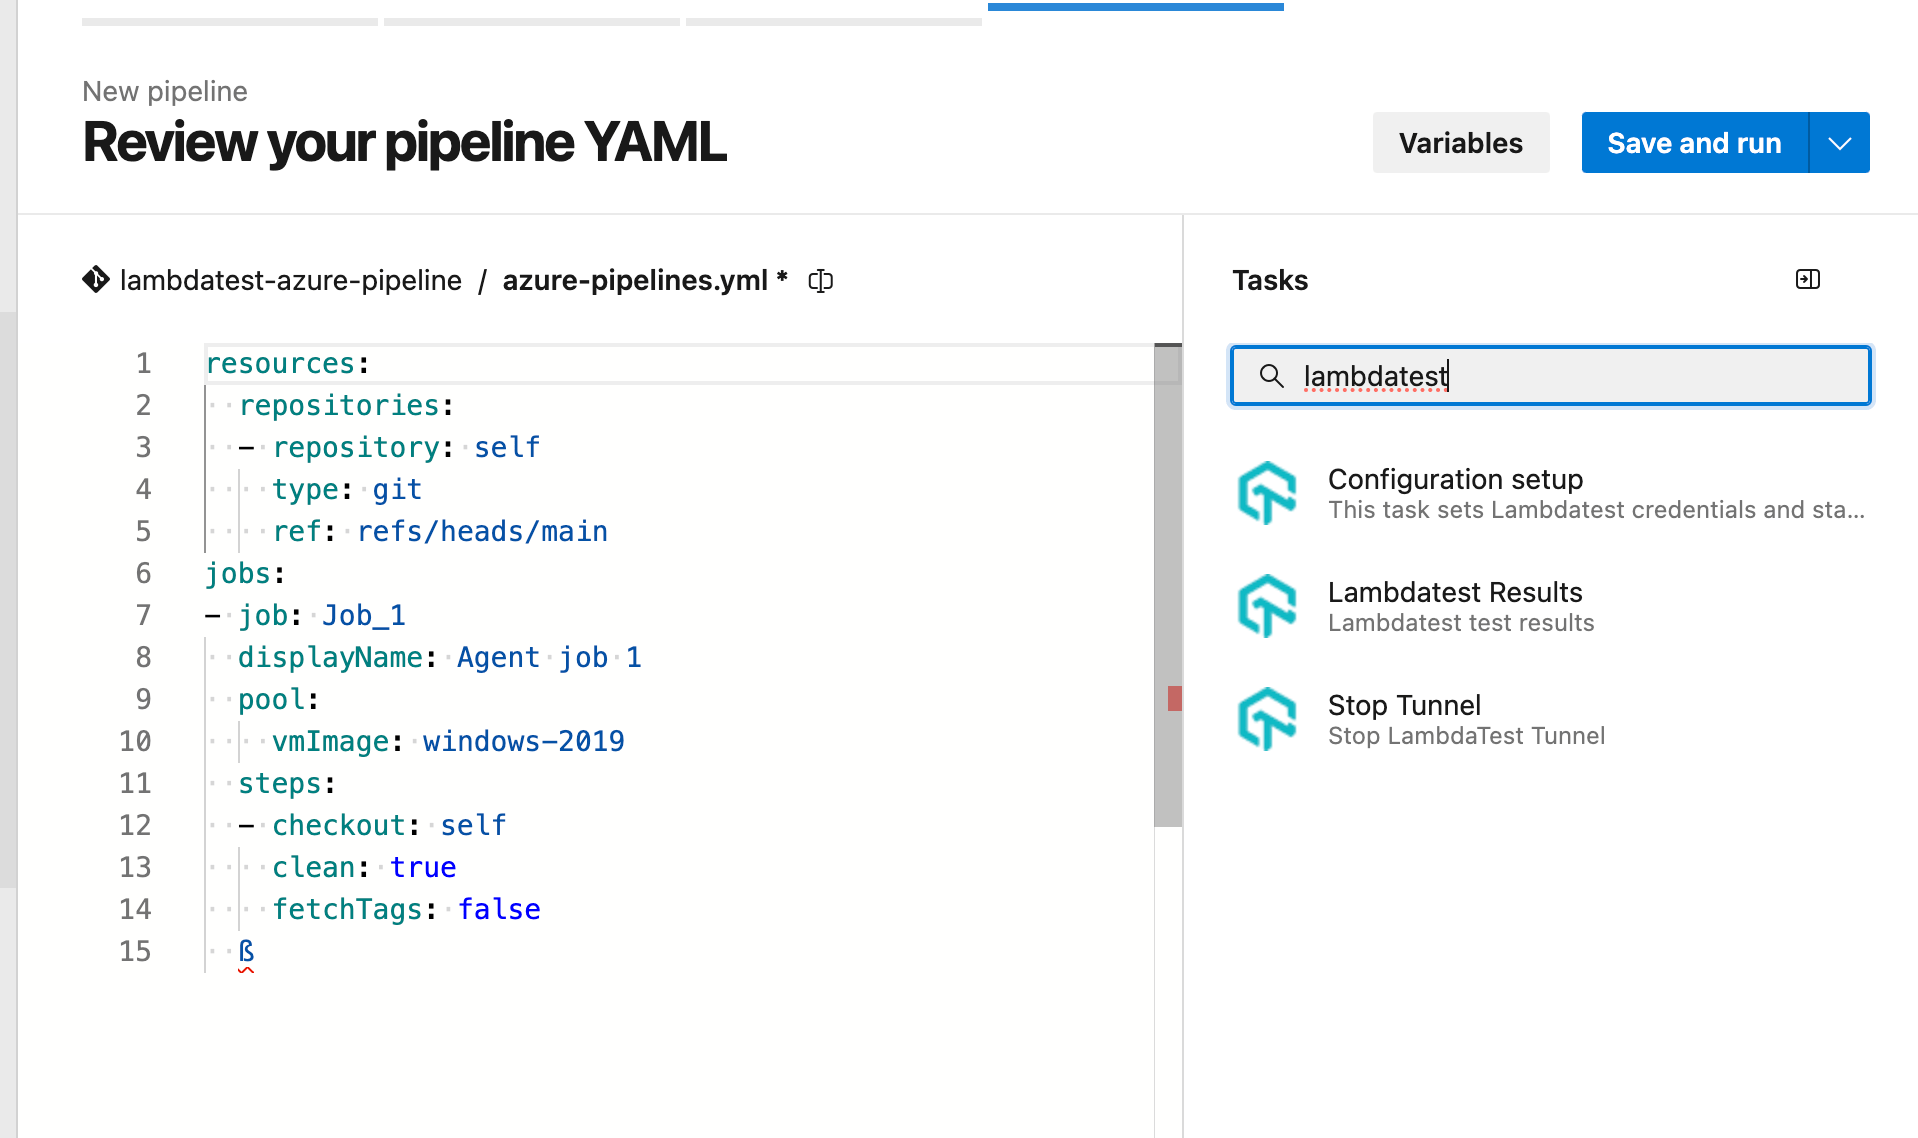
Also you may use the YAMl assistant to add your tasks in the pipeline YAML file
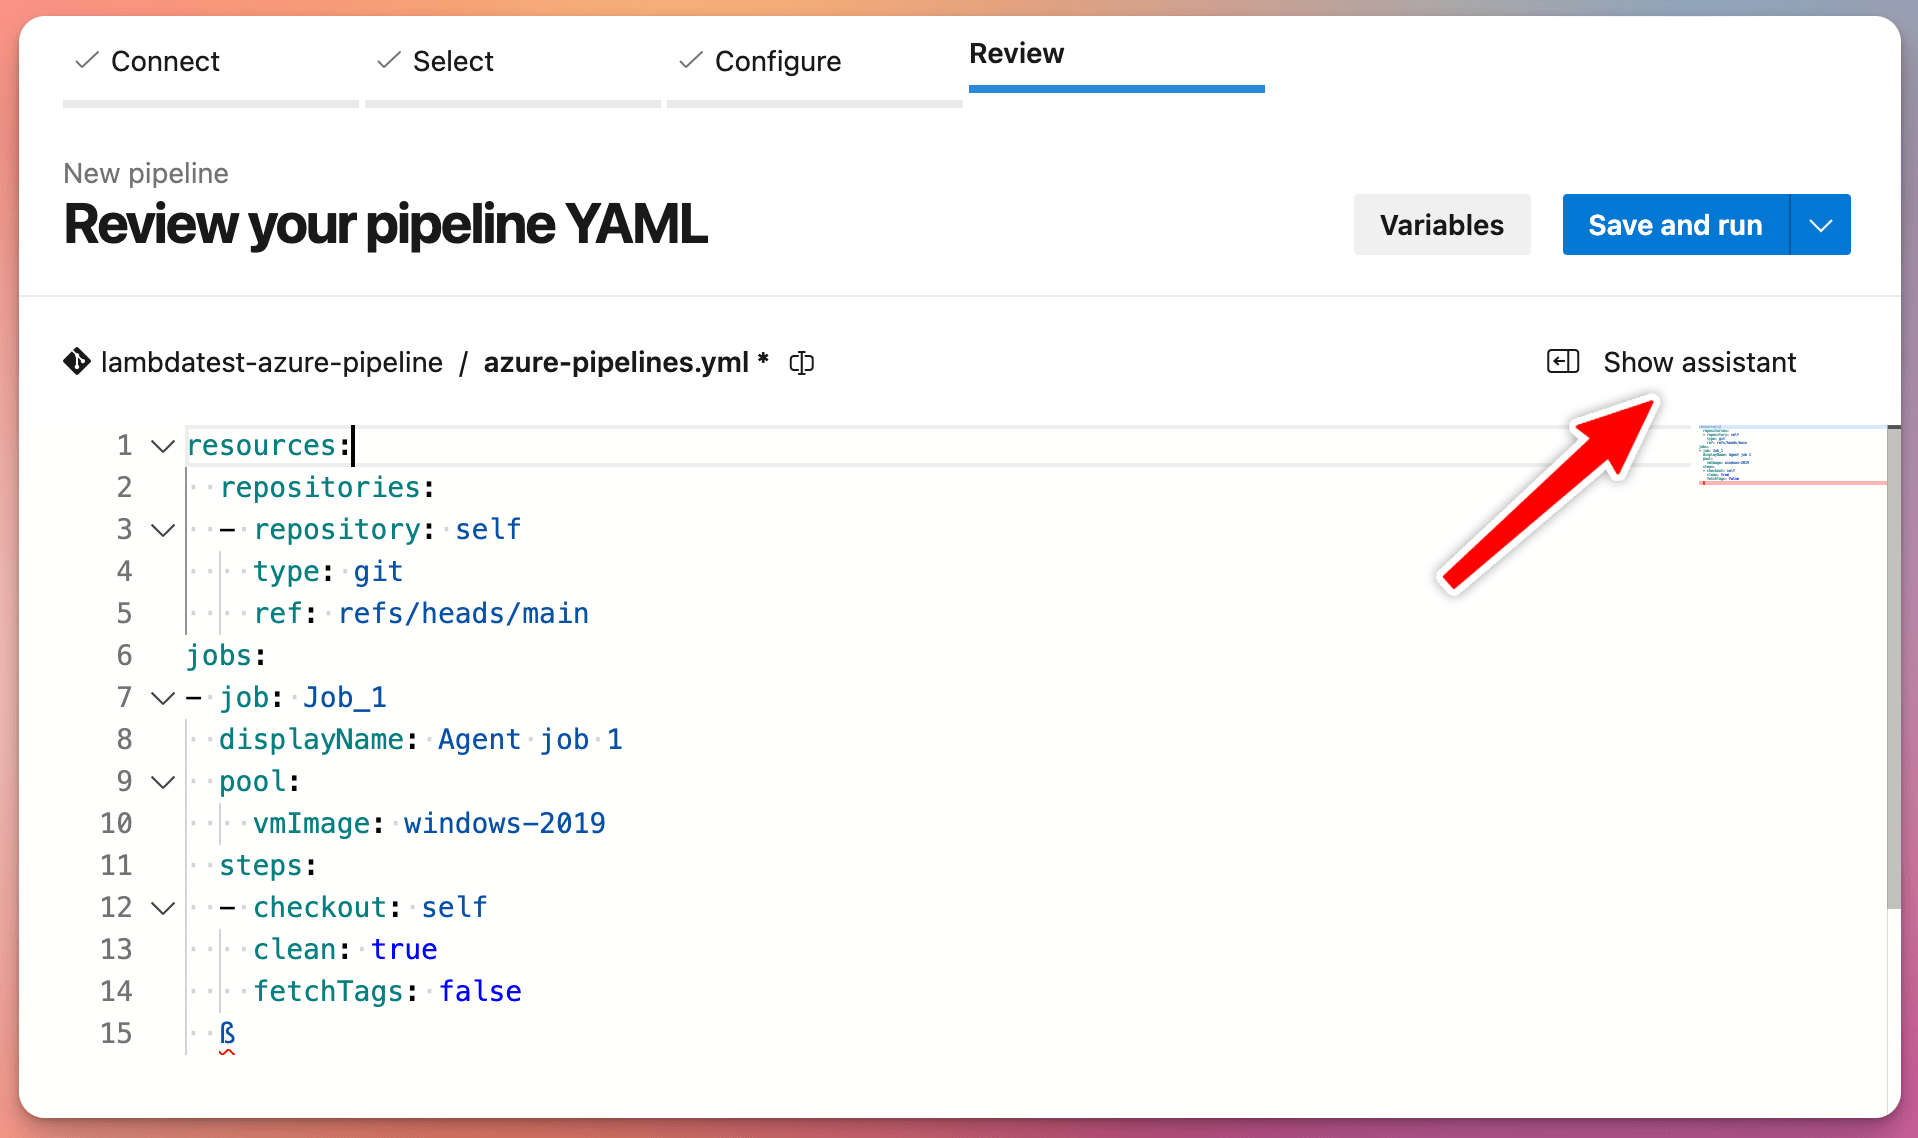
Click on the show assistant button and search for lambdatest extension tasks and add them in you pipeline YAML.
That was all you need to know for integrating LambdaTest Extension with Azure Pipelines. Increase your productivity with our integrations. If you still have any questions for us, please feel free to let us know. Our experts are always available on chat to help you out with any roadblock regarding our product. Happy testing! :)
