Selenium Testing With Codefresh CI And LambdaTest
Codefresh is a cloud-native continuous integration and delivery platform that enables teams to quickly and efficiently develop, deploy, and manage cloud-native applications.
Teams can quickly and easily build, test, and deploy their applications on any cloud platform, including Kubernetes, Docker, and AWS. Our intuitive, easy-to-use UI helps streamline the development process.
LambdaTest now integrates with Codeship to boost your go-to-market delivery. Perform automated cross browser testing with LambdaTest to ensure your development code renders seamlessly through an online Selenium grid providing 3000+ real browsers running through machines on the cloud. Perform automation testing in parallel with LambdaTest’s Selenium grid to trim down your test cycles drastically.
Prerequisites
- Signing details of Codefresh CI
- A GitHub repository. Here is our sample GitHub repository for Python Selenium Sample.
- LambdaTest Authentication Credentials
Be aware of your LambdaTest authentication credentials i.e. your LambdaTest username, access key and HubURL. You need to set them up as your environment variables. You can retrieve them from your LambdaTest automation dashboard by clicking on the key icon near the help button.
Integrating Codefresh CI With LambdaTest
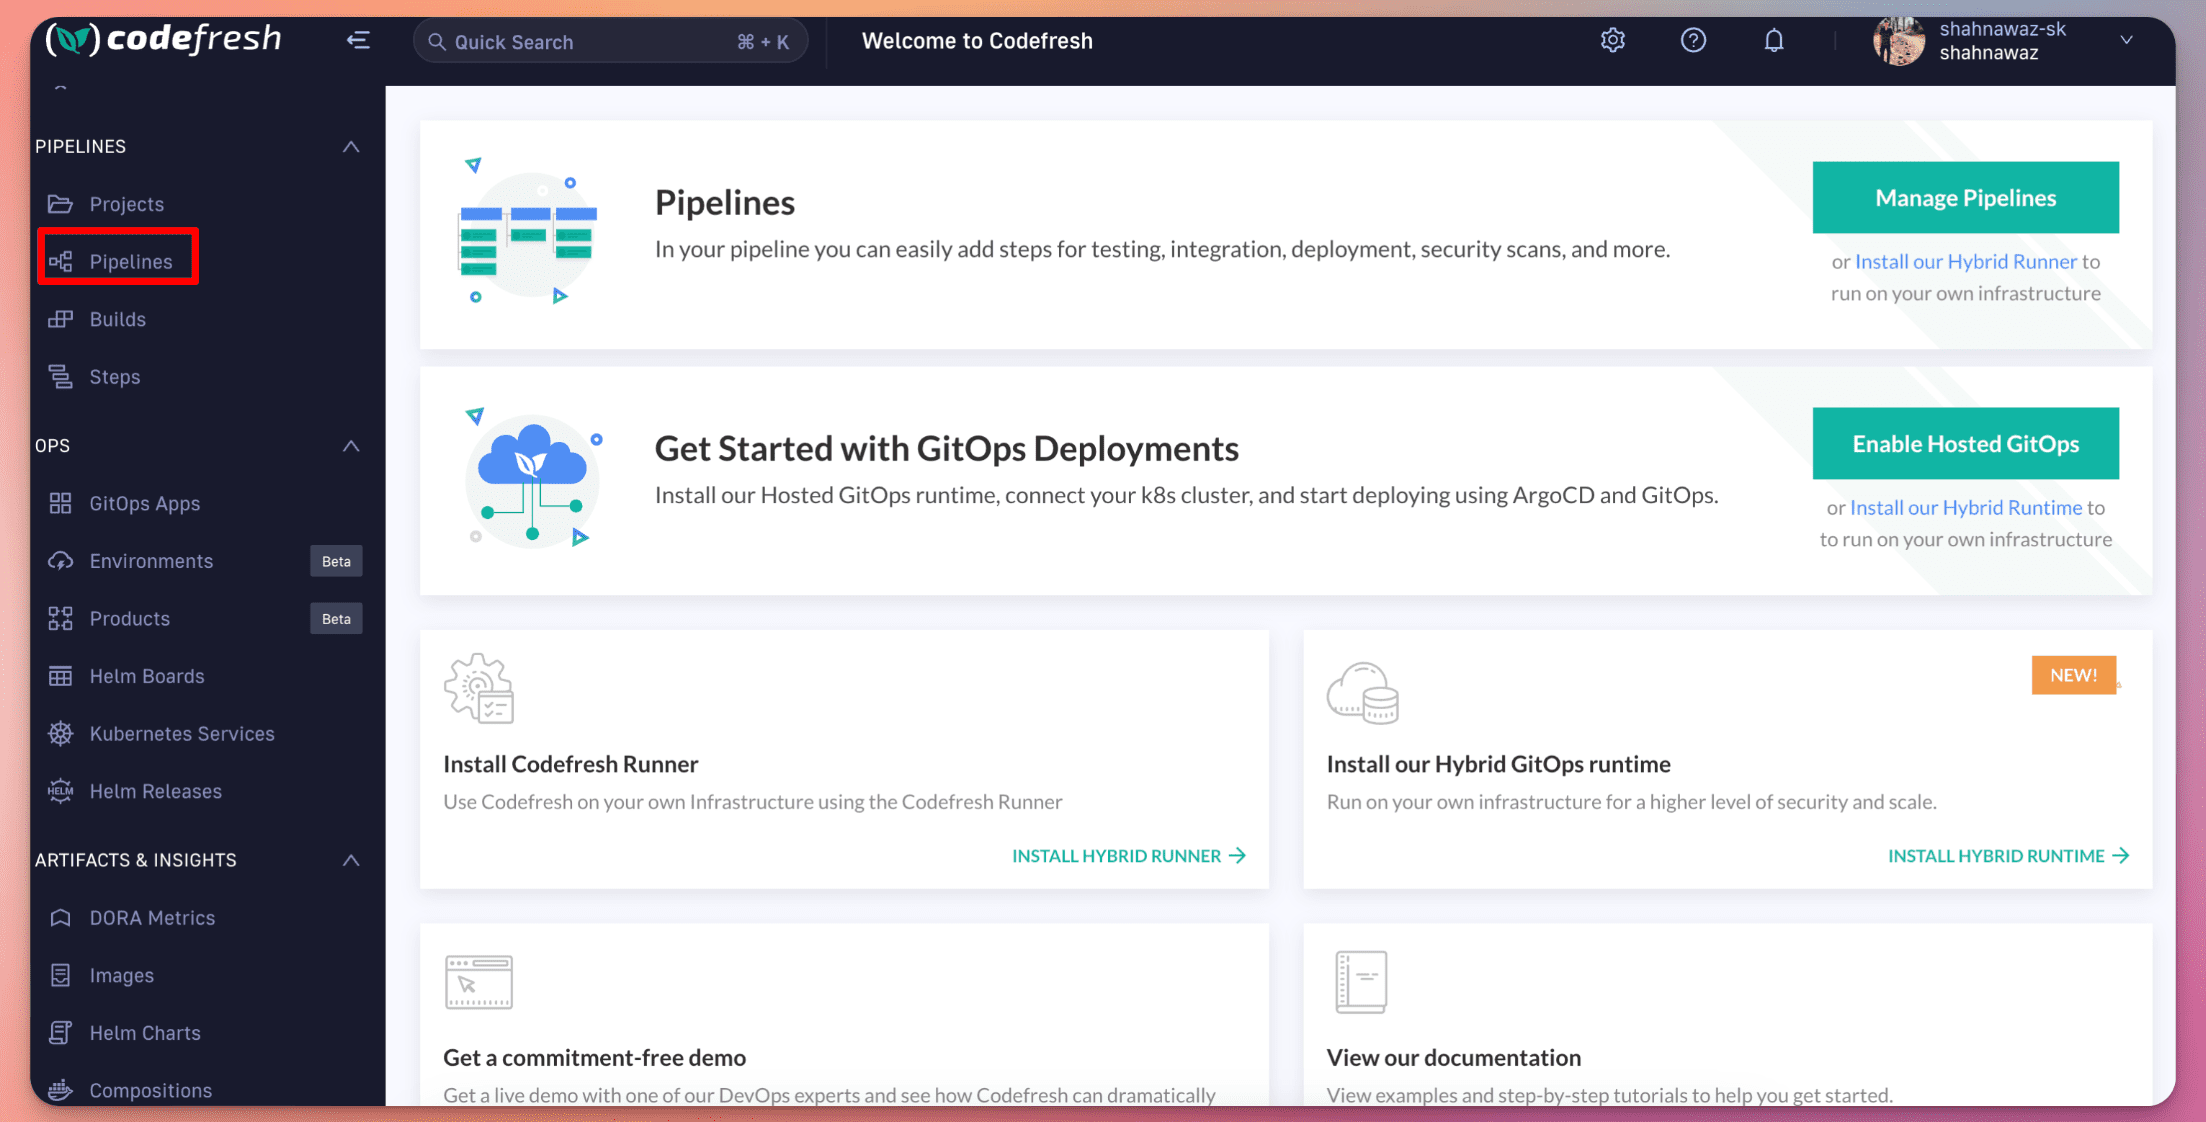
Step 1: Sign-in into your codefresh ci account , and create a new pipeline
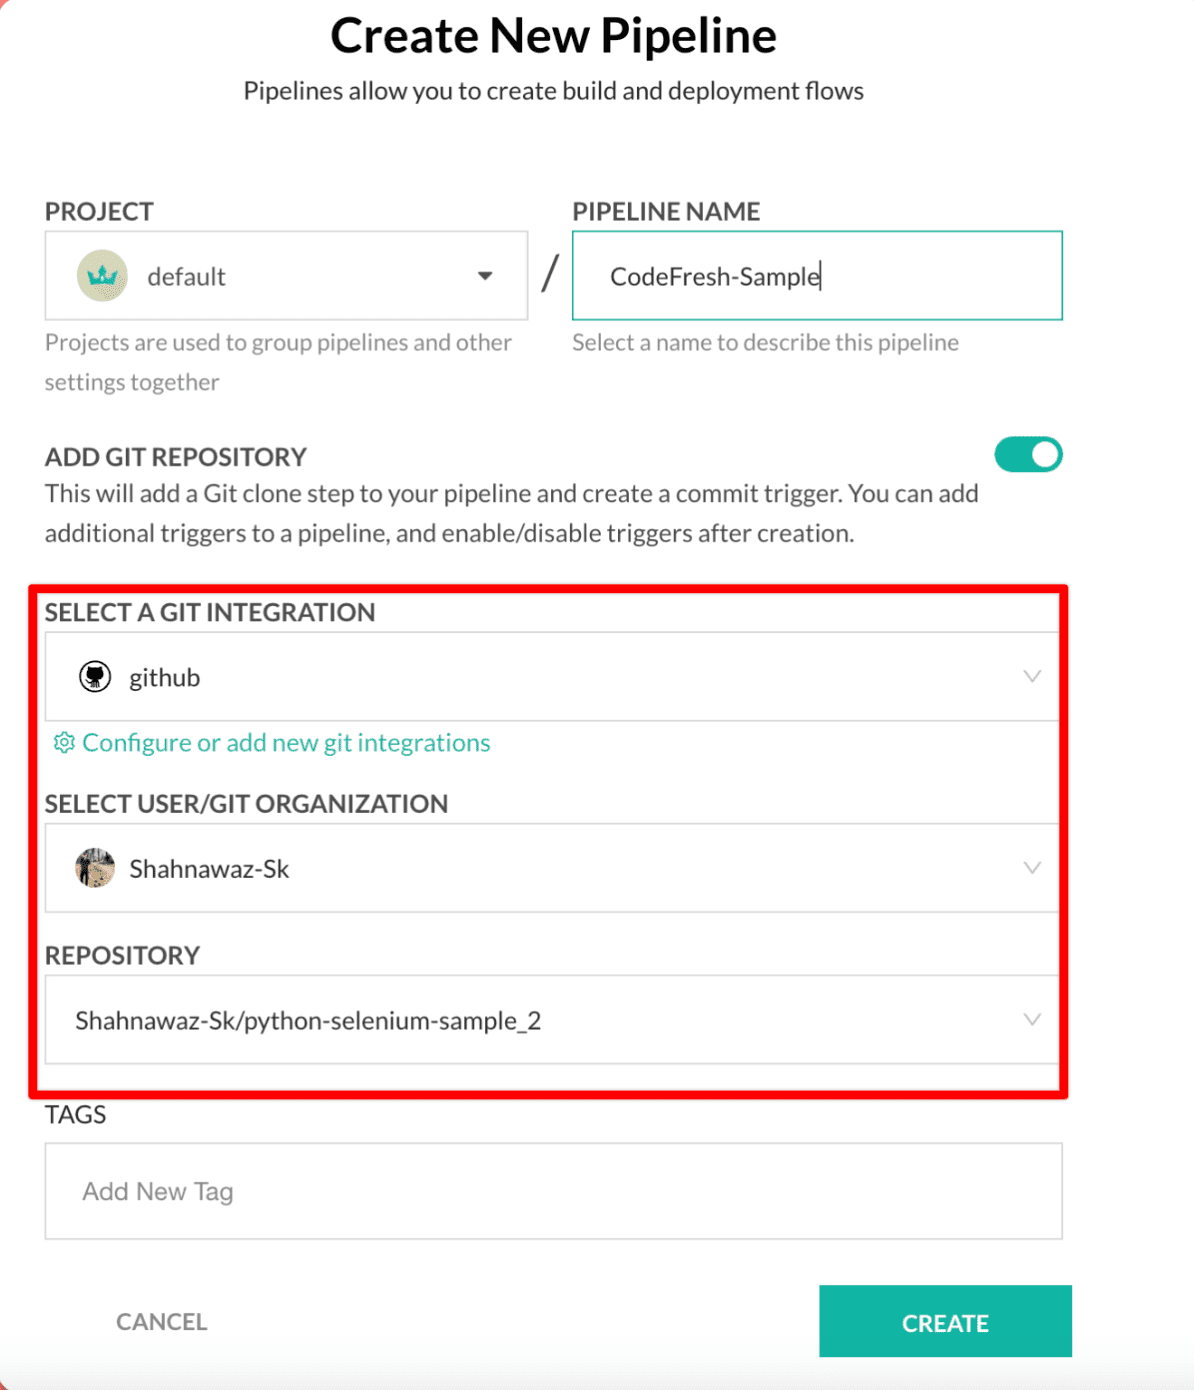
Step 2: Select your user/git organisation, select repository and then click create.
Step 3: After the creation of pipeline, you must see the workflow YAML got generated, with your selected github repository.
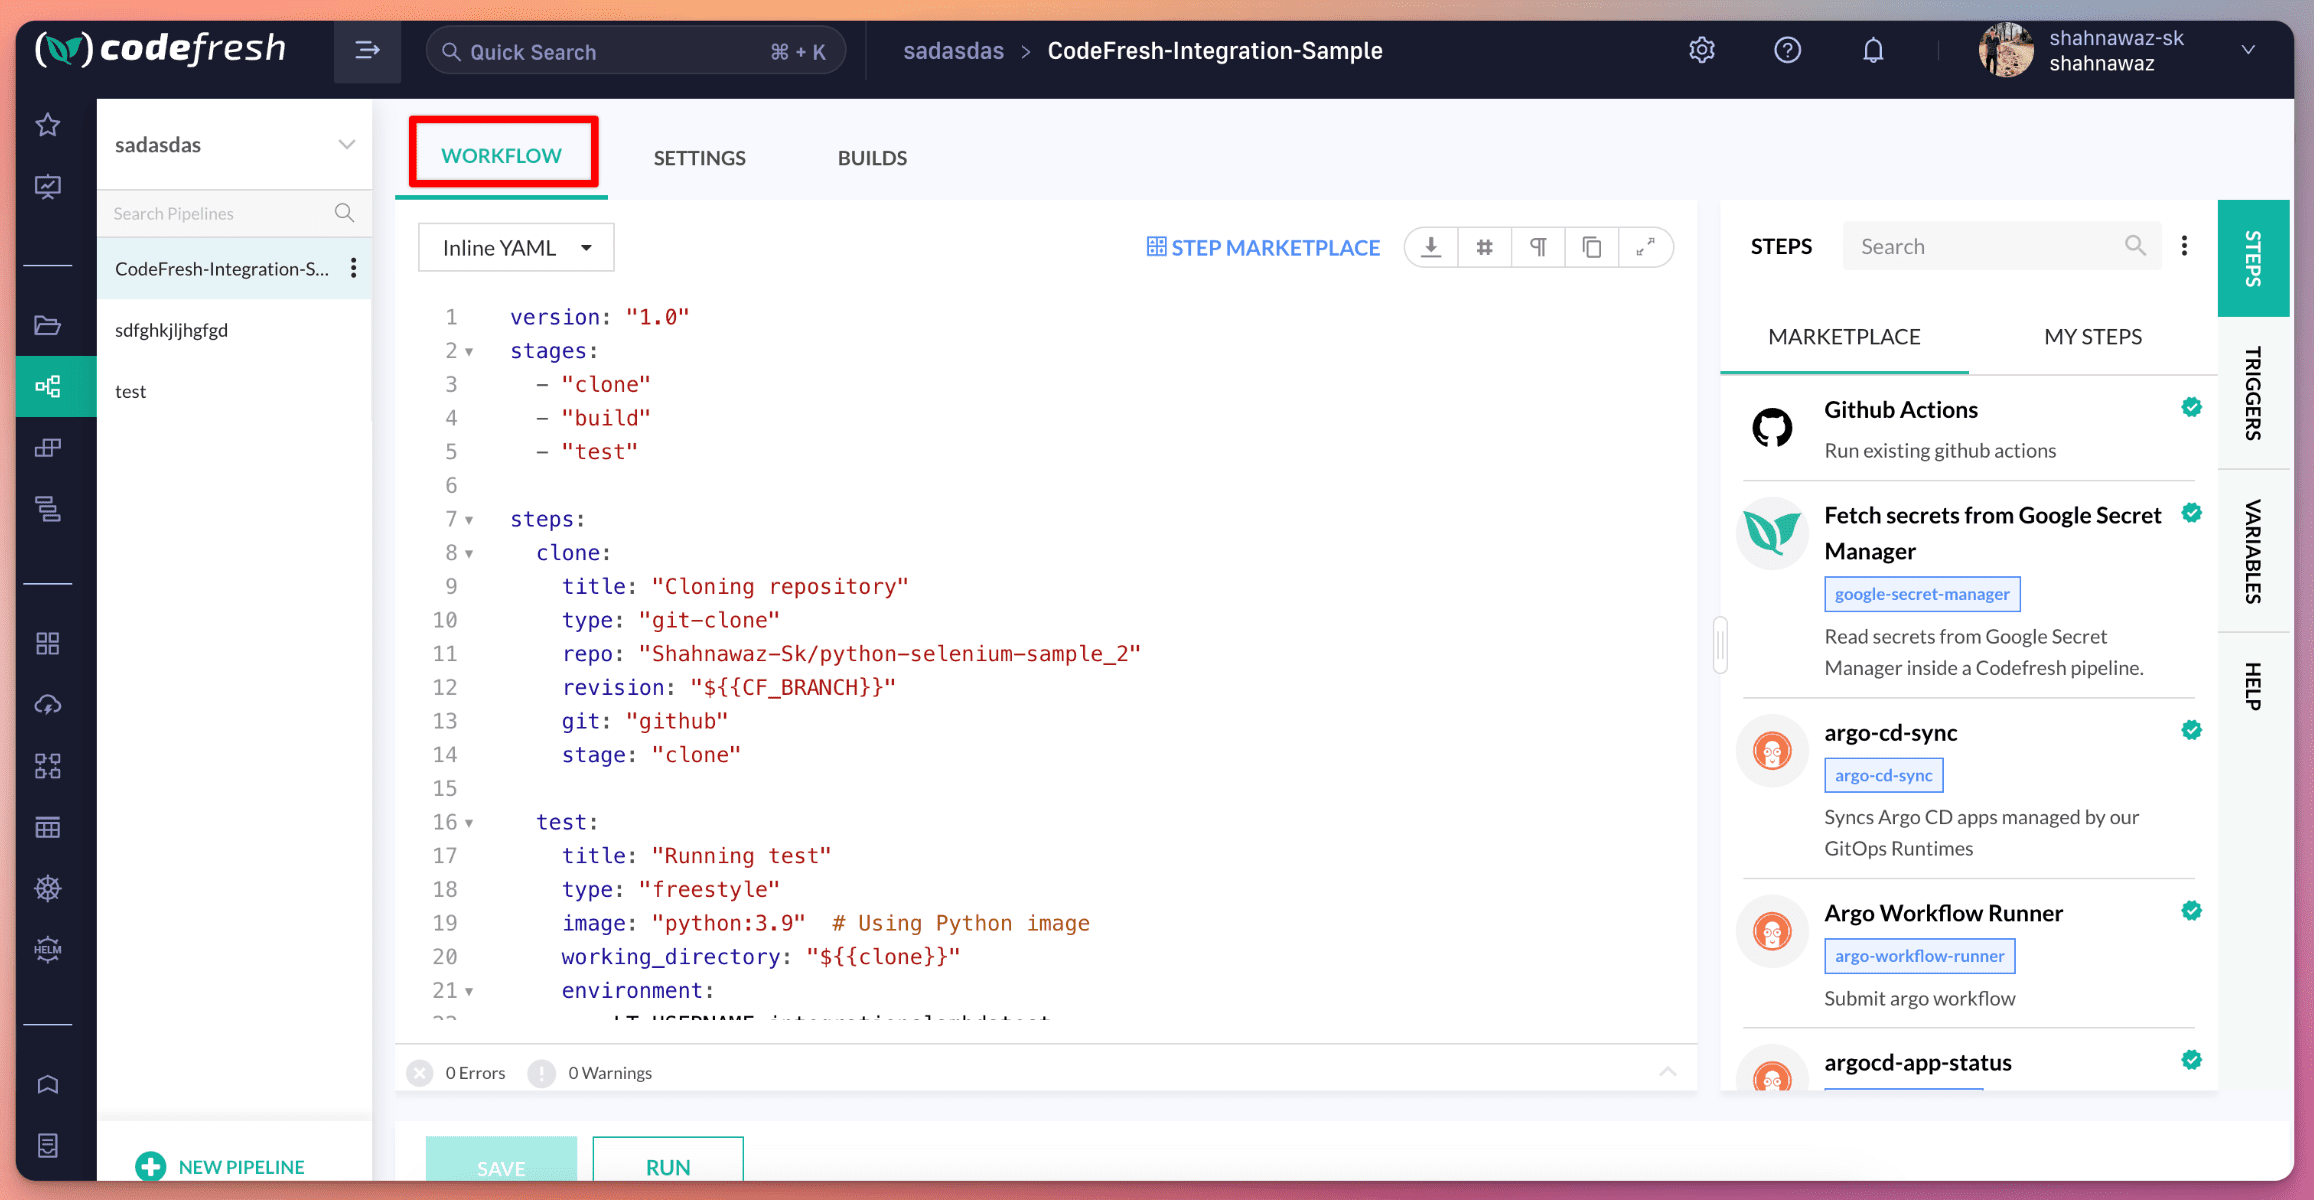
Step 4: You will have option to choose your runtime image as per your requirements, or test scripts.
- Choose your runtime image
- Add your environment variables which needs to be passed to your testscripts.
- Add your execution command in the commands option of your pipeline YAML.
- As the selected repository has scripts which is made to run tests on LambdaTest Selenium Grid, you would need
set the env variables such as
LT_USERNAMEandLT_ACCESS_KEY - Then to execute the pipeline, click the
RUNbutton.
You may take reference from this YAML to run your own test project/scripts
version: "1.0"
stages:
  - "clone"
  - "build"
  - "test"

steps:
  clone:
    title: "Cloning repository"
    type: "git-clone"
    repo: "xyz/python-selenium-sample_2"
    revision: "${{CF_BRANCH}}"
    git: "github"
    stage: "clone"

  test:
    title: "Running test"
    type: "freestyle"
    image: "python:3.9"  # Using Python image
    working_directory: "${{clone}}"
    environment:
      - LT_USERNAME=xyz
      - LT_ACCESS_KEY=xyz
    commands:
      - "pip3 install selenium"
      - "python3 codefresh-sample.py"
    stage: "test"
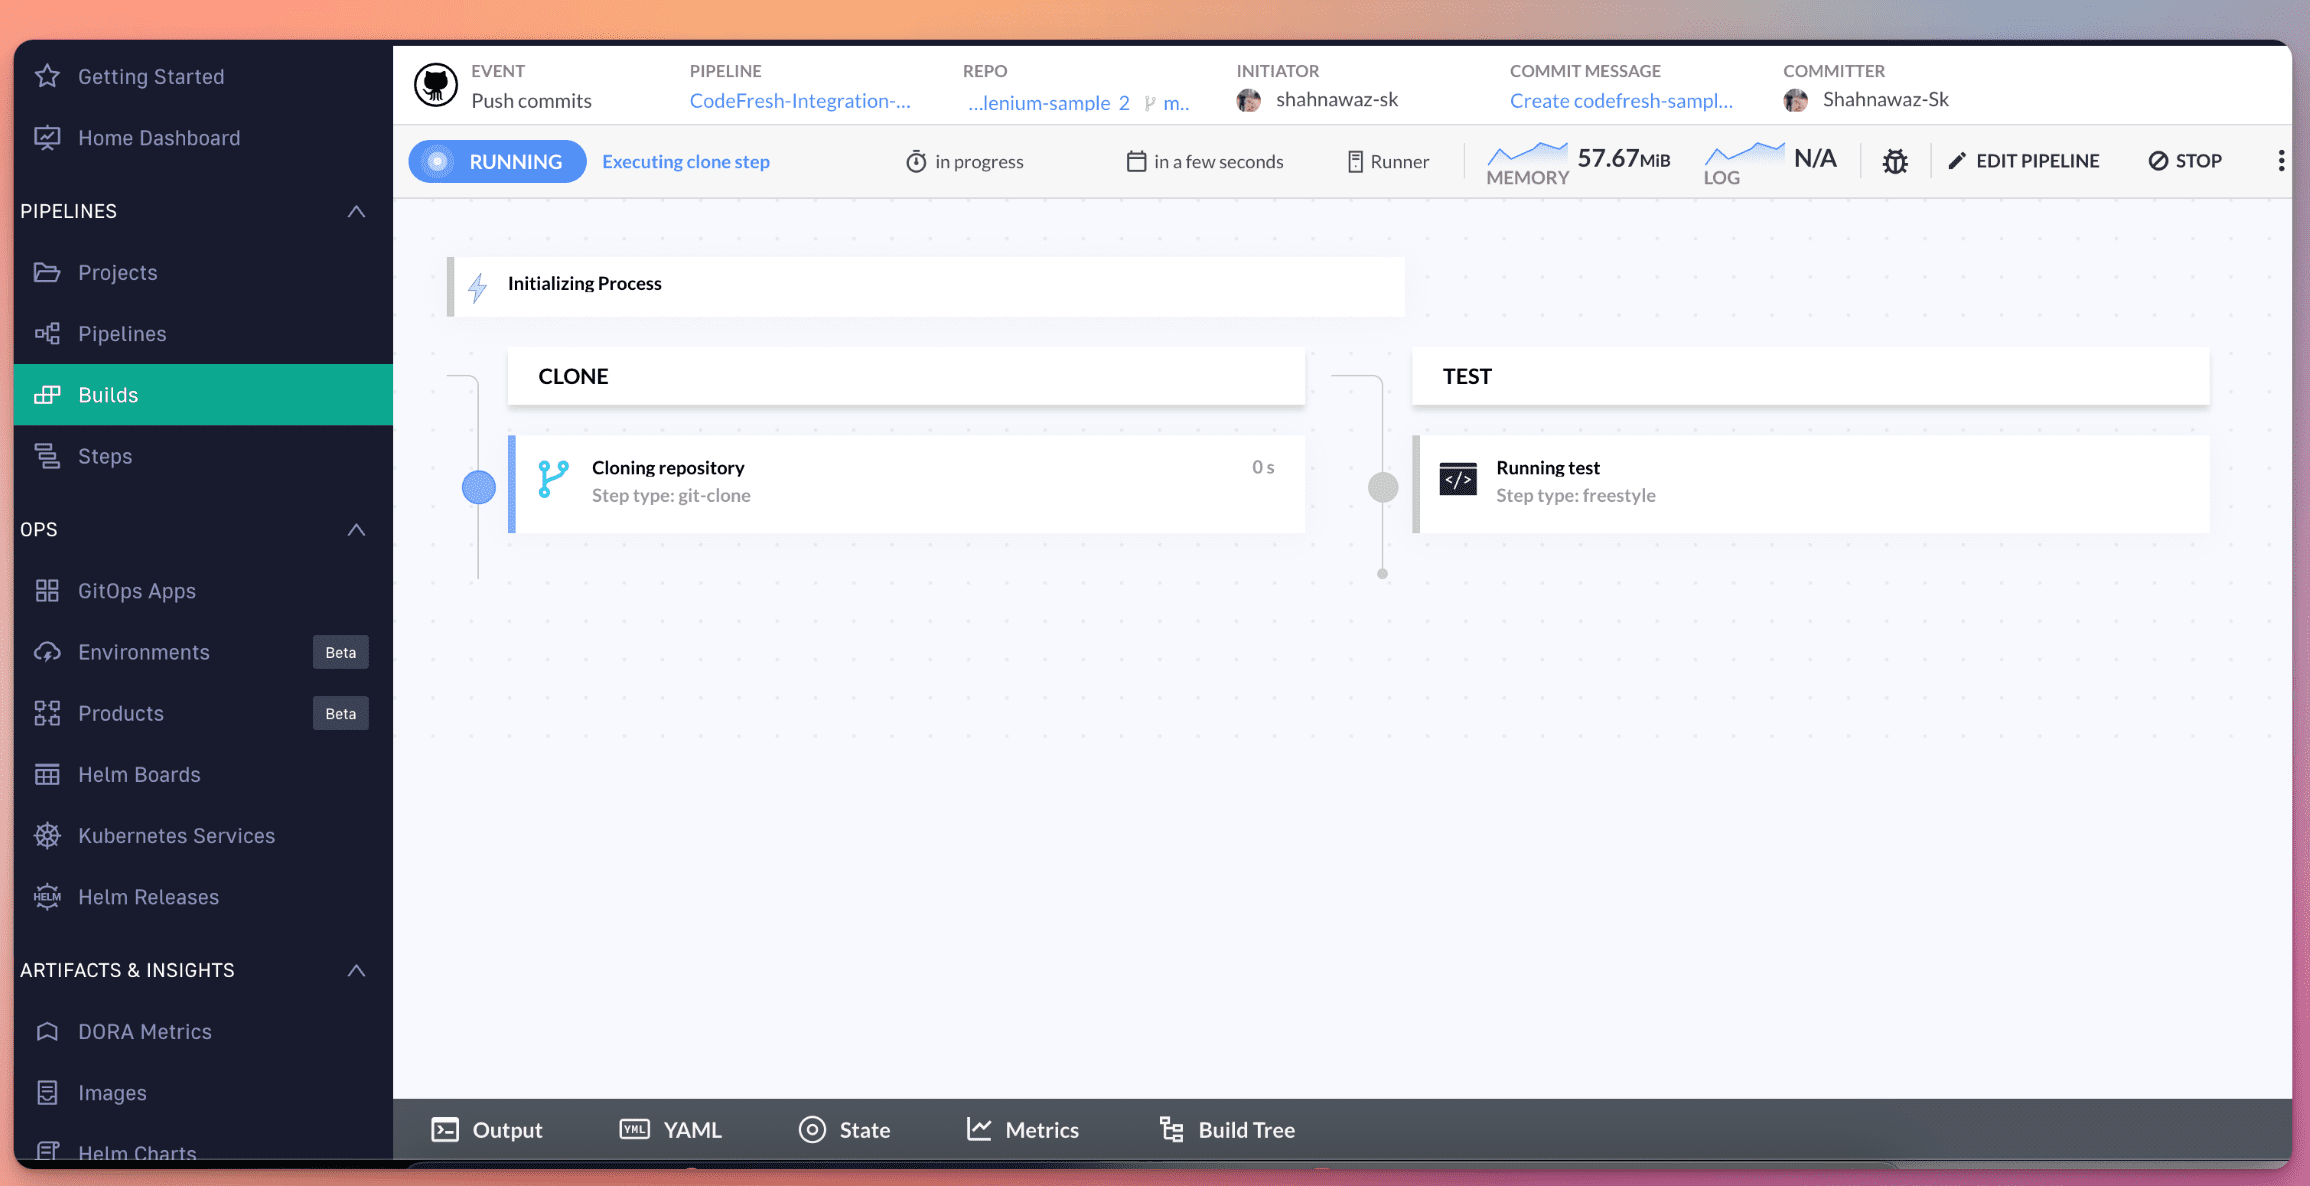
You can see the pipeline running.
Step 4: Login to the LambdaTest Dashboard, Navigate to Automation -> Web Automation. You can see your codefresh pipeline build has been executed on LambdaTest
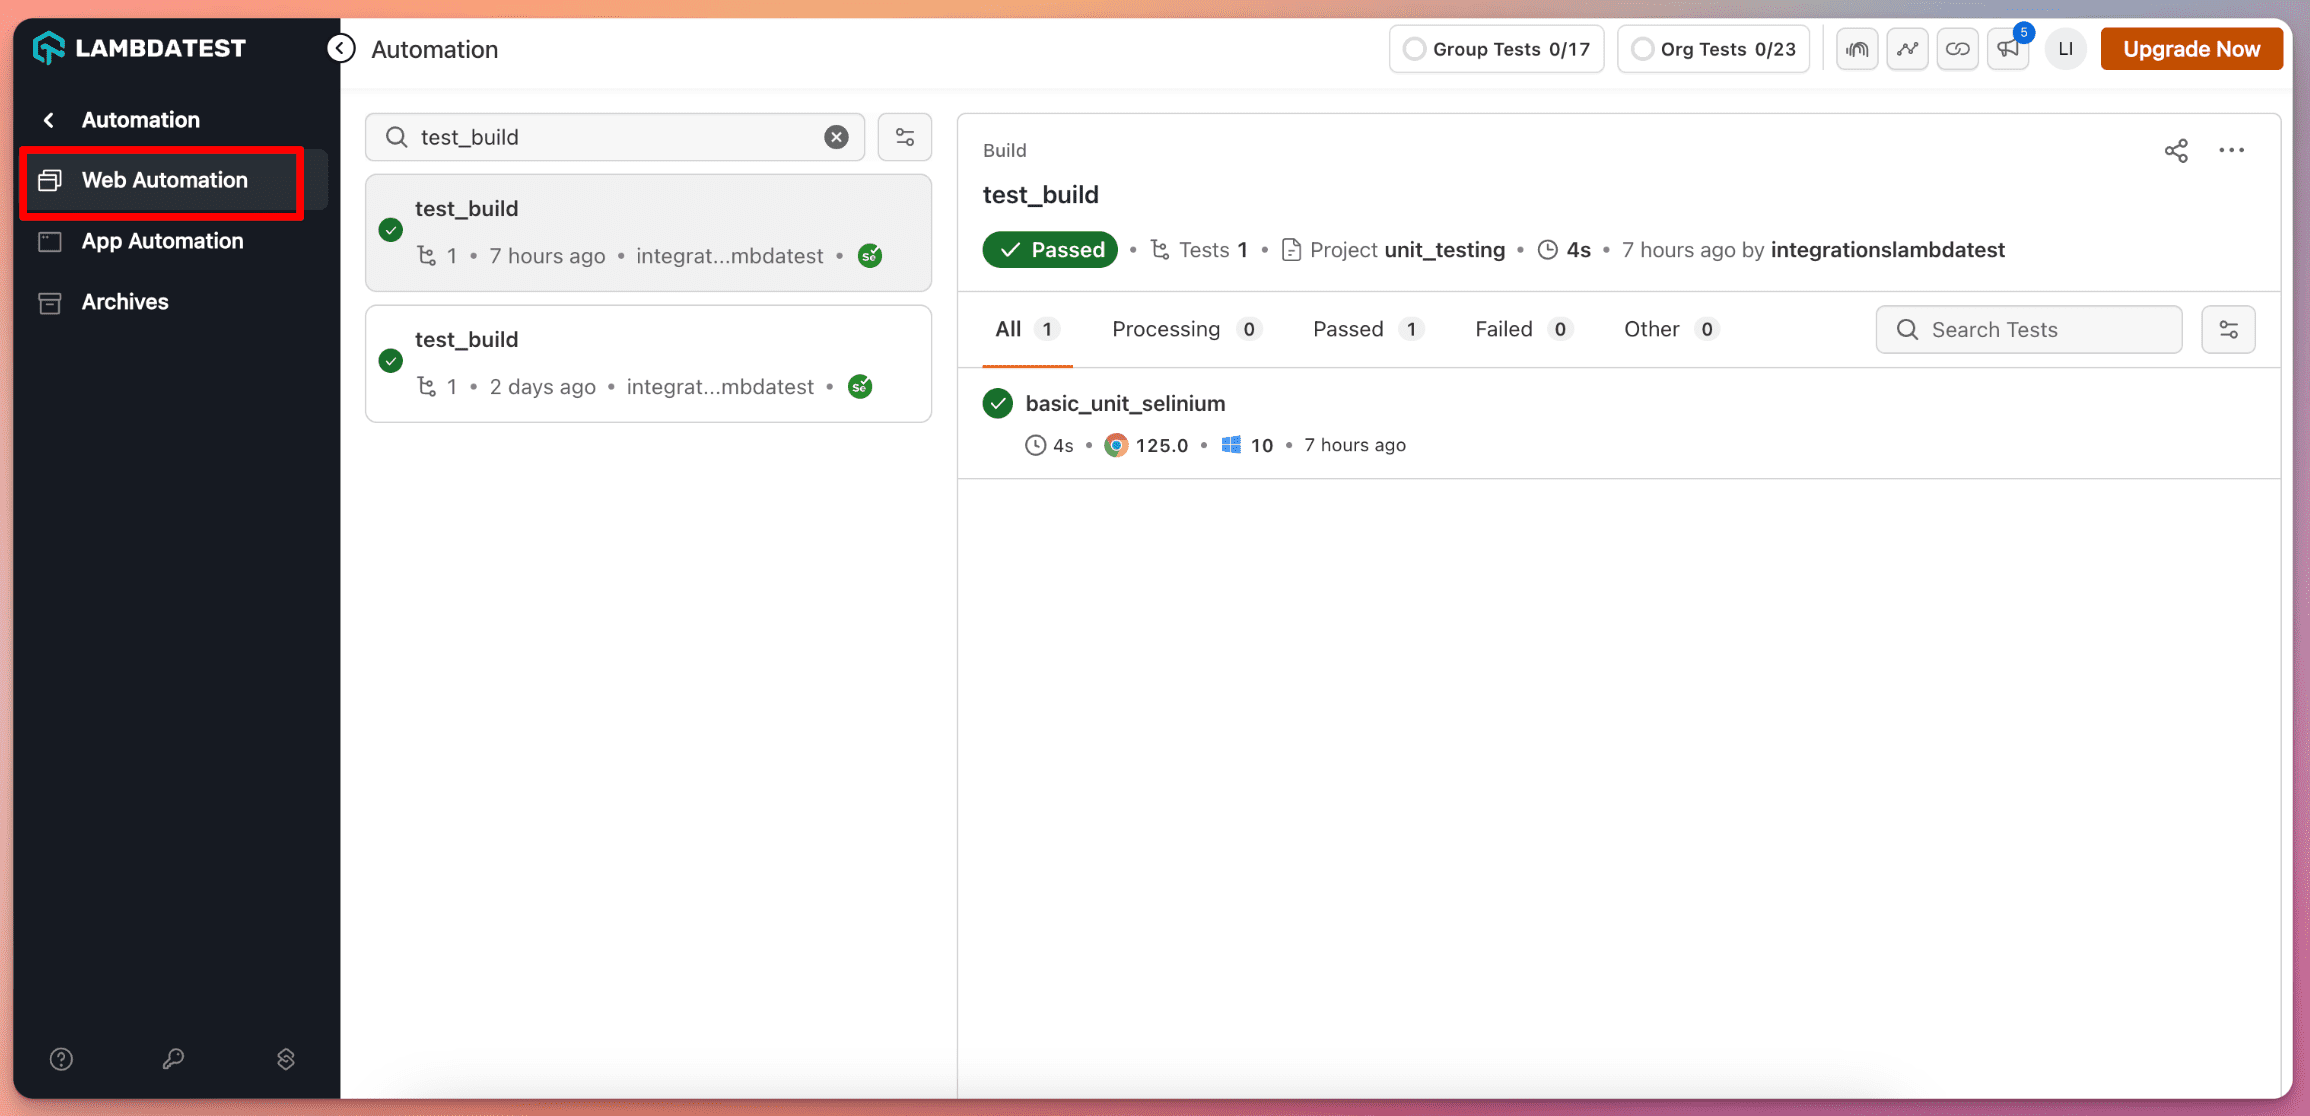
Similarly you can run test scripts based on any framework using this above described method. Here is the selenium test script for your reference.
import unittest
import os
from selenium import webdriver
from selenium.webdriver.common.by import By
from selenium.webdriver.chrome.options import Options as ChromeOptions

username = os.getenv("LT_USERNAME")  # Replace the username
access_key = os.getenv("LT_ACCESS_KEY")  # Replace the access key


# paste your capability options below
options = ChromeOptions()
options.browser_version = "latest"
options.platform_name = "win10"
lt_options = {}
lt_options["username"] = username
lt_options["accessKey"] = access_key
lt_options["video"] = True
lt_options["resolution"] = "1920x1080"
lt_options["network"] = True
lt_options["build"] = "test_build"
lt_options["project"] = "unit_testing"
lt_options["name"] = "basic_unit_selinium"
lt_options["w3c"] = True
lt_options["plugin"] = "python-python"
options.set_capability("LT:Options", lt_options)

class FirstSampleTest(unittest.TestCase):
    driver = None

    def setUp(self):
        self.driver = webdriver.Remote(
            command_executor="http://{}:{}@hub.lambdatest.com/wd/hub".format(
                username, access_key
            ),
            options=options,
        )

    # """ You can write the test cases here """
    def test_demo_site(self):
        # try:
        driver = self.driver
        driver.implicitly_wait(10)
        driver.set_page_load_timeout(30)
        driver.set_window_size(1920, 1080)

        # Url
        print("Loading URL")
        driver.get(
            "https://stage-lambda-devops-use-only.lambdatestinternal.com/To-do-app/index.html"
        )

        # Let's click on a element
        driver.find_element(By.NAME, "li1").click()
        location = driver.find_element(By.NAME, "li2")
        location.click()
        print("Clicked on the second element")

        # Let's add a checkbox
        driver.find_element(By.ID, "sampletodotext").send_keys("LambdaTest")
        add_button = driver.find_element(By.ID, "addbutton")
        add_button.click()
        print("Added LambdaTest checkbox")

        # print the heading
        search = driver.find_element(By.CSS_SELECTOR, ".container h2")
        assert search.is_displayed(), "heading is not displayed"
        print(search.text)
        search.click()
        driver.implicitly_wait(3)

        # Let's download the invoice
        heading = driver.find_element(By.CSS_SELECTOR, ".container h2")
        if heading.is_displayed():
            heading.click()
            driver.execute_script("lambda-status=passed")
            print("Tests are run successfully!")
        else:
            driver.execute_script("lambda-status=failed")

    # tearDown runs after each test case
    def tearDown(self):
        self.driver.quit()


if __name__ == "__main__":
    unittest.main()
