Bugzilla Integration
Bugzilla is an open-source bug tracking tool that allows you to keep track of software bugs. It is coded in Perl and uses the MYSQL database. By leveraging Bugzilla, users can stay linked with their customers or employees in order to communicate effectively about the product's issues.
In this documentation, we look at how to integrate Bugzilla with LambdaTest and perform one-click bug logging right away from the LambdaTest platform to your Bugzilla products.
Integrating Bugzilla With LambdaTest Account
-
Login to your LambdaTest account. To install integrations, make sure you have admin or user level access.
-
Visit 'Integrations' from the left menu and select 'Bugzilla' under the 'BUG TRACKER' category.
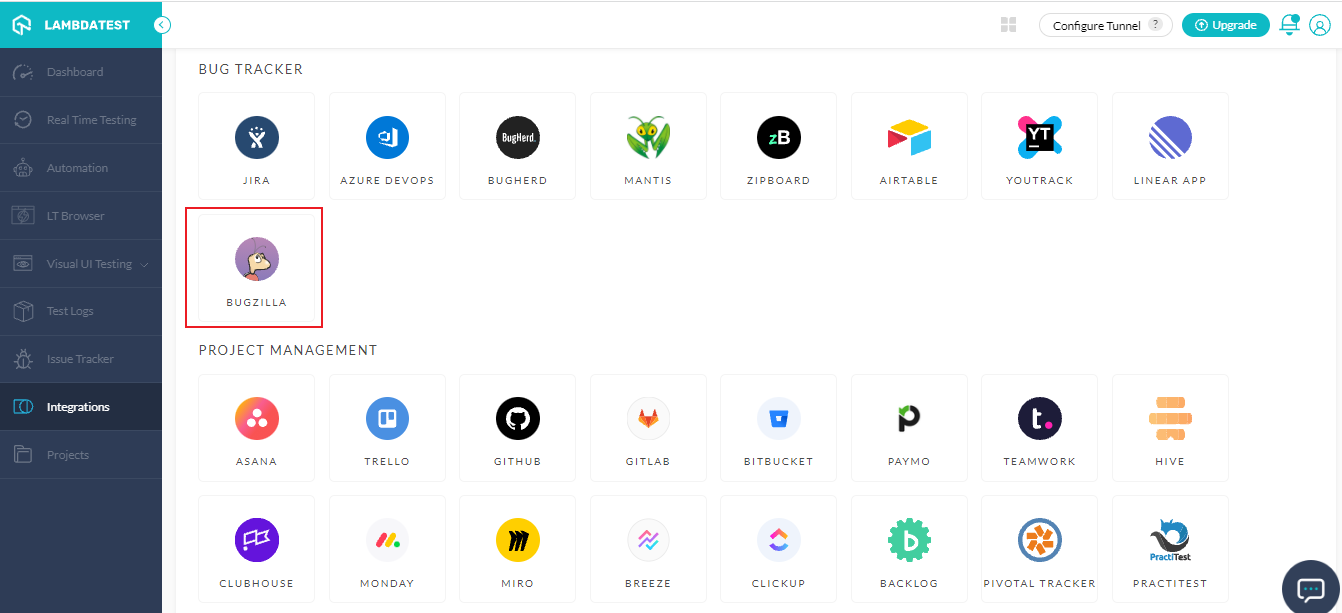
If you already have a LambdaTest integration with any bug tracking tool then you will be asked to uninstall the existing LambdaTest integration.
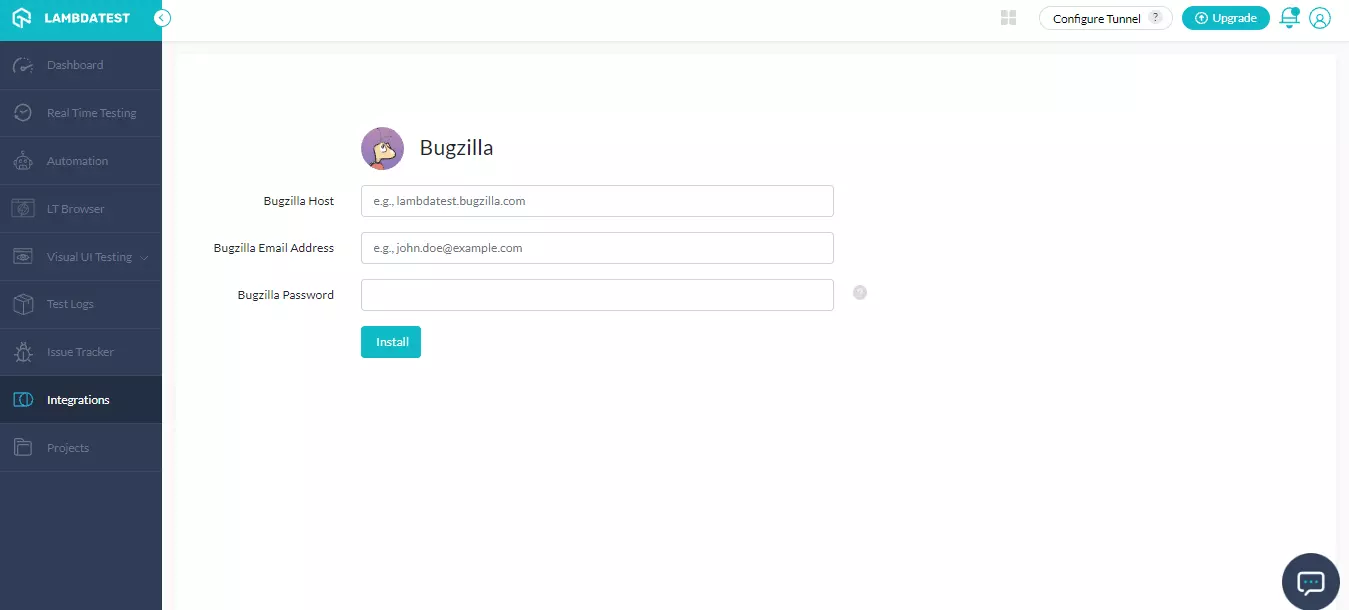
- You will be asked to enter your Bugzilla Host, Bugzilla Email Address and Bugzilla Password.
Note: Make sure you have created an account on Bugzilla.
-
What is my Bugzilla Host?
Bugzilla host is the domain name of your workspace. Open Bugzilla in any web browser and you find the Bugzilla URL (or domain name) from the browser's address bar. For Example:https://lambdatest.bugzilla.com. -
What is my Bugzilla Email Address ?
Bugzilla Email Address is the address through which you sign into your Bugzilla account. -
What is my Bugzilla Password ?
Bugzilla password is the password that you provide while creating your Bugzilla account.
- Enter your Bugzilla Host, Bugzilla Email Address and Bugzilla Password in the provided field and click on 'Install'.
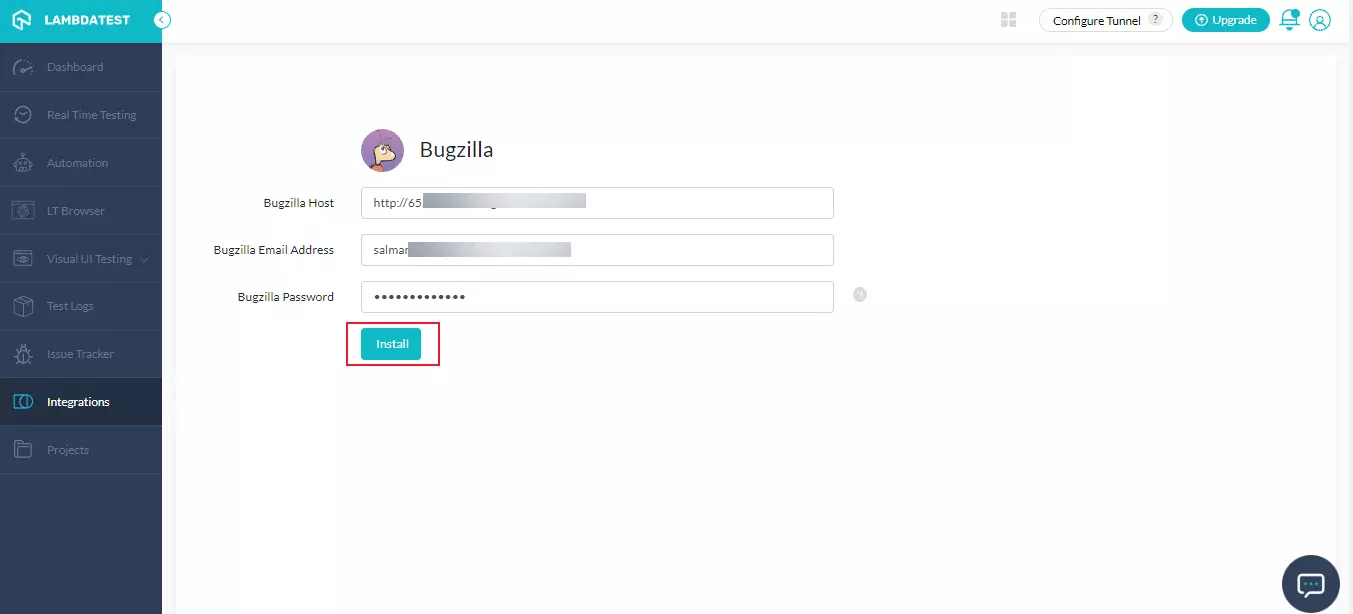
The Bugzilla will be successfully integrated with your LambdaTest account. You'll also receive the confirmation message and an email of the same.
One-Click Bug Logging Through Bugzilla
To demonstrate, we take an example of Real time testing.
-
Select the Real Time Testing from the left menu.
-
Provide your test URL, select the configurations that includes: Browser, Browser versions, OS and Resolution. Click on 'START'.
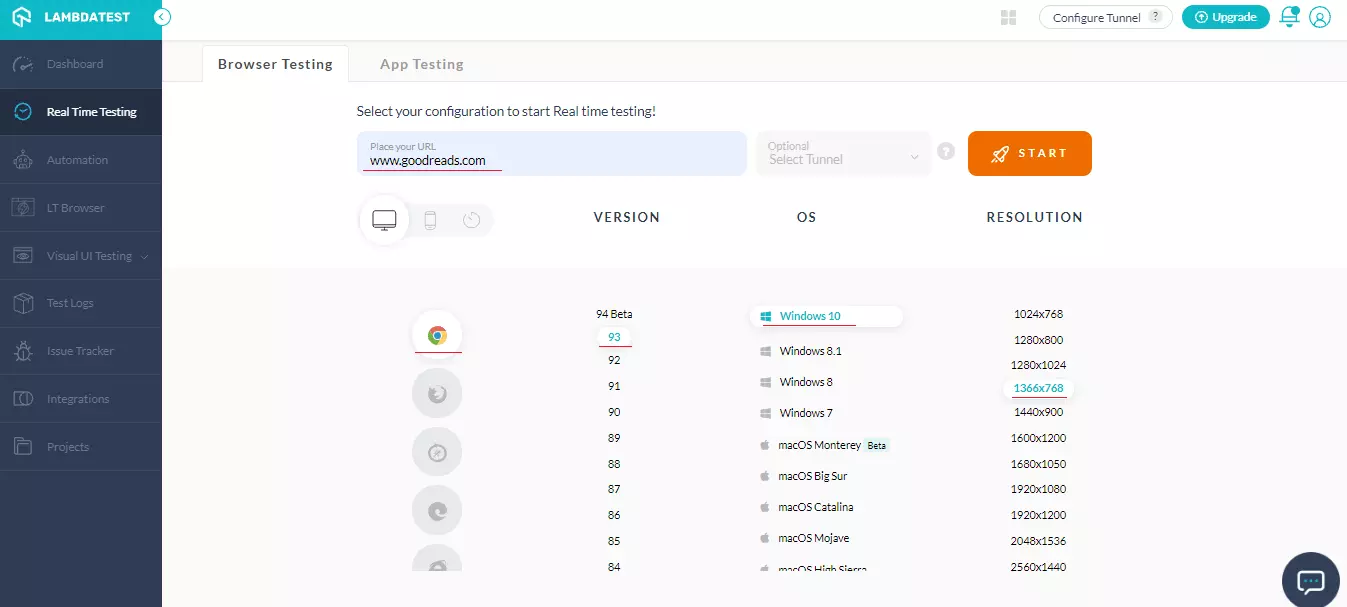
- A virtual machine will launch where you can perform real time testing of websites and web apps. If you identify a bug, click on the 'Mark as Bug' icon from the left bar to capture the screenshot.
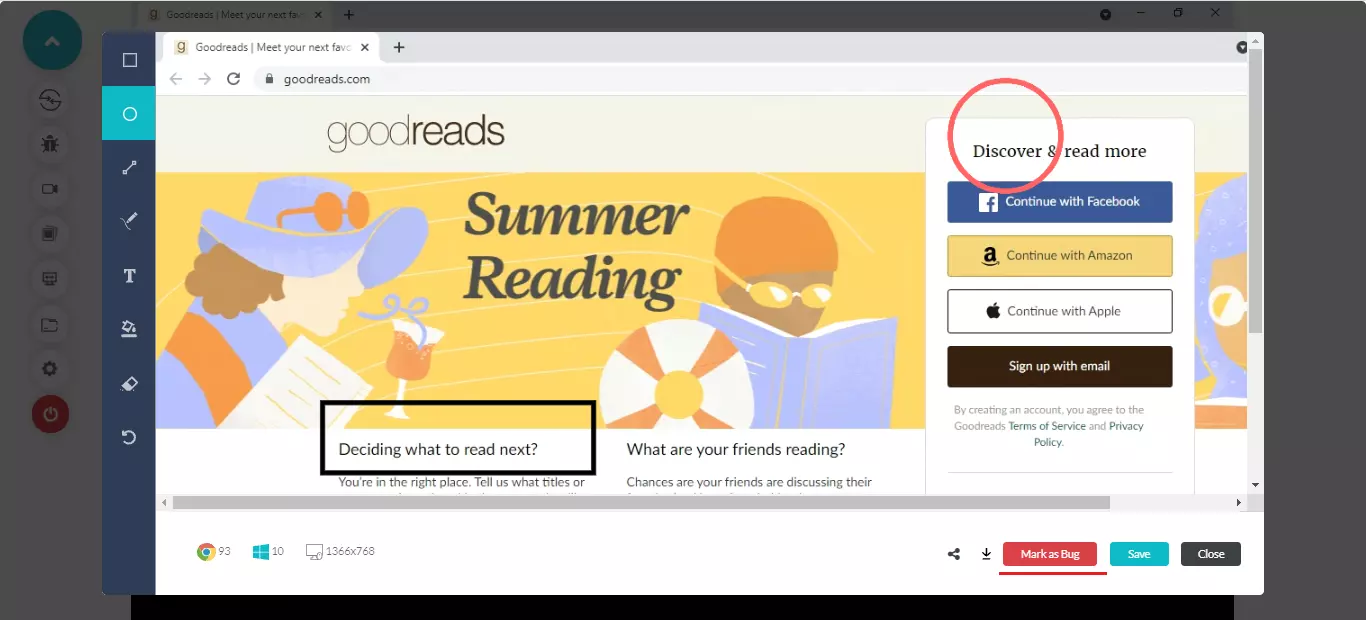
- Once the screenshot is captured, annotate issues or tasks that you have encountered using in-built image editor tools. After annotating the bugs, click on 'Mark As Bug'.
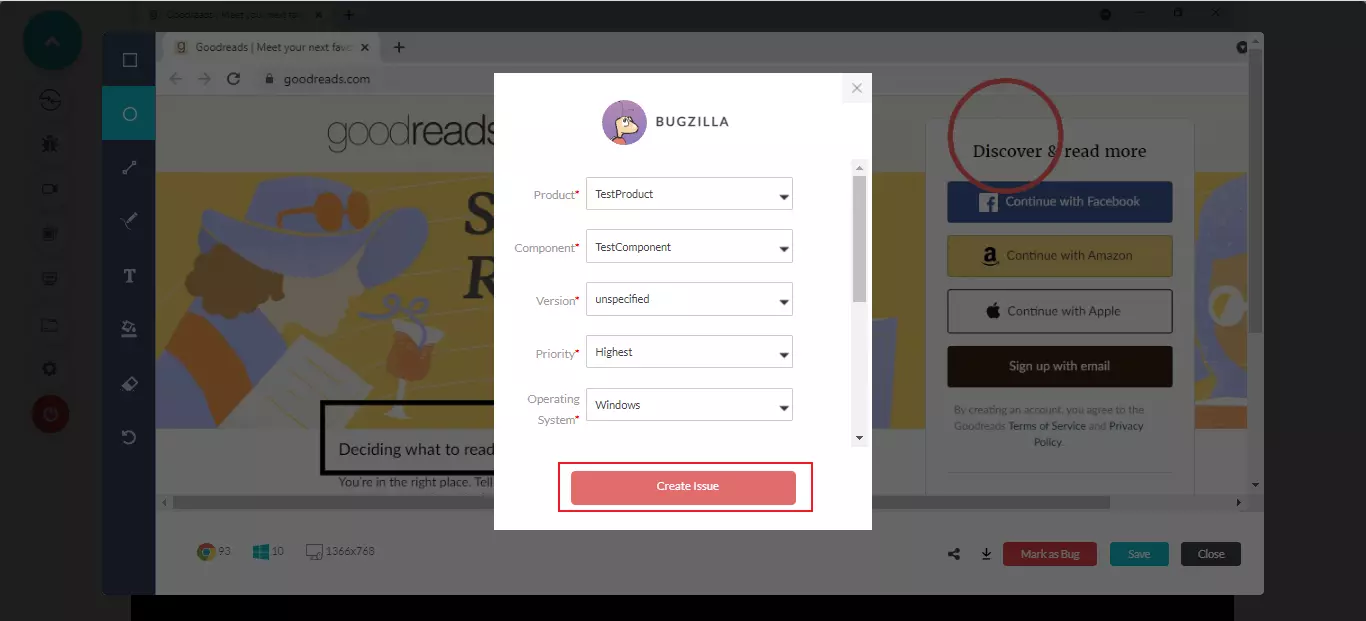
- A Bugzilla ticket will open up. Fill the details like Product, Component, Version, Priority, Operating System and so on. After populating the required fields, click on 'Create Issue".
Once you click on Create Issue, your bugs will be marked successfully.
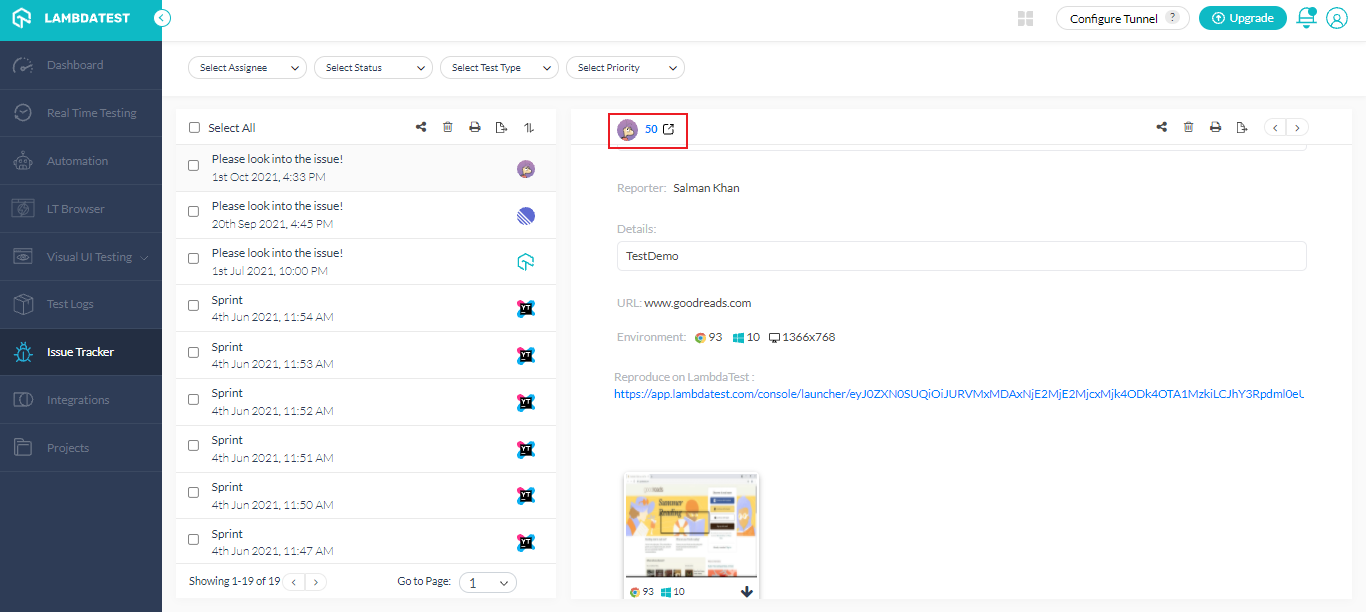
- To view your logged bugs, visit Issue Tracker from the LambdaTest left navigation menu. You'll notice the marked bugs along with the Test details.
- To view your logged bugs in Bugzilla, click on the right diagonal arrow icon.
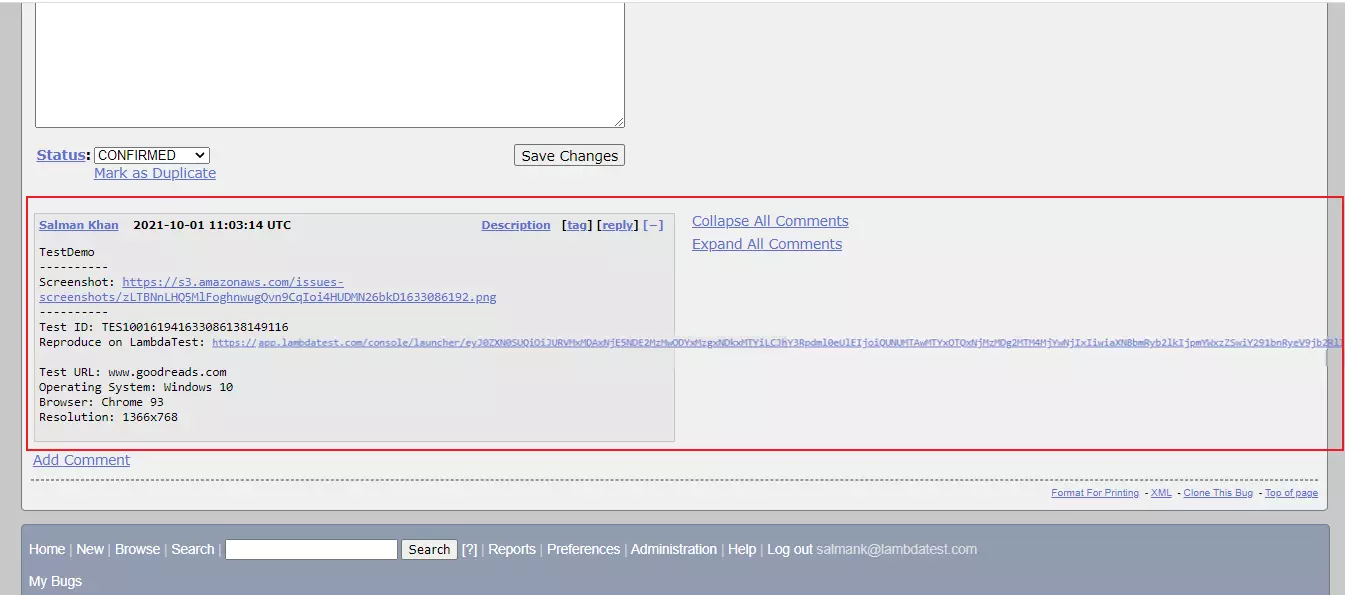
You'll be routed to the Bugzilla page where you can find the logged issue.
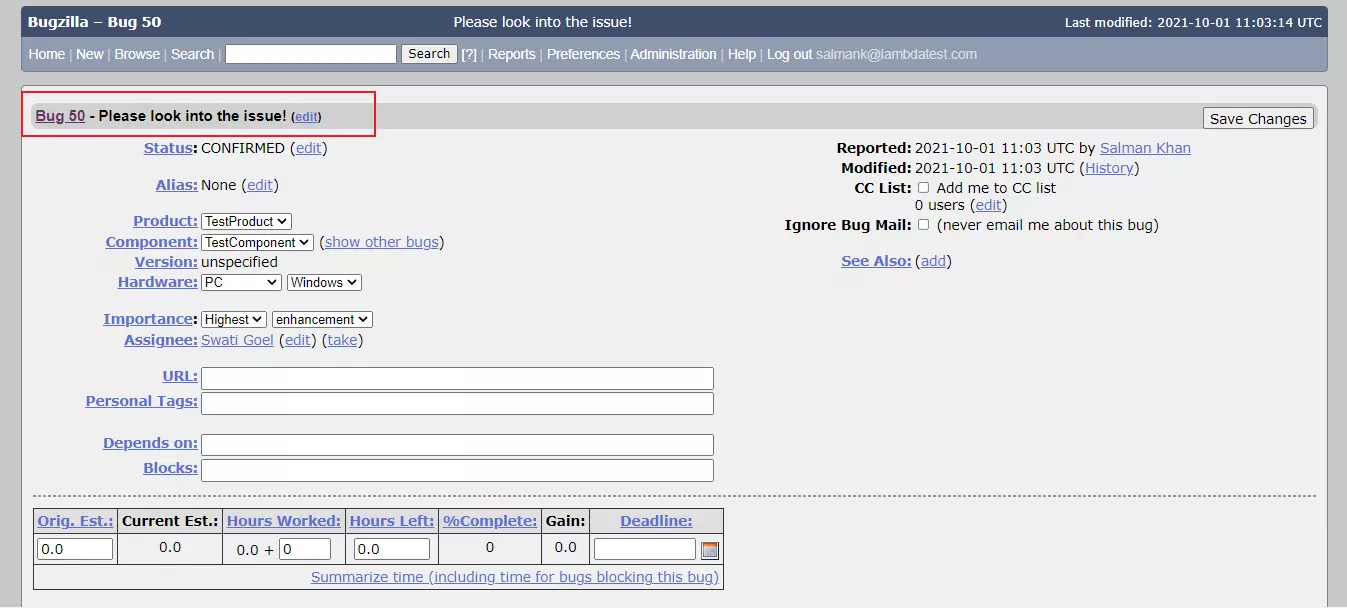
Scroll down to view the complete details of the marked bugs: Screenshot, Test ID, Reproduce on LambdaTest link, Test URL, OS, Browser and Resolution.
Uninstalling The Bugzilla Integration
-
Login to your LambdaTest account and visit Integrations from the left menu.
-
Navigate to 'My Integrations'and click on 'REMOVE'.
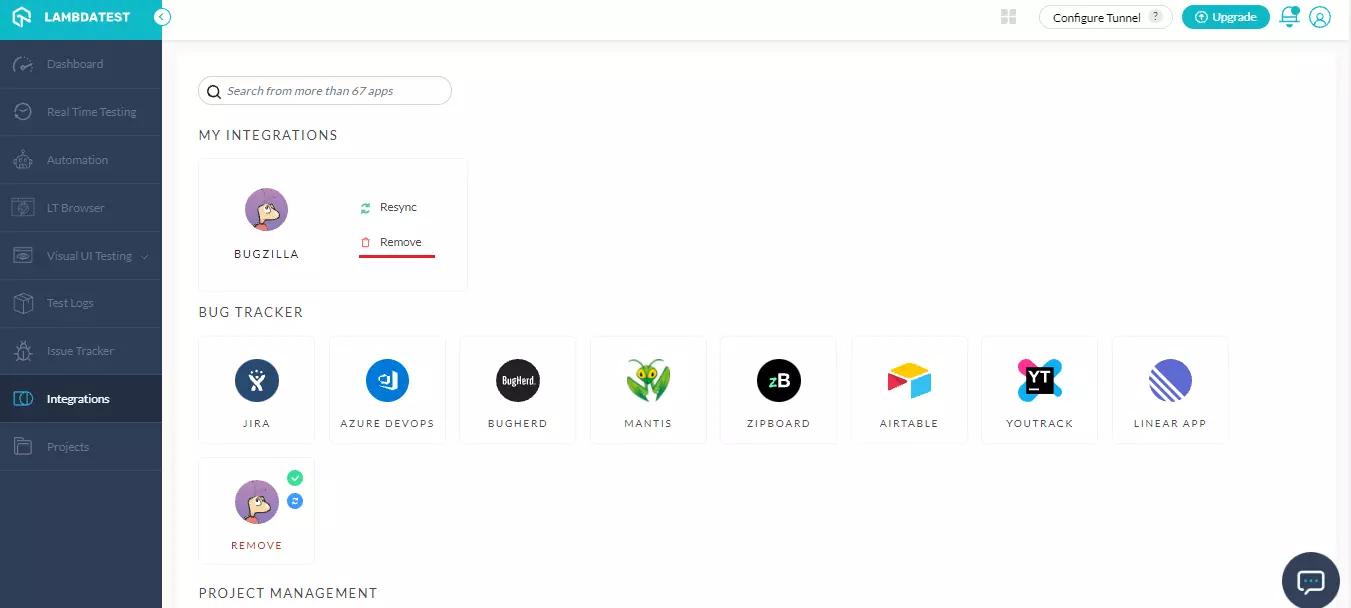
The Bugzilla integration will be uninstalled.
That's all! In case you have any doubts or questions for us, feel free to drop them at our 24x7 Chat Support or you could also mail us directly at support@lambdatest.com.
