Airtable Integration
Airtable is a cloud-collaboration platform to help you organize your team with intuitive & interactive spreadsheets that works like a database. It offers a variety of views such as Grid view, Kanban view, Calendar view, Form view. You can log a task with priority, notes, deadline and more. You can even tag attachments to a task with a simple drag-and-drop. Be it marketing, project management, product design & UX, or a simple distribution record for offline businesses, Airtable helps you to manage a track of anything.
Using LambdaTest integration with Airtable, you'll be able to log bugs over your project in Airtable from LambdaTest in just a single click. You can capture a screenshot of the bug, highlight the anomaly, annotate extra information, choose an assignee, provide a suitable title and description to help relay further actions. You can do all that directly from LambdaTest and then mark a bug to your Airtable project with just a single click.
How To Integrate Airtable With Your LambdaTest Account?
Step 1: Login to your LambdaTest account. You would need to have Admin or User level access to see and install integrations.
Step 2: Select 'Integration' from the left navigation menu bar. This will guide you to a screen where you will find a list of 3rd party applications, available to integrate with your LambdaTest account.
Step 3: Click on the block that says 'Airtable'.
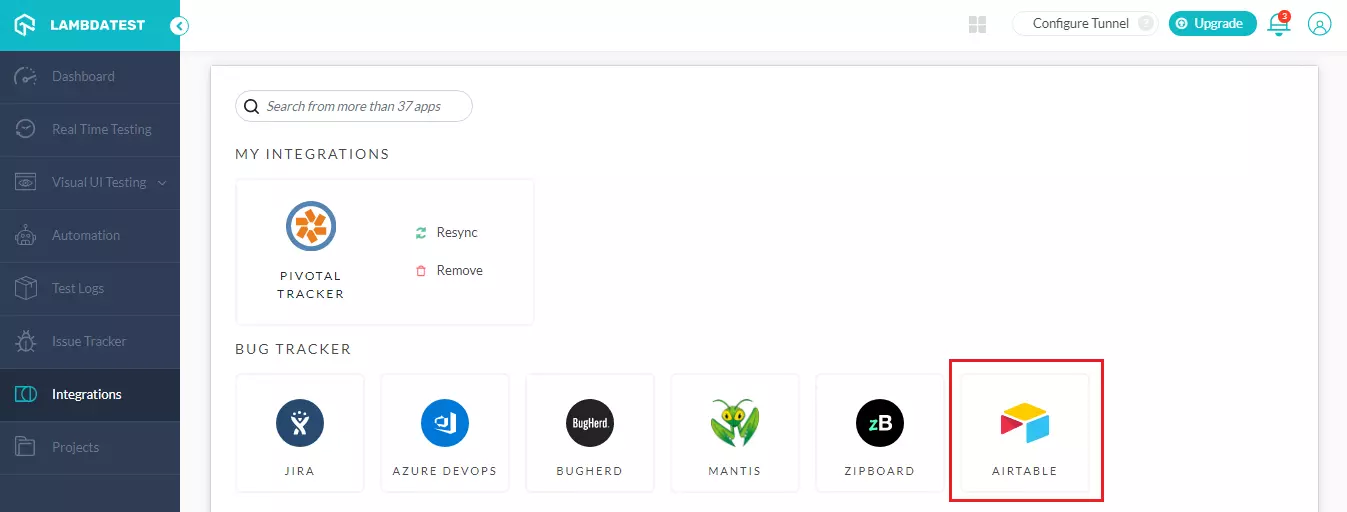
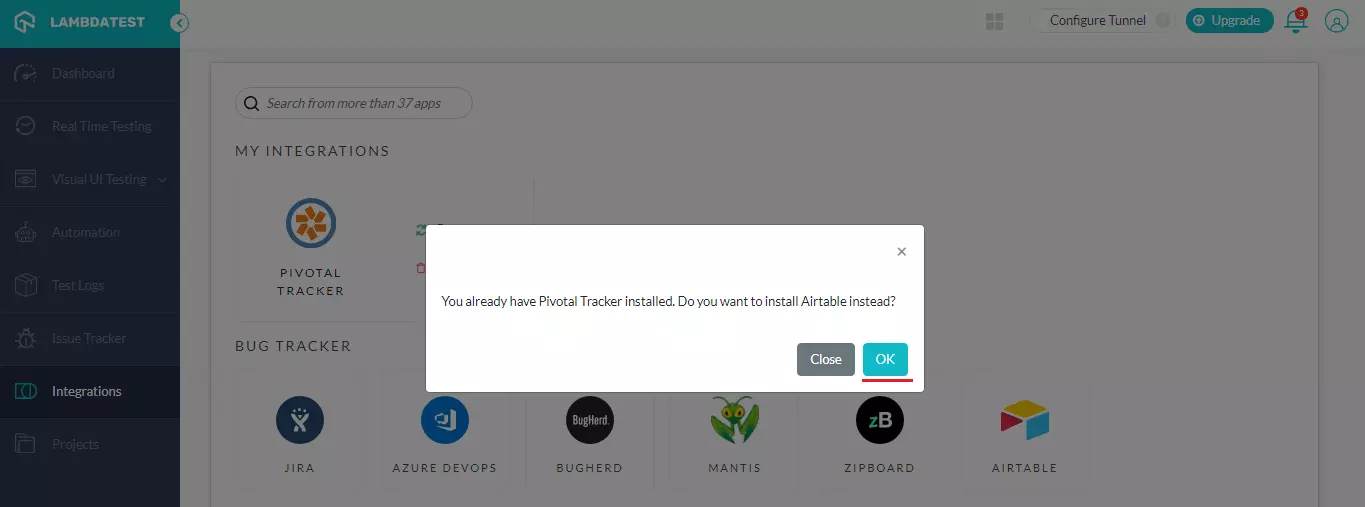
Note: If you have already installed a LambdaTest integration to any project management tool then you would come across a prompt asking you to disable your existing LambdaTest integration for integrating Airtable with your LambdaTest account.
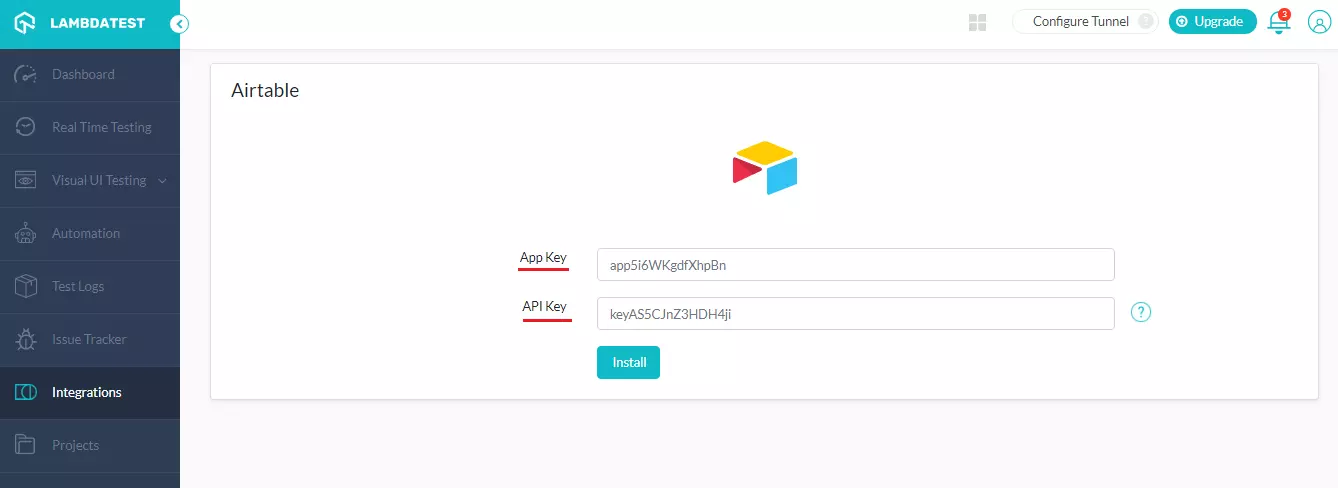
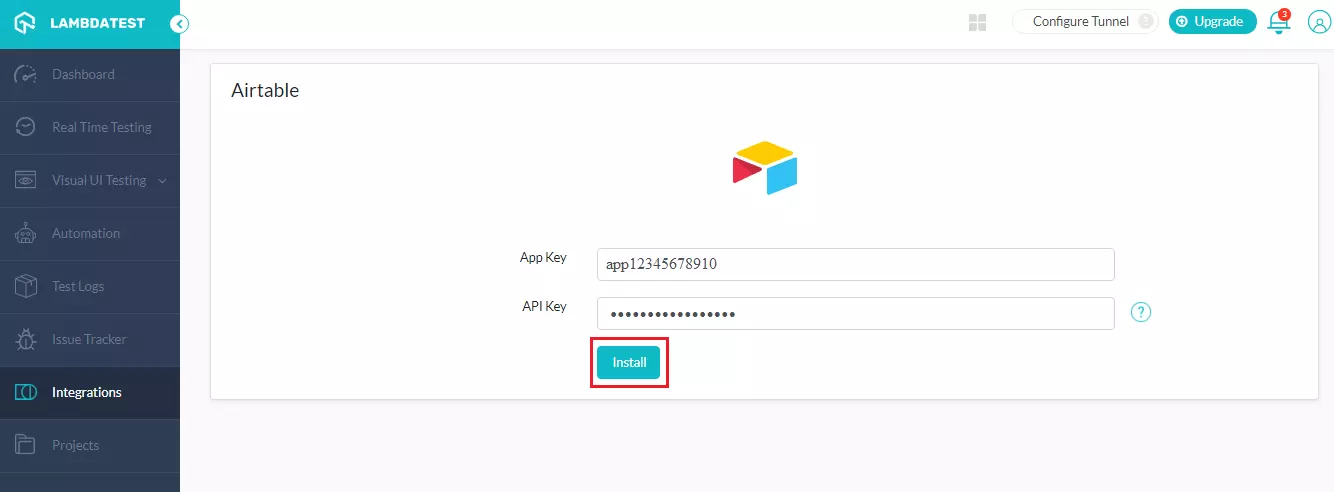
Step 4: You would now be routed to a screen where you'll need to enter your Airtable App Key & Airtable API Key.
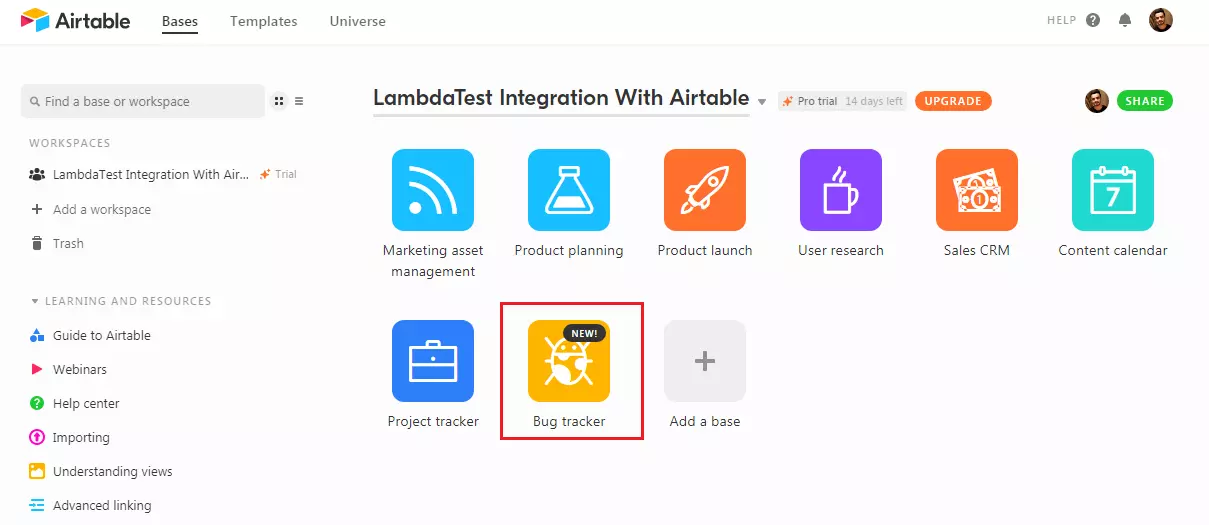
Note: You need to have Bug Tracker as a template in your Airtable account for LambdaTest integration with Airtable to work. After all, we're here to help you collect bugs and post them there. If you don't have a Bug Tracker template installed in your Airtable account, refer to Airtable's official support documentation for instantly setting up the template.
Step 5: If this is your first project in Airtable, you'll need to generate an API Key that will help LambdaTest to authenticate your user information from Airtable for integration purpose. Go to your Account Overview & click on the button to Generate API Key.
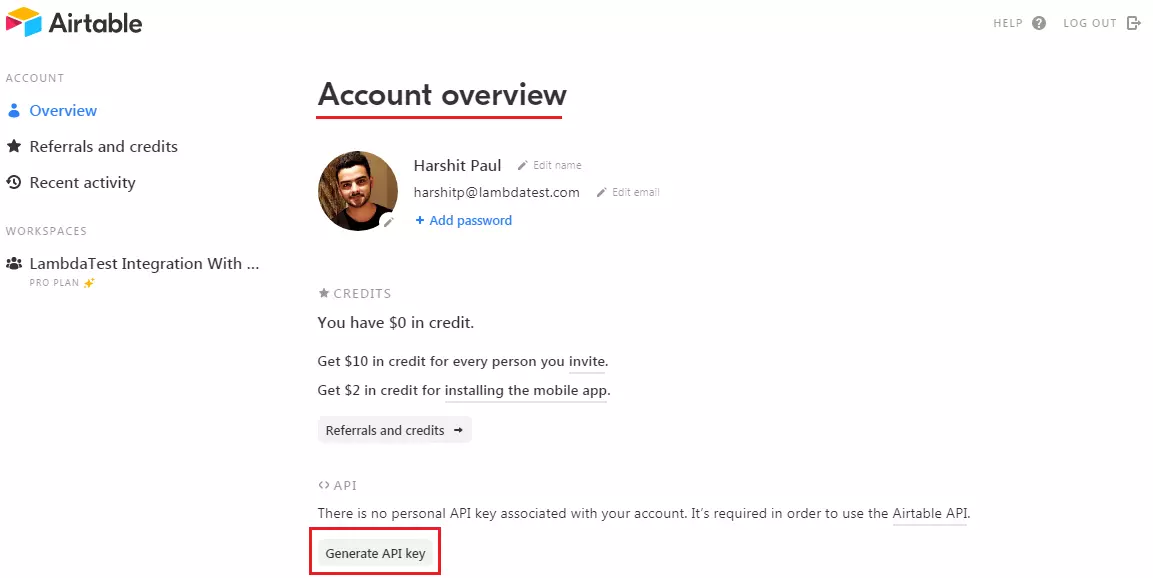
Note: Consider API Key as your passwords, the API Key will help anyone grant a third-party application on the behalf of your Airtable account so be sure to keep it safe and sound. In case you feel your API Key is revealed to someone then you must re-generate your Airtable API Key.

Step 6: Now, to find your App ID, you need to visit https://airtable.com/api. Then select your base project i.e. Bug Tracker for integrating LambdaTest with Airtable.
Step 7: After you open the Bug tracker, you'll find the App ID for your base project. Copy this App ID.
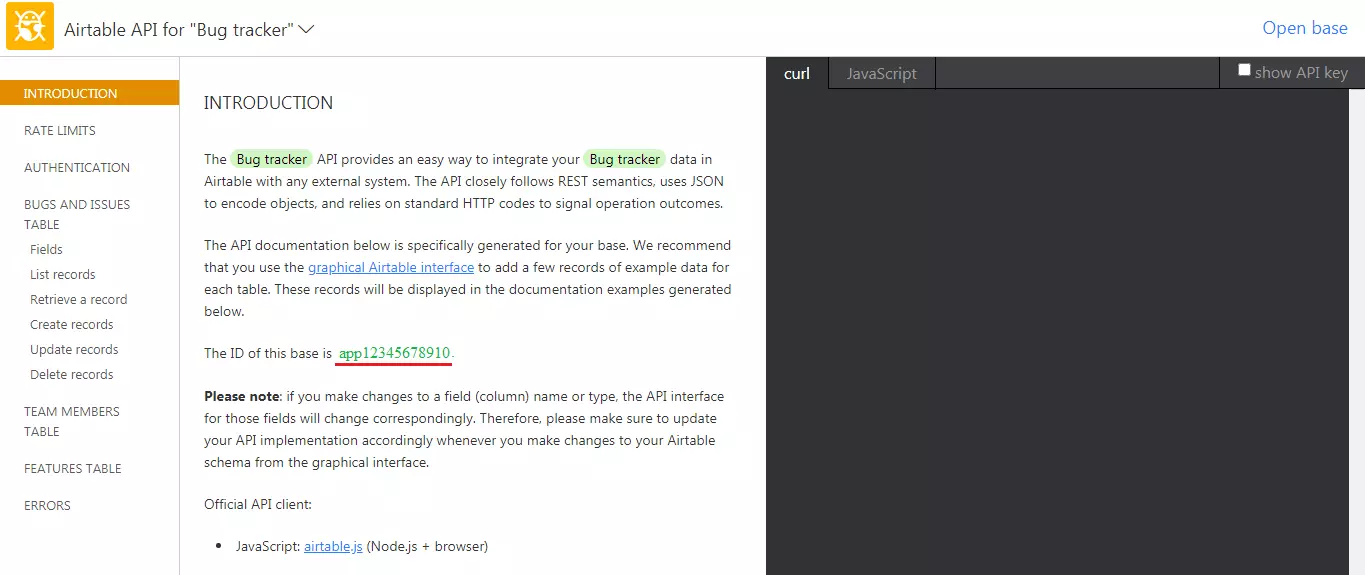
Step 8: Next, you need to paste you API Key & App ID over LambdaTest integration screen for Airtable. Click the install button.
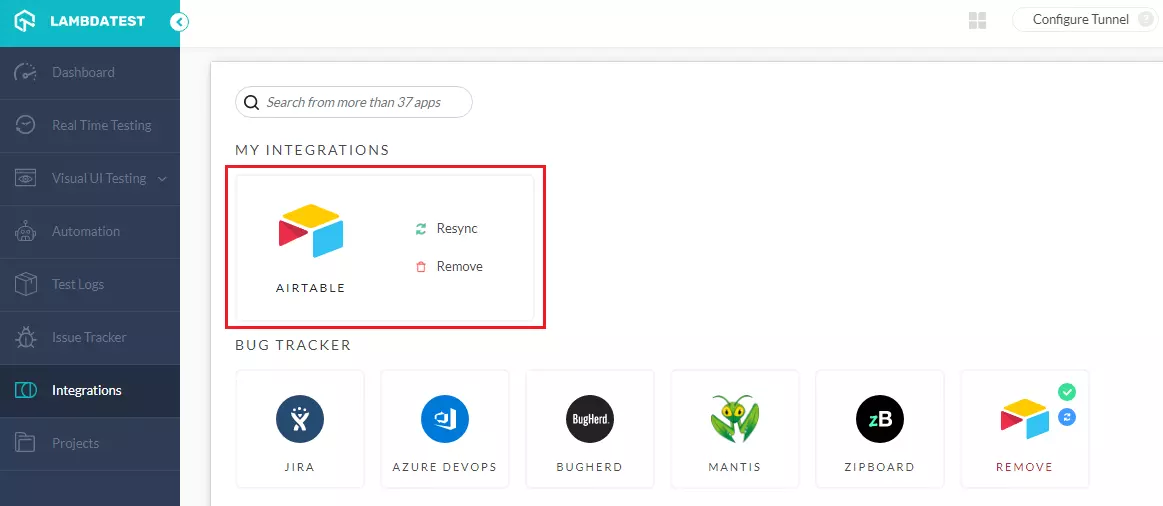
Kudos! You've successfully integrated LambdaTest with Airtable. You will find Airtable Integration highlighted under the section "My Integration".
How To Log Bug Using LambdaTest Integration To Airtable?
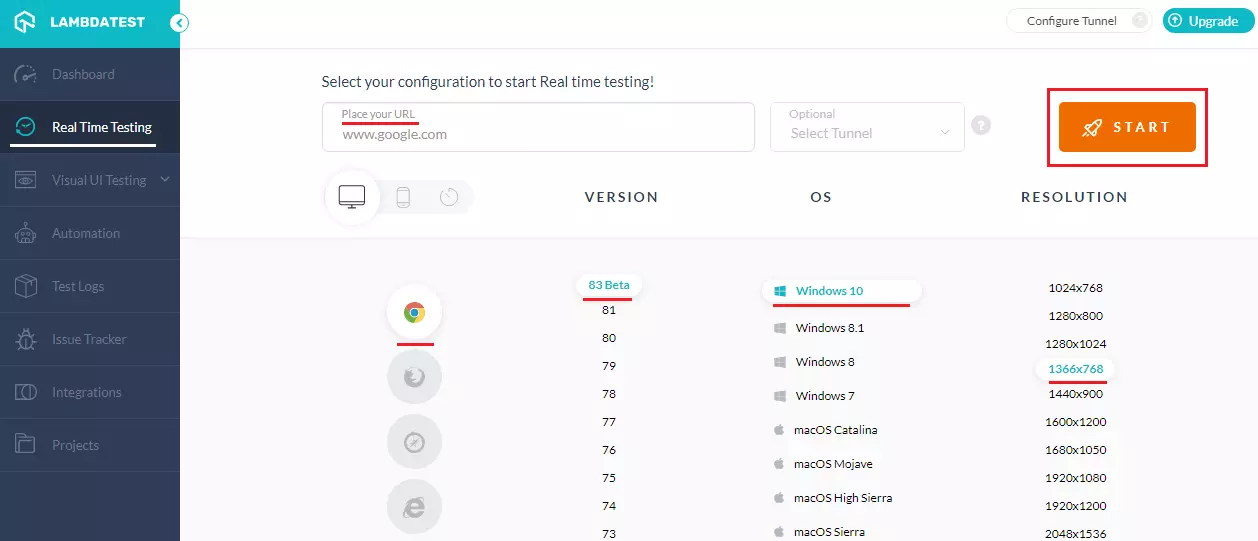
Step 1: Go for any of the test from the left navigation menu. For demo, we will be taking "Real Time Test" option.
Step 2: Present a URL of the web-app you need to test in the dialog box. After that, select any configuration for browser and operating system of your choice & hit 'Start'.
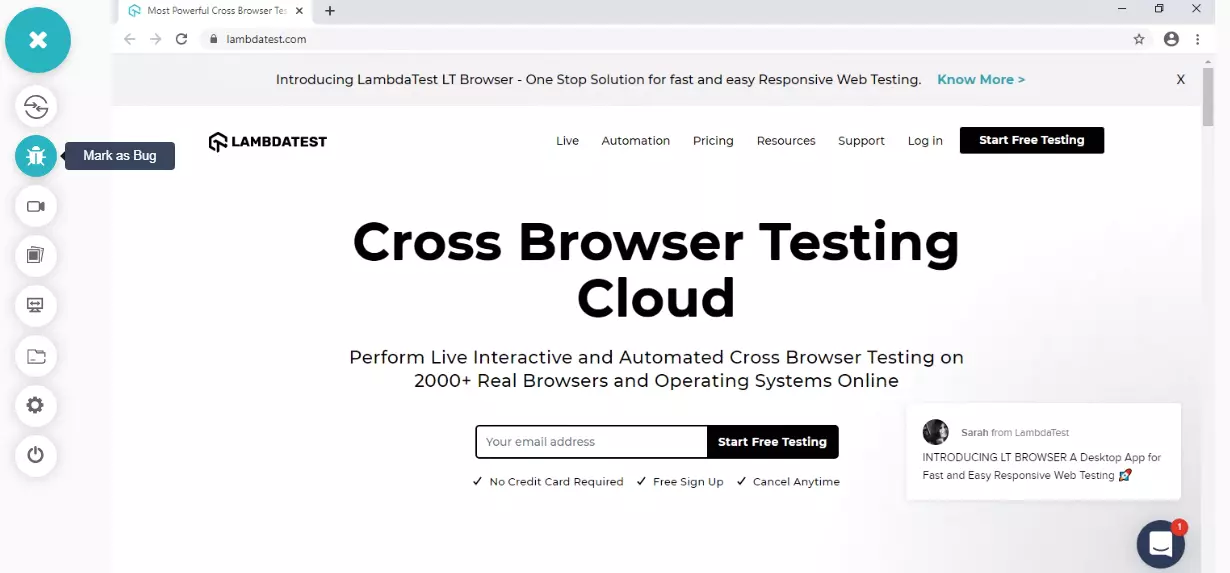
Step 3: After the VM is launched and operable. You can perform testing on your web-app for finding bugs. If a bug gets revealed, then you need to click on the Bug icon from the left panel to capture a screenshot of the bug.
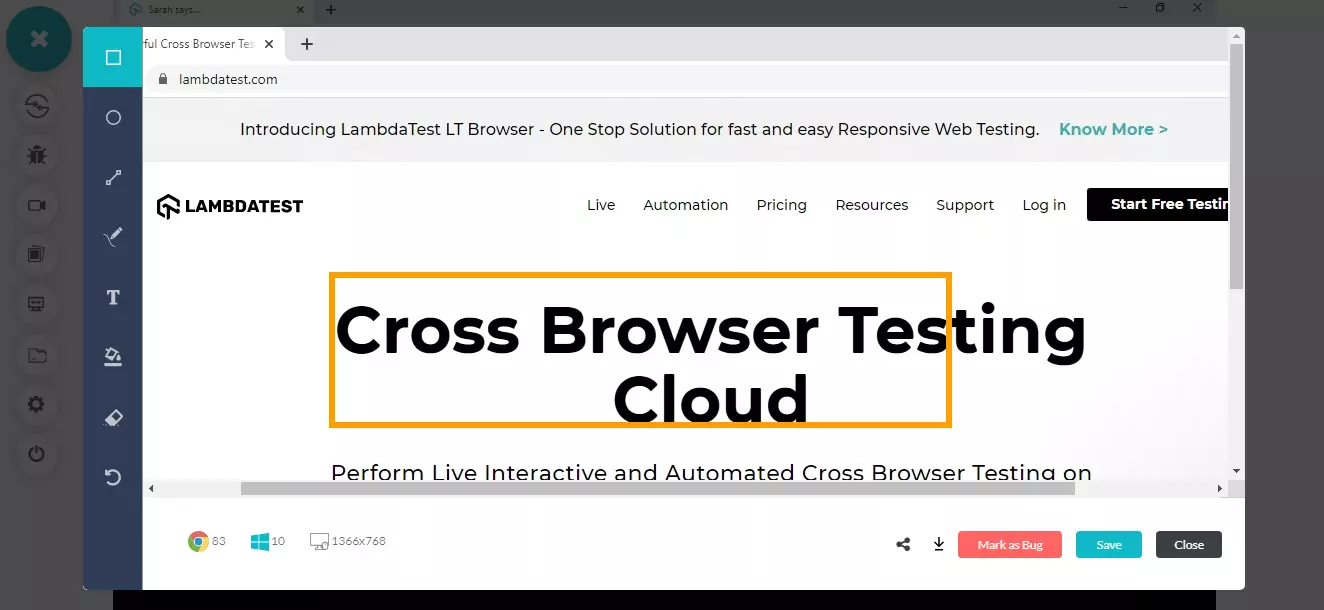
Step 4: After a screenshot is captured, you can annotate any issue or a task with an built-in image editor. Once you are done highlighting the bug, click on the button that says "Mark as Bug".
Step 5: After clicking on "Mark as Bug" button a form specific to **Airtable **would open up. Fill the fields as per your requirement, and create the issue.
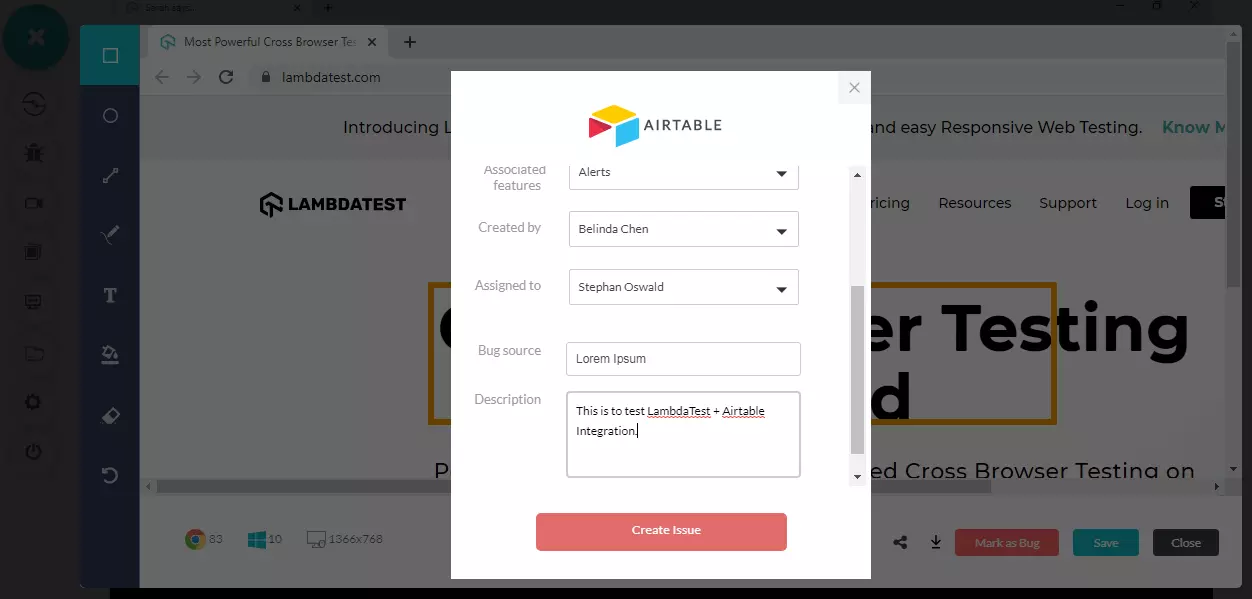
You can simply field the Name field and create a bug or you can go in-depth around the bug by providing the below details as well:
- Name
- Priority
- Status
- Associated features
- Created by
- Associated to
- Bug source
- Description
Note: After you click on "Create Bug", you will be able to observe it being successfully marked through a single click effort. You will get prompt messages on top of your Virtual Machine indicating the progress of bug logging. After few seconds you will be notified with a prompt message "Bug successfully marked" indicating that the screenshot has been pushed to your Airtable project.
Step 6: Now, if you visit your Bug tracker in Airtable, you'll find the bug that you logged from LambdaTest in it with all the provided details along with the screenshot of the bug. The bug with details can also be found under the features tab with the associated feature.
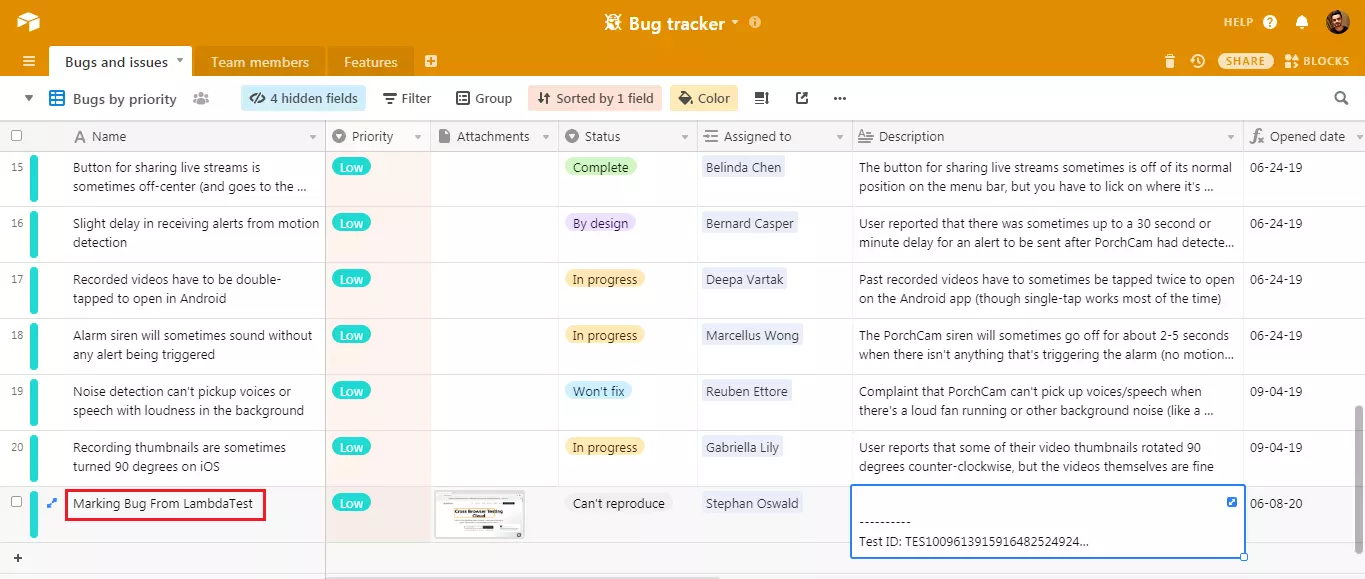
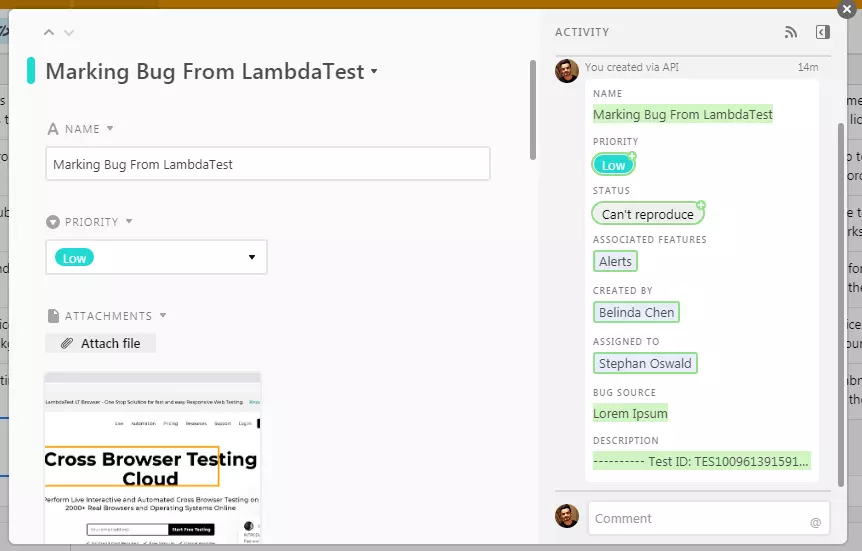
Step 7: Once you click over the Name, you will find a card which has all the details provided from LambdaTest.
How To Remove LambdaTest Integration With Airtable?
You can work with one integration at a time. So if you would want to integrate to a similar 3rd party application, then you would have to remove your current integration. Here is how you can do that.
Step 1: Login to your LambdaTest account.
Step 2: Select 'Integrations' from the left-navigation menu. This will guide you to a screen where you will find 3rd party applications, available to integrate with your LambdaTest account.
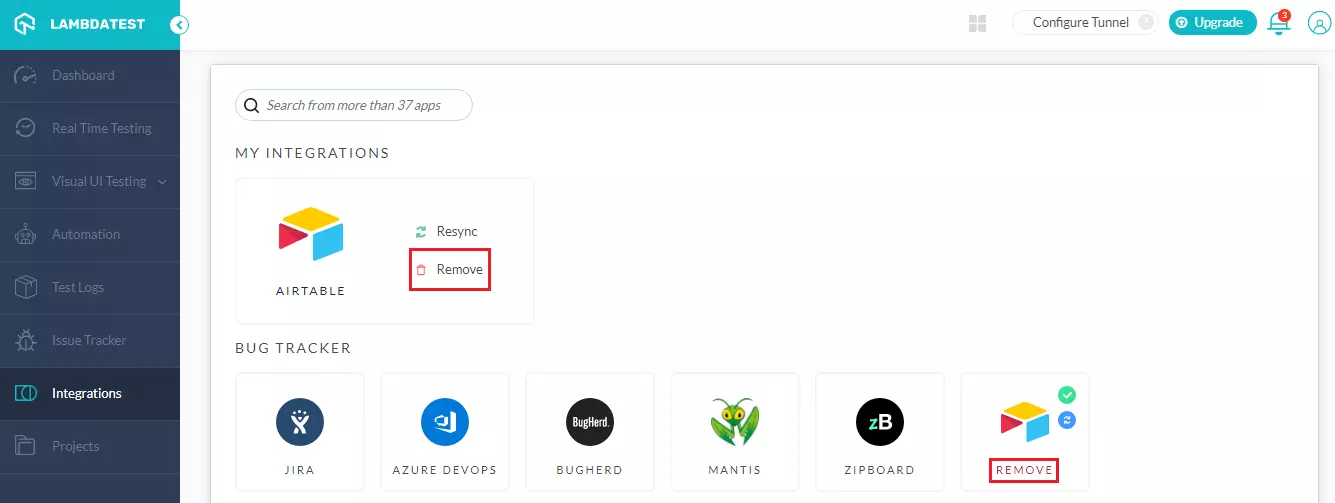
Step 3: Under "My Integrations", click on 'Remove' button. You can find also find the remove button under the 'Airtable' block.
That was all you need to know for LambdaTest + Airtable Integration. Increase your productivity with our integrations. If you still have any questions for us, please feel free to let us know. Our experts are always available on chat to help you out with any roadblock regarding our product. Happy testing! 🙂
