Airbrake Integration
Airbrake is a software tool and service designed to assist developers in tracking and monitoring errors within web and mobile applications. Its primary purpose is promptly identifying and diagnosing software errors and exceptions, enabling developers to react swiftly and effectively.
LambdaTest's integration with Airbrake provides a seamless solution for tracking and managing bugs and issues encountered during cross-browser testing. With this integration, developers can effortlessly log bugs directly from the LambdaTest platform to their Airbrake instance, eliminating the need for manual maintenance of tasks and issues.
Integrating Airbrake With LambdaTest
Step 1: Sign in to your LambdaTest account. Don't have an account, register for free.
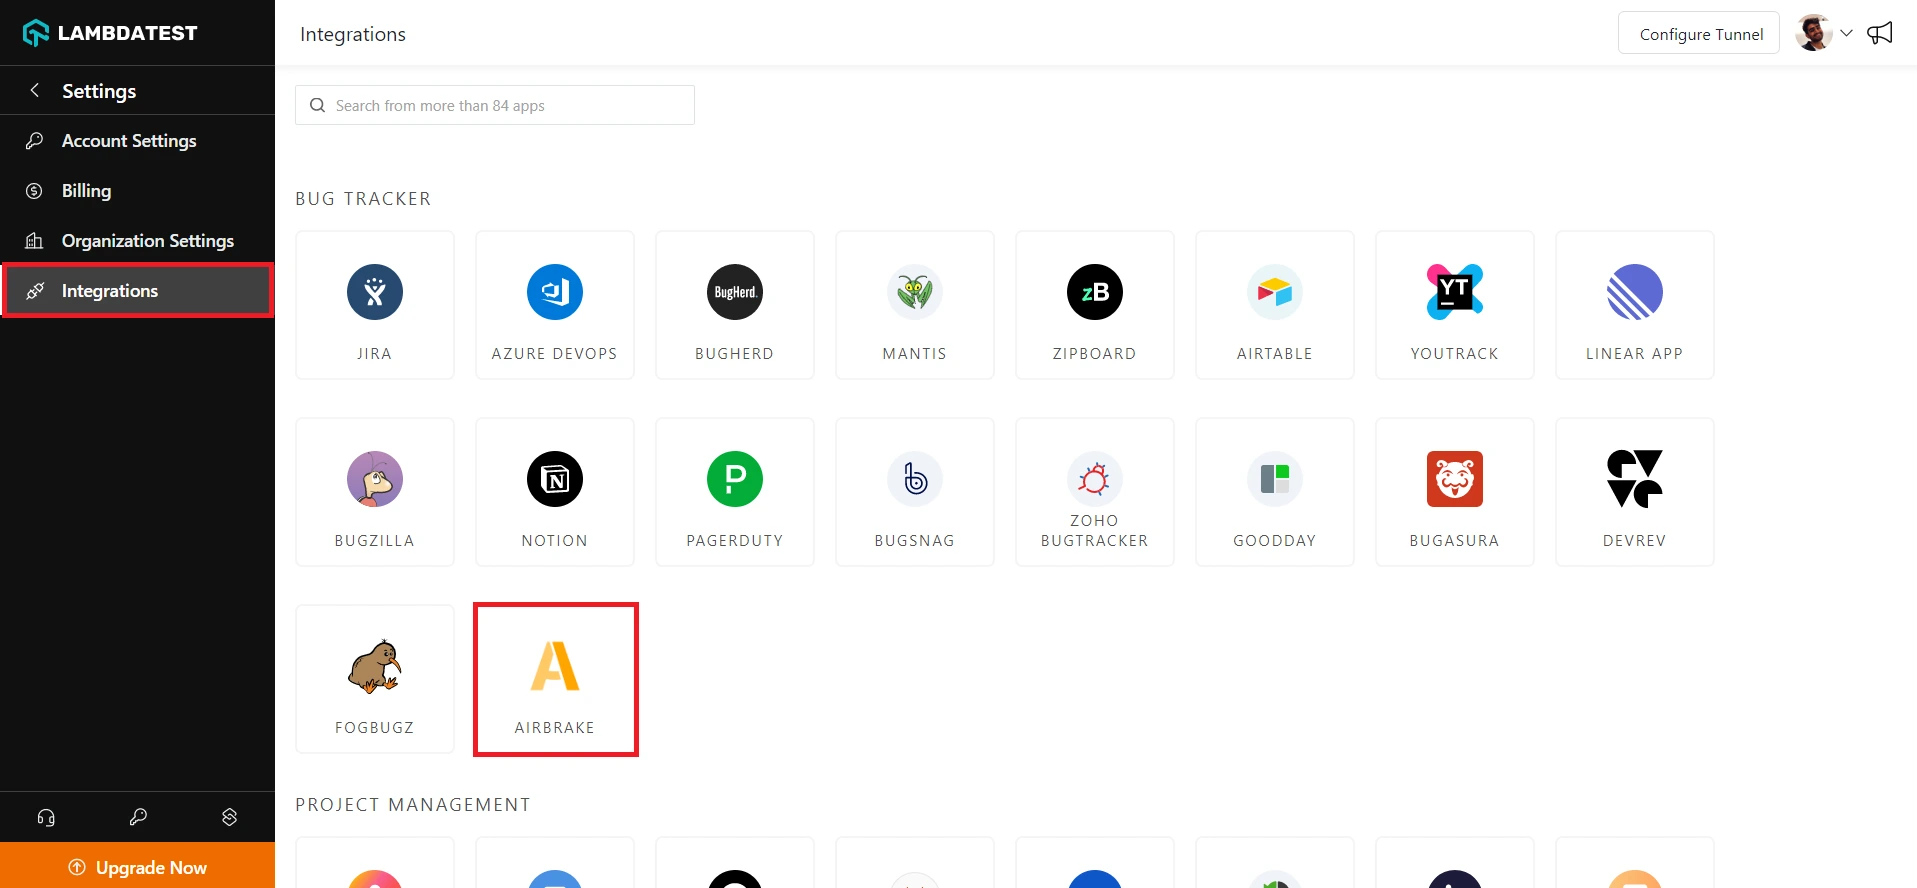
Step 2: Select Integrations from the left sidebar and head to Airbrake.
Step 3: It will route you to the installing console window, where you are required to enter your Airbrake Auth Token, Project ID, and Project Key.
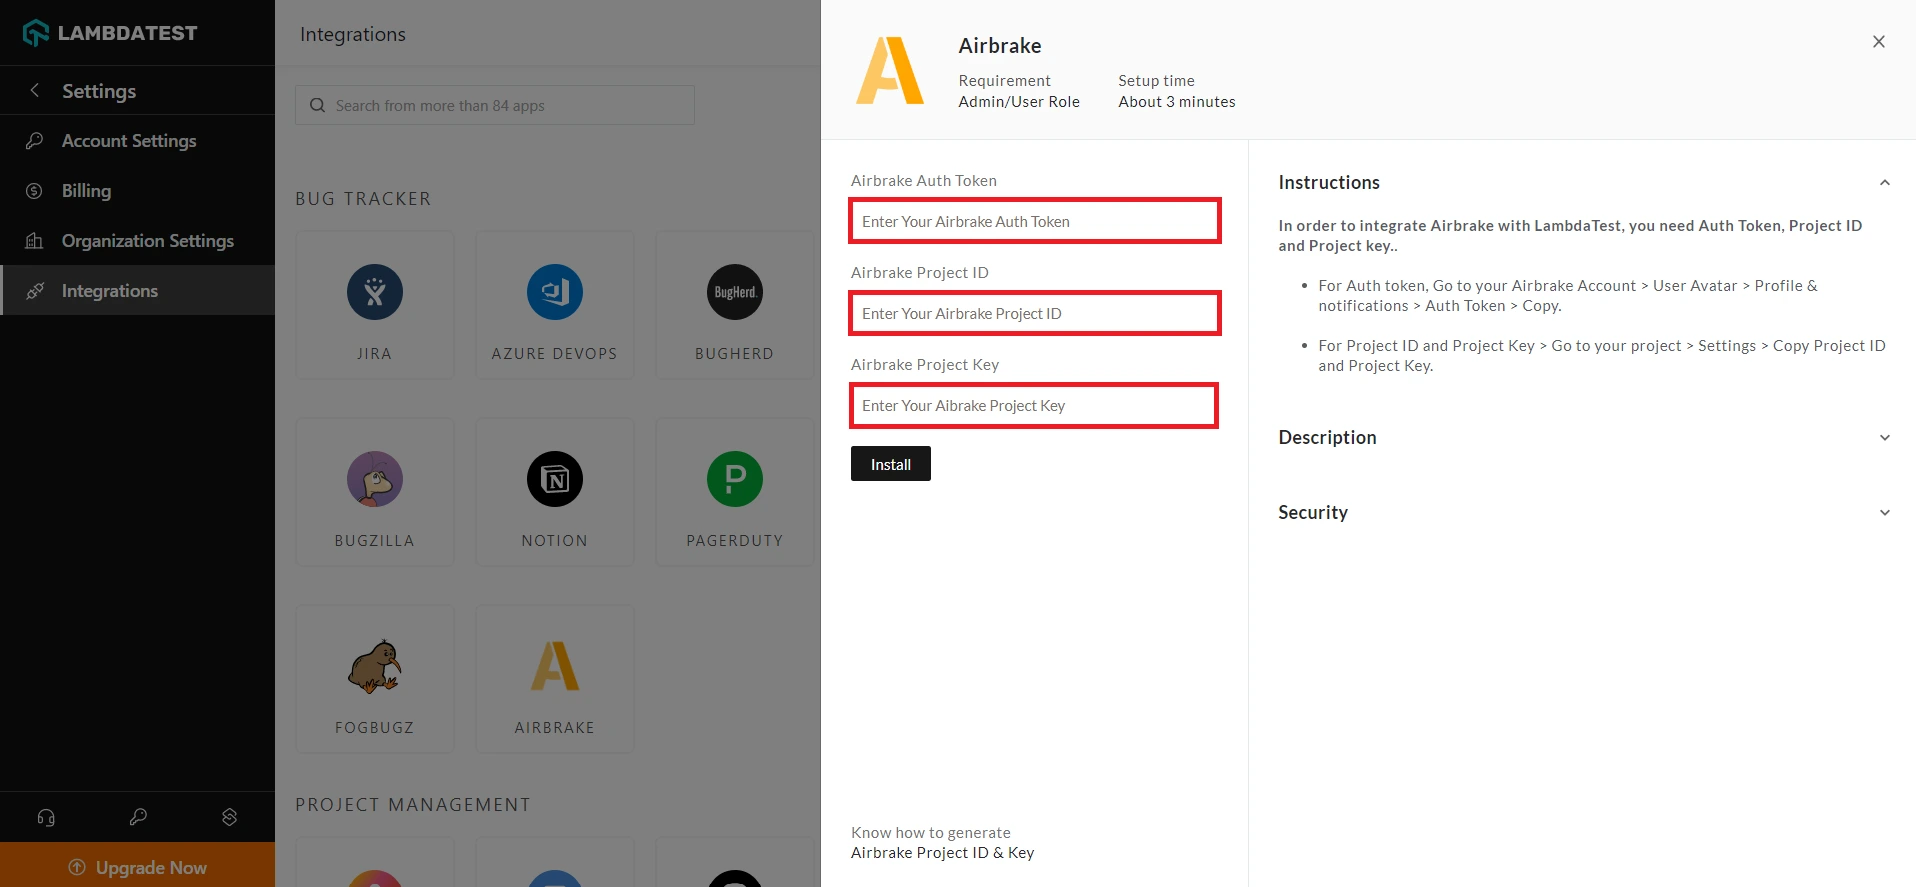
Getting The Airbrake Auth Token, Project ID, and Project Key
Step 1: Login to your Airbrake account.
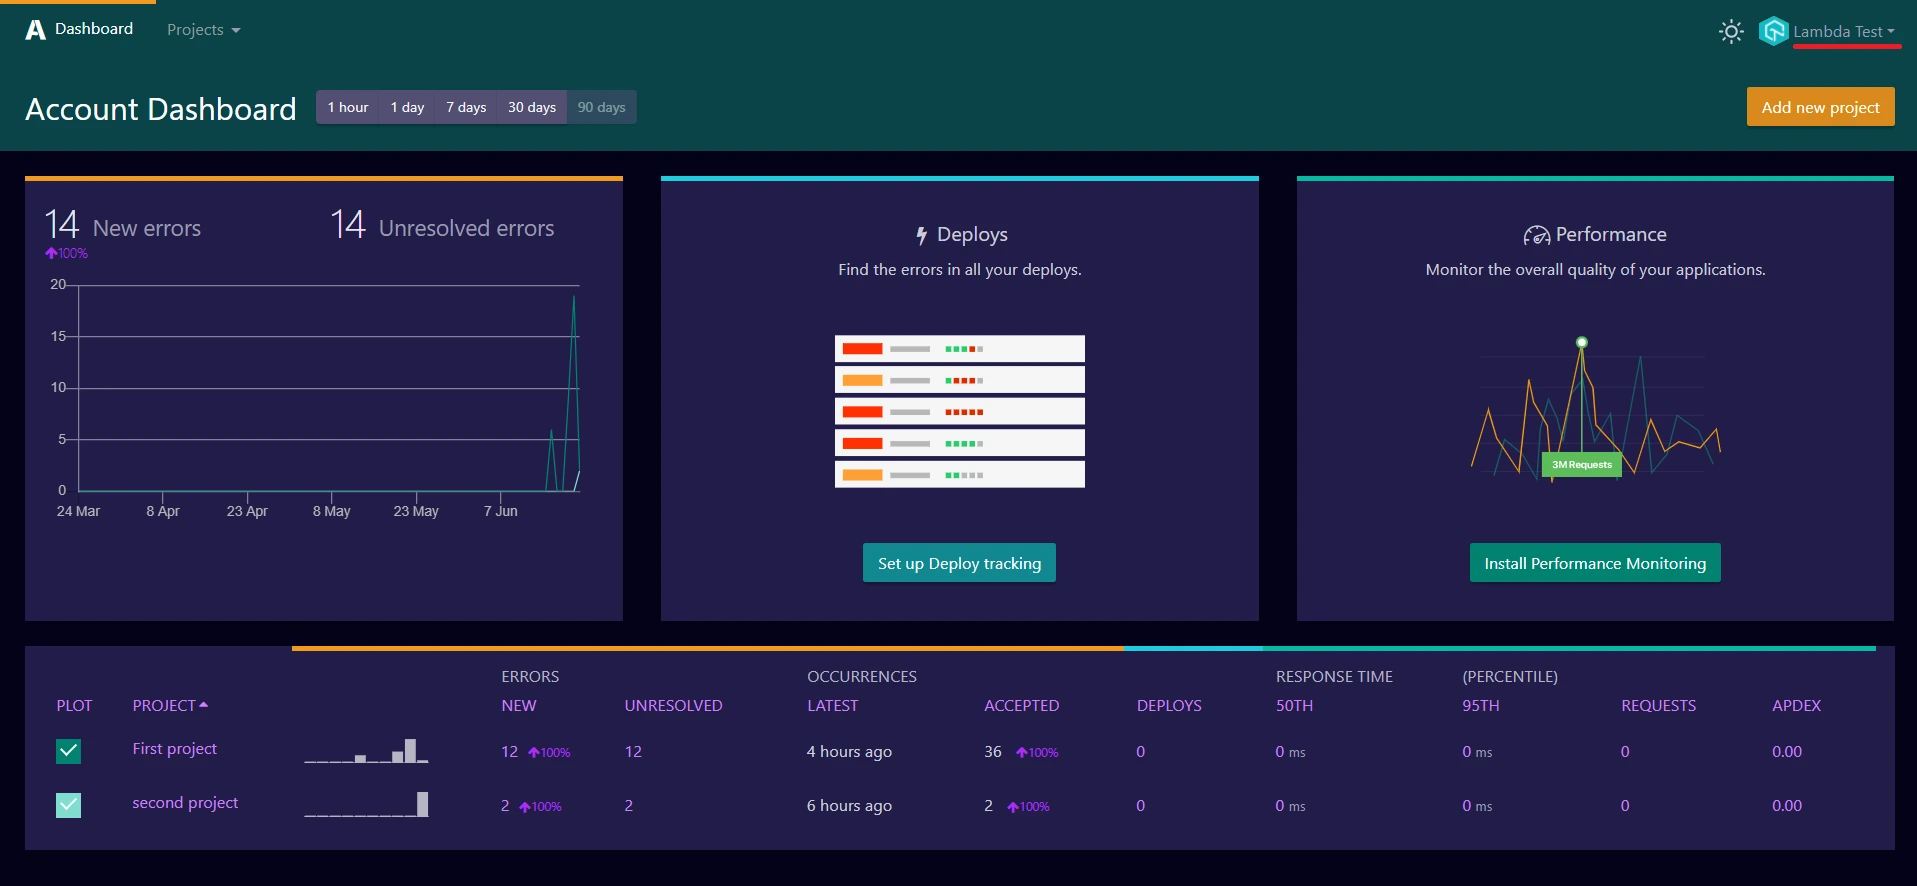
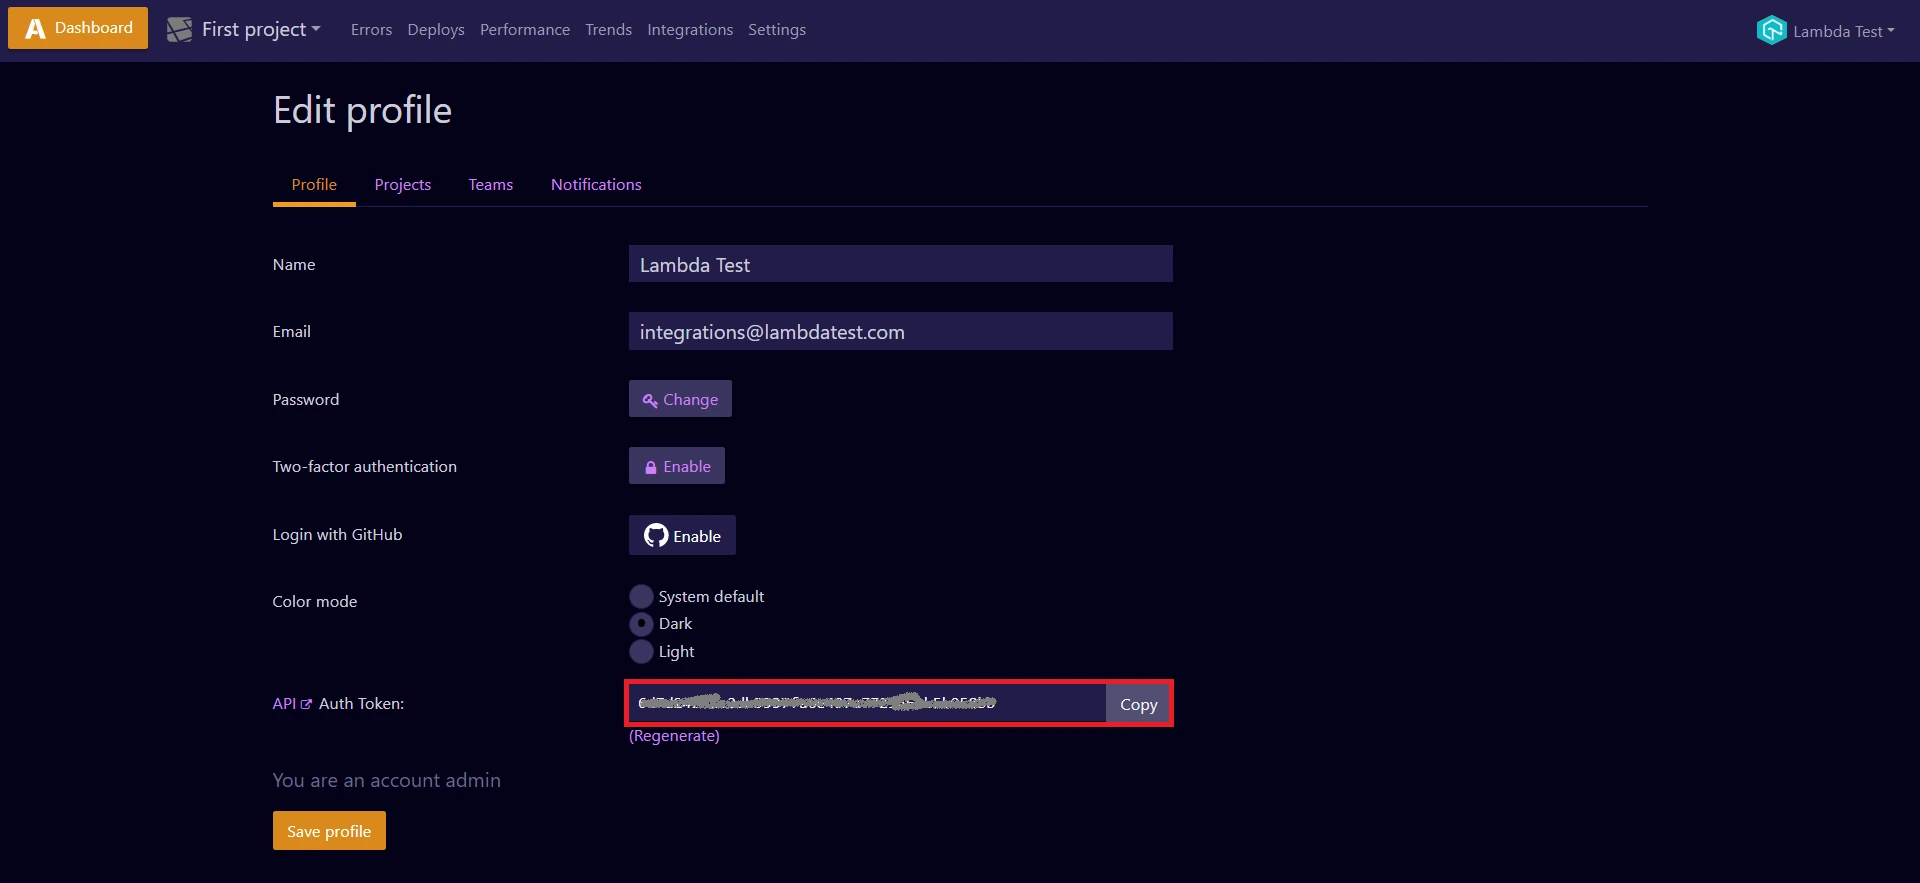
Step 2: From the left sidebar menu, hover on the profile icon and click the Profile and Notifications tab.
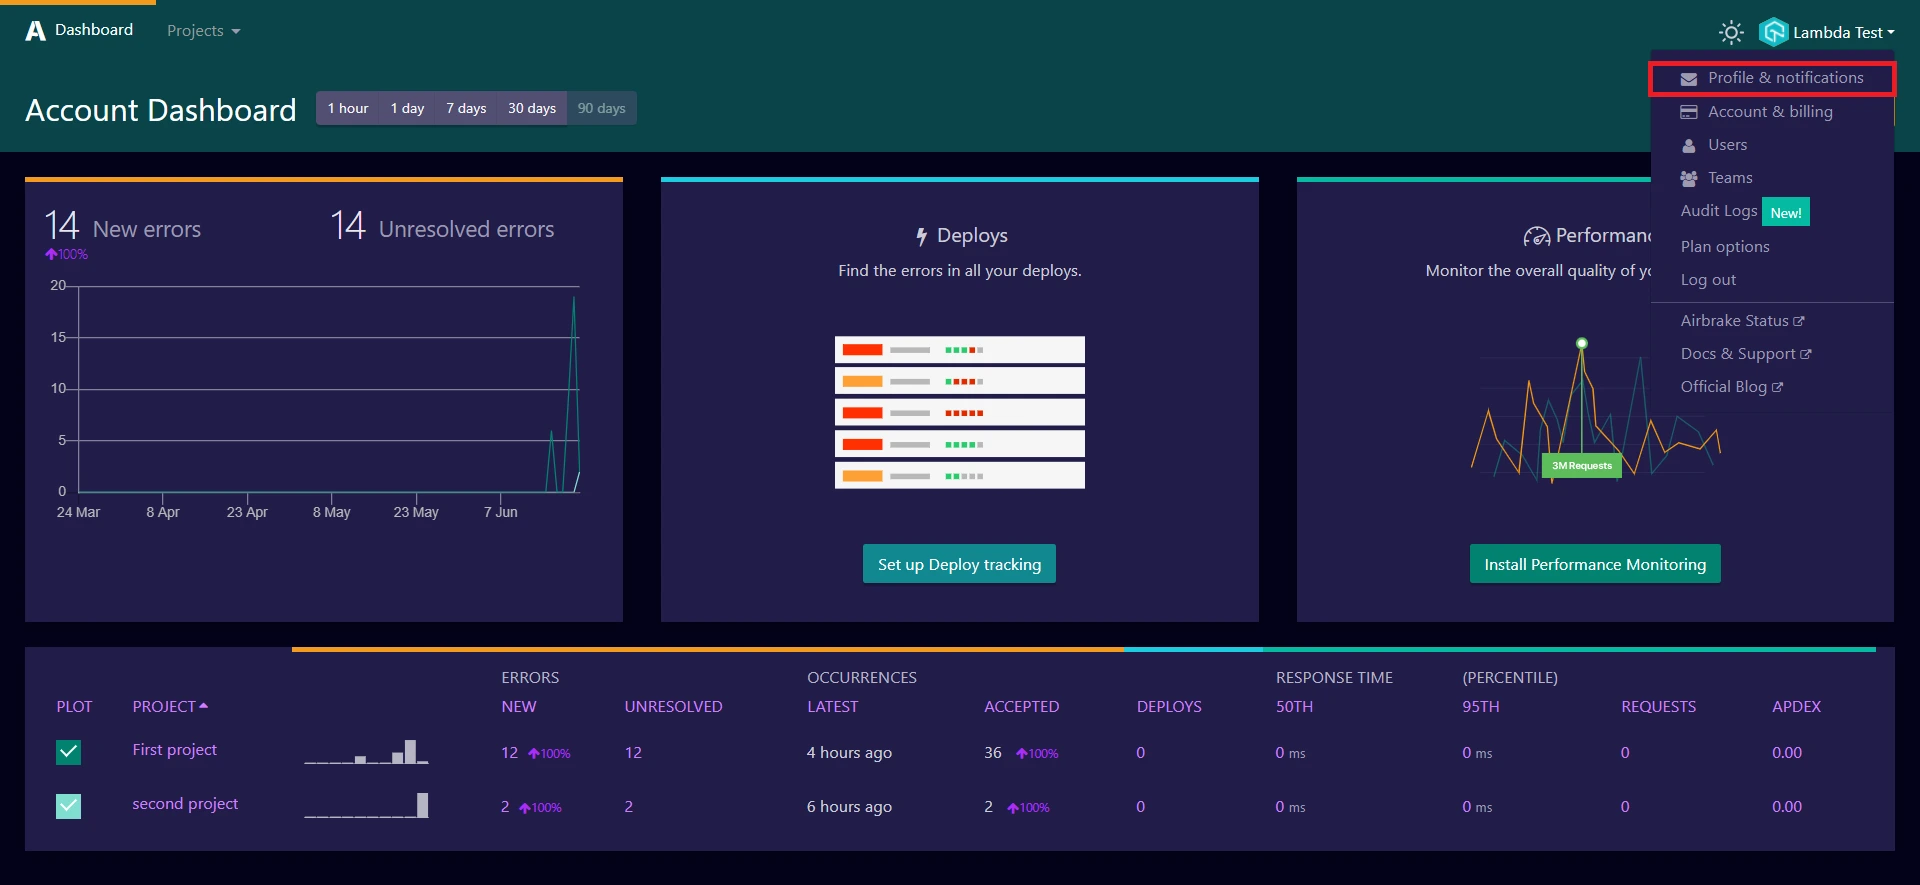
Step 3: Copy the Auth Token.
To access your Project ID and Key, head to the Projects option in the top-left corner.
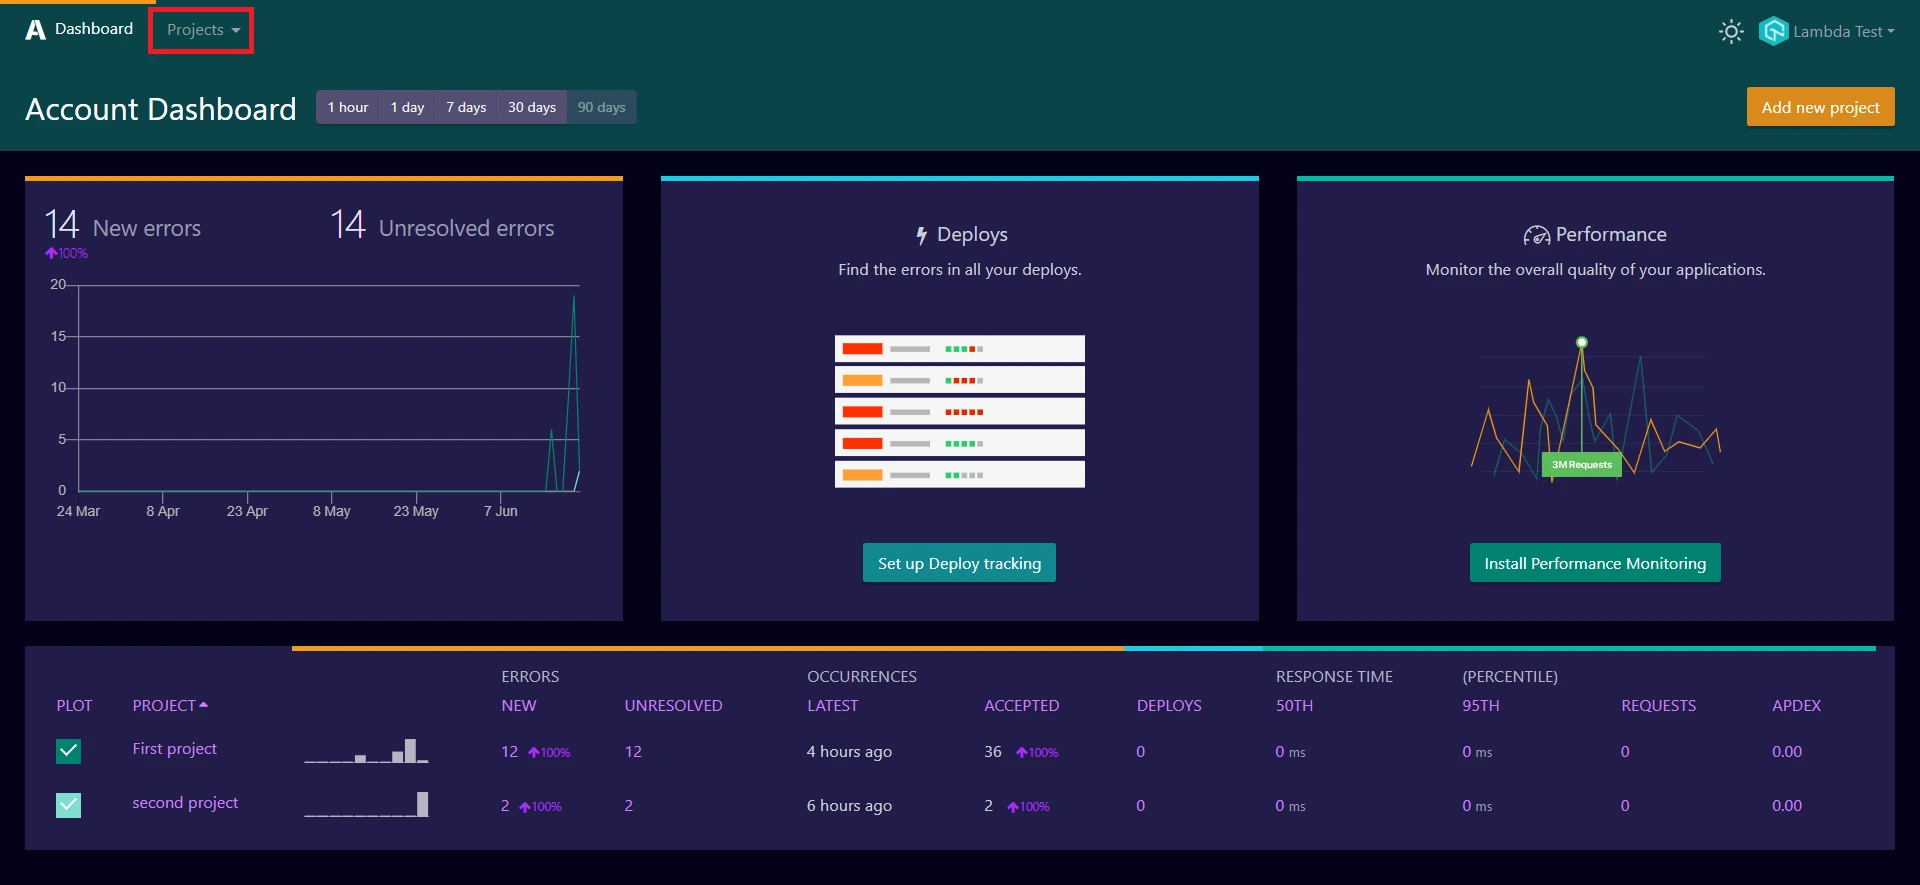
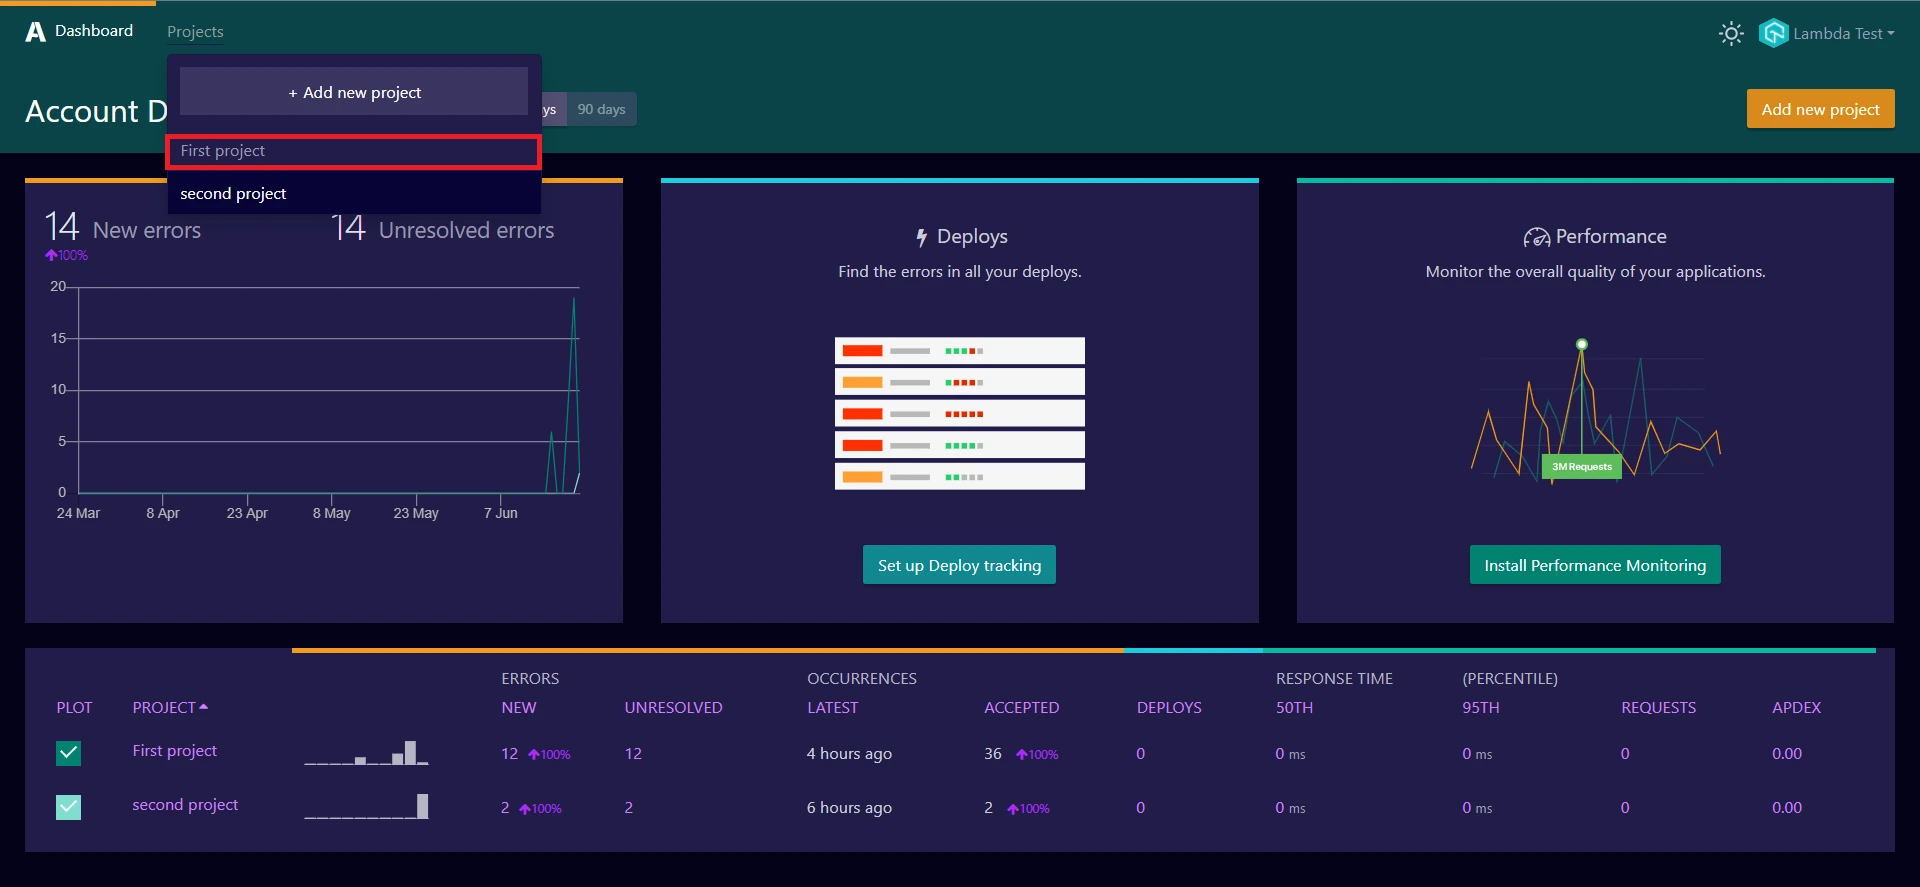
Step 1: Select your preferred project or create a new project.
Step 2: Head to the Settings tab.
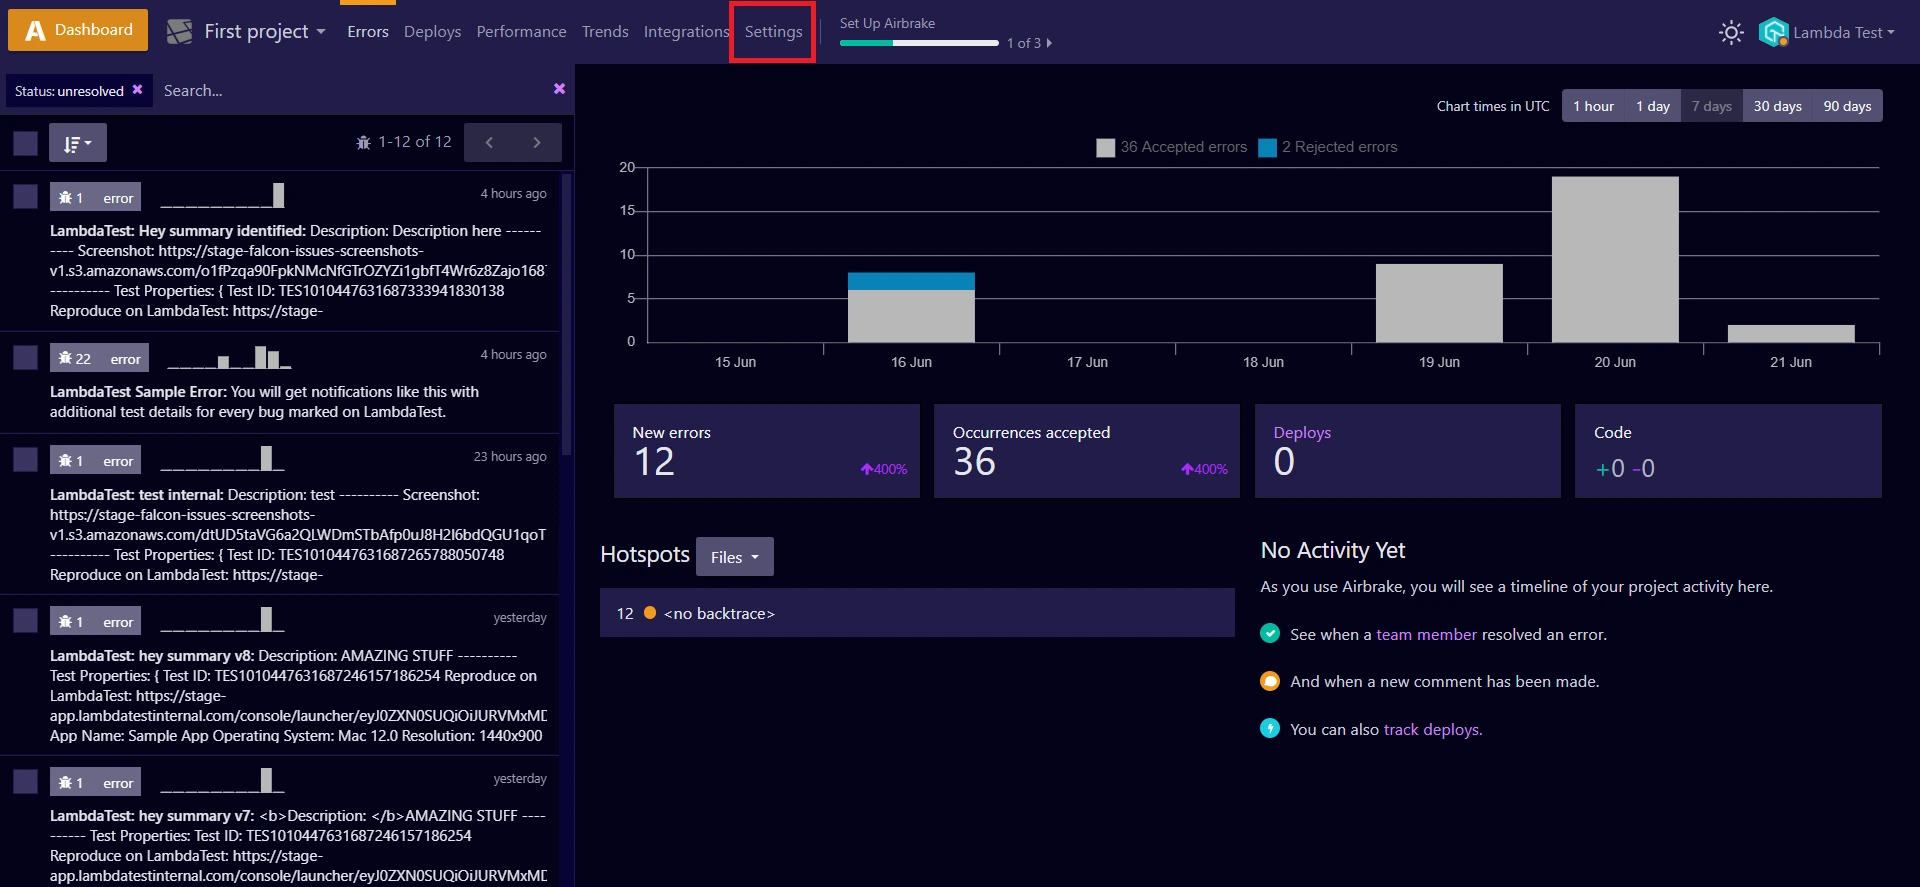
Step 3: Copy the Project ID and Project Key.
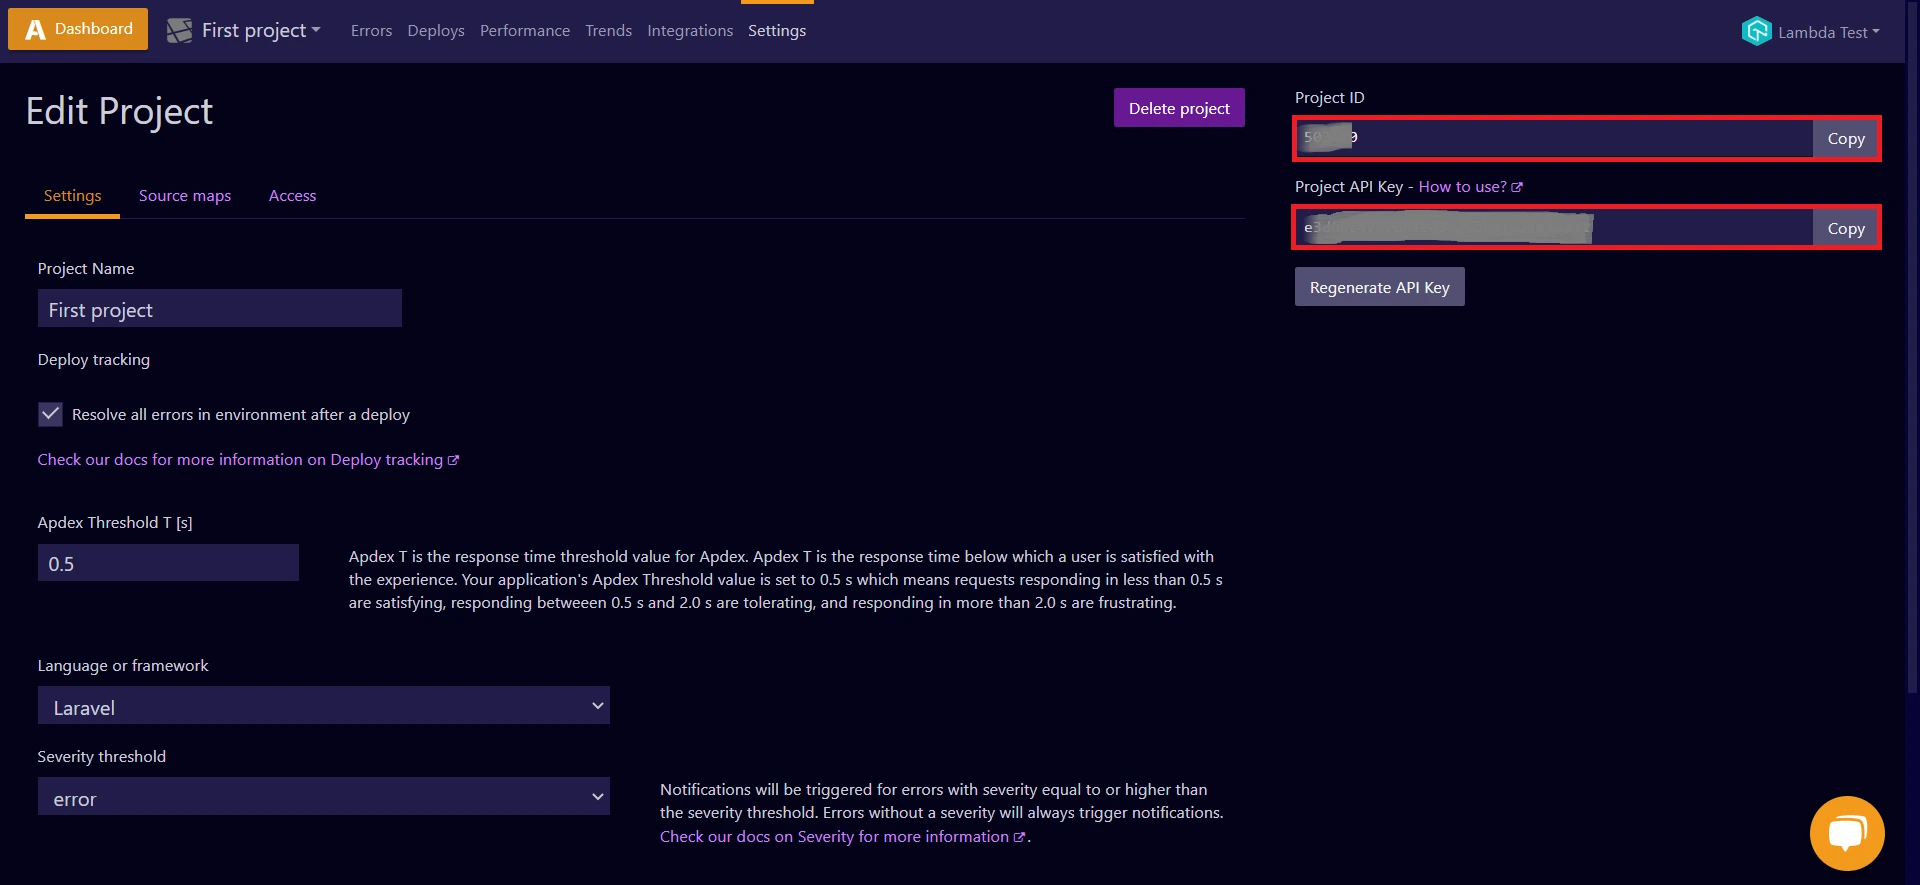
Copy and paste the required credentials from your Airbrake account and click Install.
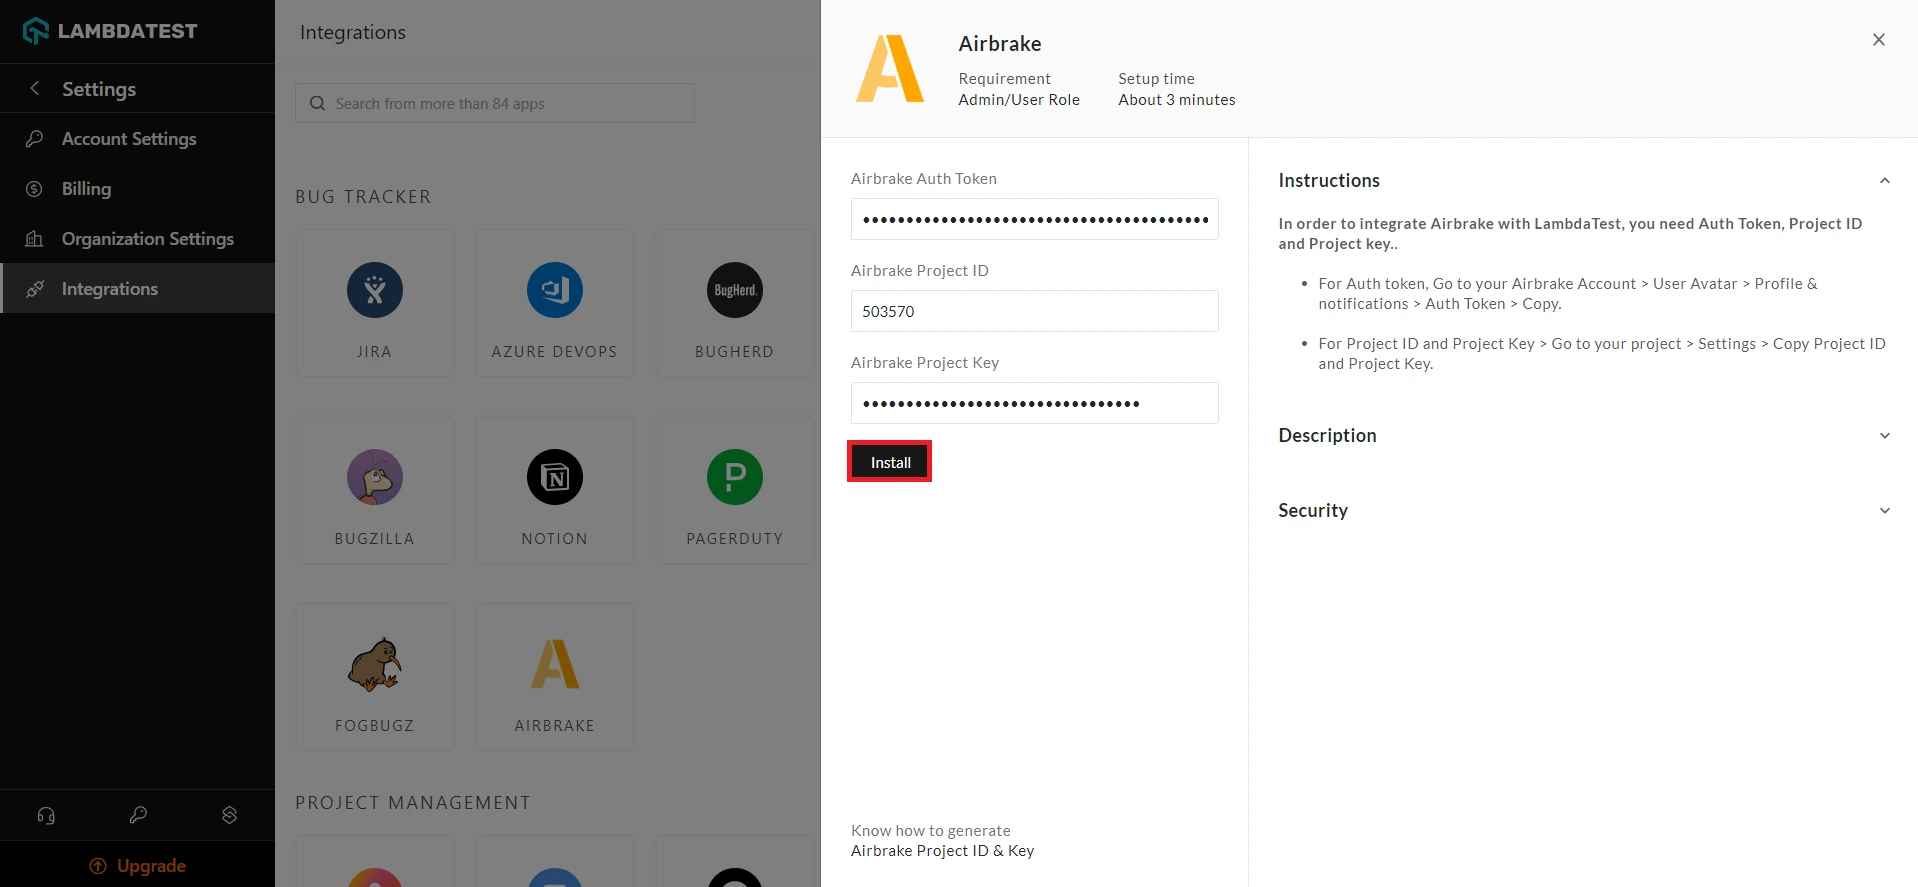
Now you have successfully integrated your LambdaTest account with Airbrake.
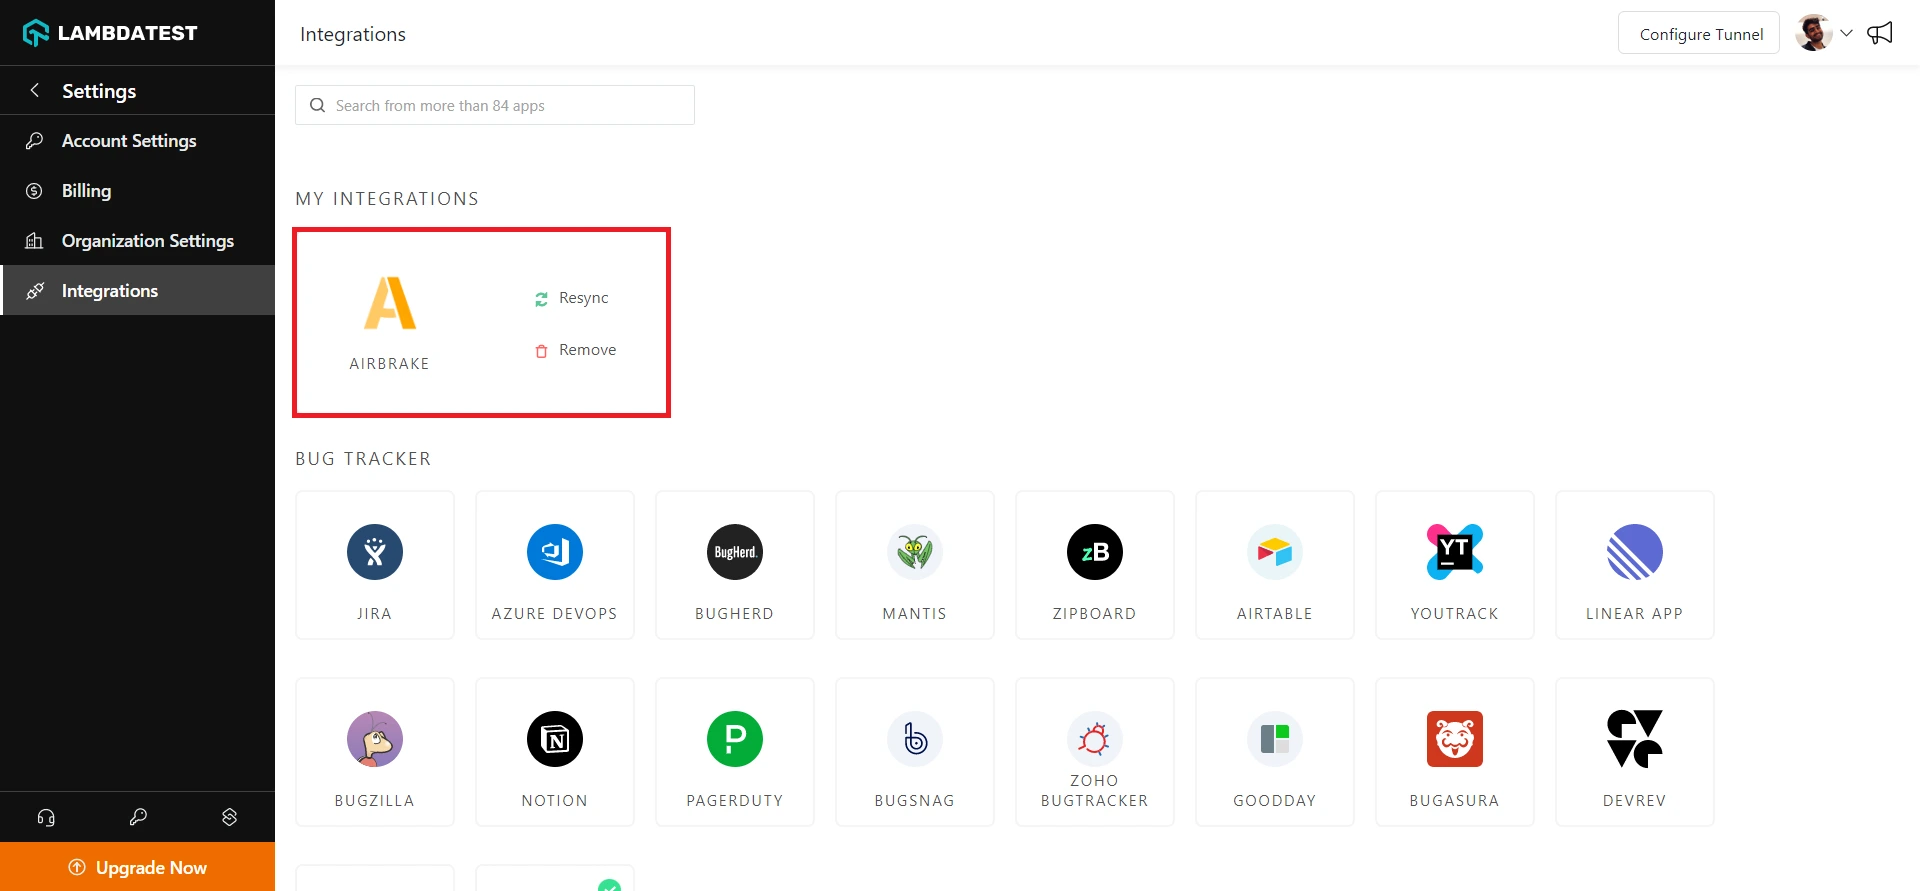
One-Click Bug Logging With Airbrake
Step 1: In your LambdaTest Dashboard, head to Real-Time Testing > Browser Testing from the left navigation menu.
Step 2: To perform live-interactive testing of your website or a web app, enter the web URL, select the testing type (Desktop/Mobile), select the browser version, OS, and resolution, and click Start.
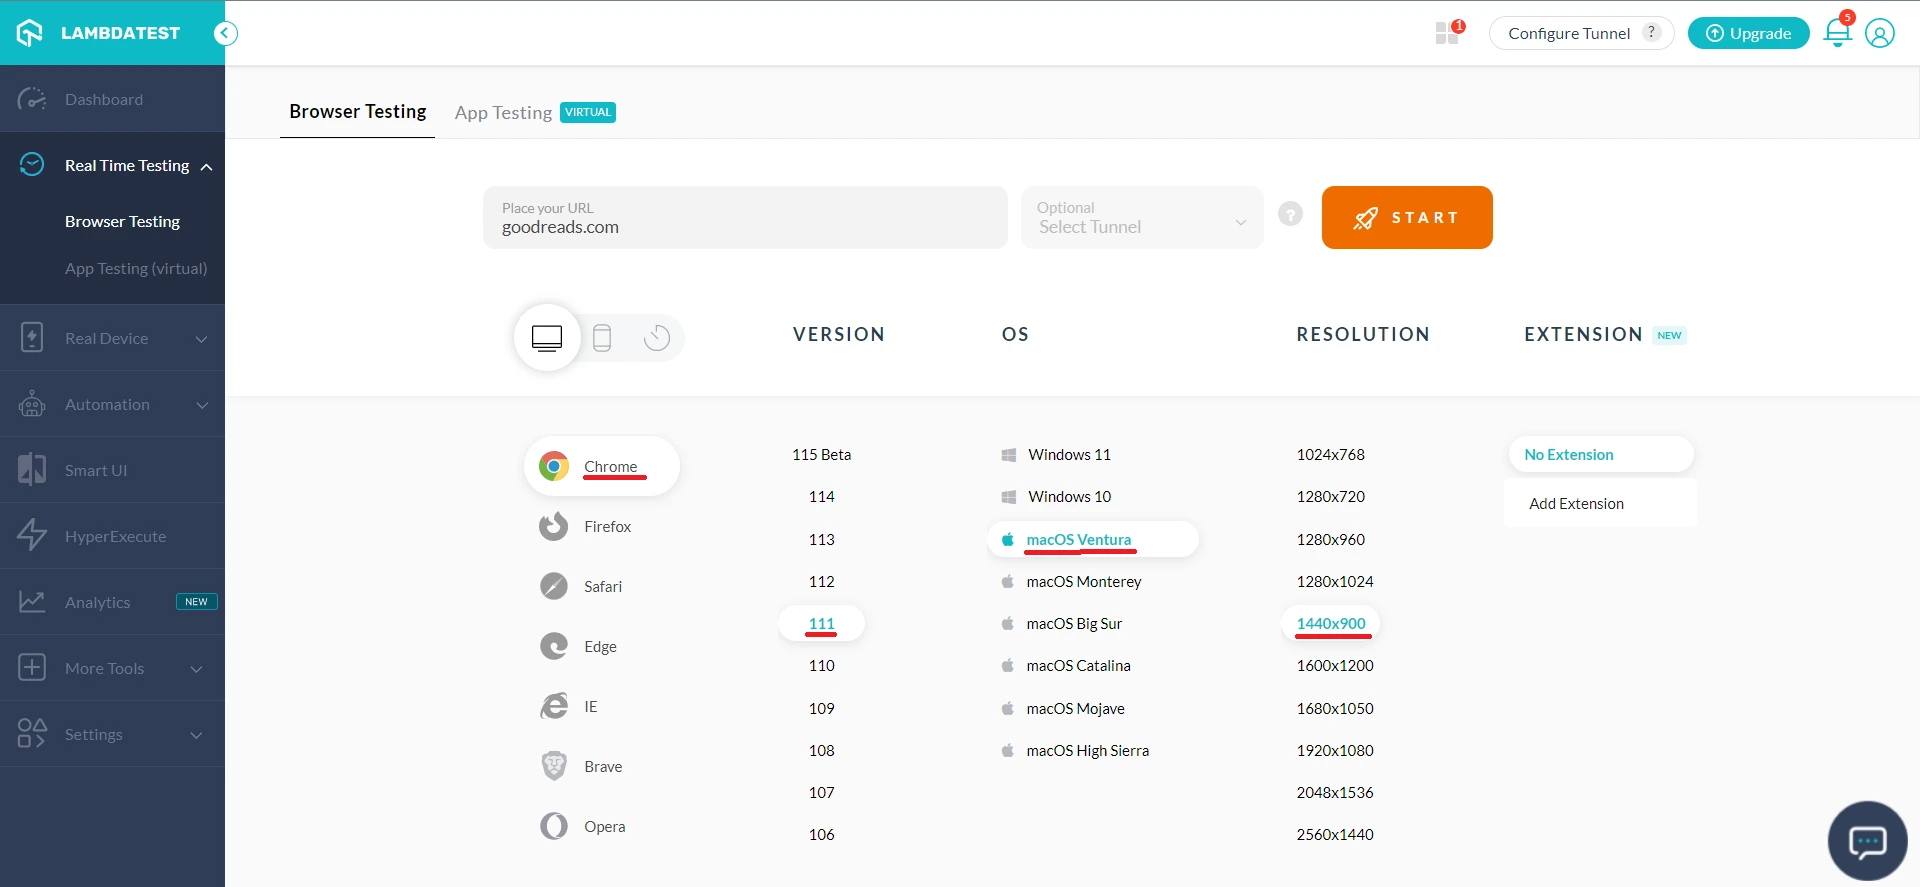
Upon clicking, a cloud-based virtual machine will fire up, running real browsers and operating systems where you can test websites and web apps for filing bugs.
Step 3: Click on the Bug icon from the left in-session toolbar to take a screenshot of any bug you encounter.
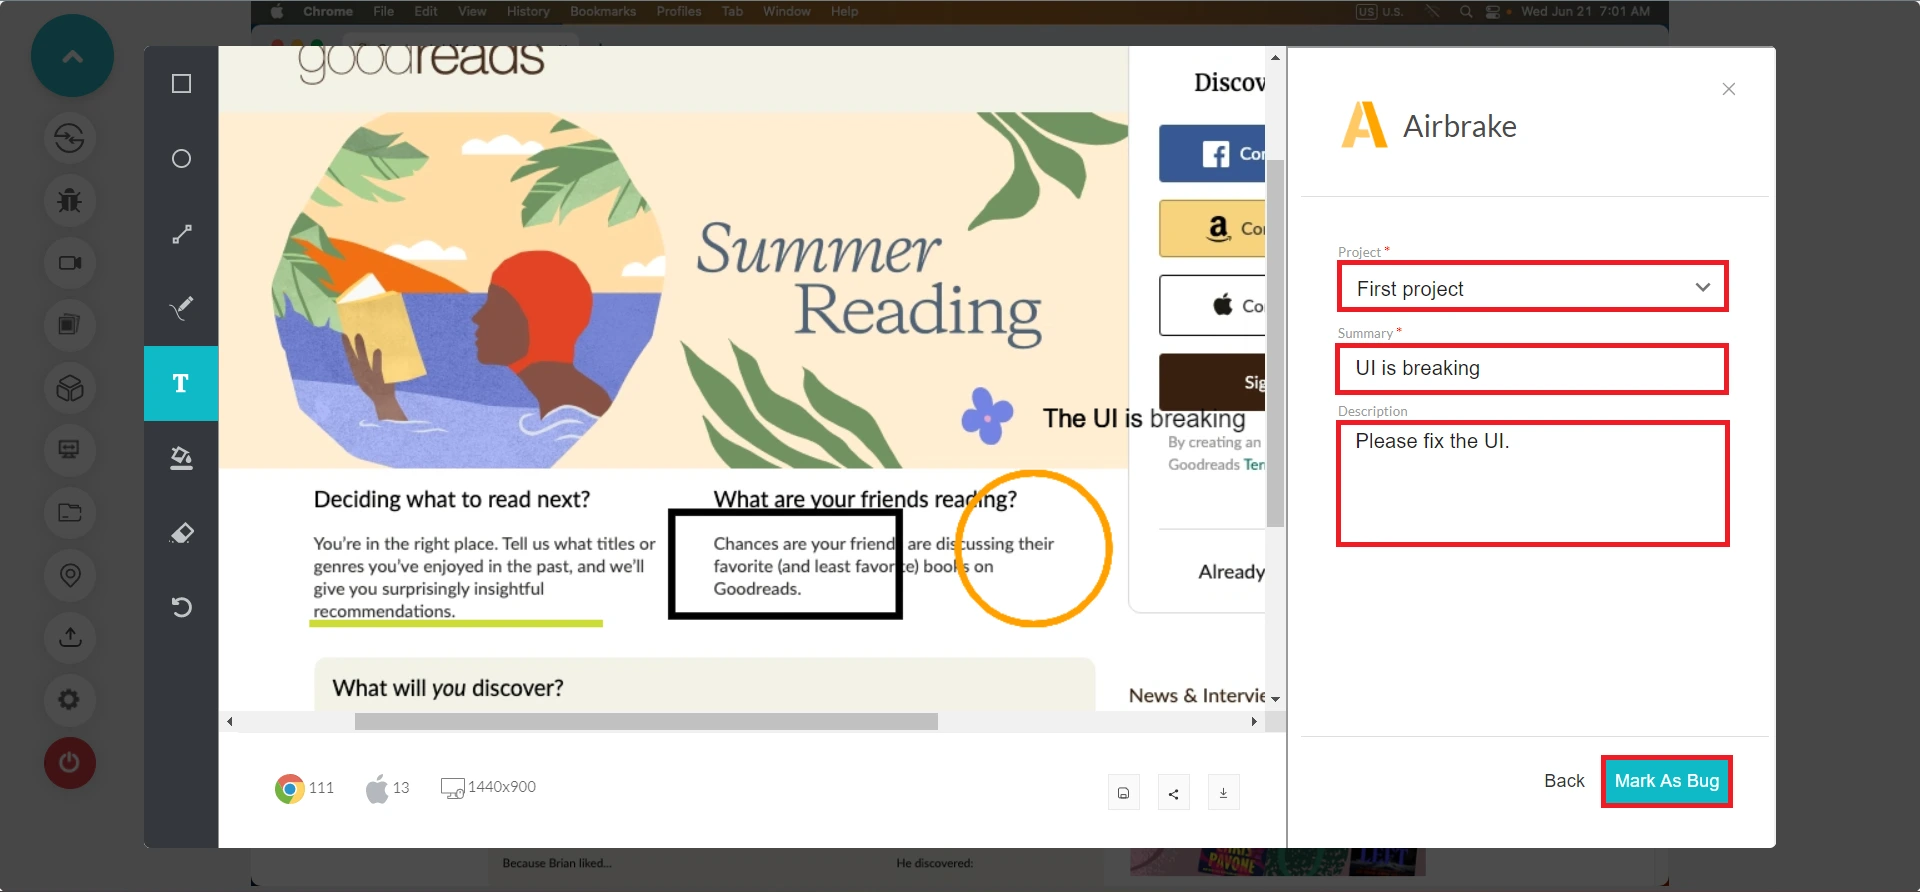
Step 4: After marking the bugs, click on the Bug icon in front of Airbrake under the integrations section.
Step 5: In the Airbrak ticket, fill the bug details like Project, Summary, and Description and click Mark As Bug to log the bugs in Airbrake.
Step 6: To view the logged issues, visit LambdaTest Dashboard and head to Manage > Issue Tracker from the left navigation bar.
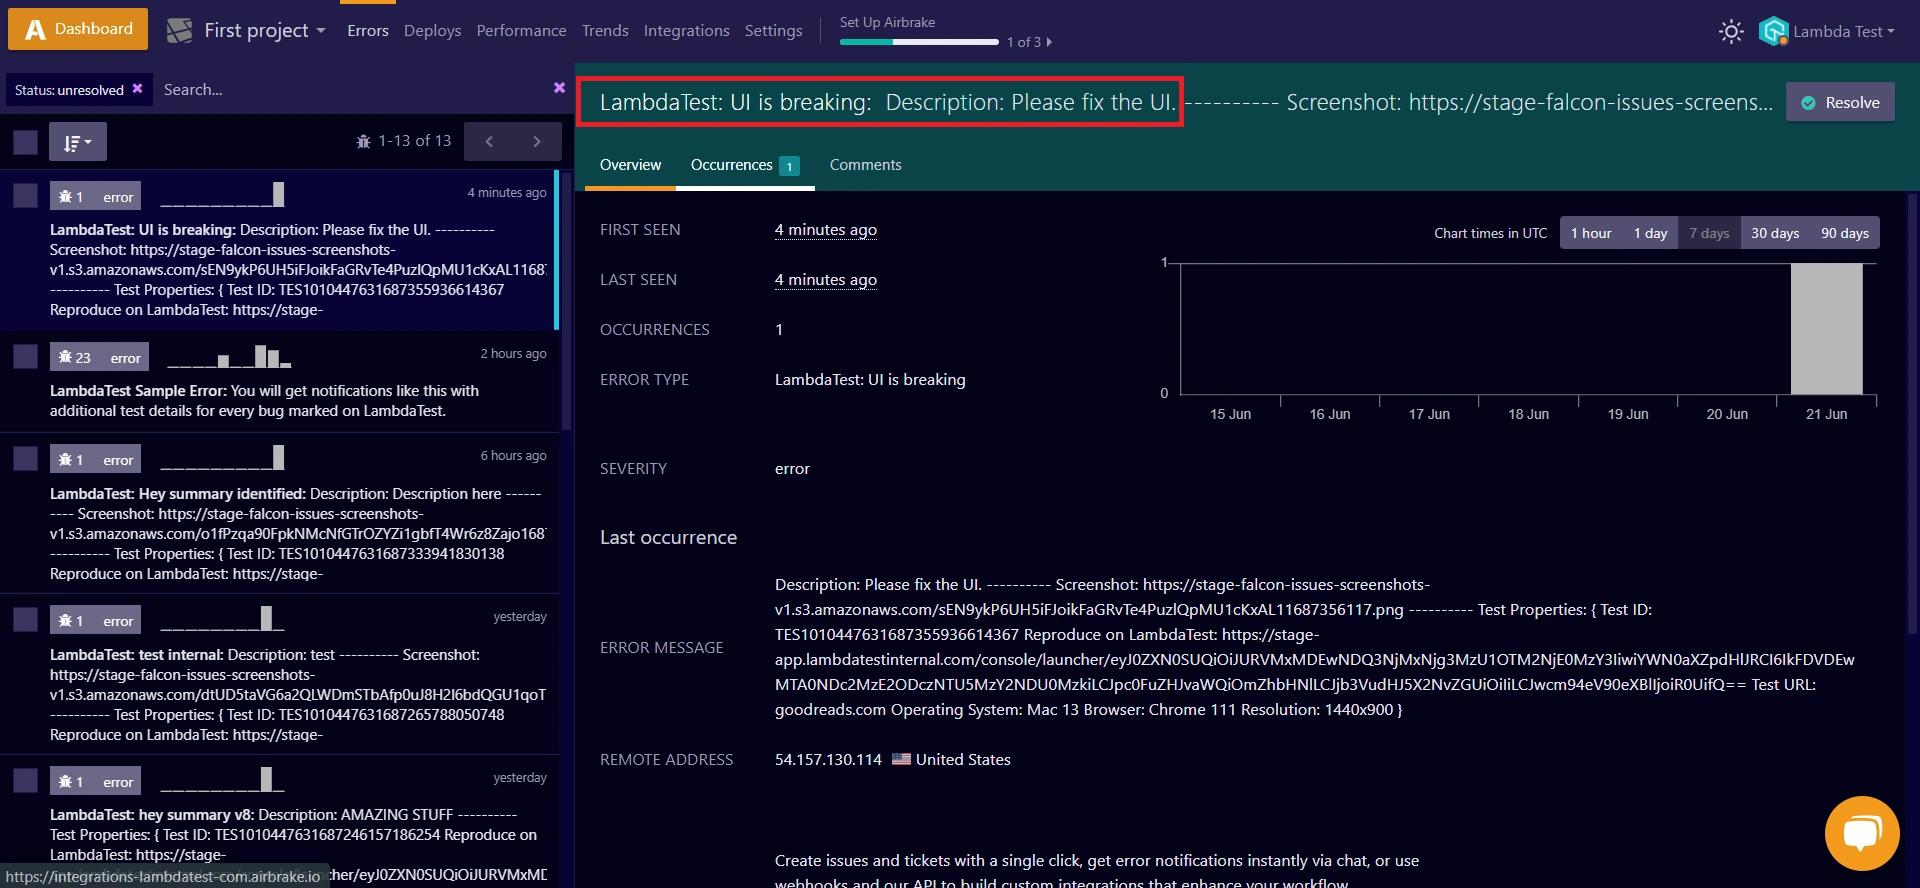
Step 7: Inside the Issue Tracker, you'll notice the logged bugs and their test environment details. Click on the upper right arrow in the square button to view your logged bugs in Airbrake instance.
Step 8: Upon clicking, you will be redirected to the Airbrake dashboard to find your logged bugs.
Uninstalling The Airbrake Integration
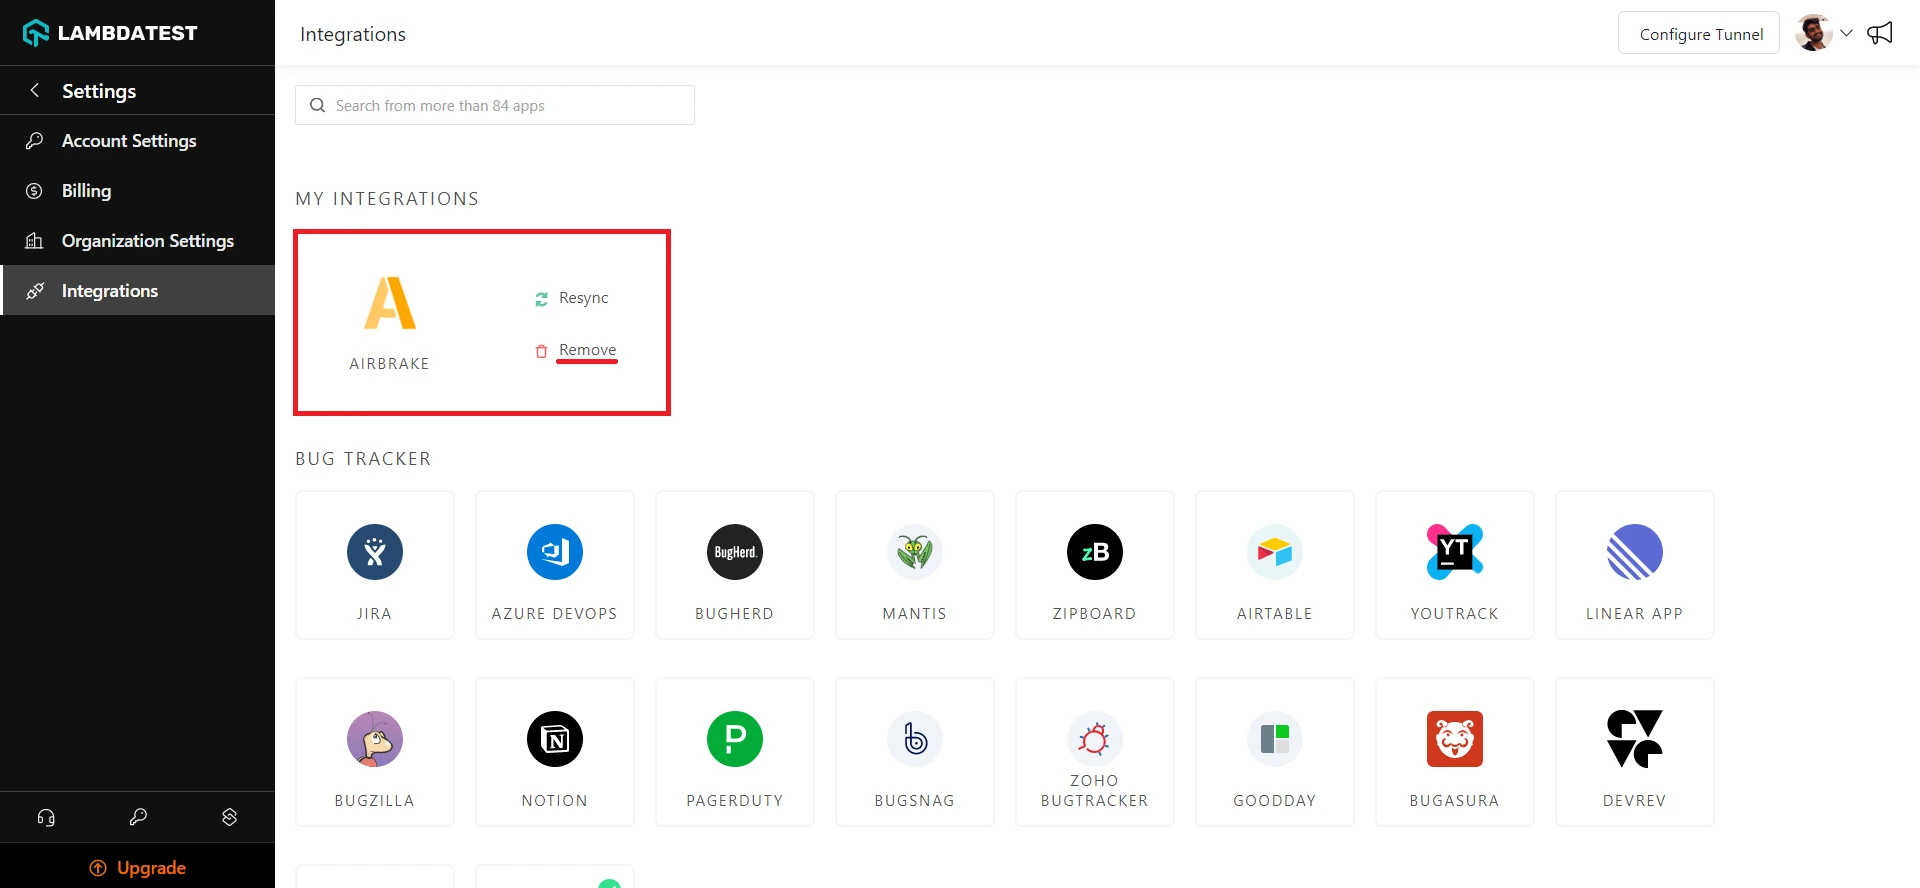
Step 1: Sign in to your LambdaTest account and visit Integrations from the left sidebar menu.
Step 2: From My Integrations, click Remove under the Airbrake block.
That was all you need to know for LambdaTest + Airbrake Integration. Increase your productivity with our integrations. If you still have any questions for us, please feel free to let us know. Our experts are always available on chat to help you out with any roadblock regarding our product. Happy testing!
