Using Page Object Model (POM) Pattern In Selenium JavaScript
Harita Ravindranath
Posted On: September 21, 2021
![]() 121827 Views
121827 Views
![]() 14 Min Read
14 Min Read
This article is a part of our Content Hub. For more in-depth resources, check out our content hub on Selenium JavaScript Tutorial.
Design patterns in test automation provide a way to handle commonly occurring problems and structure your test code in a relatively standardized way. Using design patterns, you can solve some of the common issues such as testing complex user transactions, functional testing of several web pages, and unearth performance issues related to throttling internet connectivity.
One of the popular test automation design patterns is Page Object Pattern. It is one of the most important design patterns, as it makes tests maintainable, reusable, and pushes us to think about how to structure our automation code better.
In this Selenium JavaScript tutorial, we will be discussing in detail about the Page Object Pattern in JavaScript using Selenium WebDriver. We will try to understand the benefits of adopting this pattern and demonstrate practical implementation examples using the trending test automation framework – WebdriverIO.
Perform Selenium JavaScript Testing on LambdaTest’s online cloud.
Let’s get started!
TABLE OF CONTENT
What is Page Object Pattern
The Page Object Pattern is a design practice that is commonly adopted by testers when performing Selenium automation testing. The primary goal of this pattern is to avoid code duplication and enhance code reusability. This enhances the overall ease of test case maintenance and robustness of the test code, thereby making it more programmer-friendly.
To understand the objective of this pattern, first of all, let us try to understand precisely what we can achieve with it when performing web automation testing. Automation tests allow us to navigate to different web pages and perform relevant actions with the WebElements that are identified using the appropriate Selenium locators. The Page Object Pattern wraps all the elements, actions, and validations happening on a page in one single Page Object.
The creator of WebDriver, Simon Stewart, states-
“If you have WebDriver APIs in your test methods, You’re Doing It Wrong.”
The Page Object Pattern directs us to create an object that represents the UI of the page we want to test. As mentioned, this object will wrap all the HTML elements (locators) and encapsulates interactions with the UI (methods). For example, all the WebDriver calls will go inside these encapsulated methods. So, this is the only place that you need to modify when the UI changes, i.e. the element locators are centralized.
Frequent UI changes will only impact the files that are housing the locators, with minimal (or zero) changes in the test implementation.
This series of page objects are responsible for communicating with the web pages you are testing by cleanly separating the actual test code from the page-specific code.
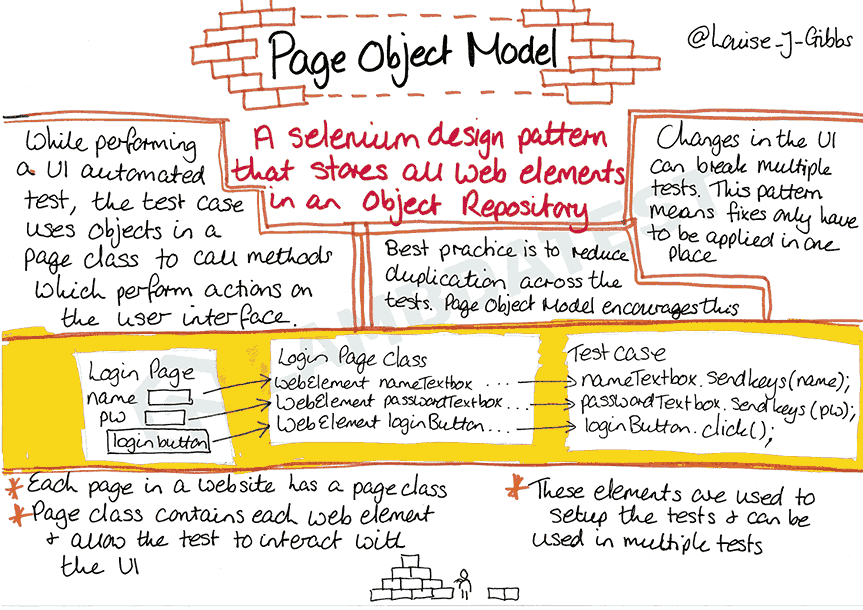
Keep the following best practices in mind when creating page objects:
- The page object can be created for a whole page/screen or even major fragments of it
- Avoid unnecessary complexity, which leads to hard-to-read spaghetti code
- Page objects should only exist if some behavior makes sense from the user’s perspective
Advantages of Page Object Pattern
The benefits of utilizing this pattern becomes apparent while testing complex, large-scale applications where you will need to manage a larger suite of regression tests.
As these applications are only expected to grow larger and more complex with every software release, adopting the Page Object Pattern makes sense as it can prove to be a huge time and cost saver for the project.
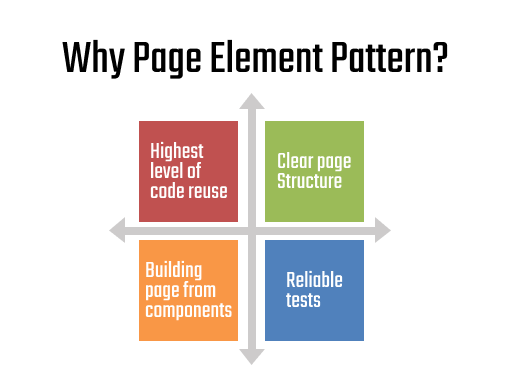
Major advantages of following the Page Object Pattern are:
- Ease of code maintenance
- Code Reusability across tests
- Enhanced script readability and reliability
- Decouples your test code and page-specific code, such as locators and interactions
Also Read – Page Object Model (POM) in Selenium Python
Page Object Pattern in JavaScript using WebdriverIO
WebdriverIO is one of the top JavaScript test automation frameworks in the market. It is very popular among testers as well as developers backed up by an active community to support.
According to the official WebdriverIO documentation, the latest versions of the framework were designed with Page Object Pattern in Selenium support in mind. To create Page Objects, no additional packages are required. All the necessary features are provided by the clean and modern classes such as:
- Inheritance between Page Objects
- Lazy loading of elements
- Encapsulation of methods and actions
The elements are treated as “first-class citizens.” Hence, using this pattern, the framework enables you to build up larger test suites. In the upcoming section of this Selenium JavaScript tutorial, we will demonstrate how to implement the Page Object Pattern in JavaScript using the WebdriverIO framework and write automation tests. But before that, let’s check the prerequisites.
Read – A Comprehensive Guide To JavaScript Design Patterns
Prerequisites for writing automation tests in JavaScript
Before proceeding to write Selenium automation tests, make sure that your system has met the following requirements:
1. Node.js and NPM
To check if Node.js is installed in your machine, just execute the following command in your terminal:
node -v
If installed, the installed Node.js version will be displayed. Else you can download the latest LTS version from the Node.js official website.
Similarly, you can check the installed NPM version using the following command:
npm -v
Note: NPM will be installed along with Node.js. There is no need for separate installation.
2. Any IDE of choice
For this Selenium JavaScript tutorial, we will be using Visual Studio Code as IDE. But feel free to pick any IDE of your preference.
You can refer to our blog titled automation testing with Selenium JavaScript in case you want to deep dive into the basics of Selenium JavaScript testing.
With these checked, let us move on to setting up the project workspace.
Step 1: Create a folder for the project in the desired location in your system. We will call this folder “PageObjectPattern.” Then, open the folder in IDE.
Step 2: Initialize the project with the package.json file. Then, type the following command in the terminal:
npm init -y
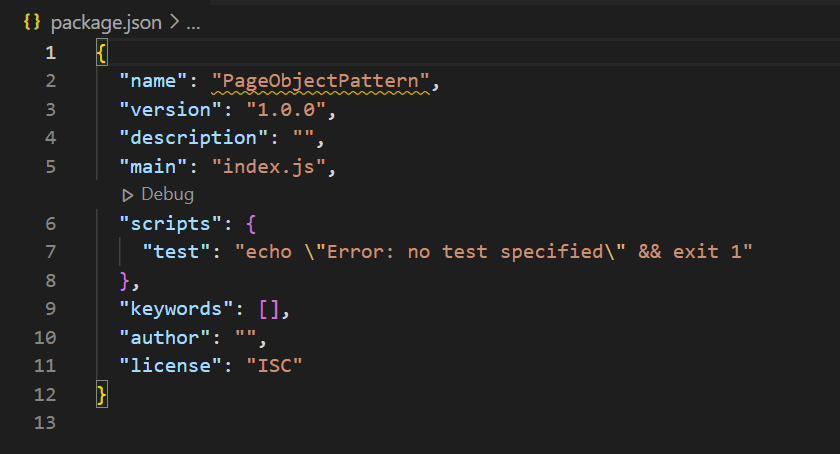
With this, we have successfully created the package.json file. The optional parameter -y allows you to skip all the configuration questions asking for “Yes” prompts and set up a default package.json setting for your project, as shown in the below screenshot.
Step 3: The next step would be the installation of the dependencies. Install the CLI tool for WebdriverIO by using the following command:
npm install --save-dev @wdio/cli
Step 4: Finally, set up the WebdriverIO configuration file using the following command:
npx wdio config
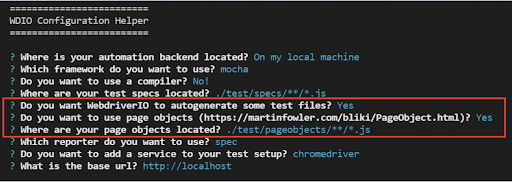
You will be prompted to choose the configurations for getting started. Select them as per your requirement.
Note: We will use Mocha as the framework and Chrome as the virtual browser for this Page Object Pattern in Selenium JavaScript tutorial.
As mentioned earlier, the WebdriverIO framework natively supports Page Object Pattern. Therefore, by selecting the configuration highlighted below, you will be able to auto-generate the Page Object folder structure along with executable sample tests, as shown in the below screenshot.
You can also skip the configuration questions and opt for the default set-up by adding the -y flag to the command below.
npx wdio config -y
Using this command, the following packages are configured automatically, which of course, you can later change if you want to:
- @wdio/local-runner
- @wdio/mocha-framework
- @wdio/spec-reporter
- @wdio-chromedriver-service
- @wdio/sync – chromedriver
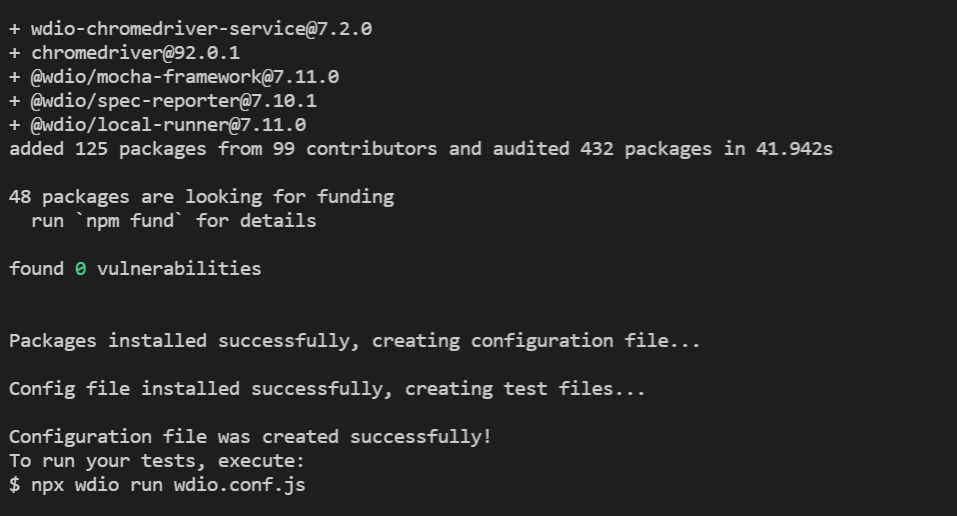
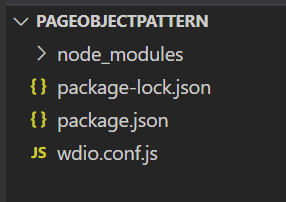
You will see that the wdio.conf.js file gets created under the project root. Therefore, the overall folder structure will look like this.
Note: In this tutorial on Page Object Pattern in JavaScript, we will set up our page object framework from scratch. So I have not opted for auto-generated tests.
That’s pretty much it with the installation and configuration part while working with Page Object Pattern in JavaScript. Now it’s time to get your hands dirty!
In the next section of this Selenium JavaScript tutorial, we will learn to write our first automated test case using the JavaScript Page Object Pattern.
There are certain steps that have to be considered before writing the first test script in JavaScript. We have discussed these steps in detail, including setting up an environment for writing Selenium tests with JavaScript bindings in our earlier Selenium JavaScript tutorial series.
However, no matter where you are in the Selenium JavaScript testing journey – planning how to start, looking for resources to improve, etc. – you can find helpful videos at LambdaTest YouTube channel.
Writing your first test case using Page Object Pattern in JavaScript
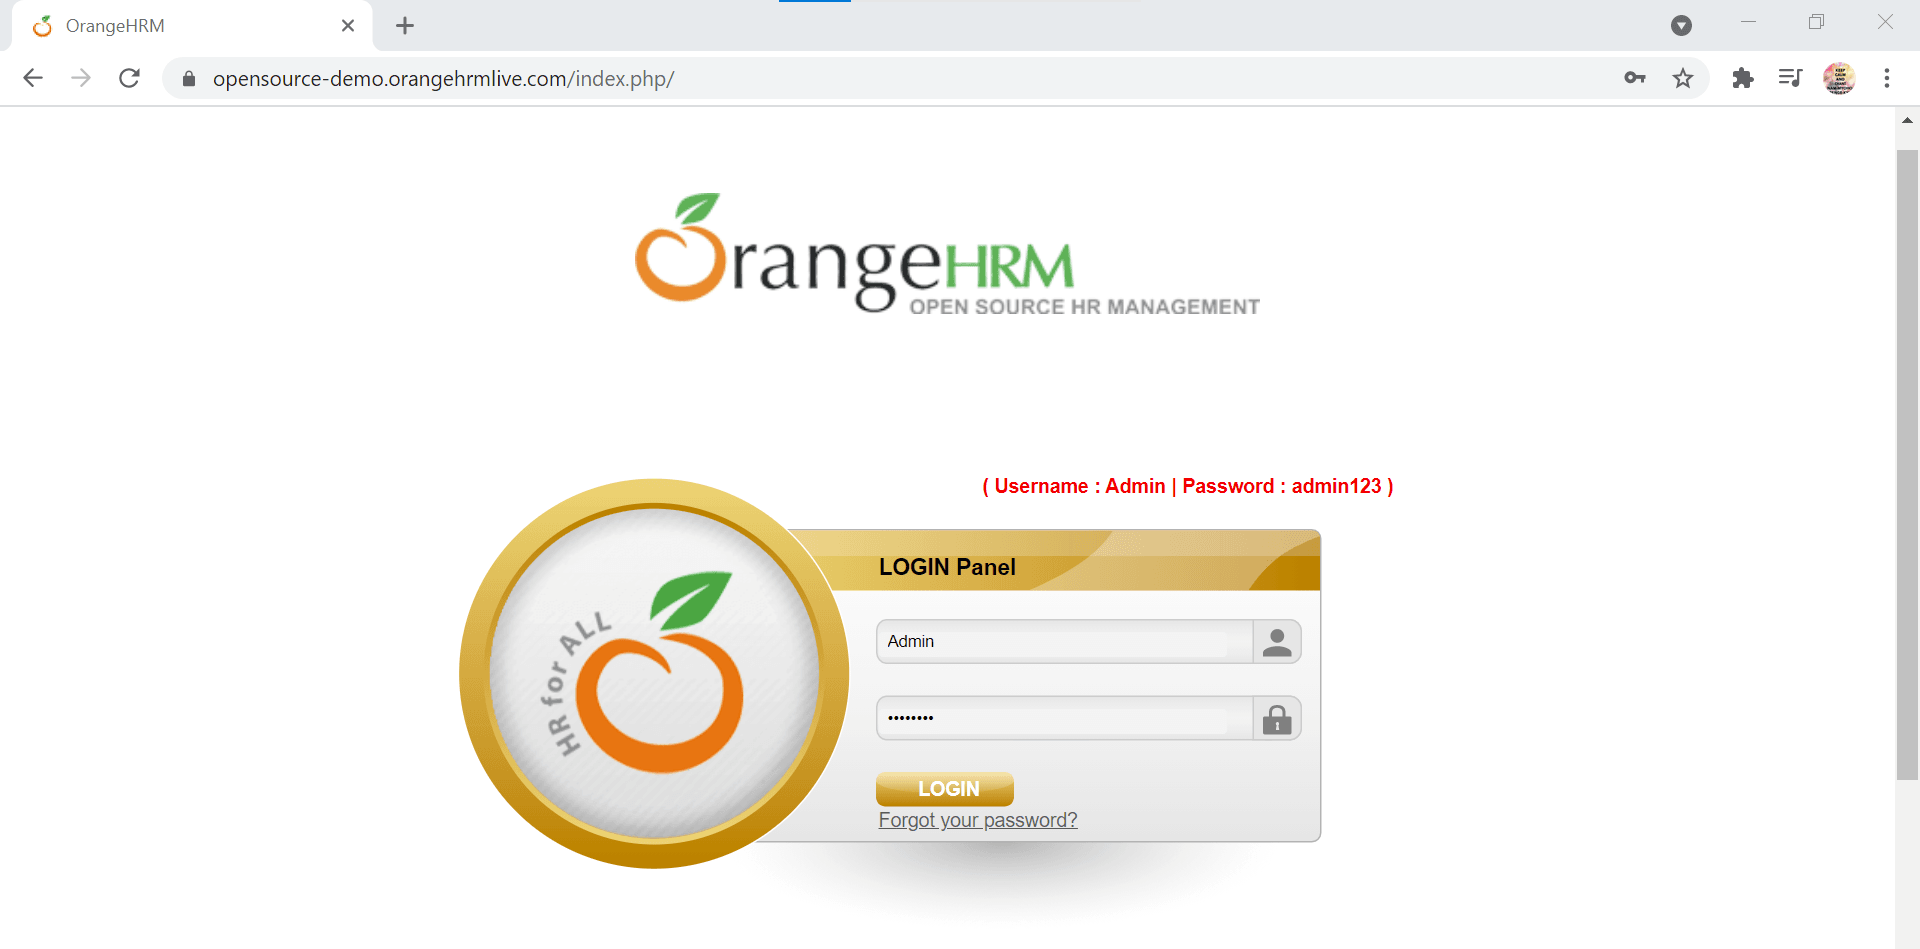
We will be writing a test case for simple login functionality, which contains the following steps:
- Launch the app (https://opensource-demo.orangehrmlive.com/).
- Enter the correct username and password.
- Click the Login button.
- Verify the navigation to the dashboard page on successful login.
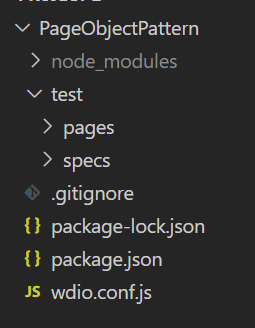
Step 1: Let’s start with creating the folder structure. One of the primary goals of the Page Object Pattern in JavaScript is to provide abstraction between page information and actual tests. So it makes sense from the structural side to separate Page Objects and actual tests into different directories.
In the project root, create a folder named “test.” Inside the “test” folder, create two sub-folders and name them as below:
- “pages” – for storing Page Objects
- “specs” – for storing Selenium tests.
Step 2: Edit the baseUrl inside the wdio.conf.js file to that of our application under test.
|
1 |
baseUrl: 'https://opensource-demo.orangehrmlive.com/index.php/' |
Step 3: Create the main page object.
Inside the “pages” folder, let us create the main Page Object page.js, containing all the general selectors and methods that all other page objects will inherit.
Inside the page.js file, let us create a “Page” class, which will contain some common functions that can be used across. Also, export it.
|
1 2 3 4 5 6 7 8 9 |
// page.js module.exports = class Page { //to go to a URL open (path) { return browser.url(path); } } |
Since we have only two pages to deal with – the login page and dashboard (home) page, let us create two specific page objects. By convention, the page name should end with “.page.js,” as shown below.
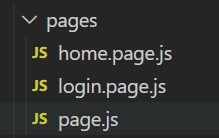
These pages should contain:
- A class extending the main page –
page.js. - Page-specific element selectors using getter methods inside the class.
- Page-specific actions/interactions as methods inside the class.
Finally, export an instance of this class.
Let us see the code for:
-
- Login Page
|
1 2 3 4 5 6 7 8 9 10 11 12 13 14 15 16 17 18 19 20 21 22 23 24 25 |
//login.page.js const Page = require ('./page'); class LoginPage extends Page{ //page locators: get inputUsername() { return $('#txtUsername') } get inputPassword() { return $('#txtPassword') } get loginBtn() { return $('#btnLogin') } //page actions: //to open a URL async open () { await super.open('/') } //to enter username and password into login form and click login button async login (username,password) { await this.inputUsername.setValue(username); await this.inputPassword.setValue(password); await this.loginBtn.click(); } } module.exports = new LoginPage(); |
-
- Home Page
|
1 2 3 4 5 6 7 8 9 10 11 12 13 14 15 16 17 18 |
//home.page.js const Page = require ('./page'); class HomePage extends Page{ //page locators: get dashboardHeader() { return $('div.head > h1') } //page actions: //to verify user is in dashboard page async isDashboardHeaderExist () { return await this.dashboardHeader.isDisplayed(); } } module.exports = new HomePage(); |
Inside the specs folder, create our first test file – “login.spec.js.” In this file, let us write the code for testing the login scenario. Then, to use the page objects, we need to import (or require).
|
1 2 3 4 5 6 7 8 9 10 11 12 13 14 15 16 17 18 19 20 21 22 23 24 |
//login.spec.js const assert = require('assert'); const LoginPage = require ('../pages/login.page'); const HomePage = require('../pages/home.page'); describe('My Login application', () => { it('I should open the main URL and verify the title', async () => { await browser.url(''); const title = await browser.getTitle(); await assert.strictEqual(title , 'OrangeHRM'); }); it('I enter valid username and password and login successfully' , async () => { await LoginPage.open(); await LoginPage.login('Admin','admin123'); await assert.equal(true ,await HomePage.isDashboardHeaderExist()); }); }); |
Let us execute the tests by giving the following command:
npx wdio wdio.conf.js
The test starts running. The browser gets launched, and the code gets executed successfully, as shown in the below screenshots.


LambdaTest offers Selenium JavaScript 101 test automation certification for developers to help organizations boost their software testing capacity. If you already have experience in basic web development and JavaScript, you must take this certification to take your JavaScript development and test engineering skills to the next level.
Here’s a short glimpse of the Selenium JavaScript 101 certification offered by LambdaTest:
Running your automation tests on a cloud Selenium Grid
In the last section, we ran our test script in the local machine. In this step, let us additionally explore how to execute our tests on a cloud-based Selenium Grid.
It is important to run our Selenium tests on a number of online browsers and devices. Adopting a cloud-based grid as an automation backend is a popular strategy adopted by companies worldwide as a measure to stay ahead in the market competition. LambdaTest offers a cloud Selenium Grid with access to 3000+ real browsers and devices for your testing needs. LambdaTest enables you to choose a specific OS-device-browser combination to ensure that your app is working as expected in all possible scenarios. The platform also aids you in performing parallel testing in Selenium, which can drastically scale your automation test for testing larger regression suites.
The good news is that the WebdriverIO framework natively supports cloud-based cross browser testing platforms like LambdaTest. With effortless integration, you can now run your tests in the cloud Selenium Grid. Let us see how.
Step 1: In your project terminal, give the following command to save the LambdaTest service as a devDependency:
npm i --save-dev wdio-lambdatest-service
Step 2: Create a free account or log in to your LambdaTest account. Fetch your unique username and access key. You can find the details in the LambdaTest Profile section.
Step 3: Now edit the wdio.conf.js configuration file as shown below.
|
1 2 3 4 5 6 7 8 9 10 11 12 13 14 15 16 17 18 19 20 21 22 23 24 25 26 27 28 29 30 31 32 33 34 35 36 37 38 39 40 41 42 43 44 45 46 47 48 49 50 51 52 |
user= process.env.LT_USERNAME || "your_username", key= process.env.LT_ACCESS_KEY || "your_accesskey", exports.config = { user, key, specs: [ './test/specs/**/*.js' ], exclude: [], capabilities: [{ name: "Page Object Pattern", build: "wdio-PageObjectPattern", maxInstances: 5, browserName: 'chrome', version:"64.0", acceptInsecureCerts: true, network: true, video: true, visual: true, console: true, }], logFile : './logDir/api.log', services: [ ['lambdatest', { tunnel: true }] ], hostname: 'hub.lambdatest.com', path: '/wd/hub', port: 80, baseUrl: 'https://opensource-demo.orangehrmlive.com/index.php/', maxInstances: 10, logLevel: 'info', bail: 0, waitforTimeout: 10000, connectionRetryTimeout: 120000, connectionRetryCount: 3, framework: 'mocha', reporters: ['spec'], mochaOpts: { ui: 'bdd', timeout: 60000 } } |
- Pass your access token and user details by creating two variables, user and key.
- Set the tunnel as true to enable routing connections from LambdaTest cloud through your computer.
- Set the hostname corresponding to LambdaTest.
- Optionally, you can also enable report formats like video recording, console, network logs, etc., to be true.
Step 4: Run the test.
npx wdio wdio.conf.js
You can observe the live test running status in your LambdaTest Automation Dashboard, as shown below.
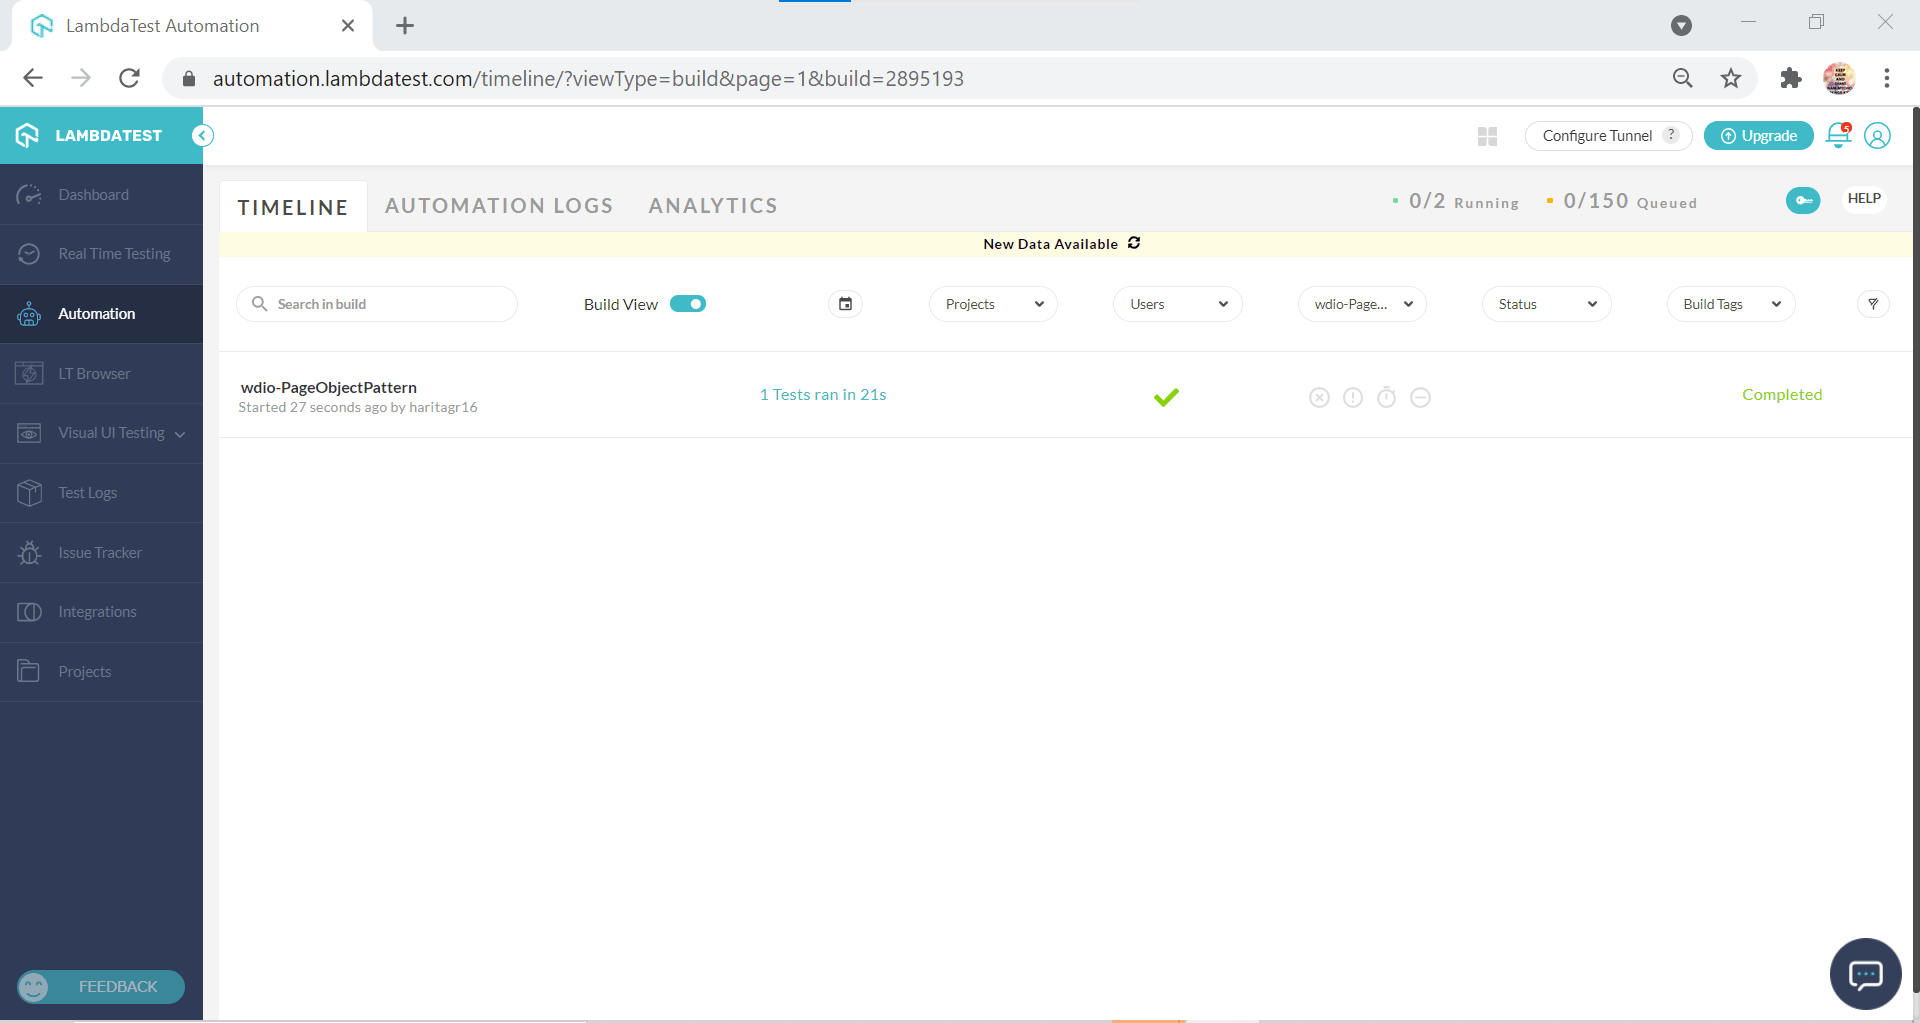
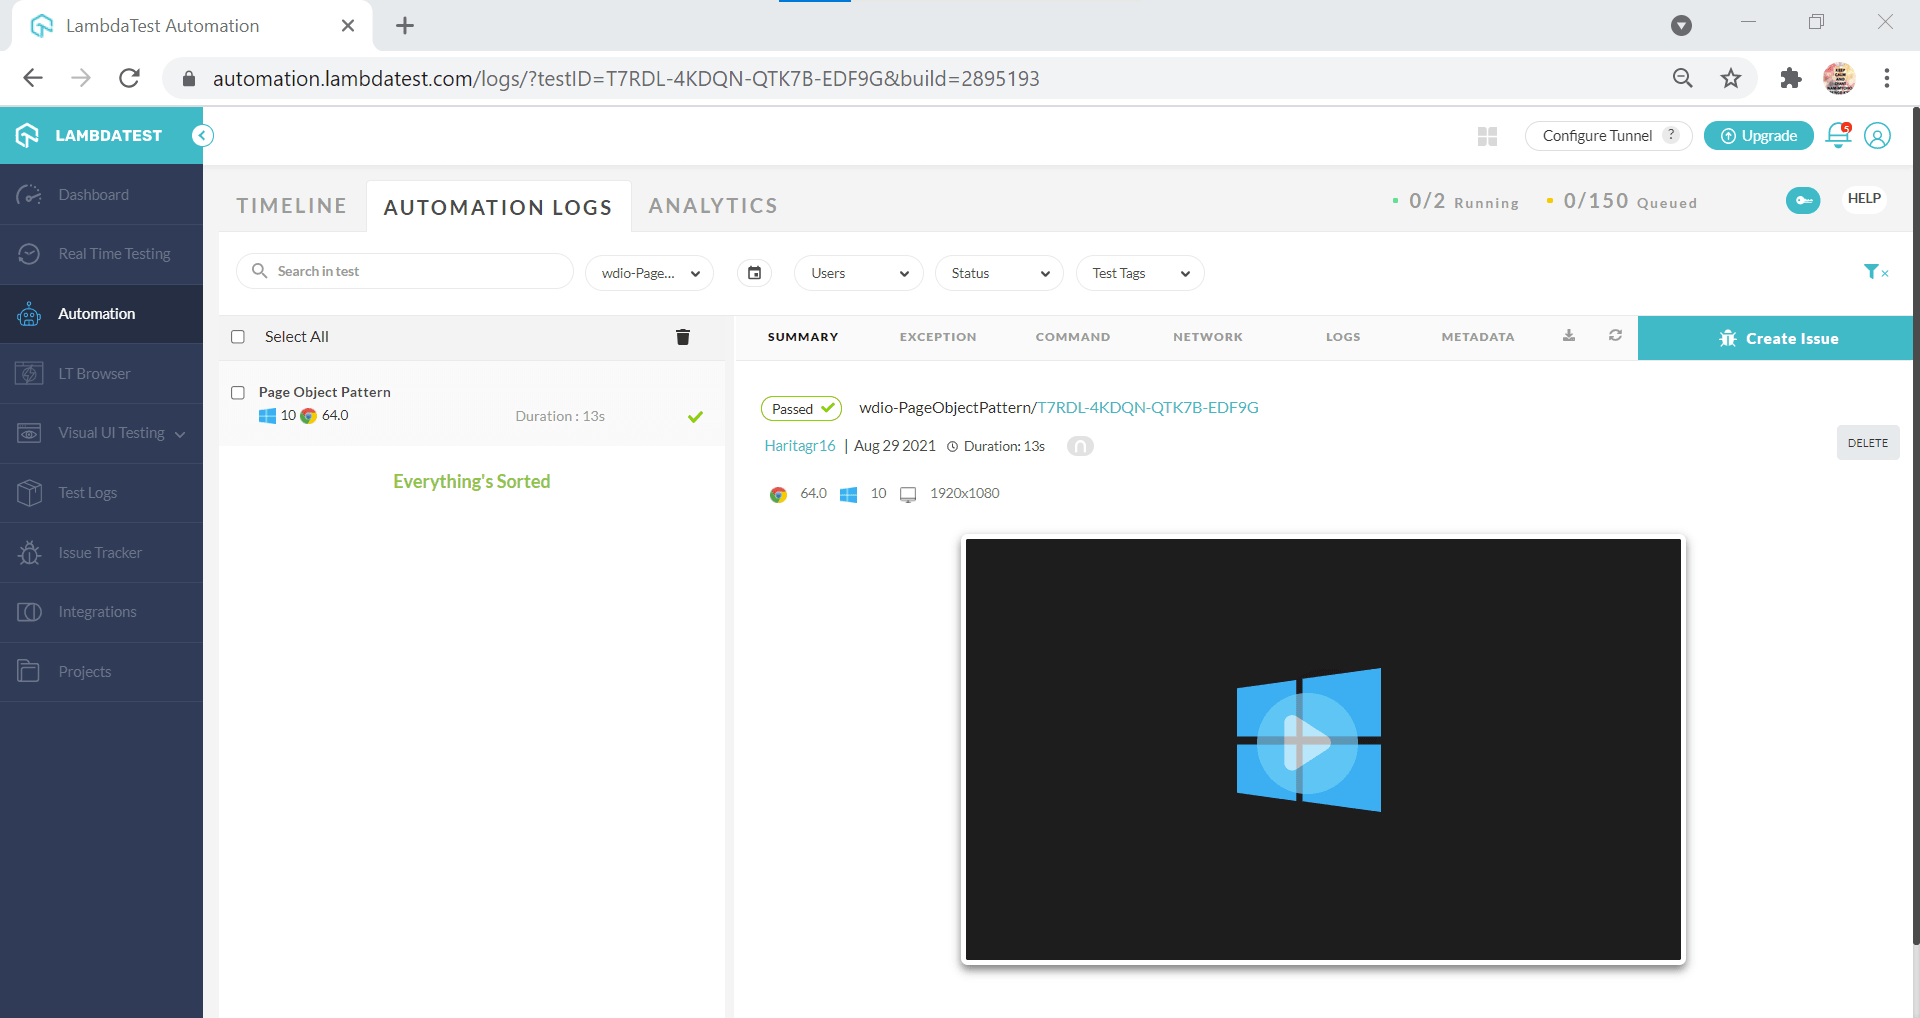
The above screenshot shows that the test has been executed successfully. To analyze the detailed report containing the video and logs, visit the Automation Logs section, as in the below screenshot.
Read – 13 JavaScript Testing Best Practices You Should Know
Conclusion
The Page Object Pattern is a framework design pattern widely adopted by Agile practitioners for ease of test script maintenance, enhanced code reusability, and readability. Whether you are a beginner getting started with Selenium automation testing or you need to manage a larger suite of regression tests, adopting the Page Object Pattern into your code will benefit you in multiple ways. However, the primary goal of this pattern is to provide abstraction between the UI-related code and test-related code.
In this Selenium JavaScript tutorial on Page Object Pattern in JavaScript, we learned how to implement the Page Object Pattern in JavaScript with the help of the WebdriverIO framework. Additionally, we learned how to scale your automation testing by utilizing the cloud Selenium Grid provided by LambdaTest.
Happy Testing!
Got Questions? Drop them on LambdaTest Community. Visit now


