JUnit Parameterized Test Using Selenium : With Examples
Harshit Paul
Posted On: April 21, 2020
![]() 75477 Views
75477 Views
![]() 10 Min Read
10 Min Read
This article is a part of our Learning Hub. For more in-depth resources, check out our hub on JUnit Tutorial.
As an automation tester, you might often come across test automation scenarios, where you need to execute the same tests, again and again, but with different inputs and environments, making the task exhausting and redundant.
To deal with this redundancy, you can opt for the Parameterized test. With Parameterized Test, you can run the same automated test scripts again but with different values. Parameterized tests help to save time spent on writing the same tests repetitively, by utilizing test methods to collect data.
Here, in this Selenium JUnit tutorial, I’ll show you how to implement a JUnit Parameterized test for Selenium test automation. If you are not already familiar with JUnit, refer to our article on Automated Testing With JUnit and Selenium.
If you’re new to Selenium and wondering what it is then we recommend checking out our guide – What is Selenium?
Why Do You Need JUnit Parameterized Tests?
Let’s start with a test scenario for this Selenium JUnit tutorial, you want to perform Selenium Automation testing with JUnit for an E-commerce website, with a wide variety of products. You’ve written the test script for a product, but soon you realize that you’d need to replicate the test not only for different products but also for different OS and browser versions.
First of all, for Selenium test automation, you’d need multiple data sets to perform your tests on. Along with this, a cross browser matrix, to cover the large and varied customer base your application would be exposed to. Second, you’d need to learn how to write test methods to collect the data from the data sets you’ve stored.
You need to keep in mind that, in the many iterations required for automated browser testing of your web application, it becomes difficult to maintain a single data set for the subsequent test iterations. You are going to have a hard time creating multiple Selenium test automation scripts of the same test case for different configurations unless you leverage JUnit Parameterized Tests. Simply speaking, hardcoding would only bring you a lot of rework and so you need JUnit Parameterized tests to help you save the time and bandwidth over Selenium test automation cycles.
For using multiple data sets in our Selenium test automation scripts, the first thing that comes to mind is to use an excel sheet to fetch that data. However, In cases where you intend to create a more concrete Selenium test automation scripts, the need to use an all-in-one framework like JUnit increases. JUnit enables us to write test cases in a more robust way and expose us to a variety of features, one of them being Parameterization.
Types of JUnit Parameterization
In this Selenium JUnit tutorial, I’ll explain the two efficient ways to use JUnit Parameterized Tests.
- Parameterization using @Parameters annotation
- Parameterization using Excel
Firstly, Parameterization using @Parameters annotation, which allows you to pass test data to your Selenium script as a Java collection. Any data change, all you need to do is edit the collection with desired data.
Secondly, Parameterization using Excel, which gives you the liberty to fetch data from an external file and load into Selenium test automation scripts no matter what the number is.
You can also use JUnit params dependency to parameterize our tests by using annotation @ParameterizedTest in place of the @Test annotation. You can pass arguments to the JUnit Parameterized Tests using a variety of annotations as listed below:
- @ValueSource
- @EnumSource
- @CsvSource
- @CsvFileSource
- @MethodSource
Tutorial On JUnit Annotations In Selenium With Examples
Parameterization using @Parameters annotation
Consider an example of searching for some keywords(let’s take 4 keywords in our case) on google. Now, let us see what our code would look like if we write a raw code with no Parameterization concepts.
| package normalRun; | |
| import org.junit.After; | |
| import org.junit.Before; | |
| import org.junit.Test; | |
| import org.openqa.selenium.By; | |
| import org.openqa.selenium.WebDriver; | |
| import org.openqa.selenium.WebElement; | |
| import org.openqa.selenium.chrome.ChromeDriver; | |
| public class TestNormExec { | |
| WebDriver driver; | |
| @Before | |
| public void startUp(){ | |
| System.out.println("----This is the beginning of our test----"); | |
| System.setProperty("webdriver.chrome.driver","D:\\Softwares\\chromedriver_win32(1)\\chromedriver.exe"); | |
| driver = new ChromeDriver(); | |
| driver.get("https://www.google.com/"); | |
| driver.manage().window().maximize(); | |
| } | |
| @Test | |
| public void searchKeys(){ | |
| String keyWrd = "Selenium"; | |
| System.out.println("----Let us start searching the keywords----"); | |
| //Entering keyword in search box and searching it | |
| WebElement srchBox = driver.findElement(By.name("q")); | |
| srchBox.sendKeys(keyWrd + "\n"); | |
| //Printing the title of the new page | |
| String title = driver.getTitle(); | |
| System.out.println("The title is : " +title); | |
| } | |
| @After | |
| public void tearDown(){ | |
| System.out.println("----We're now closing our test----"); | |
| driver.quit(); | |
| } | |
| } |
In order to run our Selenium test automation with different data sets we would have to manually change the value for the string ‘keyWrd’ every time we run our test case. To simplify this process of changing input values we can Parameterize our test cases by using JUnit Parameterized Tests. This would help us eliminate redundancy in our Selenium test cases as well.
Let’s now further explore JUnit Test Parameterization for Selenium test automation. I’ll first create a class that contains the test method. Note that here I am passing the keywords as method parameters unlike the previous approach wherein I stored the search keyword in a variable.
| package parameterizedRun; | |
| import org.junit.Test; | |
| import org.openqa.selenium.By; | |
| import org.openqa.selenium.WebDriver; | |
| import org.openqa.selenium.WebElement; | |
| import org.openqa.selenium.chrome.ChromeDriver; | |
| public class SearchGoogle { | |
| WebDriver driver; | |
| @Test | |
| public void searchKeys(String kyWrd, String kyWrd1){ | |
| System.out.println("----This is the beginning of our test----"); | |
| System.setProperty("webdriver.chrome.driver", "D:\\Softwares\\chromedriver_win32(1)\\chromedriver.exe"); | |
| driver = new ChromeDriver(); | |
| driver.get("https://www.google.com/"); | |
| driver.manage().window().maximize(); | |
| System.out.println("----Let us start searching the keywords----"); | |
| //Entering keyword in search box and searching it | |
| WebElement srchBox = driver.findElement(By.name("q")); | |
| srchBox.sendKeys(kyWrd + " " + kyWrd1 + "\n"); | |
| //Printing the title of the new page | |
| String title = driver.getTitle(); | |
| System.out.println("The title is : " +title); | |
| driver.quit(); | |
| } | |
| } |
In the next step, I’ll create a class with @RunWith annotation. This class will run tests on a new instance. In addition to it, I will create a constructor for this class which will store the data to test.
In this example, two variables will pass to this constructor. Next, to generate and return the test data, I’ll create a static method with return type as Collection. Each entry of this collection would give data for one run, for example, {“Selenium”,”Delhi”}, would be the data for one of the executions.
The Parameters annotation for this method gives the input data set for our tests to run. Here is the final code for this class.
The final step to create a JUnit parameterized test would be to create a test runner class that would be driving our test execution. This class would run the test with the help of JUnitCore.runClasses and our test class would be passed as a parameter to it.
You may get a similar output on running the Test Runner class.
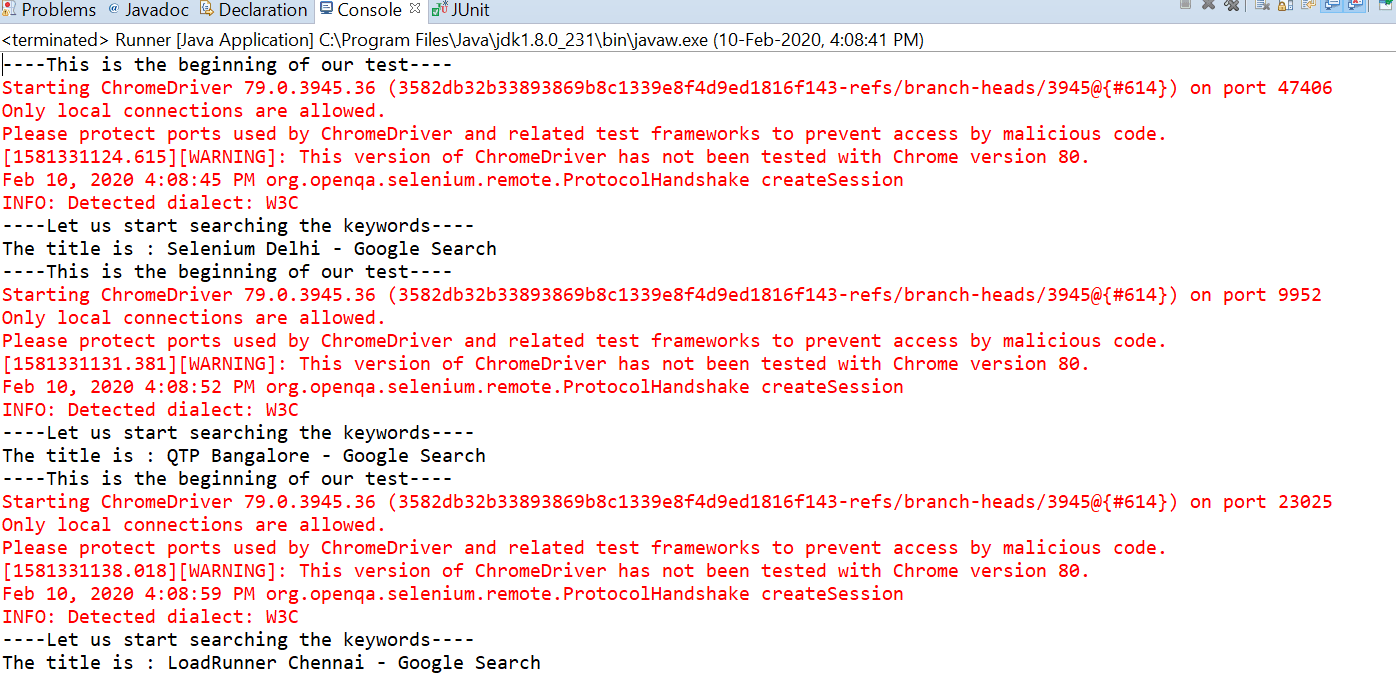
So, this was one way to execute JUnit parameterized tests with different test data without changing variable values and only modifying our collection in order to update test data.
This JUnit certification establishes testing standards for those who wish to advance their careers in Selenium automation testing with JUnit.
Here’s a short glimpse of the JUnit certification from LambdaTest:
Parameterization using Excel
Parameterization using excel or Data-Driven Testing as it is popularly called is an effective way to handle test scripts that need varied test data. Data from external files are read and loaded into the test script at runtime rather than hard-coding the same.
Some general scenarios for this Selenium JUnit tutorial can be testing logging into an application with multiple users or searching for different keywords on google. The main benefit of this approach is the code reusability wherein, you don’t need to touch the Selenium test automation scripts and just update the test data in our file. Let’s see how we can go about using a data-driven framework to parameterize our test cases in JUnit.
The primary element that we would need for Excel Parameterization in this Selenium JUnit tutorial is an excel sheet. I have created an excel sheet consisting of keywords to be searched and placed it in my project location under the Data folder.
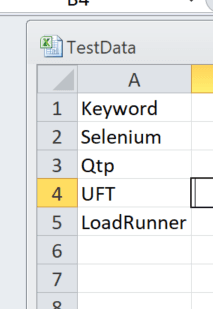
Once we are ready with our data, the next step is to create class files that would load our excel workbook, and subsequently read the data from the sheet and the corresponding cells.
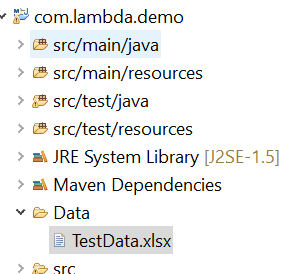
For the above steps in this Selenium JUnit tutorial, I’ll use Apache built-in packages to make the work easier.
Now that we are ready with a class that contains a method to read data from our excel, let’s go ahead and write our test method for in another class passing the parameters corresponding to the keyword that we need to search while calling the method that fetches data from the excel.
On running the above code, Selenium test automation script would fetch the excel data from the second row of the excel sheet and yield results as shown below:
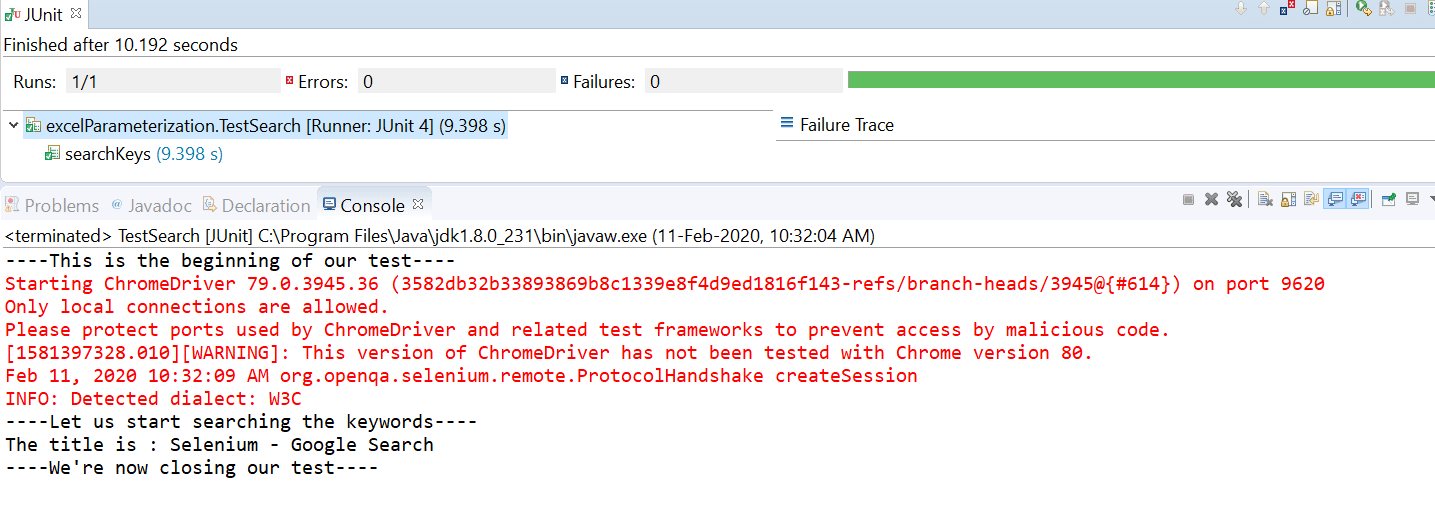
Now that you know how to perform JUnit parameterized tests using both @Parameters annotation as well as Excel, I’ll now show you how to scale JUnit parameterized tests with LambdaTest Selenium Grid.
Integrating JUnit Scripts with LambdaTest Selenium Grid
Now that you know how to parameterize Selenium test automation scripts in this Selenium JUnit tutorial, the next question that might pop up is the execution of these scripts across multiple Operating Systems and browsers.
While you may set up a Selenium grid locally on your system, another efficient way of doing so is using LambdaTest Selenium Grid and execute your automated browser testing scripts on the cloud.
To do so, you just need to modify the Selenium test automation scripts that we used in the examples above. We’ll have to add the desired capability to our Selenium test automation scripts which can be generated by Selenium Desired Capability Generator by simply providing the Operating System, Resolution, Browser details, Selenium Version, etc. In the snapshot below, you can see how those details are generated:
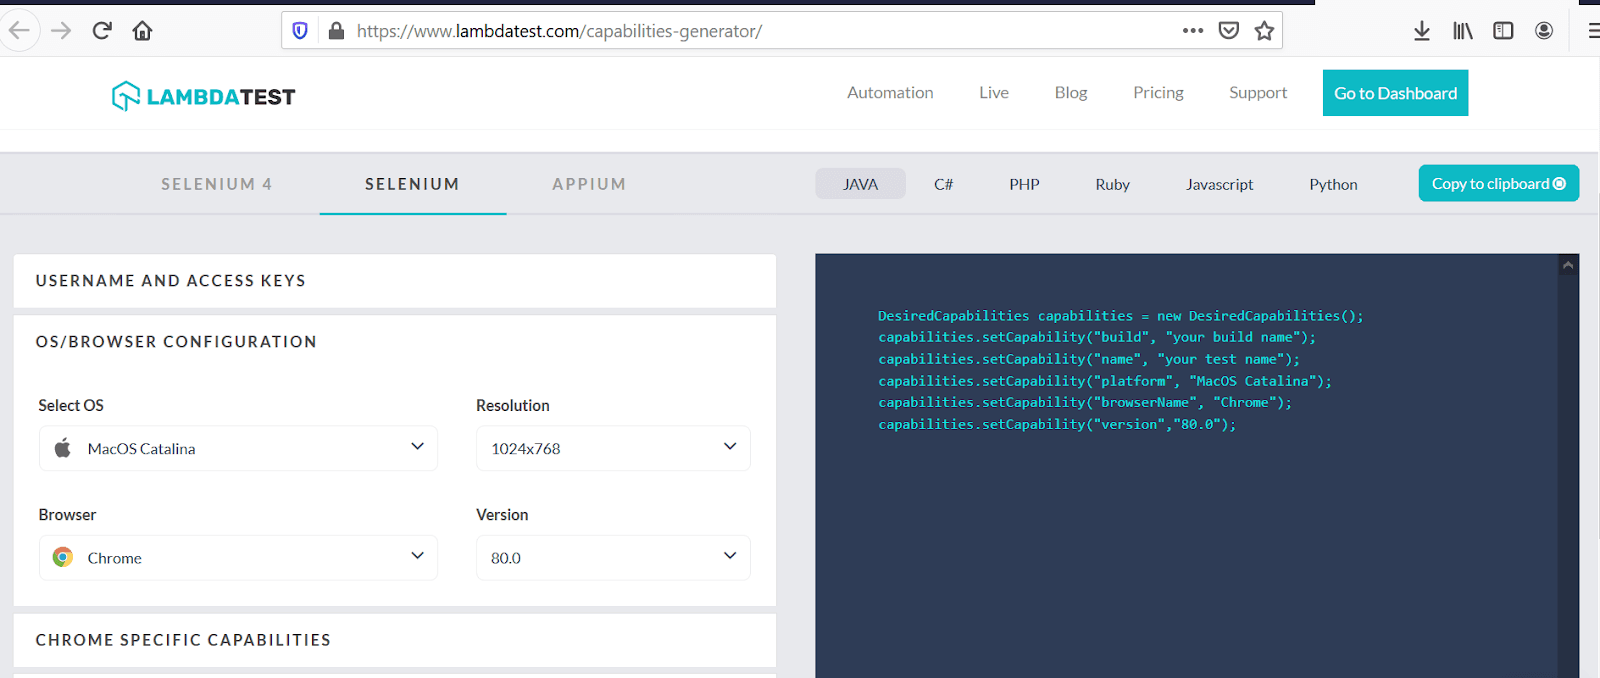
Next, we need to declare the authentication credentials in the test script so that the WebDriver points to the correct hub URL for execution. Below is the final execution script(I am using the @Parameters annotation scripts used in the example above) to run tests on LambdaTest Selenium Grid.
Note that out of the three classes, used in @Parameters annotation example in this Selenium JUnit tutorial, only one class that contains the test method, to open the chrome browser, will have the changes and the remaining two classes remain unchanged. On executing our test either through eclipse or through cmd, you’ll get to see test results in automation logs of LambdaTest like below:

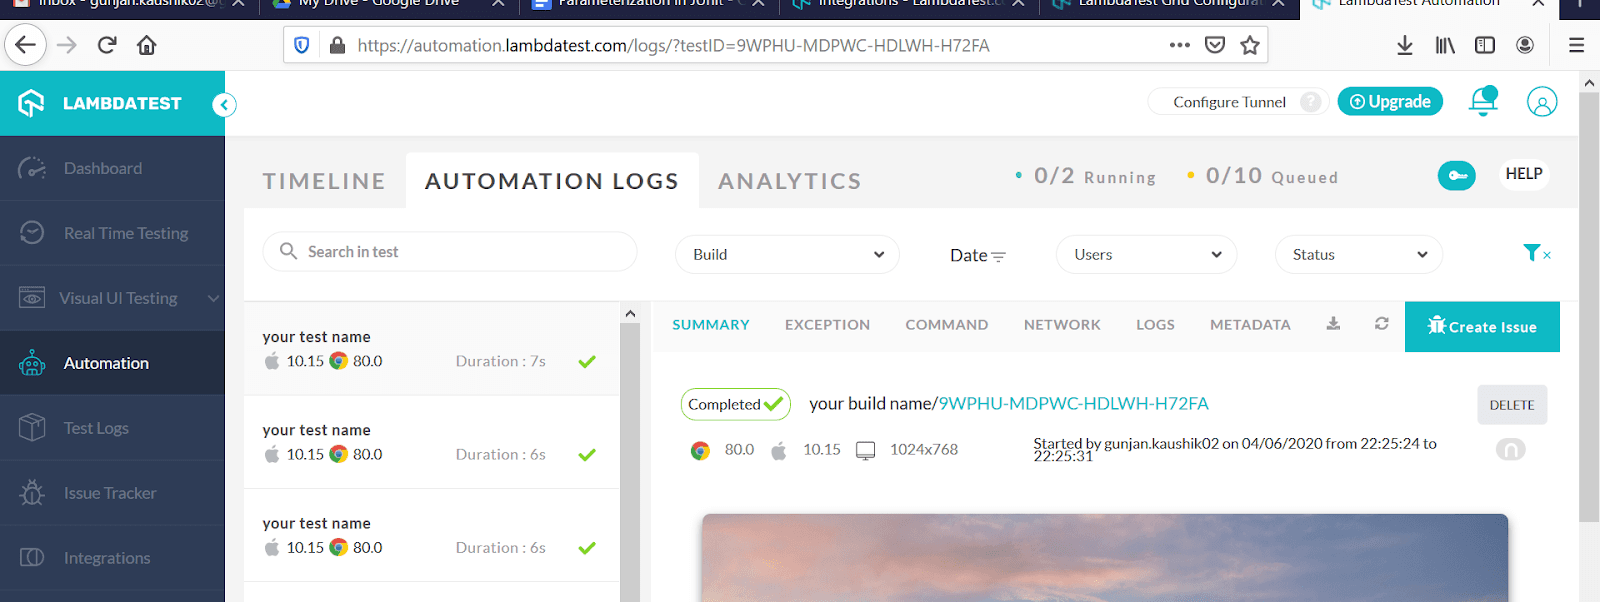
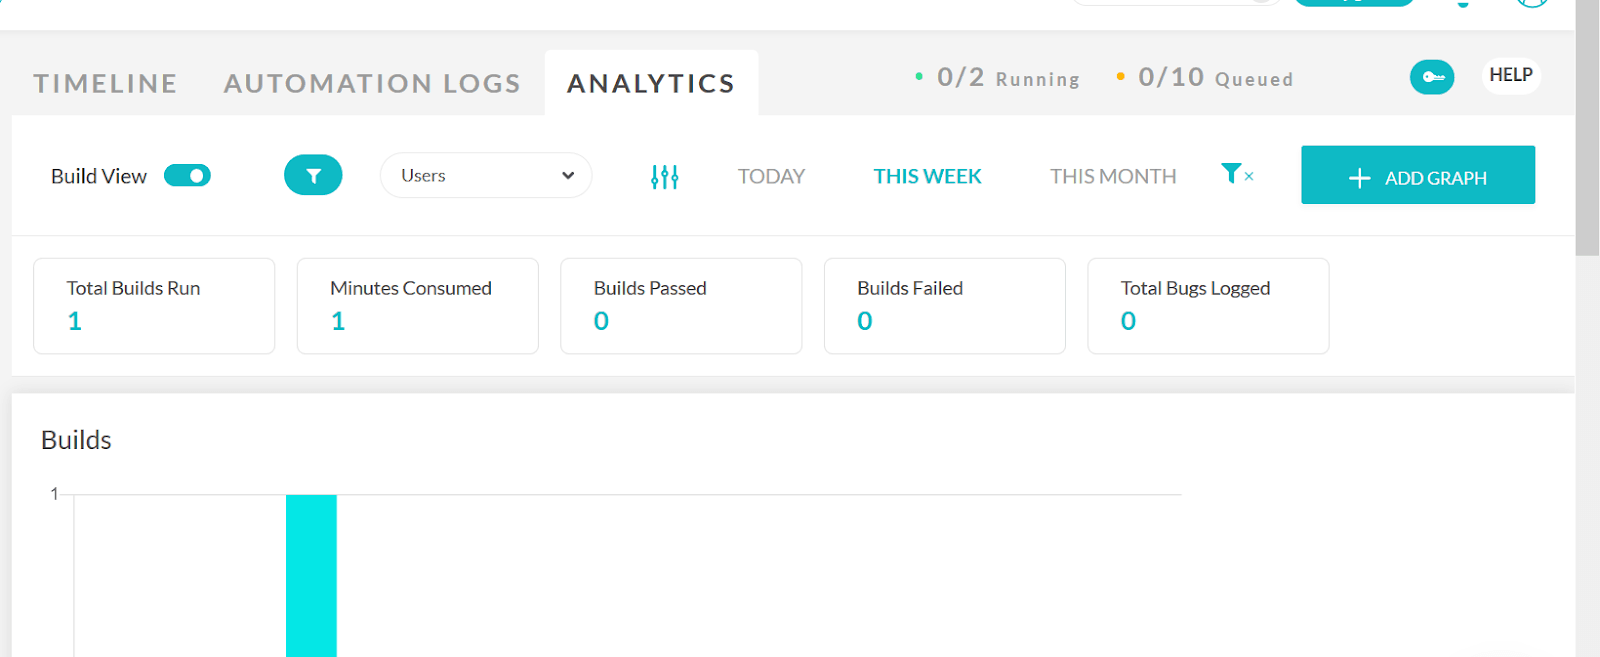
In the above script for this Selenium JUnit tutorial, we executed our tests on a different operating system and browser versions without a need to set up local machines. This is why a cloud-based Selenium Grid is more effective and useful is its capability to run your tests across multiple browsers in one go than a local Selenium Grid.
Also read: JUnit Assertions For Selenium Test Automation
Wrapping it Up
Now you don’t have to put up with the frustration of writing the same Selenium test again with different inputs. In this Selenium JUnit tutorial you’ve learned that, in the practical execution of Selenium test automation scripts, you need to know how to run the same tests with multiple data sets. The easiest way is to parameterize the test scripts rather than changing them every time a new data is being used. This can be done either by parameterization using @Parameters annotation or by using an excel sheet.
This brings an end to this Selenium JUnit tutorial on parameterized tests. Let us know in the comments section below, what you think about this article. Help us to reach out with your peers, looking to know more about JUnit parameterized tests, by retweeting us on twitter. Happy Testing!! 🙂
Got Questions? Drop them on LambdaTest Community. Visit now


