How To Install TestNG In Eclipse: Step-By-Step Guide
Kritika Murari
Posted On: February 12, 2024
![]() 248192 Views
248192 Views
![]() 7 Min Read
7 Min Read
This article is a part of our Content Hub. For more in-depth resources, check out our content hub on TestNG.
Test automation guarantees software competence without repetitive human intervention. TestNG, or Test Next Generation, is one of Java’s most frequently used automation testing frameworks, ranking 4th on the JetBrains developer survey. Inspired by JUnit and NUnit, TestNG is a Java Test Automation Framework that allows users to perform different types of testing, such as Unit Testing, Integration Testing, Functional Testing, etc.
In this article, you will learn how to install TestNG in Eclipse and set it up in your system to start writing test scripts for your test project. If you are preparing for an interview you can learn more through TestNG interview questions.
TABLE OF CONTENTS
What Is TestNG?
TestNG, created by Cédric Beust, is one of Java’s most popular test automation frameworks. The annotations, functionalities, usability, features, and ease of use provided by TestNG make it a prevalent choice of framework. Listed below are some of the benefits of using TestNG for Selenium automation testing:
- The reporting feature provides a detailed XML report of every successful, failed, or skipped test.
- Parallel testing assists testers in running multiple test cases with the added benefit of CI/CD integration.
- TestNG annotations feature allows developers to handle exceptions and understand the code easily.
- Test cases can be grouped or prioritized easily.
- Flexible runtime configuration.
How To Install TestNG In Eclipse
First, ensure you have Java installed on your system, as the TestNG framework is based on Java. Install Eclipse IDE from the official website if you haven’t already. We are now ready to install TestNG in Eclipse by following any of the given methods:
Installing TestNG from Eclipse Marketplace
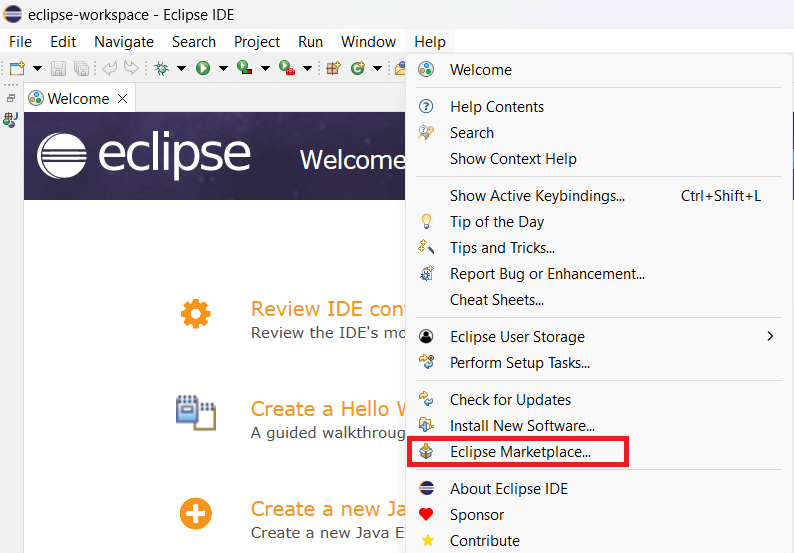
Step 1: Open Eclipse IDE. Once it is launched, navigate to Help > Eclipse Marketplace.
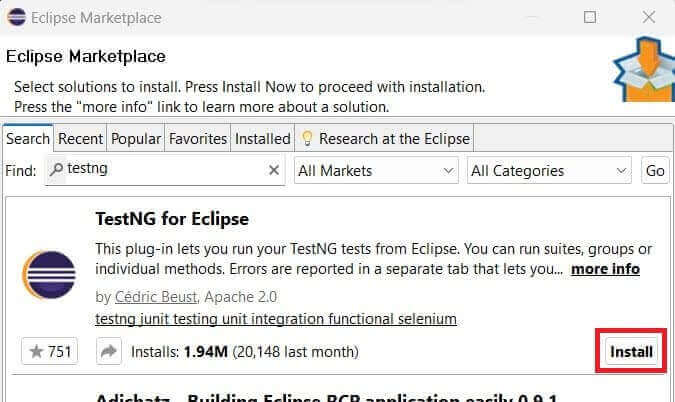
Step 2: Search for TestNG in the search bar and click on install for the first result.
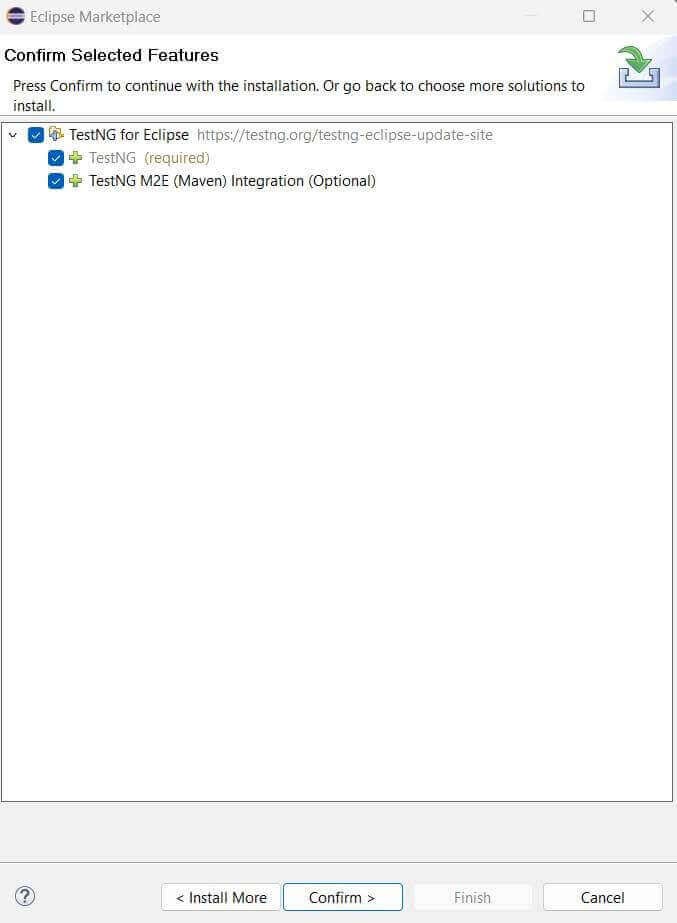
Step 3: Make sure that all the checkboxes for TestNG are checked, and then click on the Confirm button.
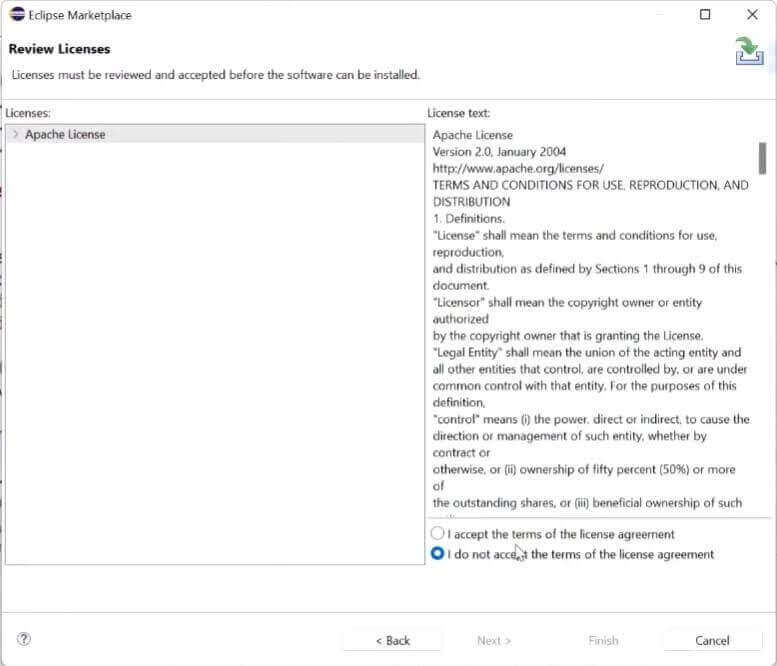
Step 4: Accept the license and click on Finish.
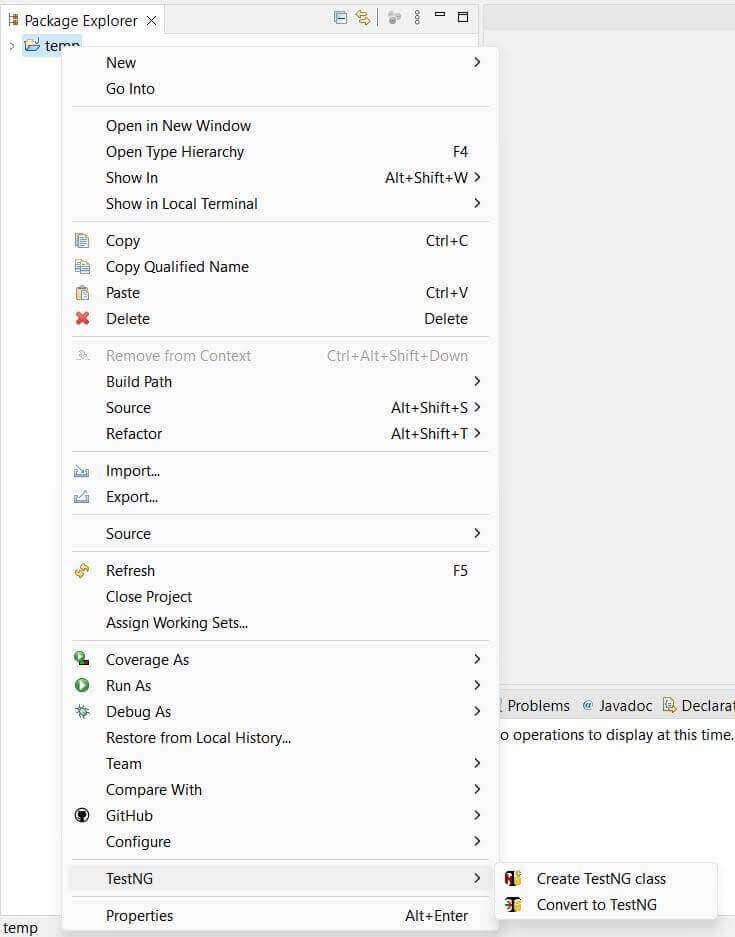
Note: For the TestNG plugin to work, Eclipse must be restarted. When you right-click on a project, you can find TestNG in the menu options if installed.
You can watch the Complete TestNG Framework Tutorial to understand the basics and get started with TestNG. With the help of this video, you can start writing unit tests for your project on Eclipse using TestNG.
You can also subscribe to the LambdaTest YouTube Channel and stay updated with the latest tutorials and updates on Selenium automation testing, Playwright automation testing, and more.
Install TestNG Using – Install New Software
In some versions of Eclipse, you might not find the TestNG plugin in the Eclipse marketplace. We can install TestNG in Eclipse from the TestNG plugin site in such cases.
Step 1: Go to Eclipse help and click on the “Install New Software” button.
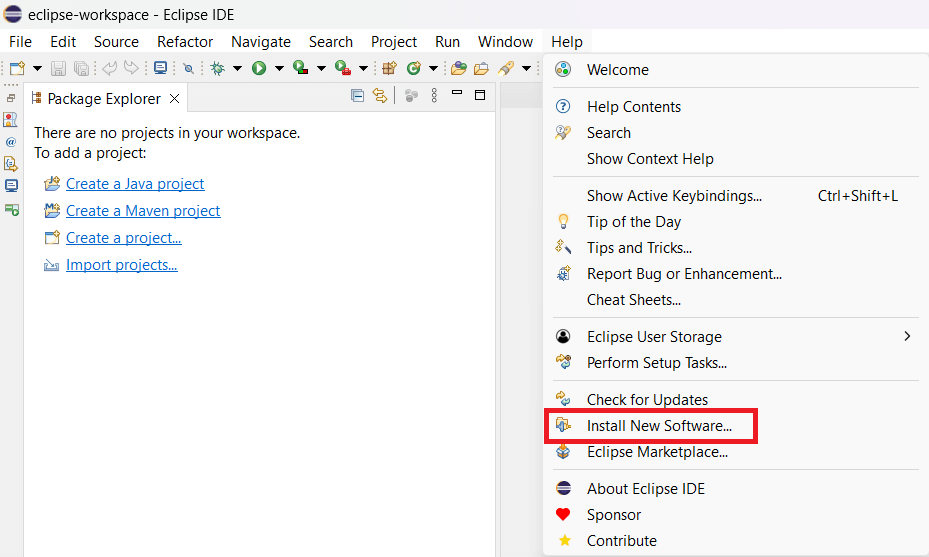
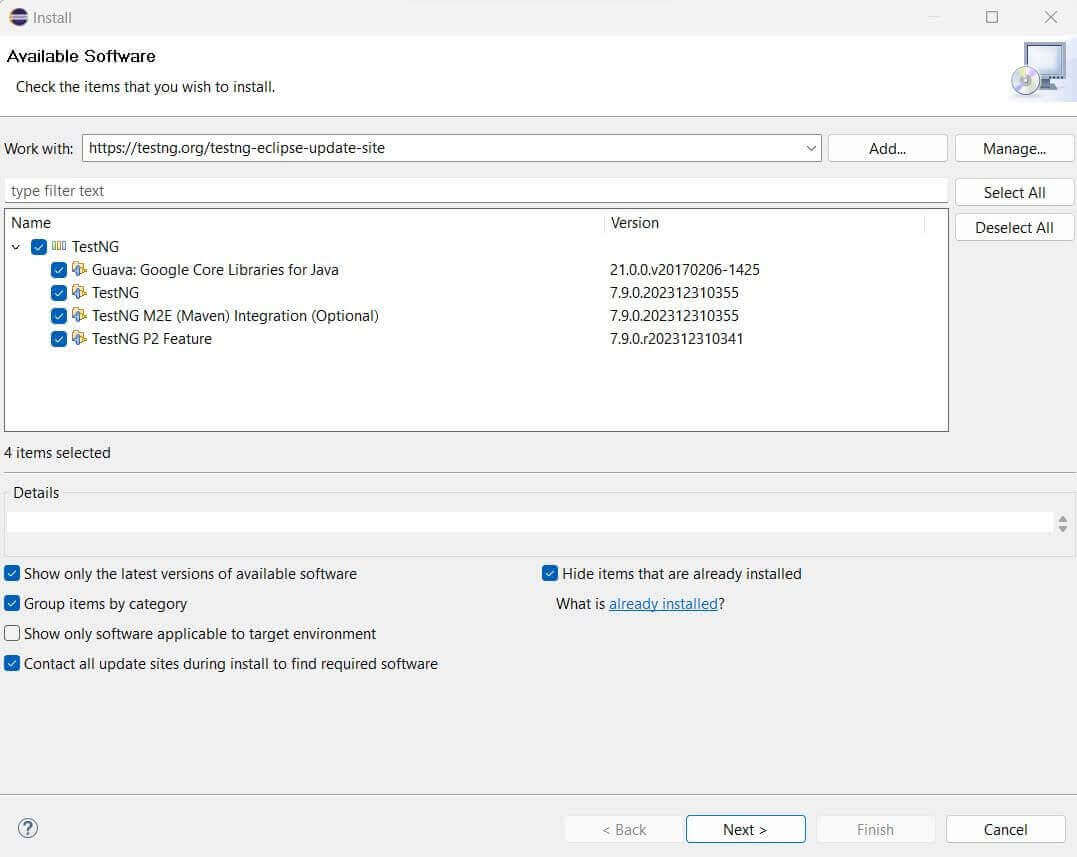
Step 2: Enter the TestNG plugin link “https://testng.org/testng-eclipse-update-site/” in the search bar. It will fetch the required plugin. Ensure the check bar is selected, and click the next button to start the installation.
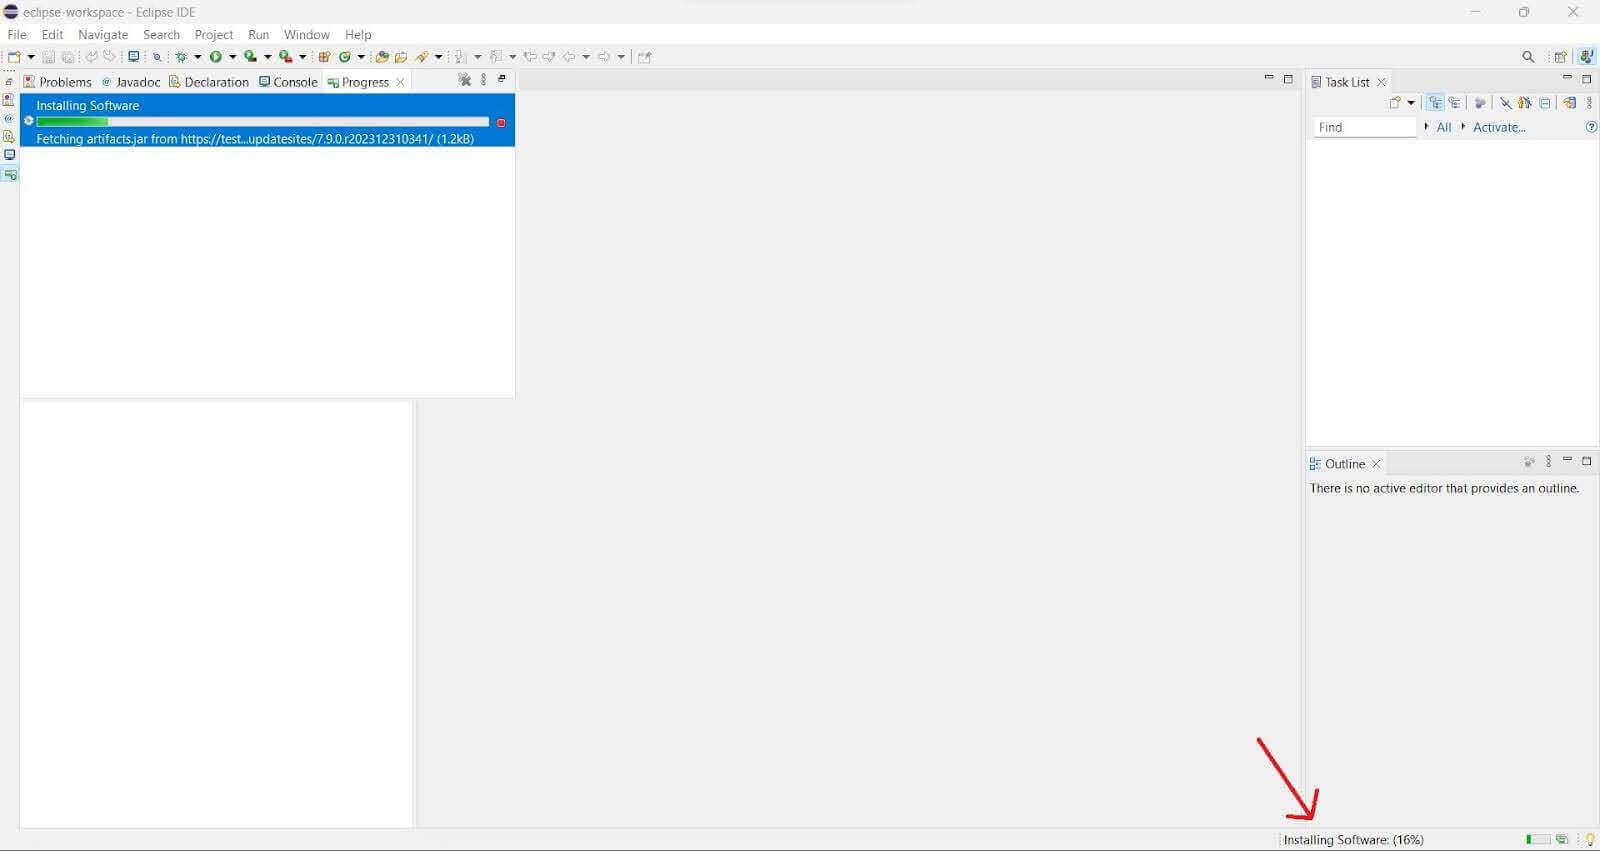
Step 3: Accept the license agreement and hit the Finish button. The installation status is visible in the bottom right corner. Provide permission wherever required. Once installation is complete, restart the IDE to notice changes.
Setting Up TestNG Eclipse Tests From Your Existing Java Projects
Once we have successfully installed TestNG on Eclipse, we can integrate it with existing Java projects to create tests by doing the following:
Step 1: Writing a test with TestNG on Eclipse is very simple. First, find the project you need from the explorer on the left and right-click on it.
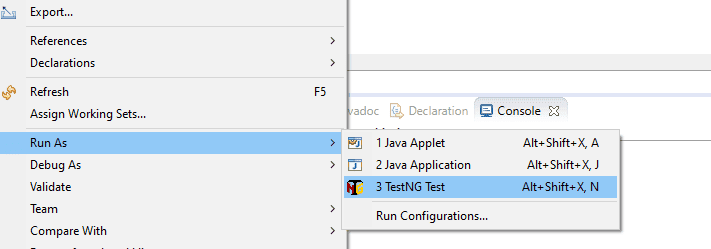
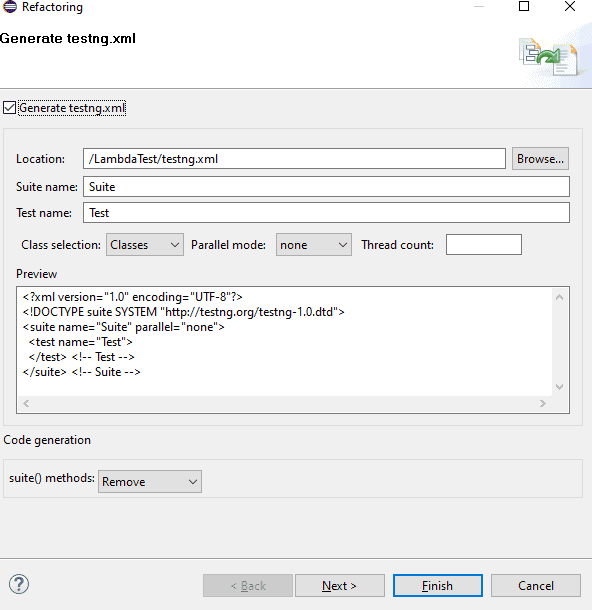
Step 2: Select and click on Convert to TestNG. You will see a refactoring window popping up with the testng.xml details. Testng.xml is the configuration file that allows us to control the execution of tests, handle multiple test classes, define test suites, etc. Click on Finish. We can see the XML file created in the directory.

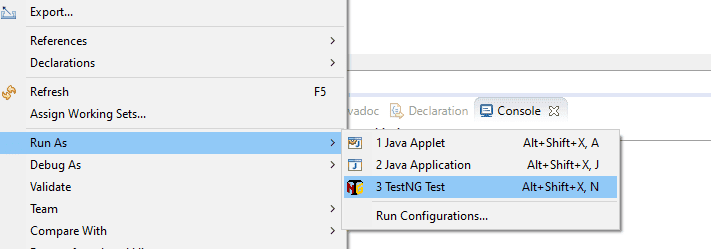
You can create a new test class from the dropdown and add annotations to define actions. Under the project, you can run the tests from the Run As option.
TestNG Certification from LambdaTest is also a great way to validate and refine your test automation testing skills. LambdaTest is an AI-Native test orchestration and execution platform that lets you run manual and automated tests at scale on over 3000 real devices, browsers, and OS combinations. Not only does it validate your expertise, but it also provides a recognized credential, boosting your credibility in the job market.
Conclusion
To conclude, we installed TestNG in Eclipse from the Eclipse Marketplace and via the Install New Software option. We also verified that TestNG has been installed successfully and is working. We then tried adding TestNG to our existing Java projects in Eclipse.
You can now learn to create and run your first TestNG automation script and try running automation tests on the Cloud.
Frequently Asked Questions (FAQs)
How do I know that TestNG is installed in Eclipse?
You can verify whether TestNG is installed by going to File > New > Other. After clicking the Other prompt, a select wizard is prompted on the screen. Scroll down, and if there is a folder named TestNG present in the list, then it means it has been installed successfully in Eclipse.
How to uninstall TestNG in Eclipse?
Go to the “Install New Software” option in Help. Click on the “What is already installed” button. A list of installed options will appear. Scroll down to TestNG, select it, and click Uninstall.
What is the difference between TestNG and Selenium?
While TestNG is a Java automation framework that allows users to perform automated tests, Selenium is an open-source suite of tools and libraries that allows users to automate web browsers. They are commonly used together as Selenium allows us to test how our UI control behaves, while TestNG allows us to extend it to E2E testing, integration testing, etc.
Got Questions? Drop them on LambdaTest Community. Visit now


