TestNG Annotations Tutorial With Examples For Selenium Automation
Sadhvi Singh
Posted On: April 24, 2019
![]() 69834 Views
69834 Views
![]() 13 Min Read
13 Min Read
This article is a part of our Content Hub. For more in-depth resources, check out our content hub on TestNG.
TestNG is a testing framework created by Cédric Beust and helps to cater a lot of our testing needs. It is widely used in Selenium. Wondering on what NG stands for? Well, it refers to ‘Next Generation’. TestNG is similar to Junit but is more powerful to it when it comes to controlling the execution flow of your program. As the nature of framework, we tend to make our tests more structured and provides better validation points through the use of TestNG Annotations.
Some of the noteworthy features of TestNG are:
- Powerful and wide variety of TestNG annotations to support your test cases.
- Helps to perform parallel testing, dependent method testing.
- Flexibility of running your tests through multiple sets of data through TestNG.xml file or via data-provider concept.
- Test cases can be grouped and prioritized as per need basis.
- Provides access to HTML reports and can be customized through various plugins.
- Test logs can be generated across tests.
- Can be easily integrated with eclipse, Maven, Jenkins etc.
A basic process flow of a TestNG programs involves the following steps:
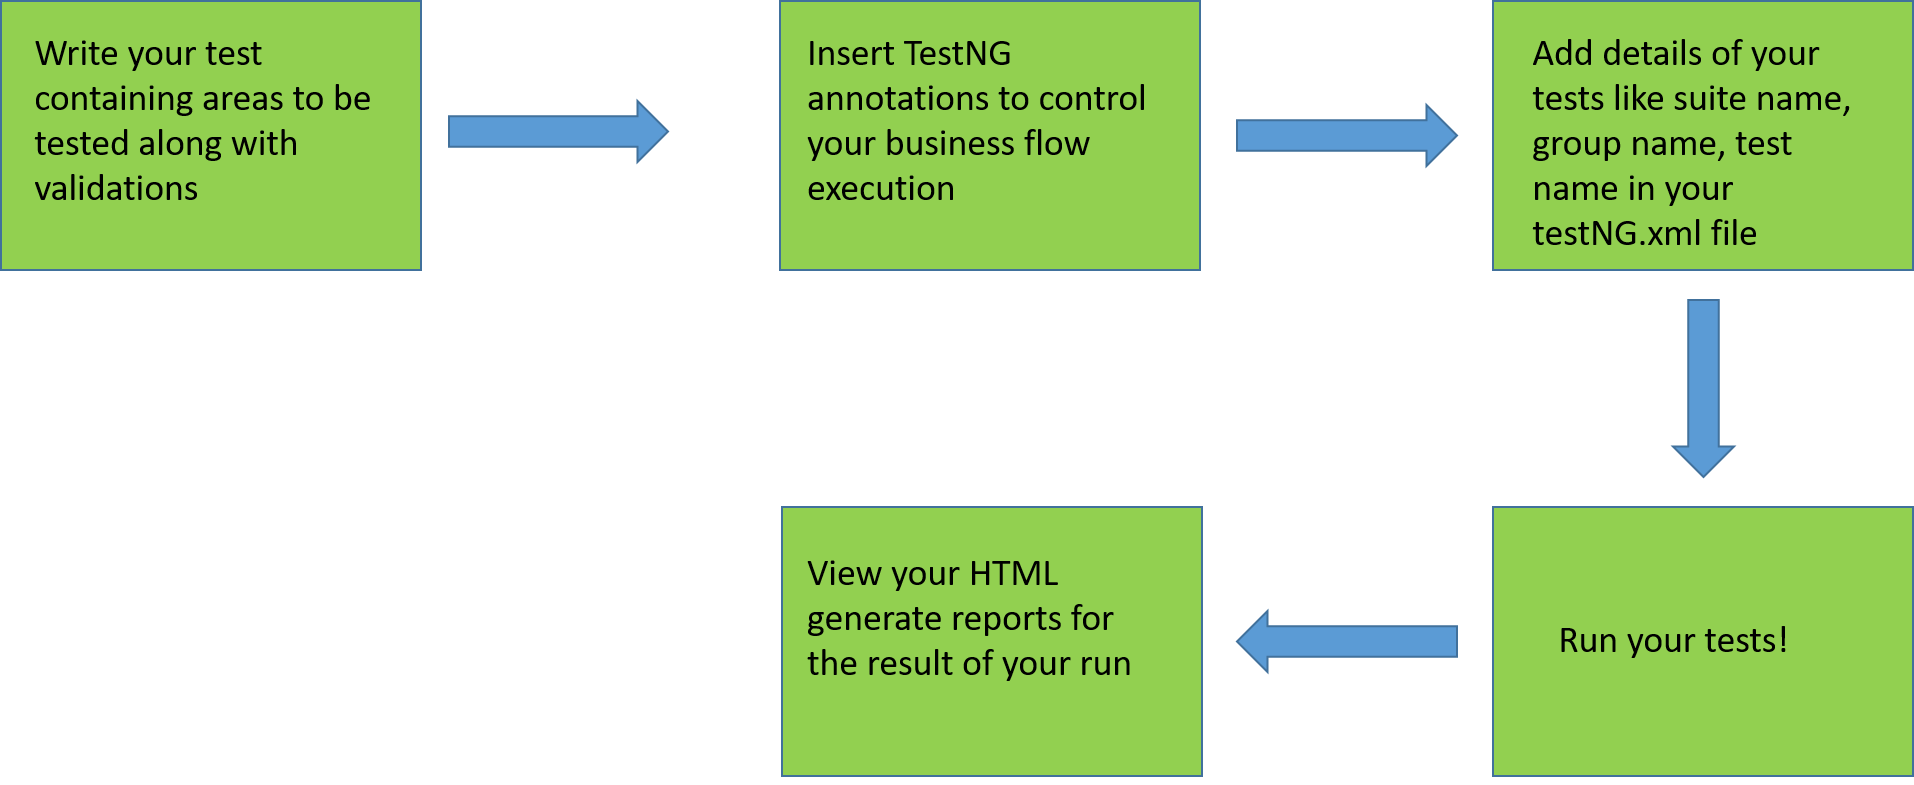
So, before jumping onto the annotations in TestNG for Selenium automation, it would be better to refer the prerequisites are required to setup TestNG.
Prerequisites
- Java Development Kit
- Setup Eclipse or any other IDE.
- Install TestNG in Eclipse or any other IDE.
Note: Annotations can be used only with Java version 1.5 or higher.
If you are new to TestNG framework then follow our guide to run your first automation script with TestNG.
If you’re new to Selenium and wondering what it is then we recommend checking out our guide – What is Selenium?
TABLE OF CONTENTS
So, What Is An Annotation?
An annotation is a tag that provides additional information about the class or method. It is represented by ‘@’ prefix. TestNG use these annotations to help in making a robust framework. Let us have a look at these annotations of TestNG for Selenium.
@Test
The most important TestNG annotations framework where the main business logic resides. All functionalities to be automated are kept inside the @Test annotation method. It has various attributes based on which the method can be reformed and executed.
Example of a code snippet below validating the url :
@BeforeTest
This annotation is run before your first @Test TestNG Annotations method in your class. You can use this annotation in TestNG for Selenium to setup your browser profile preferences, for example auto opening your browser in maximize mode, setting up your own customized profile for your browser etc.
Below is the code snippet for BeforeTest method ensuring the browser opens in maximize mode:
@AfterTest
This TestNG Annotations runs after all your test methods belonging to your class have run. This is a useful annotation which comes handy in terms of reporting your automation results to your stakeholders. You can use this annotation to generate report of your tests and share it to your stakeholders via email.
Example of the code snippet below:
@BeforeMethod
This annotation in TestNG runs before every @test annotated method. You can use it to check out for the database connections before executing your tests or lets say different functionality been tested in your @test annotated method which requires user login in a certain class. In this case also you can put your login code in the @BeforeMethod annotation method.
Below code snippet is an example, displaying login functionality of the LambdaTest platform:
@AfterMethod
This annotation runs after every @test annotated method. This annotation can be used to take screenshots of every test method ran against test runs .
Below code snippet indicating screenshot taken in the @AfterTest TestNG Annotations for Selenium:
@BeforeClass
This annotation runs before the first test method in the current class.This annotation can be used to setup your browser properties, initialize your driver, opening your browser with the desired URL etc.
Below is the code snippet for BeforeClass:
@AfterClass
This TestNG Annotations runs after the last test method in the current class. This annotation in TestNG can be used to perform clean up activities during your tests like closing your driver etc
Below is the example of code snippet showing closing activities performed:
@BeforeSuite
A suite can consist of multiple classes, this TestNG Annotations runs before all the tests methods of all the classes. This annotation marks the entry point of execution. @BeforeSuite annotation in TestNG can be used to perform the needed and generic functions like setting up and starting Selenium drivers or remote web drivers etc.
Example of @BeforeSuite annotation in TestNG, code snippet showcasing setting up of driver:
Explore what WebDriver is, its features, how it works, best practices, and more in this WebDriver Tutorial.
@AfterSuite
This TestNG Annotations runs post all the test methods of all the classes have run. This annotation can be used to clean up the processes before completing off your tests when you have multiple classes in functioning, for example closing the drivers etc.
Below is the code snippet for @AfterSuite annotation in TestNG for Selenium:
@BeforeGroups
TestNG helps testers create a bunch of tests into groups through the attribute group used in the @Test TestNG Annotations. For example, if you wish all similar functionalities related to user management to be clubbed together, you can mark all tests like Dashboard, profile, transactions etc. into a single group as ‘user_management’. This @BeforeGroups annotation in TestNG helps to run the defined test first before the specified group. This annotation can be used if the group focuses on a single functionality like stated in the above example. The BeforeGroup annotation can contain the login feature which is required to run before any other methods like user dashboard, user profile etc.
Example of the Code snippet for @BeforeGroups annotation in TestNG for Selenium:
@AfterGroups
This TestNG Annotations runs after all the test methods of the specified group are executed.
Example of Code snippet for @AfterGroups annotation in TestNG for Selenium:
With TestNG certification, you can challenge your skills in performing automated testing with TestNG and take your career to the next level.
Here’s a short glimpse of the TestNG certification from LambdaTest:
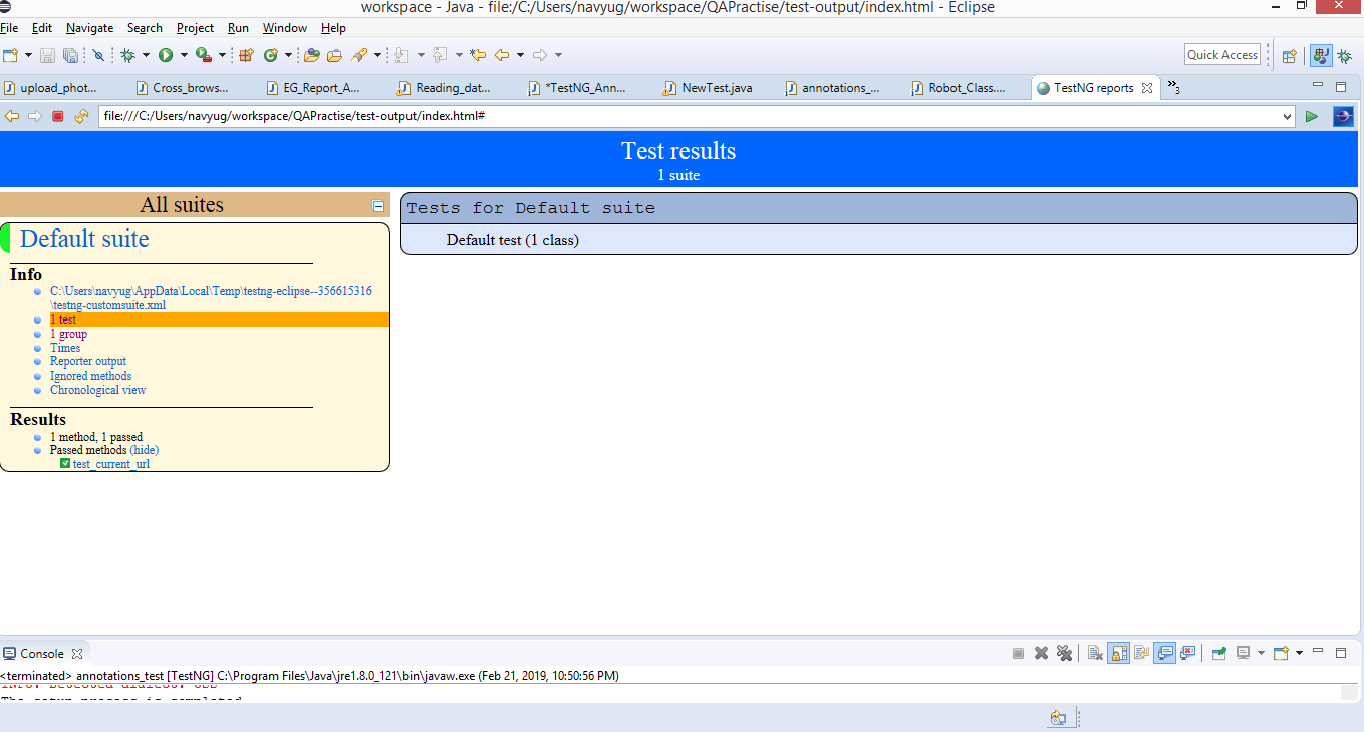
TestNG Report:
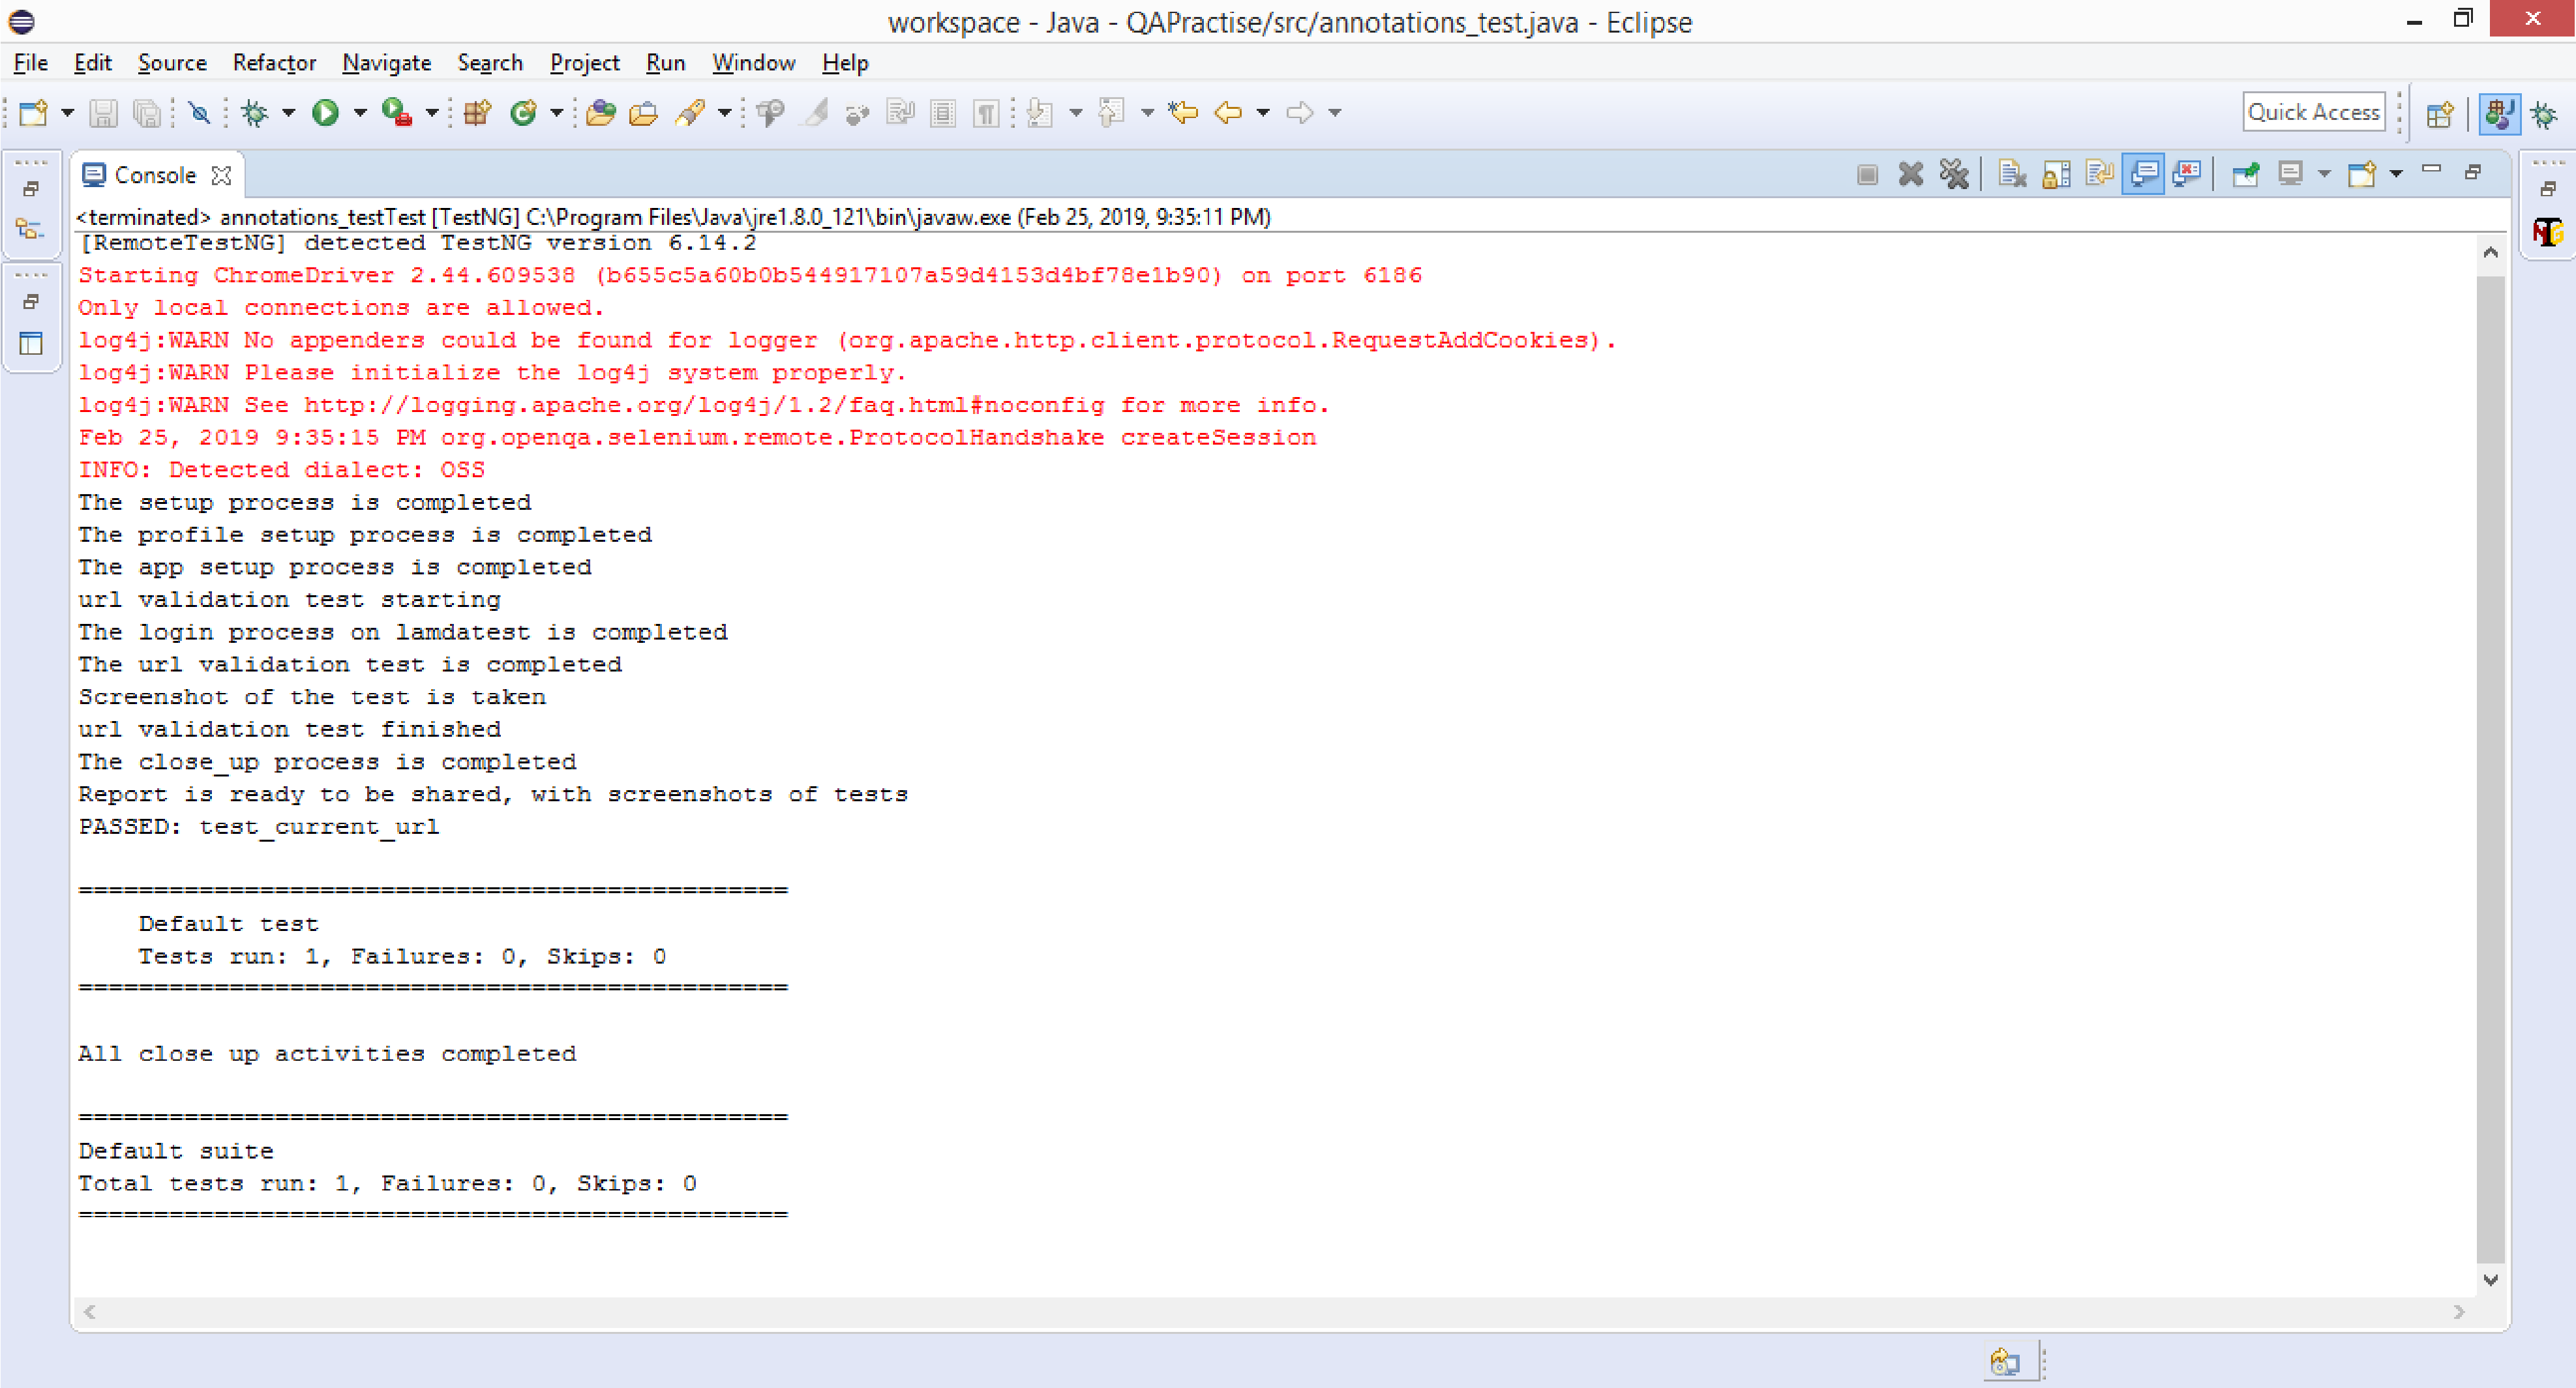
Console Output:
Watch this video to learn how to set up and use TestNG with Selenium to automate your testing process. We will also introduce the TestNG Priority method, which allows you to write easy-to-read and maintainable tests.
Execution Sequence Of Annotations In TestNG For Selenium
All TestNG Annotations described above are executed on runtime in the following order:
- BeforeSuite
- BeforeTest
- BeforeClass
- BeforeGroups
- BeforeMethod
- Test
- AfterMethod
- AfterGroups
- AfterClass
- AfterTest
- AfterSuite
Here is an image of the basic workflow of these annotations:

Attributes Used With TestNG Annotations
These test annotations in TestNG have multiple attributes that can be used for our test method. The attributes further help in defining our tests and help in providing clarity in terms of execution flow of the different test’s method used in the TestNG class. Listing them below:
- Description: It defines the test method. One can define what a method does via the description. For example,
@Test(description=”this test validates the login functionality”). - alwaysRun: this attribute when used with a test method ensures it always run irrespective of the fact even if the parameters on which the method depends fails. When the value is set to true this method will always execute. For example,
@Test(alwaysRun= true). - dataProvider: This attribute is set to provide data from the dataProvider annotated test to the test provided with this attribute. For example, let’s say you intent to run your tests on multiple cross browsers, where a dataProvider annotated test is written which contains multiple inputs of browsers and their corresponding versions. In this case the test containing this attribute will use those inputs of data to run you tests on multiple browsers. Syntax for the same is,
@Test(dataProvider=”cross browser testing”). - dependsOnMethods: This attribute provides details to the execution flow, wherein the test is executed only if its dependent method mentioned in the attribute is executed. In case the test on which the method depends on is failed or not executed, the test is skipped from the execution. For example,
@Test(dependsOnmethod=”Login”). - groups: This attribute helps to groups your test methods focusing onto a single functionality into one group. For example,
@Test(groups=”Payment_Module”). This attribute also helps in the longer run when one can choose to ignore few groups during the execution cycle and chose over the other groups. All one need to do is mention the included groups in the TestNG.xml file within the include tag whereas the excluded groups can be defined using the exclude tag in the xml file. - dependsOnGroups: this attribute performs the above two attributes functions in collation i.e. it defines the test method with the attribute ‘dependsOn’ the defined groups. Once that group of tests are run, only post that this annotated method would execute. For example,
@Test(dependsOnMethods = "Payment_Module" ). - priority: This attribute helps us to defined priority of the test’s methods. When TestNG executes the @Test annotated method, it may do so in random order. In a scenario where you wish that your @Test annotated method runs in a desired sequence you can use the priority attribute. The default priority of all test methods is 0. Priorities in ascending order are scheduled first for execution for example,
@Test(priority=1), @Test(priority=2),in this case test with priority equal to one will be executed first then the test with priority as 2. - enabled: This attribute comes into picture, when you have an intent to ignore a particular test method and don’t want to execute it. All you need to do is set this attribute to false. For example,
@Test(enabled= false). - timeout: This attribute helps to define the time a particular test should take to execute, in case it exceeds the time defined by the attribute, the test method would terminate and will fail with an exception marked as org.testng.internal.thread.ThreadTimeoutException. For example,
@Test(timeOut= 500). Please note the time specified is in milliseconds. - InvocationCount: This attribute works exactly like the loop. Based on the attribute set across the test method, it would execute that method those number of times. For example,
@Test(invocationCount = 5), this would execute the test 5 times. - InvocationTimeOut: this attribute is used in unison with the above invocationCount attribute. Based on the set value of this attribute along with the invocationCount, this ensures the test runs the number of times specified as per the invocationCount in the defined time set by the invocationTimeOut attribute. For example,
@Test(invocationCount =5,invocationTimeOut = 20 ). - expectedExceptions: this attribute helps to handle the exception the test method is expected to throw. In case the one defined in the attribute is set and thrown by the test method it is passed else any other exception not stated in the attribute and thrown by the test method, would make the test method fail. For example,
@Test(expectedExceptions = {ArithmeticException.class }).
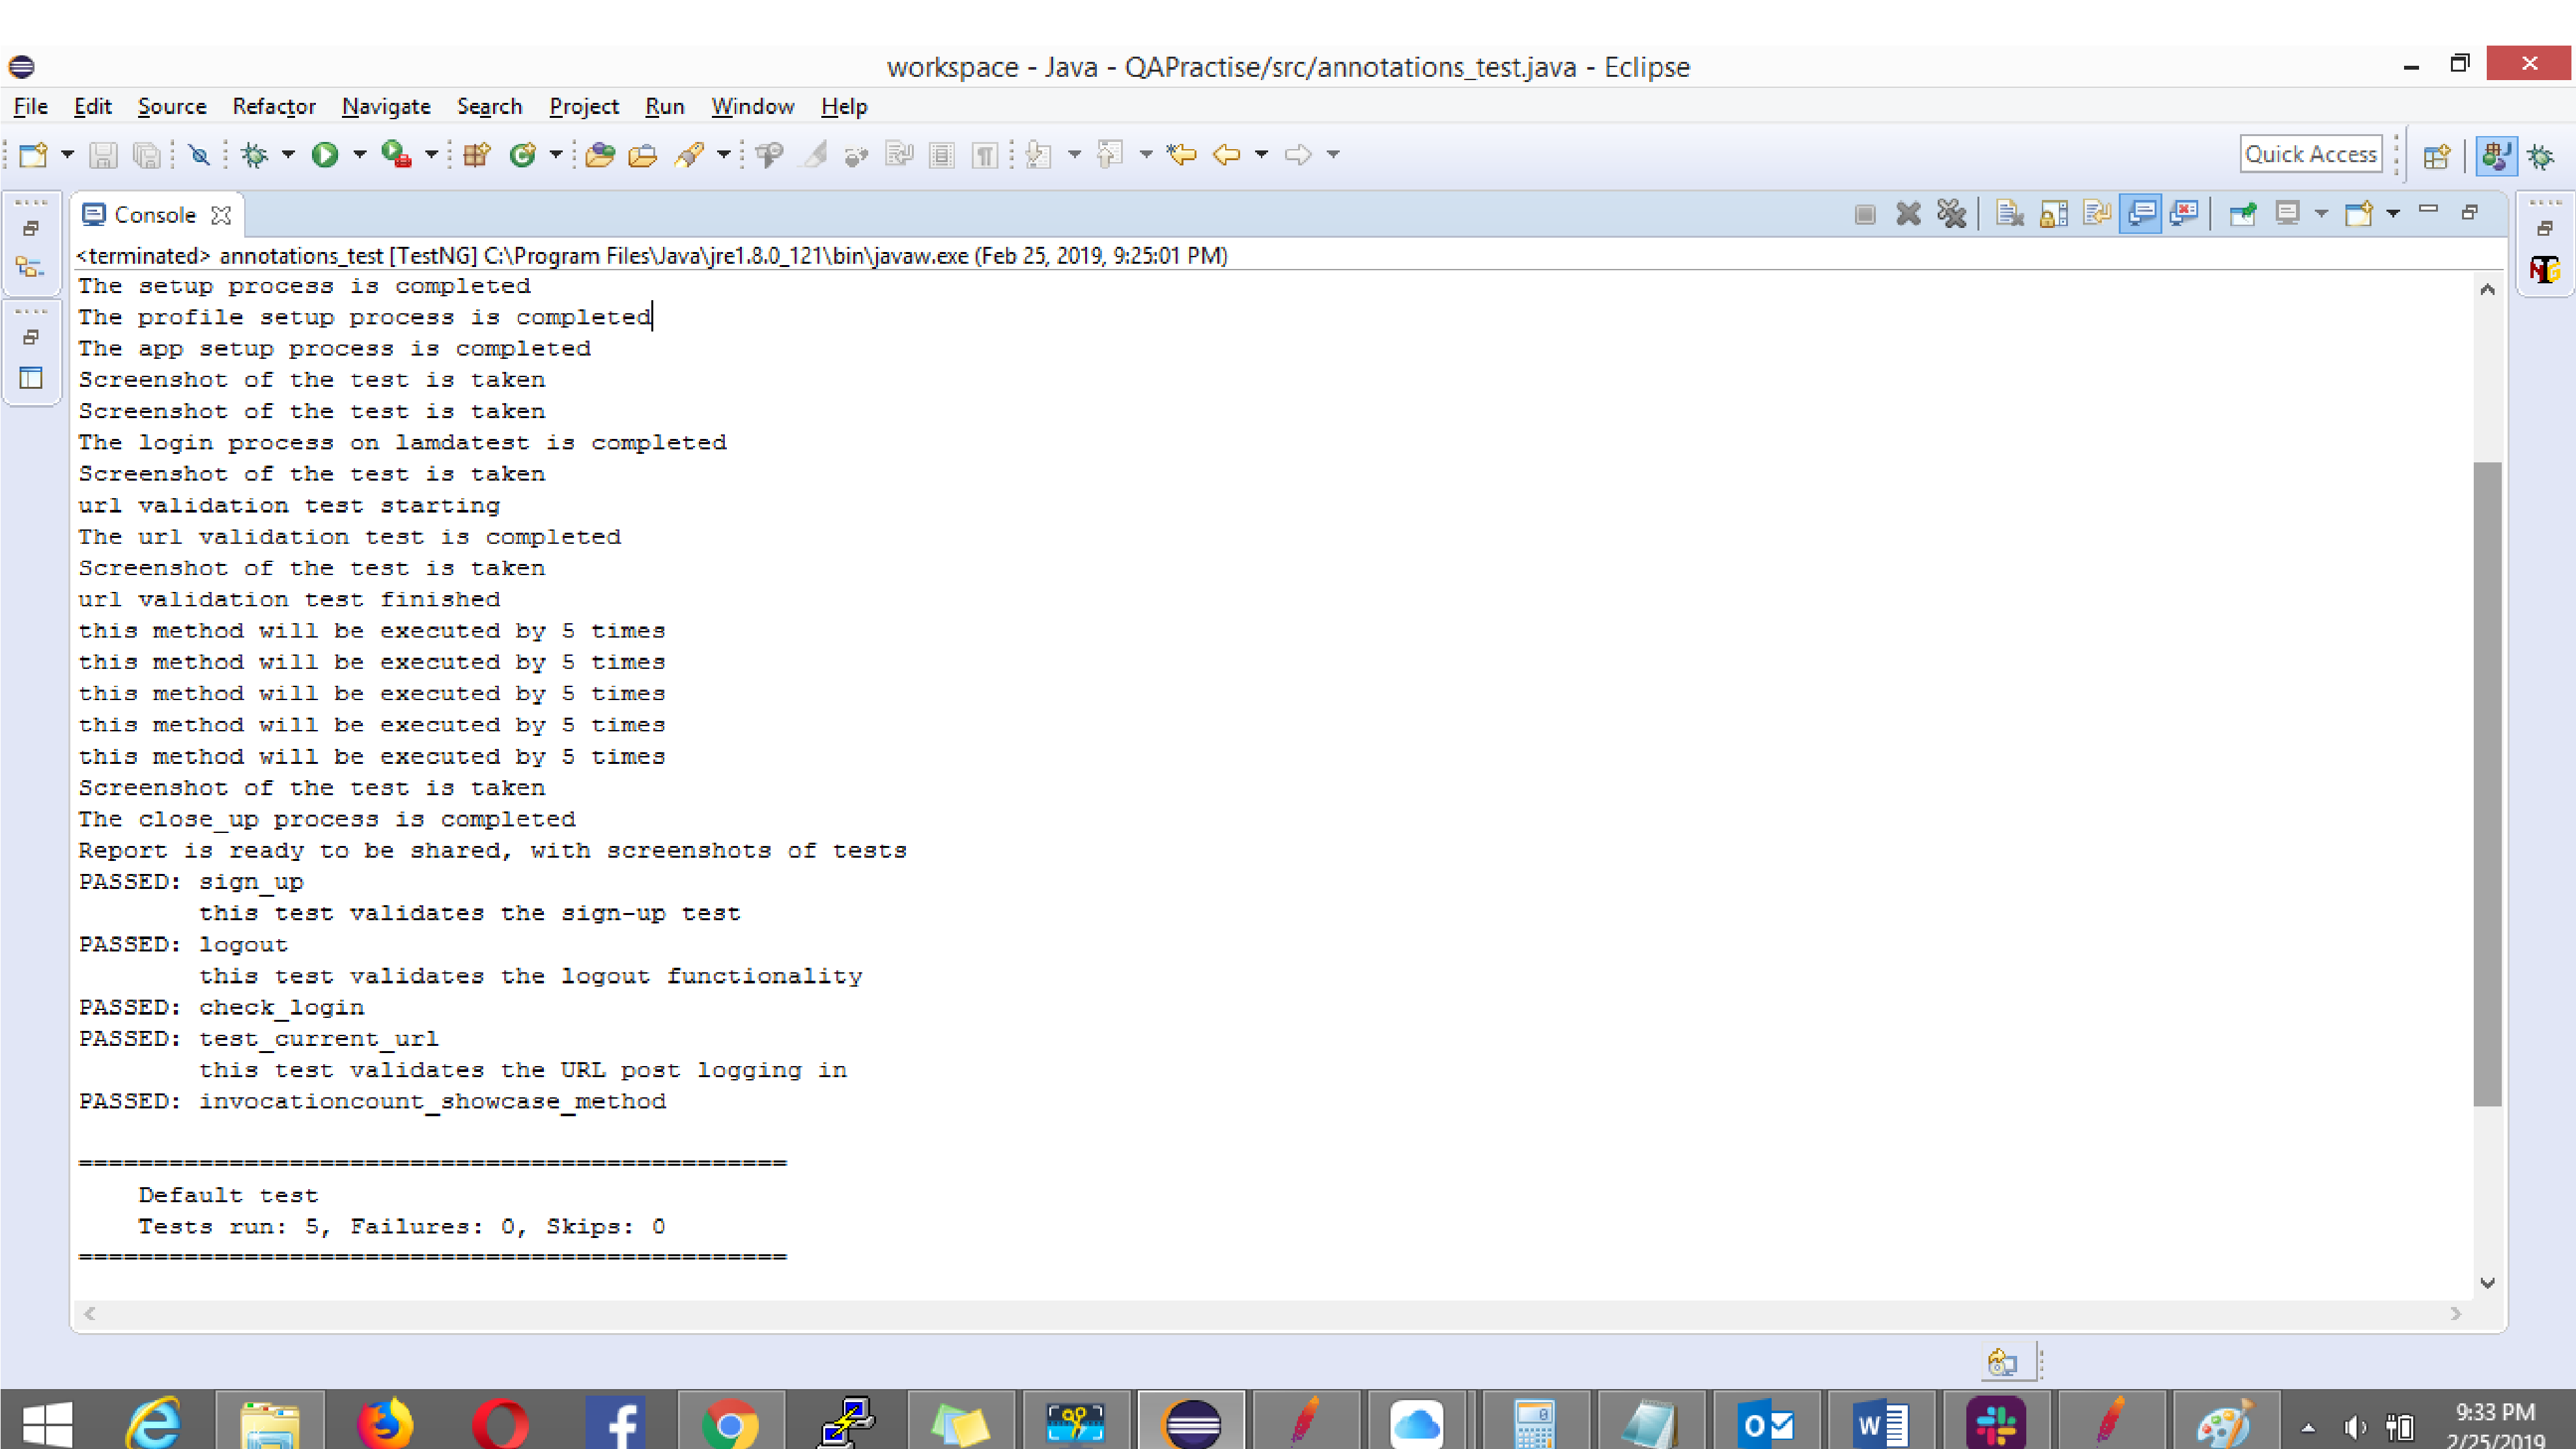
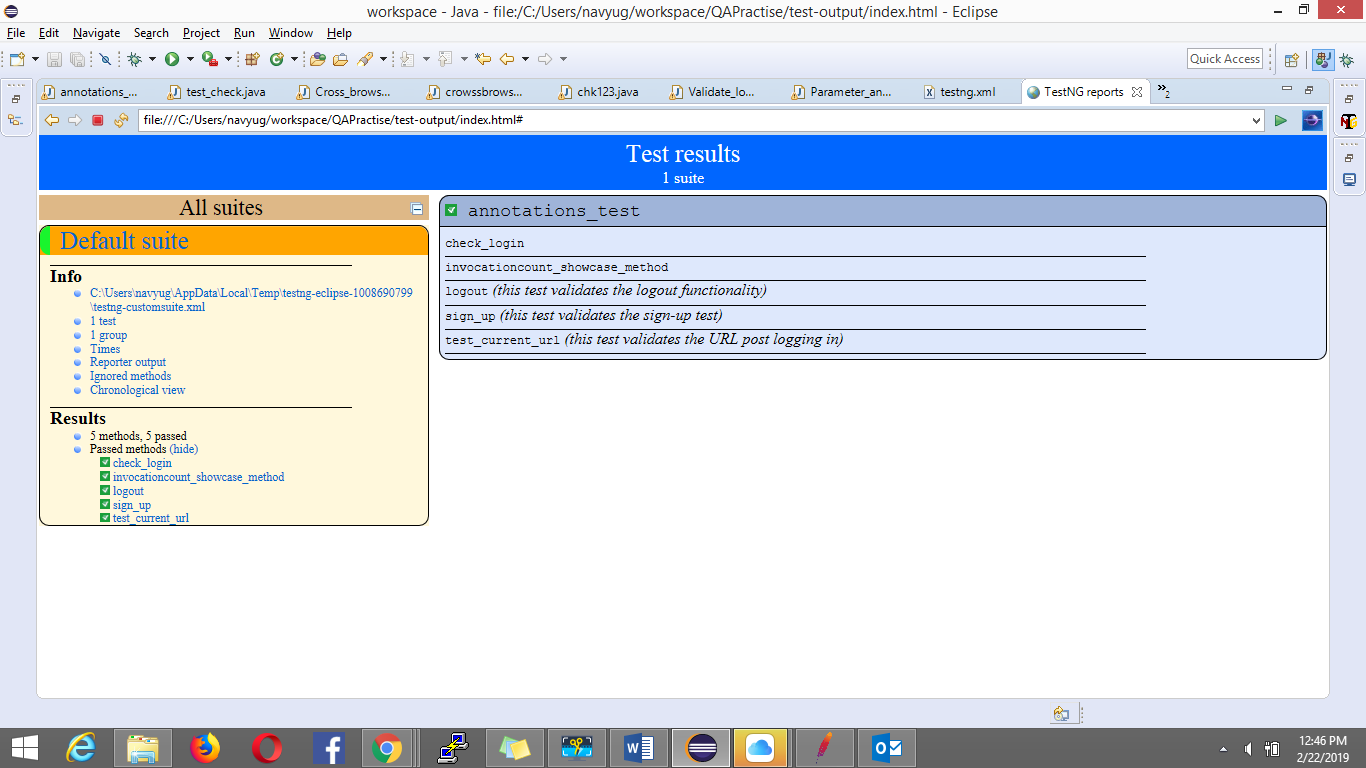
The above defined are the attributes used with the annotations in TestNG for Selenium. Below is the code snippet showcasing the use of the above attributes:
Console Output:
TestNG Report:
Watch this video to learn about the TestNG Annotations and how they help provide better structure and readability to the code.
Annotations In TestNG For Desired Purpose
There are more annotations than the ones defined above, which are used for desired purpose only.
@DataProvider
This annotated method is used for supplying data to the test method in which the dataProvider attribute is defined. This annotated method helps in creating a data driven framework where multiple sets of input values can be given which returns a 2D array or object. @DataProvider annotation in TestNG comes with two attributes.
- name- this attribute is used to provide name to the dataprovider. If not set it defaults to the name of the method provided.
- parallel-this is one attribute that helps in running your tests in parallel with different variation of data. This attribute is one of the reasons to make TestNG more powerful to Junit. Its default value is false.
Below is the code snippet indicating the use of @DataProvider annotation with name and parallel attribute set to it.
@Factory
This annotation helps to run multiple test classes through a single test class. It basically defines and create tests dynamically.
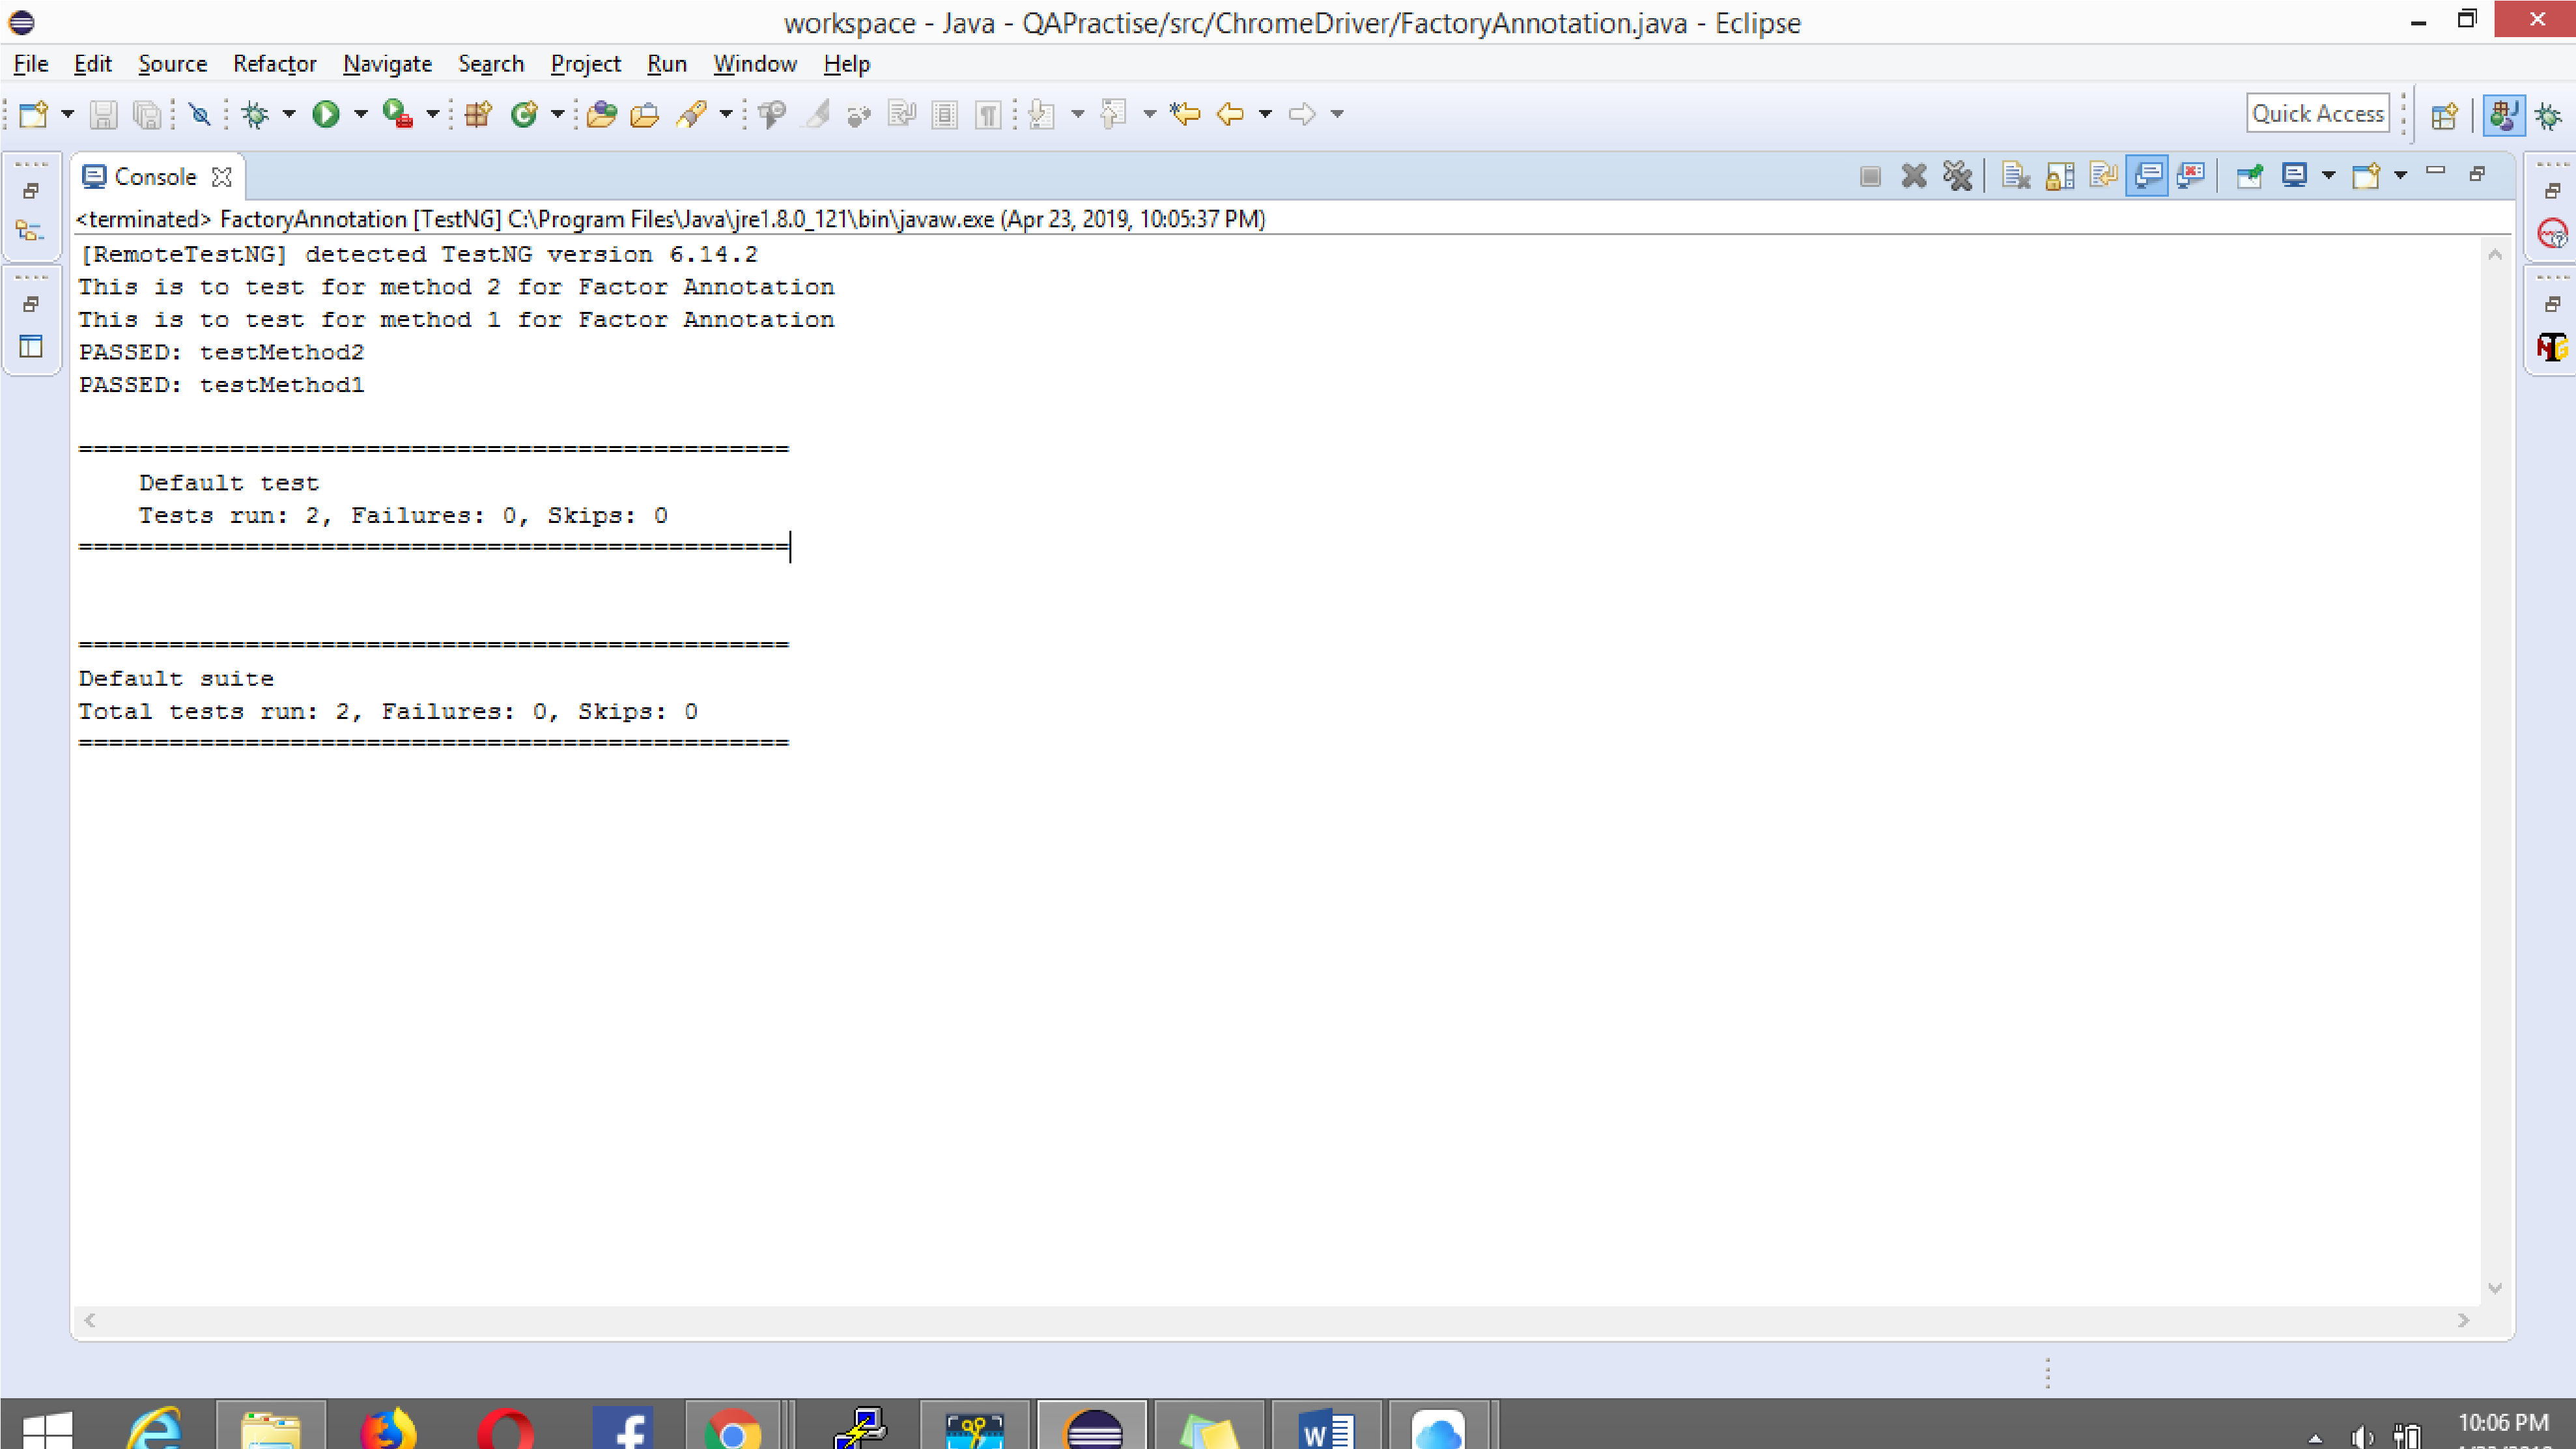
The below code snippet indicates the use of @Factory annotation that helps calls the test method class.
Console Output:
@Parameters
This annotation helps you pass parameters to your tests directly via the testNG.xml file. Usually this is preferred when you have limited data sets to try on your tests. In case of complicated and large data sets @dataProvider annotation is preferred or excel.
The below code snippet showcase the same:
The parameter values are defined in the TestNG.xml file as below:
@Listener
This annotation helps in logging and reporting. We have multiple listeners like:
- IExecutionListener
- IAnnotationTransformer
- ISuiteListener
- ITestListener
But to go in depth with these listeners and their uses would be a talk for another blog. I will be writing one soon, so stay tuned.
If you want to know more about Event Listeners In Selenium WebDriver watch this video to learn how the Listeners “listen” to the event defined in the Selenium script and behave accordingly.
That Was All!
The key point to note while working with all these annotations and attributes is your system should have java 1.5 version or higher as these annotations are not supported for all lower versions of java and you may tend to receive error for them.
For an all in one session on performing a complete TestNG tutorial with Selenium you can checkout this video.
All the above mentioned TestNG Annotations and attributes of TestNG helps to provide better structuring and readability to the code. It helps provide detailed reports that makes status reporting part even easier and useful. Use of these annotations in TestNG for Selenium completely depend on your business requirements. Hence, choosing the right ones for the right use is important. If you’re interested in exploring more about TestNG, check out our comprehensive TestNG interview questions guide. Try out these annotations in TestNG on LambdaTest Selenium Grid now!
Got Questions? Drop them on LambdaTest Community. Visit now


